

HockeyTrooper
-
Posts
373 -
Joined
-
Last visited
Content Type
Profiles
Forums
Gallery
Articles
Everything posted by HockeyTrooper
-
For reinforcement in the mic tip area you can do the equivalent of paper mache. I used glue on some extra cloth strips I had around to reinforce the area.
-
How do you secure neck trim to an ATA ABS bucket?
HockeyTrooper replied to anphrax's topic in Assembly, Mods, and Painting
Andy, I'm pretty new (just approved about 3 weeks ago) but I know somewhere on the webs I have seen someone who has a 501st hockey jersey, I just haven't been able to track them down to see if it was a run of jerseys or a one time thing. If there ever were a run of 501st hockey jerseys I would definitely jump on board. Remember to be careful with that glue! It does the job, but sticks (literally) around forever if you get it on your fingernail or something. -
How do you secure neck trim to an ATA ABS bucket?
HockeyTrooper replied to anphrax's topic in Assembly, Mods, and Painting
CA glue is the way to go. Apply glue, apply pressure and almost instant bond. Should be available at a local crafts store with other model glues. They have different thicknesses of the glue - I think I went with the thicker of the 3 options. Just be careful when you apply the glue...I got a little bit on my fingernail and it stayed there for nearly a month. -
This is an ATA armor set - from the looks of it I am guessing an ABS set of ATA. Terrell is awesome and (at least for people who are new to armor building) sends 2 sets of ears because of how difficult they can be to trim. Corey, Your cut on the bottom looks good to me, especially since about a centimeter of that will be covered by the S trim when you put it in.
-
TK-4674 standing by for 501st access, 70th Explorer's Garrison http://www.501st.com/members/displaymemberdetails.php?userID=14157 Thanks!
-
Grant, I just completed, submitted and was accepted as a ANH stunt TK in ATA's ABS armor, so I highly recommend it. As for tips and tricks, have a lot of patience when working with your armor once you get it, measure twice before you cut and keep up the research on here. There are a lot of great posts in the Tips and Tutorials and How To sections. Don't be afraid to ask questions. Look up your local garrison and try to get in touch with them so you can get local help if you run into a hiccup or something you aren't comfortable making the cuts on. Take lots and lots of pictures as you build so when you have questions to post here you have a picture to go with the question. I have seen that help with a lot of people's questions. One thing I did while I was waiting for my armor was my E-11 hasbro mod. It is a good foot in the door/warm-up for what you are about to get into with your armor. Best of luck!
-
A huge "Thank You" to everyone here at FISD. I got my approval e-mail yesterday and am now TK-4674. Again, thank you to everyone who contributed to my TK (literally with parts or figuratively with feedback). You have all made the journey much less stressful than I thought it would be and I hope I can help do the same for future troopers. -Bennett
-
What is in your TK emergency kit?
HockeyTrooper replied to Sparrow's topic in Hard Armor (General Discussion)
CA glue, also hot glue sticks and gun, E-6000, Velcro, scissors, spare nylon and elastic, snaps, hammer and snap tool, a roll of padding (the kind with sticky back), magic eraser, a few rare earth magnets. Need to add white and black duct tape to mine. Bigred, does this work pretty well? Part of my ab plate near the side where I had to heat bend it a little has a very small crack forming that I'm not sure if I should be worried about or not. -
My First ATA Helmet Build ever!
HockeyTrooper replied to Mogwai's topic in Build Threads Requireing Maintenance
Looks great! I too recently finish up an ATA build. For the S seal around the neck of the helmet I used CA glue. As you might have noticed other glues really don't like to hold it down, especially in the area near the front of the cheek tube. With CA glue I just had to add a little under the seal and press down for about 10 seconds with my fingers and it has held solid for me. Oh, and be careful if you do use CA glue - I got a little on my fingernail and it is still there...almost 2 weeks later. -
New and scared where to start
HockeyTrooper replied to Baldrik78's topic in Hard Armor (General Discussion)
Welcome to the boards, you're in the right place for finding help. Do you happen to know if the kit you ordered has a name associated with it (such as FX or some other abbreviation)? I'm not aware of any TK armor makers who make their armor out of resin, almost all of them are HIPS or ABS plastic. Generally everyone warns against ebay armor on here, but depending on what you found you might be alright. A really good source for getting help with getting started on your armor is your local garrison. You can find a full list of the garrisons @ http://www.501st.com/members/displayUnits.php#garrisons. Introduce yourself on their forums and possible see if they have a facebook group where you can get in touch. As far as instructions go for assembly, the best thing to do is look for threads on here labelled as armor builds or some of the "how to" and "tips" under the tutorials. Best of luck! -
Thanks, Damon! I am actually hoping to find time to resize my right forearm sometime this week. I haven't decided on the left one just yet. I need to remove the return edge on both forearms at the bottom and on the inside for EIB and once I do that I might decide that both need to be sized down a bit.
-
There will be a few tweaks for my EIB submission when I do that. I appreciate the compliment Just gotta wait for elections stuff to get wrapped up and figure out who my new GML is so I can submit and become official!
-
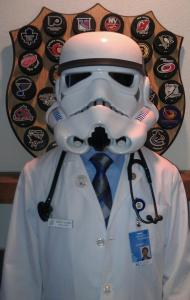
Here are some pre-submission photos. For some reason the photographer didn't send me the shot we took of me standing with the helmet on from the front. I'm also not sure if this background is plain enough to be okay for submission. I should probably take off my balaclava for without helmet pictures because it kind of falls down and covers my neck seal. Anyways, as I mentioned, for some reason my photographer didn't send me the frontal shot with helmet on but please give me any feedback you think is appropriate. I do still want to go back and resize my right arm, even if it looks ok it just feels way too big. Thanks again, Bennett
-
Etienne, The arms are pretty big but I am using weather stripping to pad them which keeps them from moving around. I'm looking at ways to shorten them up and possible thin them up a little as well. Nick, Would there be a good way for me to remove the strips I currently have in place? I know E-6000 is forgiving, I just haven't tested exactly how forgiving it is. Thanks everyone!
-
I have been building my ATA ABS armor for about the last 2 months and am trying to get it finished up for the Episode I midnight release. I have a few shots of me wearing everything except the helmet (it is currently being painted). I'm a little concerned about some of my sizing with things since I'm a little bit on the small side (5'7", 135lbs) In this photo I feel like the way I have my arms is turning the shoulder bells back. I'm also holding the belt up because I haven't decided how I want to attach it to the armor yet. I'm making adjustments so that my left thigh and left shin will line up better. I'm also concerned about my torso. Does it look too wide? I feel like I might need to reduce it by about 4 inches or so in the waist and then use a heat gun to bend the sides in a little to give it a better form. Another thing, what does everyone do as far as keeping their chest piece in place? I don't want to add straps around my sides connecting the front and back because it doesn't look like that will work for EIB (which I eventually want to do). I also think some of my cover strips might be a little too long so I need to sand those down and trim them. This is just a little bit closer shot of my upper half. Does it look like my forearms are too long and need to be trimmed back? This is just a side shot. I don't currently have a picture from the back. Thermal detonator pieces are getting in this week sometime. Please leave me any and all feedback. I want this to look good when I wear it for the first time on a troop and right now I feel like I'm just a little bit off in several places. Thanks!
-
From what I can see your helmet looks great! I am just about to finish mine up. My girlfriend and I are doing everything hand painted so it is taking a little longer, but it was a good way to include her on my project.
-
Looking for the perfect snap source
HockeyTrooper replied to TKittell's topic in Assembly, Mods, and Painting
Nick, how do you go about making a hole in the nylon to get the neck of the snap through? I think that is part of my problem currently -
Looking for the perfect snap source
HockeyTrooper replied to TKittell's topic in Assembly, Mods, and Painting
I may be putting my snaps together wrong or using the wrong material to put them through, but I've been having issues with the dritz snaps. My snap plates are all good and have been attached to the armor, but my male snaps that I put on my straps didn't hold (the two pieces for the snap came apart on the strap side). I'm not sure if it is because the post is too short or maybe I am using the wrong material for my straps. The straps that are giving me trouble are my nylon webbing, the ones that I have put through elastic are fine though. Would tandy snaps be better for me to use on my nylon and are they compatible with the female dritz snaps? or does anyone have some other suggestions as to where I might be going wrong? I attached all the straps I had made to my torso last night, got excited, did a test fit...and 3 or 4 of them popped off almost immediately. -
Du... Du Hast... Du Hasbro
HockeyTrooper replied to YouCantBe Sidious's topic in Build Threads Requireing Maintenance
Looks great! I like the use of the pill bottle to add color to the inside of the scope, and the use of the straw to cover the light was pretty clever as well! -
Modding a Hasbro to pass the time
HockeyTrooper replied to daennika's topic in Build Threads Requireing Maintenance
Looks good so far! I've heard that a general sanding over the plastic of the gun helps with paint adhesion. I'm not sure if that is true or not but I just took some regular sand paper and gave everything a rub down. -
Modding a Hasbro to pass the time
HockeyTrooper replied to daennika's topic in Build Threads Requireing Maintenance
Were the tape rolls scotch tape rolls? When I used one of those it fit like a glove. I did some minor sanding where I took the scope off so that might have helped with the fit. There is also the issue with the bar in the back of the scope getting in the way that needs to be taken out. Sorry about the picture quality, just showing where I took the bar out in case that was part of the problem. Looks good so far! -
I would try to get in touch with some local members for you at http://www.mg501.com/ and talk to some of them to see if they could help you with building and such. Best of luck to you!
-
Yeah I went with ATA. I e-mailed him in the first week of September and he said it would be about 6 weeks, so I might check in with him if I haven't heard from him by the beginning of next week or so.
-
Finally finished up the paint job, silver coats followed by lots of black coats: That is all! Hopefully I will hear about my armor in the next week or so. Can't wait!
-
I covered my blinky light with some plastic from a ziplock bag that I cut to pieces. I wanted to use plastic wrap but did not have any. Looking good so far! Also, I have heard it is good to sand all the plastic down a little to help with paint adhering to the surfaces. Good luck!