bpoodoo Posted April 30, 2014 Report Share Posted April 30, 2014 I picked up this kit about a month ago. It's a sharp clean pull with nice shape and features. Since it's white HDPE not a khaki HDPE I can't emulate the paint flaking weathering of some of the original stunt helmets. So I'm going to try for a more idealized look. If the paint does flake it will be down to white HDPE and not so noticeable. I want to hand paint all the details (no decals). This is my first helmet build, and I know it will be fun and challenging. Sent from my iPhone using Tapatalk Quote Link to comment Share on other sites More sharing options...
bpoodoo Posted April 30, 2014 Author Report Share Posted April 30, 2014 The kit came with both HDPE and ABS ears. I used the HDPE ones for practice and the ABS ears for the helmet Sent from my iPhone using Tapatalk Quote Link to comment Share on other sites More sharing options...
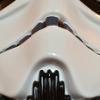
bpoodoo Posted April 30, 2014 Author Report Share Posted April 30, 2014 After some initial trimming, putting the faceplate and the dome together to see what I think looks best. I'm going for a somewhat narrower profile and more vertical faceplate than a typical SFS or DavidM style helmet. Sent from my iPhone using Tapatalk Quote Link to comment Share on other sites More sharing options...
gazmosis[501st] Posted April 30, 2014 Report Share Posted April 30, 2014 Those details are saweeeeeeet! Quote Link to comment Share on other sites More sharing options...
bpoodoo Posted April 30, 2014 Author Report Share Posted April 30, 2014 Yep! Trimmed and assembled: Sent from my iPhone using Tapatalk Quote Link to comment Share on other sites More sharing options...
The5thHorseman[TK] Posted April 30, 2014 Report Share Posted April 30, 2014 Lol, smallest picture ever! It looks good, but the left ear seems quite thick. Quote Link to comment Share on other sites More sharing options...
bpoodoo Posted April 30, 2014 Author Report Share Posted April 30, 2014 (edited) These ears are tricky especially the left. I tried to figure out how to better trim them but couldn't find a way that wouldn't result in gaps galore. The tubes aren't very wide and the helmet at the top of the ear angles inward. And the lower half of the left ear launches out at about a 45 degree angle. And the ears are a bit short. These factors are why I have the wider ear trim. I probably could have positioned the ears higher lower that could have allowed a more aggressive trim. I'm open to suggestions how I could make the ears narrower. Some gap would be alright. And screen accurate!Sent from my iPhone using Tapatalk Edited May 1, 2014 by bpoodoo Quote Link to comment Share on other sites More sharing options...
SCTrooper[TK] Posted April 30, 2014 Report Share Posted April 30, 2014 Nice progress. Can you post some larger pictures. I am working on the same kit, patiently waiting for the paint to cure. As you are looking at the helmet the left ear sits higher than the right ear, at least on the Dave M. Quote Link to comment Share on other sites More sharing options...
Dark PWF[Staff] Posted April 30, 2014 Report Share Posted April 30, 2014 Nice looking kit, to be sure!! Looks like you're off to a great start with it, too! Quote Link to comment Share on other sites More sharing options...
bpoodoo Posted May 1, 2014 Author Report Share Posted May 1, 2014 (edited) Thanks guys. Yes SC you're correct and the trim could be closer if I moved that left ear (wearer) down like in the DavidM helmet (closer trim if moved down not up as I originally stated). These next pictures are practice HDPE ears on the helmet before lowering. Edited May 1, 2014 by bpoodoo Quote Link to comment Share on other sites More sharing options...
bpoodoo Posted May 1, 2014 Author Report Share Posted May 1, 2014 I replaced the HDPE ears with ABS ears and moved them lower. The trim I think looks a bit better. I prepared the helmet for painting by first washing with dish soap, drying, and then gently scuffing with gray scotch brite. I painted with VERY light coats of "Rustoleum Painter's Touch 2X Ultra Coverage Paint + Primer" gloss white. Easy to get runs and fisheyes if applied heavily or repeatedly over one section. Technique that worked for me was to think "mist painting" not "spray painting" by holding the can about 2 feet away sweeping across the helmet. Next the hard part - waiting! At least 5-7 days before starting detail painting. Quote Link to comment Share on other sites More sharing options...
bpoodoo Posted May 2, 2014 Author Report Share Posted May 2, 2014 (edited) Here's a technique for how to install and trim an ear if it would otherwise look too wide. This photo is from the RS propmasters photobucket. Use the middle of the ear against the helmet as a pivot, point the top of the ear outwards away from the helmet and angle the the bottom of the ear inwards towards the helmet. This allows the bottom of the ear to be trimmed thinner and still be flush against the helmet. Edited May 2, 2014 by bpoodoo Quote Link to comment Share on other sites More sharing options...
Techne[TK] Posted May 2, 2014 Report Share Posted May 2, 2014 Looks sweet! I think it's interesting to see this kind of helmet build. Do you have some armor as well? Quote Link to comment Share on other sites More sharing options...
bpoodoo Posted May 2, 2014 Author Report Share Posted May 2, 2014 No, no armor... yet! I'd say it's inevitable that I will at some point. Finding armor and properly trimming, assembling, and fitting is a very different skill set, but I know I'm in the right place to learn how to do it. Quote Link to comment Share on other sites More sharing options...
SCTrooper[TK] Posted May 4, 2014 Report Share Posted May 4, 2014 I replaced the HDPE ears with ABS ears and moved them lower. The trim I think looks a bit better. I prepared the helmet for painting by first washing with dish soap, drying, and then gently scuffing with gray scotch brite. I painted with VERY light coats of "Rustoleum Painter's Touch 2X Ultra Coverage Paint + Primer" gloss white. Easy to get runs and fisheyes if applied heavily or repeatedly over one section. Technique that worked for me was to think "mist painting" not "spray painting" by holding the can about 2 feet away sweeping across the helmet. Next the hard part - waiting! At least 5-7 days before starting detail painting. I used a similar paint+primer, the Valspar brand. I have never heard of this painting technique. From 2 feet away, I am surprised the coverage would be that good. Your helmet looks nice and shiny. Quote Link to comment Share on other sites More sharing options...
bpoodoo Posted May 5, 2014 Author Report Share Posted May 5, 2014 It's still pretty wet in that picture. That's right after I brought it inside after painting it outside. I've read good things about Valspar. I did not like Krylon Fusion gloss white which is what I first tried. It didn't spray on evenly, and the color as it dried had a slight gray tint. Sent from my iPhone using Tapatalk Quote Link to comment Share on other sites More sharing options...
SCTrooper[TK] Posted May 5, 2014 Report Share Posted May 5, 2014 Good to know! These new paint cans have more high tech nozzles and really put down a coat, more like a real paint gun. Quote Link to comment Share on other sites More sharing options...
bpoodoo Posted May 6, 2014 Author Report Share Posted May 6, 2014 (edited) Start of detail painting. I'll be using templates for tube stripes and vertical lines within tears and rear traps, the rest by (not-so-steady) hand. Rough-in of traps, tears, ears. Also paint the frown. Using Humbrol #5 gray for these. For tube stripes, I started using Humbrol #15 midnight blue but switched to Humbrol #14 french blue. Had some leakage using the template, but nothing some mineral spirits and cheap low-lint rolled up tissue couldn't fix. Note: Don't use Q-Tips as-is for clean-up The cotton fibers get caught up in the paint. Also, when correcting mistakes painting the tube stripes, it's possible and probable you can wipe away the underlying white base paint. I wanted all details painted, but for tube stripes in particular, I can see why decals might be a good choice. Edited May 6, 2014 by bpoodoo Quote Link to comment Share on other sites More sharing options...
SCTrooper[TK] Posted May 7, 2014 Report Share Posted May 7, 2014 I am sorry that your white paint job didn't fair so well. Looks like it has a lot of texture to it. Quote Link to comment Share on other sites More sharing options...
bpoodoo Posted May 7, 2014 Author Report Share Posted May 7, 2014 I'll characterize it as going from idealized to looking screen used Sent from my iPhone using Tapatalk Quote Link to comment Share on other sites More sharing options...
bpoodoo Posted May 7, 2014 Author Report Share Posted May 7, 2014 Final pics Quote Link to comment Share on other sites More sharing options...
SCTrooper[TK] Posted May 7, 2014 Report Share Posted May 7, 2014 Looks awesome! I hope mine comes out half as good. Quote Link to comment Share on other sites More sharing options...
Minuteman Posted May 7, 2014 Report Share Posted May 7, 2014 It´s a beauty! Quote Link to comment Share on other sites More sharing options...
bpoodoo Posted May 7, 2014 Author Report Share Posted May 7, 2014 (edited) Thanks guys - it was a fun first helmet for sure Edited May 9, 2014 by bpoodoo Quote Link to comment Share on other sites More sharing options...
bpoodoo Posted May 25, 2014 Author Report Share Posted May 25, 2014 Well, never say "final pics". The thickness of the right ear (as you wear it) was really bugging me. WIth a bit more confidence in drawing an ear trim line, I trimmed it down just a few millimeters. I couldn't go much thinner without running out of ear in the circular part at the top. But now I can sleep at night Quote Link to comment Share on other sites More sharing options...

Recommended Posts
Join the conversation
You can post now and register later. If you have an account, sign in now to post with your account.