Mr_Vader
-
Posts
83 -
Joined
-
Last visited
Content Type
Profiles
Forums
Gallery
Articles
Everything posted by Mr_Vader
-
Thanks for the tips Ed, I'm hoping to hit deployment status before the end of the summer! I have straps in between the ab plates but they were a bit loose in the photo. I tried the top part on the other night and it evens up a bit, but there is still a bit of a gap between them. My wife is going to use the extra canvas we have left over from the belt to help seal up the sides, I think a bit of velcro on the material and on the plates should do it. I just finished up the belt drop boxes yesterday, as well as added some elastic to the shoulders and wrists. I sitll have to work out the webbing from the thighs to the abs though, I think thats todays project. I do have one question, is there anyway to significantly fill in ABS plastic, for example, if you cut a one hole too many on the frown of the a helmet, is there a way to fill it in smooth, sand and paint over it? Any ideas?
-

Requesting deployment status for ANH.[04][AP]
Mr_Vader replied to Dirty White Boy's topic in Request Expert Infantry Status
The armor looks great Kent, that Mark list will be lucky to have you! -
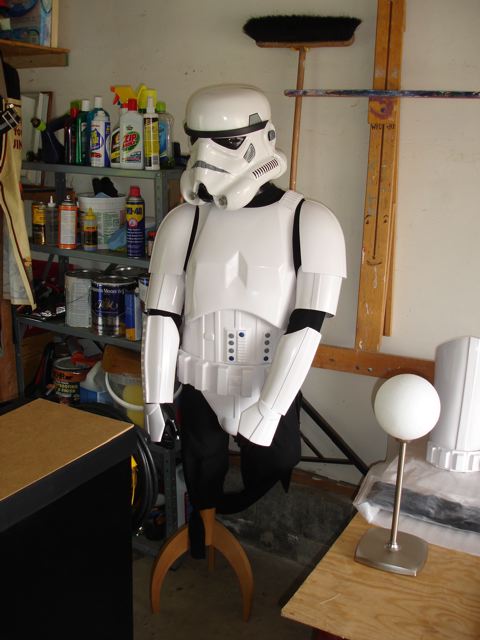
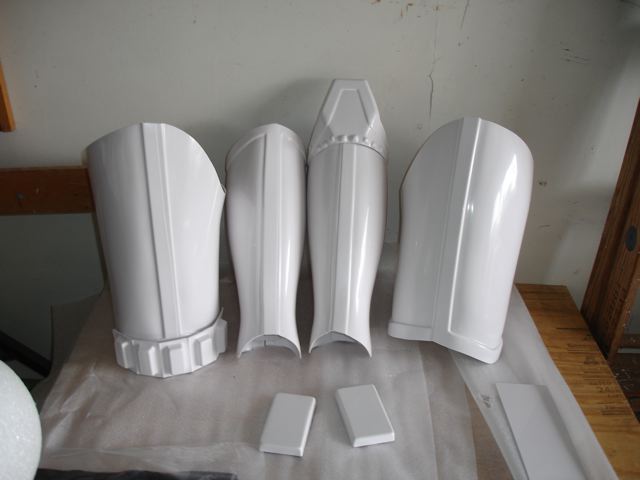
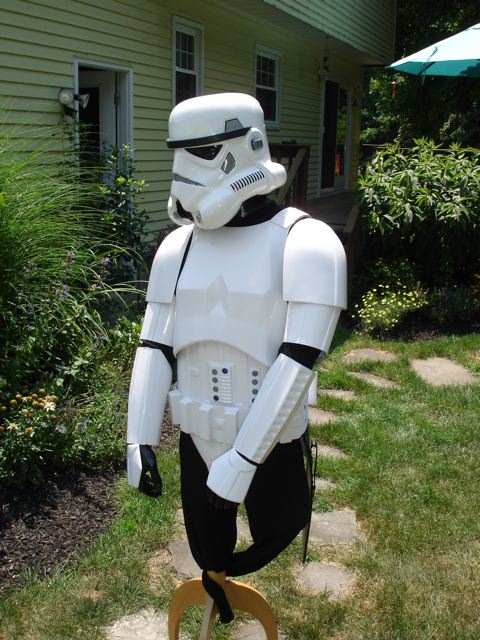
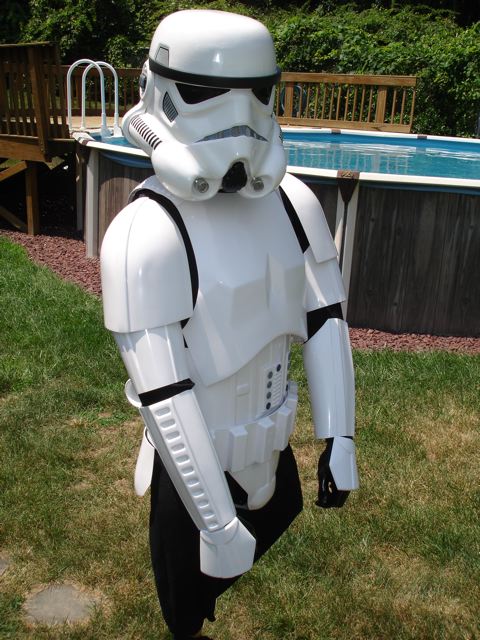
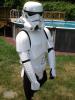
Ok, PHOTOS! Don't mind my dead grass, we're going though a local drought Please be brutal, I want to get everything as correct as I can. Ignore the bucket for now, it will be replaced soon Sorry the mannequin has no legs, I included a photo of the completed leg armor though.


-
All right, legs and thighs are mostly done, just need to figure out the velcro and webbing on the thighs, but we're nearing the finish line. I have the whole thing on a mannequin and I've been fitting all the webbing around it using the snap/velcro Dave method. My wife is finishing up my belt so I can start cracking on that (shes doing this for me because I spent the last two days putting together my daughters playset ). I picked up my under armor at Dicks the other day, scored underarmor pants and a shirts for less than $50, go sale day, and I've begun investigating the boot situation. Everything seems to be falling into place, I should have my helmet going in the next 2 weeks or so, whenever Matt gets done being married (hahah, JK ), my only fear is not being able to match the color/sheen of the ABS with spray paint on the helmet. Right now I have an FX helmet on the mannequin for reference, which I'm looking to sell if your interested . Anyway, as always photos to follow and thanks for the words of encouragement Joey!
-
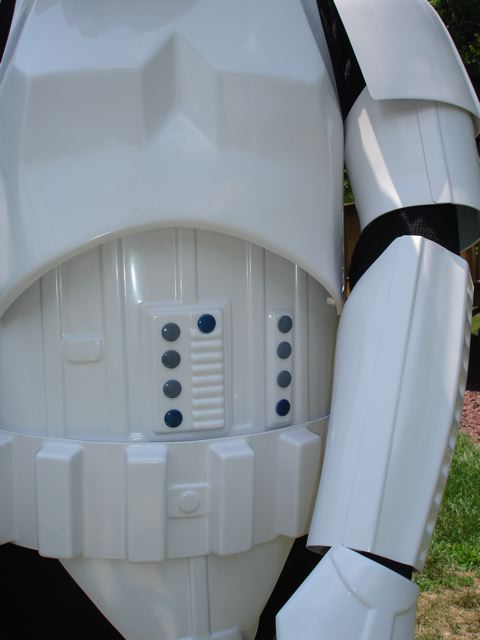
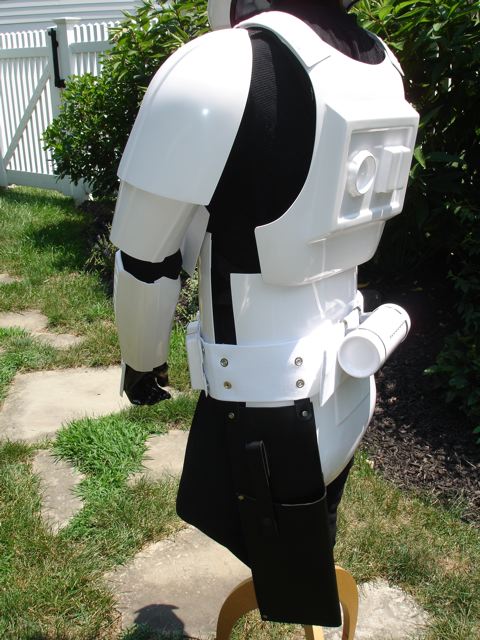
OK, so I finished up the forearms, the biceps and painted/installed the buttons on the ab plate. Also, I cut the "butt" from the back piece as well as reinforced the back/abs plates for the suspenders. The past two days I've been battling the O2 tank though. I tried gluing them together using shims to connect the two seams, and its holding but the shape remains an oval. Then, since I was a bit to anxious to get working on it, I didn't allow enough time for the paint to dry as I had gotten finger prints through it all and since I didn't clamp properly, the bank clips never adhered correctly so they fell off. Once that happened I went to bed Today I removed the stickers and all the paint from the tank, sanded and repainted it, this time having to mask off the control paneled that had been plastic welded on yesterday. The re-paint looks much better as I waited for it to dry, but I didn't center the panel correctly so I'm a bit unbalanced. To correct it, I hot glued one end in place to match the other, this seems to be fine for the moment. I think in the future I'm going to just get an ABS tube from the local giant home store, but where to find another control panel? Tomorrow I'm going to tackle the shins. Although its not as smooth and steady as I'd like it to be, everything I screwed up on has been easily fixed so my seams are straight, everything is trimmed nicely and I have little to no glue showing anywhere. I know I keep promising pics, I'll get to them soon. As always, thanks for the help and support guys! PS Daves link: -------
-
OK, the armor arrived today!!!! Sweeeeeeeeeet... It was really carefully packaged so kudos to the gentlemen I got it from. The odd thing about this kit was that no webbing/straps/glue was included. Everything as far as the ABS was present, including holster and buttons, but no "soft" parts. He did include two extra pieces of ABS so that made up for it . So it arrives today at 4:30, I've been waiting at the door like a Labrador all day for the UPS man, God I love that man. As he runs into the back of the truck to take out the box I was quivering with anticipation, and then he came out..... and I said "thats it?" as he replied "thats it!" So puzzled I run into the garage to tear open the box (carefully) and saw the Tetris skills it must have taken to package it all up, but true enough it was all there, neatly trimmed and ready to go. Just as I ran into the house to get my laptop to follow "Daves Garage" through the first steps... my wife sees me and reminds me, hey, we have to go pick out the new play-set for the baby before it gets too late. Mind you, we've done nothing all day, I was as the door for the most of mine. Bubble busted, we're off to Monroe (30 minutes away) to find a play-set. Fast forward to 9:00, we're home! Nice. I've been thinking about the forearms all night, I'm ready to go. I set up the shop, I'm relaxed, I have Daves calming Brit accent in the background, lets make a Stormtrooper... and then it happened... I'm sure everyone must go through pretty much the same moments when they first put together their inaugural armor. My moments were filled with immediate stress, sweat and anxiety. I fumbled around with the tape, didn't mix enough glue, broke a clamp, slid the armor all over the place as soon as the two were starting to set, all the meanwhile my beautiful 2 year old only wants to say "goodnight," waiting ever so patiently for her crazy father to unglue himself from testing fitting the forearm... Needless to say, the second one went alot better.. Photos soon!
-
This is linked on the resource page: http://www.mcmaster.com (Product #8507K41) Has anyone used or order from these guys?
-
OK, any suggestions?
-
Hmmmm a tall pint of the black stuff, what a great idea on such a rainy afternoon, and what am I celebrating, no work until September of course More on topic, I've started my own batch of labels in Illustrator in order to get the sharpness of vector based graphics. I'll post what I have soon.
-
What a great idea! I don't know how I didn't think of that, I teach computer graphic design for goodness sake! Thanks!
-
I'm having some problems finding proper labels, I can easily enough find a set with the black helmet stripes, but not a lot of luck on the dark blue. Also, armor buttons on an ANH armor, I know the FX kit comes with all black, but what are the colors and configuration supposed to be?
-
HOWTO: How to Video's on You Tube "FX Armor Kit"
Mr_Vader replied to TK-6044's topic in Tutorials, Tips and HOWTOs
Dave, this video series is amazing, I would have a heck of a time putting my new set of armor together if not for them. I really appreciate the help, and I'll keep you updated on the process! Thanks! -
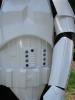
So I did a bit of work today, the most progress I had was with the screws on the earpieces of the helmet, I picked up a baggy of them from the electrical aisle at my local giant home store. The FX helmet I had stickers on it, but I've since painted the front grill (good pain, bad cutting, my fault) and had every good intention of painting the rear vents. Well As I began the painting process, I discovered how much of a pain it is to paint or mask those vent lines. I'm thinking of reverting back to the labels, the ones on their previously were wrinkled, so they needed to be replaced anyway, only thing lost was a bit of paint. Any suggestions? Also, any suggestions on where I would pick up those decals? Also, the bubble lenses installed are pretty much the standard FX lenses, they leave something to be desired. I researched a bit and most people have been recommending buying a face shield (HF4118-DRK) for the dark green look, which I actually prefer, but from photos it appears too dark to look correct. The only guy on eBay selling lenses wants $20+ shipped for the pair, and I can't justify that. Any suggestions in lens land? Thanks again everyone, I don't have a local garrison to help me out, its nice to have this forum to guide the way.
-
Thanks for the advice everyone, I'm starting to get real excitied about this. Thanks for the tips on the helmet Darth Nickel (good to see a familiar name ), it turns out I've had an FX helmet now for about 6-7 years, it was one of the first major Star Wars purchases I made so luckily it was already assembled. Over the years I've taken a few cracks at it, removing stickers for paint, new aerrators, etc, its not perfect but it'll do for now. I'll post some photos for you guys as soon as I have the "armor building station" up and running. The kit thats arriving is sans helmet, so I'll build my confidence up with the suite first, and when I'm really rip roaring to go, I'm going to try a helmet from scratch. So today I picked up a few clamps, some plastic epoxy, industrial velcro and such. I've been watching "Dave's Garage" on youtube and it is absolutely brilliant, I plan on following his instructions with a few of my own ideas here and there. Thanks again everyone, my biggest challenge will be taking my time, I have a tendency to rush and spend years and years trying to repair.
-
Hey all, I'm sure there is a billion posts like this, so i figured I start another I am brand new to armor building and my very first FX kit is on its way. I would really like to get everything right the first time I put it all together. I've looked at the various resources and tutorials all over the place, but I do have one great question: What should I do now, before the armor gets here, to get myself ready for the build. Looking around it seems that the snap system is the way I am going to go, so pretend that I have no tools what so ever and please point me in the right direction. Thanks!