

Zinfer
-
Posts
479 -
Joined
-
Last visited
-
Days Won
2
Content Type
Profiles
Forums
Gallery
Articles
Everything posted by Zinfer
-
A touch of helmet work today. A few dabs of some E6000 between the trim and lip to keep the helmet trim in place. Letting it cure overnight. Need to wipe the bucket down as there appears to be some kind of residue just below the left eye.
-
I just saw one on TrooperBay. Ordered.
-
I like it, nice and clean. Went browsing for it on Home Depot, Menards, Lowe's, Walmart. Is there a particular model #? I presume this is a 'fixed' insert as there's no adjustment wheel. Looking for one that fits in the bucket with no problems.
-
Do you just then glue it to the interior with E6000?
-
Yea, with all that padding I installed it still wobbles and sits too low on my head. Can't turn my head, scruffs my back plate and just no neck at all. Need to get it up off my head just a tad. The only kind of control I have is the snap if I can get that snapped with gloves on.
-
I was kind of surprised how ineffective and frankly a waste of money some of these helmet liner retailers are. Really not happy with what I installed today. It almost seems a hard hat suspension system would be more effective in how the helmet sits on your head over some of this rubbish out there. https://www.ebay.com/itm/Helmet-EVA-Pads-19PCs-CS-Field-Outdoor-Tactical-Protective-Accessories-Set-US/392721498699?ssPageName=STRK%3AMEBIDX%3AIT&_trksid=p2057872.m2749.l2649
-
Dude I had no idea the heat buildup. Even removing my shins my legs could then breath. Reminds me of the sand fleas in boot camp biting the crap outta me while standing at attention in boot camp. Complete discipline.
-
Not to mention the gasp for air after bucket removal.. Thanks buddy.
-
Yea, but to do it properly, you'd need to slice and remove the left hinge elastics (3 of them). FIND, buy and replace the uhm..rivets (Can't remember their name) and put shims equally on both sides for it to be accurate and good appearance, not just a single side. Then undo all of that when you reach your target weight. Or am I wrong? Pretty sure I'm right.
-
Yea let me get closer to my weight goal. I do not like the way the butt plate looked. I will need to probably cut the elastic and bring that in and under. All the offsets I see including the shoulder bell is due to the clamshell not closing. I'm not aware of side shims being easy to install or remove. I just think I need to do it right the old fashioned way. Sweat blood and tears my way back 20 or 30 pounds. :D. I didn't even ATTEMPT to snap the right closure.
-
Only way I could do a photo shoot is with a spotter and photographer, so I'mma need someone else to shoot the application photos when I actually apply. Tried doing this by myself - a big NOPE! Video was the best way to display the first full fitting attempt.
-
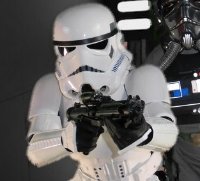
First FULL FIT balaclava, neck seal, gloves the whole bit. Don't judge too harshly. Just a first full fitting. I brushed my belt which unsnapped one. Couldn't get it resnapped. Really needed a spotter. Unable to get the detonator on back. Just a trial full fit. Helmet padding needed. Clamshell unable to close, no side snaps engaged. In order to fix these things I need to stop eating entirely and cardio biking all summer long. Unable to take photos as gloves were blocking and unable to see. Got pretty steamy inside the bucket. Was easier to take a video than to timer snap photos. Video upcoming via Youtube. Wore my butt out! Sweaty experience. I was patrolling the arcade for some Droids I was looking for. All perceived flaws were due to the clamshell not fully closing on the right. SO Yea I have ALOT of work to do with my body.
-
Does it really work to slice that off, put some brackets and loops on that to sit down properly?
-
Huh! Just noticed that bottom crotch line is off from the rest of the costume.
-
Doing another trial fit this weekend after this last cure session on the belt. Probably tomorrow night. Full suit up. I know the torso's gonna look trash with my waist size in the high 40's. But peeps wanna see overall the entire thing and it's fit. The only thing that sucks is no spotter. All on my own putting all this on for a photo shoot of timer photography with a cheap camera on a cheap tripod. I'll run a walking video as well.
-
Thinking this has got it. Checking with Garrison and Legion. Looks like I may need a popsickle stick to get rid of some of that glue residue under the button panel. It's hidden by the belt anyways, but I know it's there.
-
Oh I know buddy. Yea you know I've been hunting high and low for a Doopy kit or something otherwise affordable. I wouldn't dare submit with that prop. I was looking at Quest but I guess they don't have the magazine box. I'm searching for a worthy prop E11 but Im really not in a financial position to spend multiple hundreds for a single prop.
-
You're right. I didn't notice this. I'll go up a bit higher with some E6000. Just took care of it. Glued, clamped for overnight cure.
-
Wrapped up the rework of the Belt last night. All the snaps replaced with Line 24 snaps. Alot of drilling out of original snaps. Tested and it appears to be holding well. Haven't test fitted again yet as it's not really time, no changes in weight. But the snaps ARE holding. I think I found my issue in that the main Torso Belt snaps appear to be VERY close tolerance distance and that was leading to the original snaps failing. Too tight. I'll let it fly for now. Still need to have some velcro sewn on the inside for the inside center of it to hold it up and in place. Going to run to JoAnn fabrics today and find some velcro without the stickyback for fabric sewing. At least now I can remove the belt and have it cleaned if it ever needs to be. It is pure white, so you know.
-
It's about time to get just a little work done on the E-11 prop. I need more parts yet for my cheapo blaster prop.
-
Considering some more work on the Helmet. I really hate doing this as it means tearing the helmet back down again. But the results do look kinda cool.
-
I am so very excited. Nearing the end of my build. Finish this belt off. Get the chest plate bracket loops sized right and I am all over weight loss to get that approval. I can't wait to be a part and participate in my Garrison, meet new people and newfound friends. It's gonna be a blast. It's been a long haul from someone that's never had any experience in this kind of costume building and accuracy to actually beginning to LOOK LIKE a Movie StormTrooper. Thanks guys for helping me get to just this point. Bit of a ways to go yet - mainly my own problem in body shaping.
-
I mean if I used a hot iron to poke a hole that left a mark on the torso that'd do. Just wondering who has actually cleaned or washed (and I imagine wash would be dry cleaners due to all the fray on both edges) their belt. Mine is bright white, not a cream color.
-
Pulled the original button snaps off the torso using a drill. Replaced button snaps with Heavy Duty beefier Line 24 male snaps. Now for the canvas belt work of replacing all the snaps. I'm really feeling like placing velcro in the center of the torso rather than installing a 3rd snap. Check me if I'm right, but I'm thinking this is better than a misaligned snap. Now for the canvas belt itself and plastic ammo section.
-
Well I can wait a day or two on the 24's. I ordered those too. Also, I never considered washing the canvas belt. Not sure how badly it'd fray considering the edges are a complete mess of stringiness. I would think 24's would have a firmer grip but really not sure. As I alluded to earlier, I'm thinking best approach is to drill the previous snaps out.

