jaxninja
-
Posts
47 -
Joined
-
Last visited
-
Days Won
2
Content Type
Profiles
Forums
Gallery
Articles
Everything posted by jaxninja
-
 TK 20247 updating access, just had my TFA TK approved https://www.501st.com/members/displaymember.php?userID=30303&costumeID=326
 -
aaaaand approved! TK-20247 I still have some things to tinker with to make it a bit easier to deal with for suiting up and such. Right now my main issue I think is having the suspension harness attached to the abdomen and slipping into it, or suiting up in the harness first and then attaching the armor with the help of a handler. As it sits right now, I suit up in the shoulder gaskets first, with the biceps attached (myself). Then slip into the abdomen with harness attached, including posterior and cod piece (myself, with handler making sure it's all secure). Then connect the thighs myself, then back/yoke with a handler, chest myself, thermal det myself or handler, forearms myself, shins and spats with handler, then helmet. The problem I keep running into is keeping the harness straight when I slip into it if it's attached to the abdomen. Went for my first troop in it, and I somehow had one of the clasps for the back connected to the front. I still don't understand how I managed to wear it . The suit from Sheev's would solve that, as again it's a shirt with a basic shoulder suspension system that only needs to clasp onto the front and rear of the abdomen and then done. I just need to figure out my issue with getting the biceps to sit right so I can actually move my arms properly. The only think I don't like is that it's not adjustable, so I have to figure out the exact mounting point on the abdomen. Not a big deal, just more to tinker with. I'll post some updates once I get it to a point I'm satisfied.
-
Well, took forever to figure out the best way to do all the strapping/suspension. I tried using the fancy top from Sheev's I had bought, posted above, but found I couldn't get the bicep armor far enough up my arm to be in the right spot, as the material would bunch up too much and keep me from getting it into the right position. Ended up using Ukswrath suspension kit, shoulder and elbow gaskets from Geeky Pink's, and with the pants from Sheev's for a test fit. Worked well enough, except that I didn't put a belt through the pants, and as the suspension for the thighs and such hangs from it, after walking around for a bit they all started to slide down. Easily fixed with a belt later on. I'd really like to get the Sheev's top to fit, as it would make suiting up immensely easier compared to having suspension both from the shoulder gaskets and Uks kit, but we'll see. Oh, also got the belt sorted out. Used a kit from Belts of the First Order. Nothing too fancy about assembly, just following the assembly directions, although I am still fidgeting with how to wear it exactly. I installed a pair of snaps on the front of the ab plate for it to snap on to, and then velcro across the posterior plate where it rests against to make sure it's secure and doesn't droop. The only problem I have is that I had already assembled the belt before the velcro, so the velcro is only adhered with the mounting adhesive to the belt, so whenever I take the belt off the velcro seems to go with it. Once everything is on it seems to be secured well enough, but I'd like to figure out something a little more secure.

-
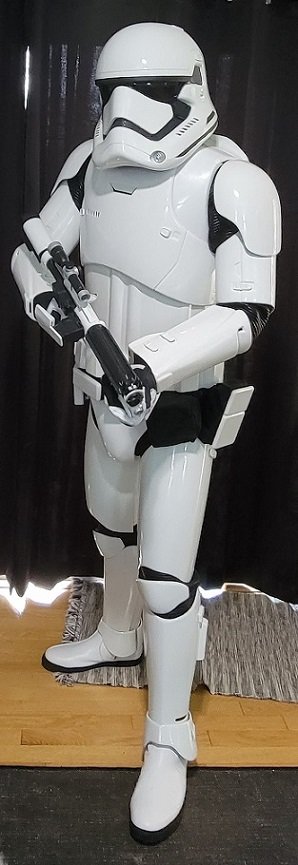
Wow, so this has been a long time. I'm not quite dead yet! Sadly, if things could have gone wrong, they have... So, where to begin... Shortly after my last update, I was working on the back/yoke seam when disaster struck. Trying to sand the seam smooth, it was getting to a point where the plastic was thinning on that back ridge so much it was nearly see-through. Before I went any further and potentially sanded a hole through the armor, I decided to reinforce it with some ABS sludge. I inverted the back piece and filled that ridge with the sludge, then left it overnight to cure. Unfortunately, I guess it was still reacting, and melted the entire ridge, essentially destroying the back plate.. I contacted KB for a replacement, but before they were able to get to making one, I found someone selling an already finished KB kit that just needed some paint. Huzzah! But wait, it's not over... I got the kit, everything pretty much looked okay, so I went right to paint. I built a makeshift paint booth in my garage, using 1/2" pvc pipe and plastic sheeting to make both a booth, and something to hang the armor off of while I painted. After much trial and error I finally got all the white laid down perfectly, using the Rustoleum Professional series of spray. Next step was the clearcoat, which I was going to use the 2k spray clearcoat with the activator and such. Wanting to make sure I didn't waste any, I wiped down all of the armor with a tack cloth. Unfortunately, that seemed to have left a sticky residue on the armor, because every single particle of dust seemed to magnetically draw to the armor from out of nowhere. I didn't think to check before I started applying the clear, as when I left it everything was spotless. As I go part by part, I realize the debris is there, but silly me figured I can't stop because I've already popped the can and don't want to waste it (note to self... stop what you're doing next time). Once the clearcoat dried and I could see what I did, I proceeded to cry myself to sleep and ponder my life decisions. At this point, other life events take over (pandemic and all), so I have to put things to the side for a while. Unsure of wanting to try and sand down the clearcoat and re-do it myself due to time and such, I happened to find a prop making company that was taking new orders, and they had apparently done a number of FOTK commissions before. Great! I can have someone else finish the armor while I work on other things and hopefully get it back all painted, then I can work on strapping and all those fun things. Long story short, I send them every part I have, from both my original kit and the "already done" kit, with the agreement for them fix/repaint the clear, and if there are any parts that have issues they can use my "original kit" parts to do whatever is needed. They offer to fully complete both kits, which wasn't needed but hey, figure if something breaks I'll have a spare ready. I asked them to take their time and do it right. Four months later... they tell me its nearing completion, so I ask if it'd be possible to have it for my birthday this year (August 1st). Not to derail this with ranting about other peoples work, but they tell me a date it'll be ready, go to meet to pick it up, and like 1/3 of the parts are missing. I look over the work, and the paint is awful - it's full of debris, severe orange peel in some places, paint runs, paint filling seams that are not supposed to be seamless, chips in the paint, odd stains and marks. I tell them to stop working on whatever else they were doing with my armor and send it back. Two weeks later, I finally have my parts. While the paintjob wasn't great, I could get away with approval because it's likely things that can't be seen from a distance... basically like vanilla bean ice cream - looks solid white, till you get up close and notice all the flecks in it. That was until I got the helmet, which was just... bad. They completely painted over the black stripe that goes around the bottom area of the helmet, plus a massive paint run that is chipping off on the left cheek. Ugh. Now I can't even get approved till I fix at least the helmet. So, now I'm back to roughly where I was at the time of my last post. Luckily after working with some squadmates, I we picked the best bits of armor that should be approvable, and painted in the missing stripe along the bottom of the helmet. I'll probably strip it later and re-do it, but for now I just want this done. Working on the belt and strapping now, so hopefully later this week... One bit of good news, I got a fancy undersuit for it! I'll avoid vendor names to protect the innocent, but it's basically an integrated undersuit, with the gaskets part of the pants and shirt, with all the mounting and velcro built in. Also has a pouch for an amp which is what you see on the "suspenders" there. Took under a minute to put on Moral of the story - take your time and do it yourself, you can do it!
-
So, thigh update. Got the left thigh measured and fit and such, making sure I have decent space and movement to actually bend my knee. I think I have a little work to do still on the shaping of the bottom on the sides of the knee. I'm slightly concerned I cut the arc of the outer seam a little bit too... arc-y. Some shots make it look fairly significant, where others make it look like it barely arcs at all. To make sure each thigh matched in shape, I used the scrap from the pieces cut on the first thigh, then inverted them to make the lines for the other thigh so they have the same shape. Outer thigh (left): Front thigh (left): Back and inner thigh (left):
-
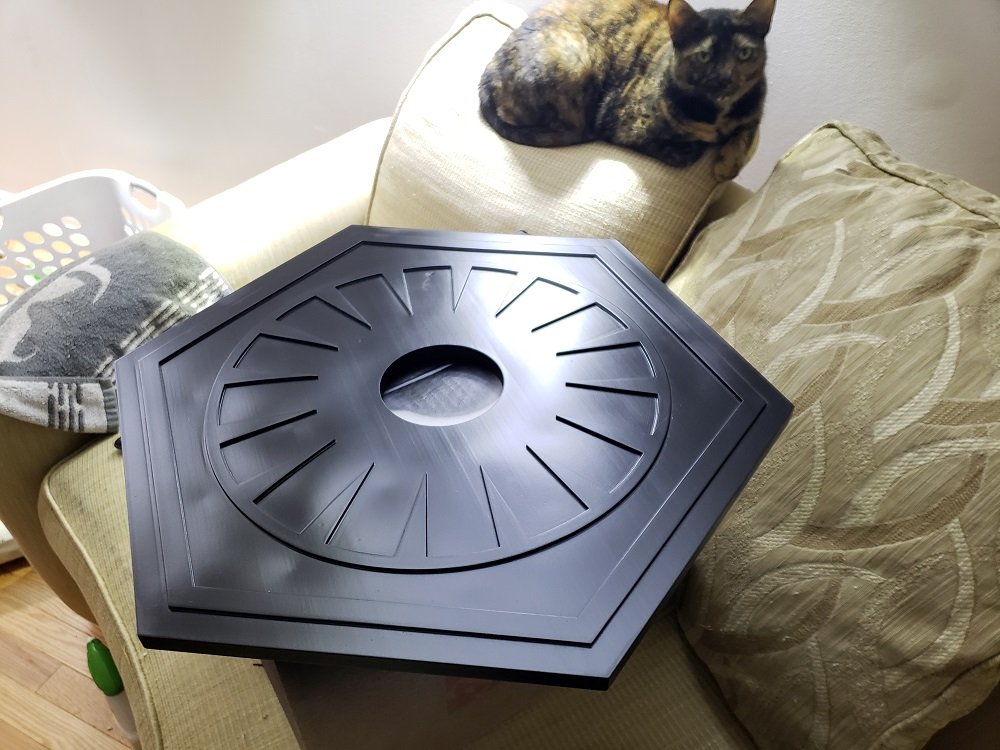
Ok, so haven't updated the thread in a bit but have still been working. Have both shins essentially where I am happy with them for now. I want to add some abs paste or epoxy on the top of the right shin (first picture from the previous post) to seal it up a bit as there's a little gap between the pieces that needs to be fixed, but nothing major. I finished both spats, but decided to go with what seems to be the alternate route of the opening clasp on the inside instead of where the clip greeblie is, as I don't really trust myself to not break a resin greeblie. I glued the back and yolk together as well since it was pretty quick to do. I was going to leave the yolk in one piece, but the opening fit close enough around my head I just decided to open it up and hopefully make getting in/out of it easier instead of having to wiggle in. I try to flex myself instead of the armor as much as possible . I'll get back to this part later I also worked on the chest a smidge. I need to trim the return edge more, but I went ahead and cut out the pillholes and the chest detail. I sanded the pillholes down smooth with the armor, but they didn't all come out the same. I am not the best with eyeballing sanding out holes like that, so I made a reference for myself to help assist with the sizing. Using a flexible rules I drew lines on the top and bottom to help guide me to make sure they matched the same height. I still need to round them out a bit smoother but it's on the way at least. I also finished painting my little house project - a First Order ceiling medallion for the ceiling fan in my den aka Star Wars room. Printed by The Imperial Factory. Also did some work on the thighs. The back of the thighs are just half cylinders now, so... that's fun. I've got the left thigh shaped and the outer seam glued. Still need to get the right thigh together. Will post some progress pictures later. I think I'm at the point now I need to get around to putting my gaskets together so I can size everything properly.
-
By some miracle I fixed the first shin. After much tinkering with various options, I was somehow able to separate the strip which ended up being the ultimate issue - it was way too stiff to conform to the curves of the shin and allow the halves to mate together. Found a bit of abs that was far more flexible and used that to ultimately get the shin together. There are a couple spots it didn't fully adhere, so I need to go back and sneak some more glue in there. There's a small gap at the top, but I'll figure that out later. Maybe abs sludge and then sand down to make the seam again. Forgot to mention before, I cut out the insert part because the pull was super wonky there. It's still got one part with a weird lip but I don't really want to sand it down any more. If I recall though, it's supposed to be solid there with a black sticker and not cut out with gaffers tape like on the chest, correct?
-
Did some work on one of the shins tonight. Got everything test fit and lines traced and cut. Added on an abs strip for the outside part, but then a minor disaster struck. I didn't realize it but the abs strip I cut happened to be super stiff and did not want to conform to the curves of the shin. It was fine on the first half, but when I tried putting the entire thing together it would not seat down properly and left a bunch of ugly gaps where the shin curved away from the strip. I was able to separate it before it fully cured, with only some minor warping on the back half that I was able to separate off. I tried cutting it a little thinner but I'm not sure that'll work either. Now I need to figure out how to make it work. Thinking I'll either gently warm it to try and get it more pliable, or just grind it off and start new. My only worry is the part that it's actually properly adhered to is like paper thin so I'm worried about destroying the shin if I try and remove the strip entirely. We'll see tomorrow! This is a picture of the shin after having to separate it again.
-
Thanks for the tips! Cleaned up the spats tonight quite a bit. Will add a tab to them tomorrow so they can be securely attached. Then work shall begin on the shins! I've decided to try and work my way from the bottom up so I can try and stay focused on one part instead of constantly doing a bit on everything all at once, and then working on one part a day.
-
Ah, interesting. So the greeblie side is fixed and the inner side is velcro? Did your spats come with that bit where you put the velcro on? Mine totally don't have it, so I am debating about cutting down the "main" spat to accommodate a slot for it, or manually adding on a tab for it
-
Ok, finally figured out how to use Dropbox So these are the spats just roughly cut and sanded. I think I need to cut down way more of the return edge around the top on both parts, and where they meet together. I've got the inside seam wrong way around I believe, but it was just test fitting. There's no extra surface area on the inside portion to connect the parts together like on the Anovos kits, so... I'll thin it out a bit and test fit again.
-
also tested the spats. Not sure I like how they fit on the non-greeblie side... have some work to do I think trying to post photos but I keep hitting smaller and smaller size limitations. I need to figure out another photo host or something
-
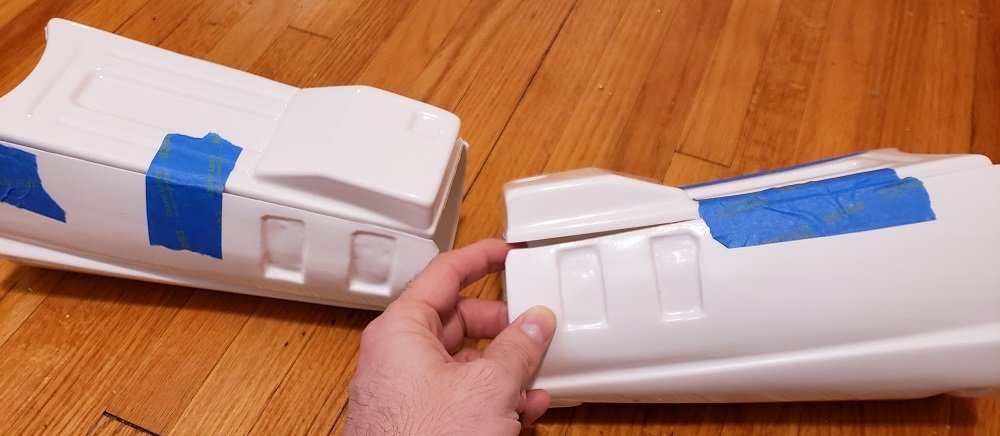
Spent some time tonight working on the forearms. Cut them as mentioned previously to have the front fit loose per the CRL for Centurion. Here's a rough mock-up to see how it worked I realized of course that KB's working on a new forearm mold for Centurion approval so... I think I'm going to put these on hold for now till I get the rest done before trying to hack them apart any further
-
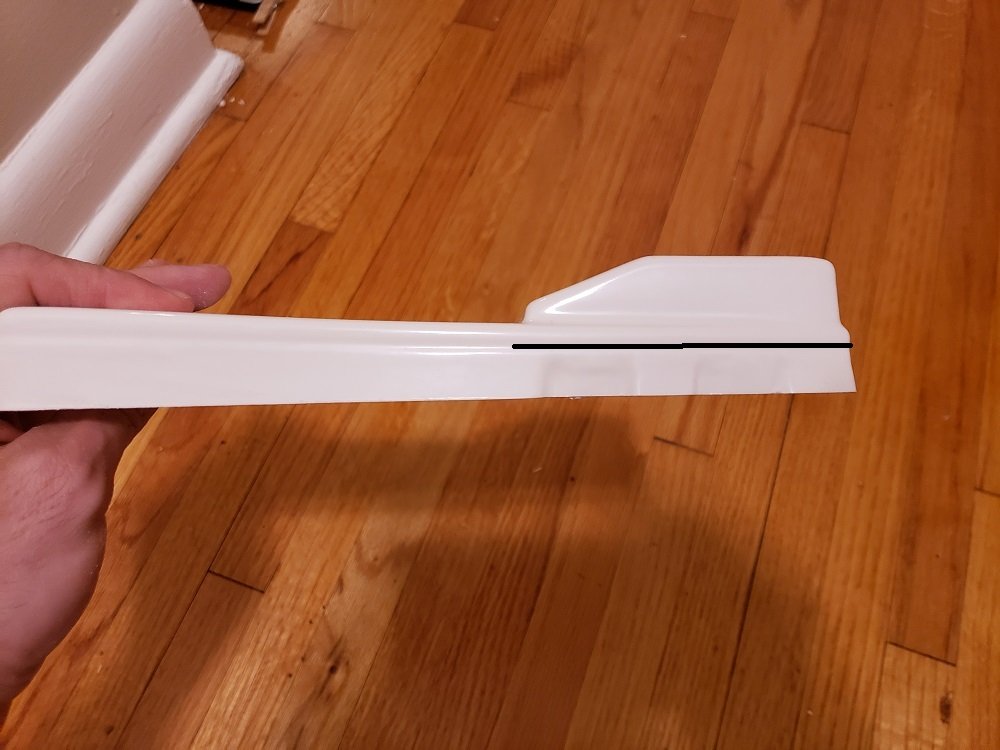
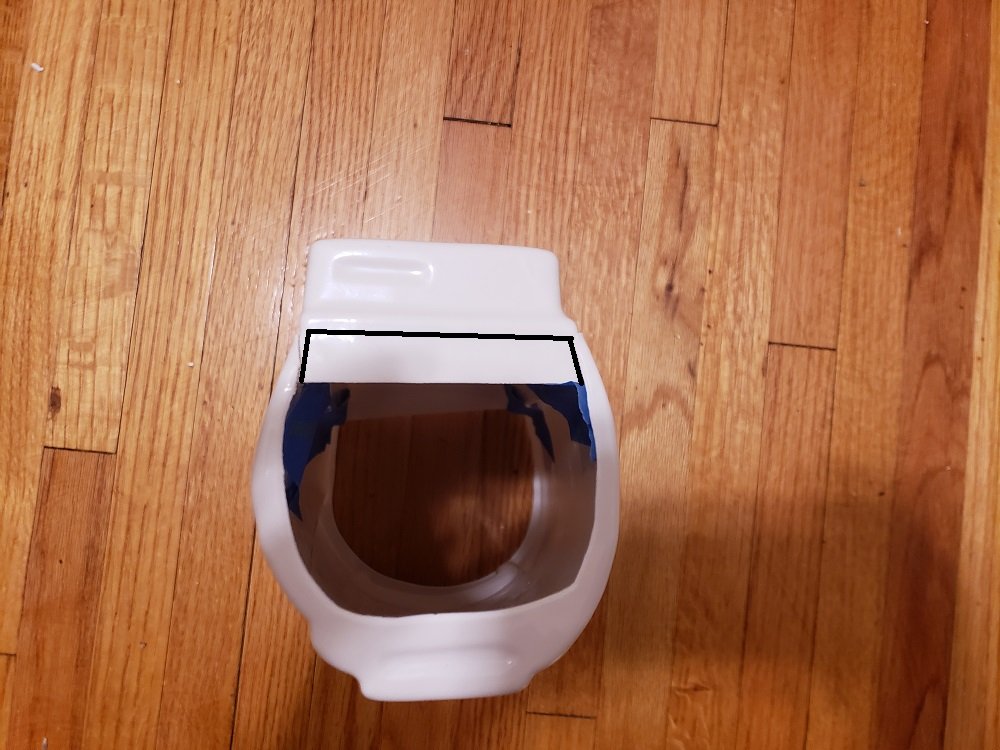
Trying to figure out how to cut and modify the forearms for Centurion approval, as the side with all the greeblies and the box that's supposed to be separate is one piece. I'm thinking of leaving the sides as it is here, and cutting along the black line to let the flap be loose. while the rest of the lower section is adhered to the forearm piece and then cutting the "box" off, filling the bottom with a plate of abs to make it solid, and filling the gap it'd create with another plate of abs. My only worry is the pull lines around the box are a little soft, so it might look real obvious, but we'll see!
-
Worked on two different projects today. First, one for the house: Second, got the raw sanding/trimming mostly done: Need to do some final sanding by hand to smooth the edges and then I'll post to make sure I've got them right.

-
So this is basically the part in question. The screen there goes in the hengstler counter box. It's not required for the unit to function, but has a lot of neat features like shot count, overheat count, and the settings menu. I'd prefer to have it, but I can also order the system without it if it'd affect getting approved for Centurion. The rest of the system has all the other bells and whistler - LED's where needed, LED's in the barrel so it looks like it actually shoots, a laser aiming out the barrel if you want it, speakers, the full works. ------------
-
And so it begins! Got most of the rough cutting done yesterday. Planning to sand down as much of the rest as I can today
-
Finally had my armor delivered today, just in time for a squad armor party tomorrow Hopefully I'll be able to make some good progress with it tomorrow! Also a question about the F-11D blaster for Centurion approval if anyone knows... I was looking at getting the Blast FX kit for it, but I wasn't sure if having the display screen for the counter box would count against that, or if I should play it safe and not have the display
-
Awesome, thank you!
-
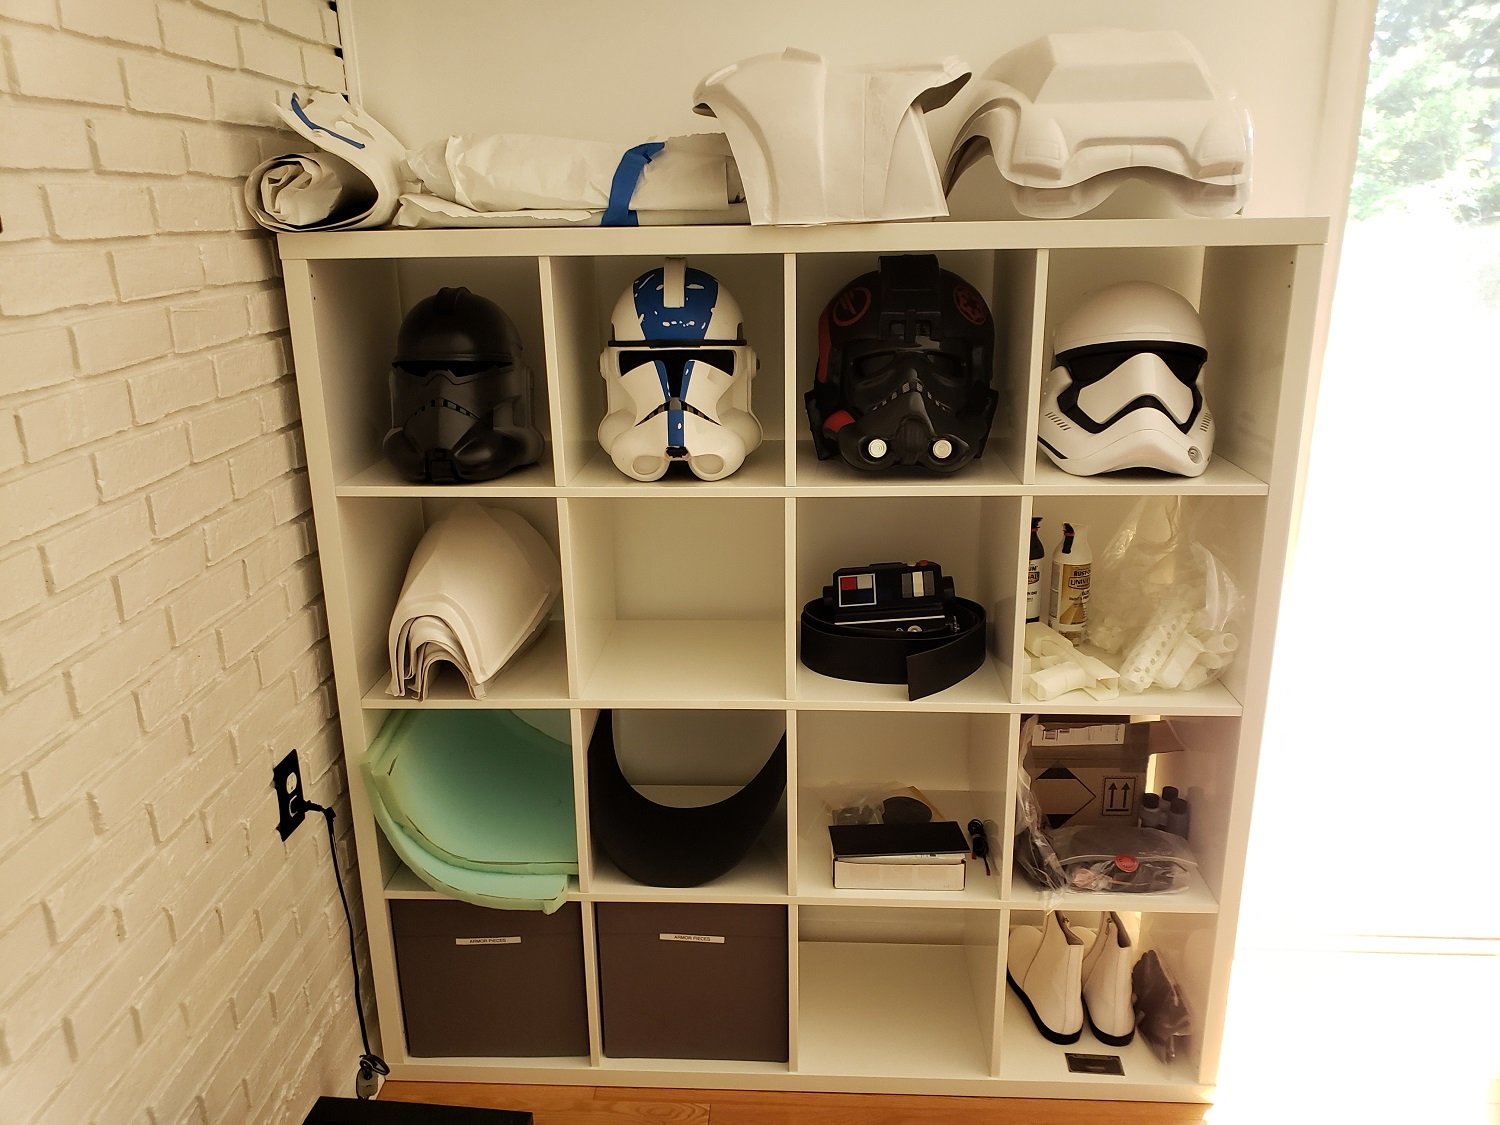
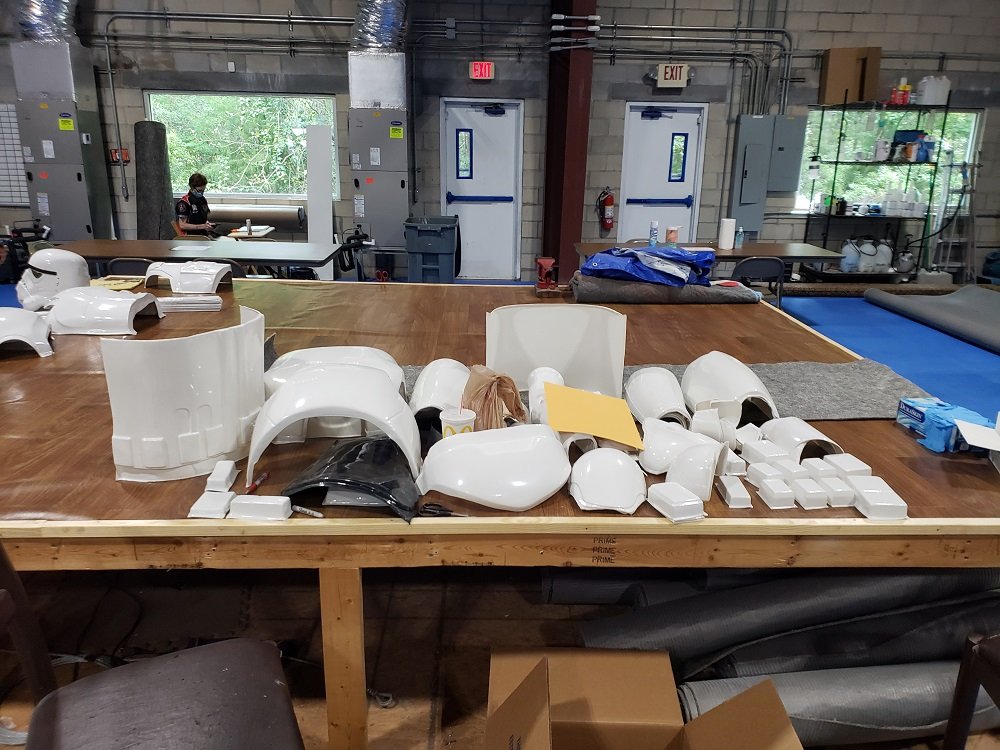
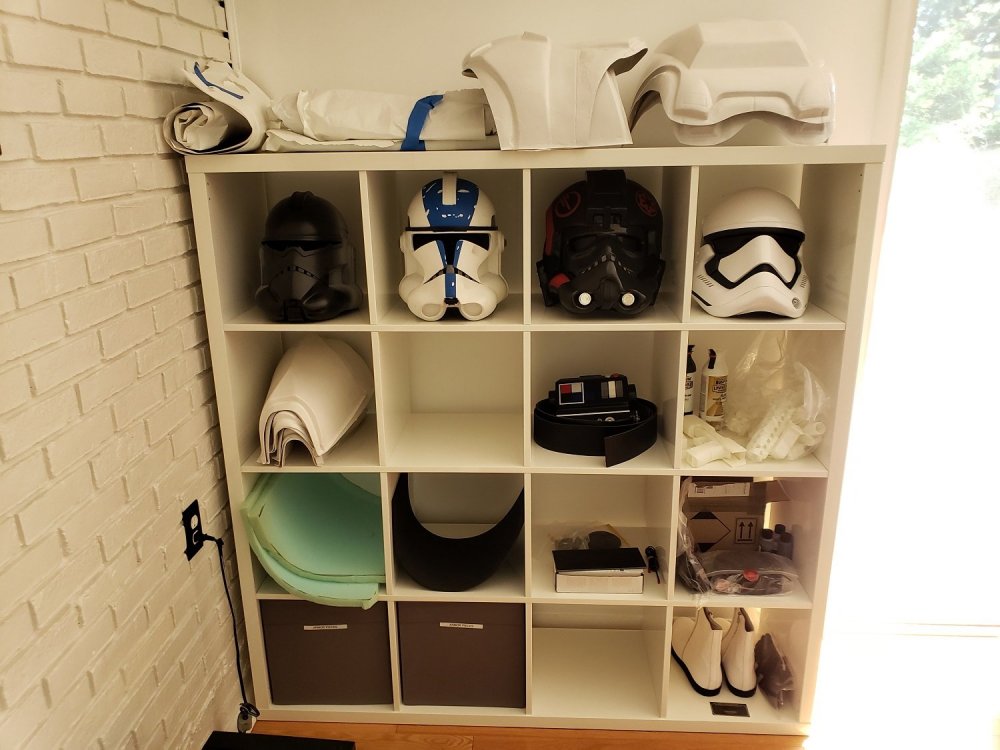
Feel like forever since I made my introduction post, but I'm finally starting my very own build thread! Been waiting for my KB armor to arrive since October and it's finally on the way, hurray! As I've done an ANH TIE Pilot and Inferno Squad build so far, this'll be my first "full armor" build. My goal is to go for Centurion level, so... that'll be fun. Pretty much have all of the accessory bits ready to roll, now just need the armor. Luckily enough my squad is doing an armor party next weekend so I am hoping to make some good progress on it there. I'm planning to document the build in detail, but we'll see how well I remember to do that as I go Parts: Armor - KB Props Helmet - Anovos Gaskets - Imperial Gaskets, Geeky Pink's, Sheev's Emporium (redundant much?) Belt - Belts of the First Order Gloves and Boots - Imperial Boots Neckseal - Anovos, Geeky Pink's, Sheev's Metal Holster - R2Dan Anything else I'm forgetting - Probably F-11D and SE-44C - Imperial Factory (updated 19 Oct 21) My collection, with all my FOTK stuff anxiously awaiting. Don't mind the clone armor still in progress
-
Awesome! I'm very excited to see this. I was about to order the same thing but wasn't sure about going with the screen on the counter or not.
-
Hello! While waiting for my armor to arrive some day, I've decided to tackle doing the blasters in the mean time. I was looking at doing the TRamp BlastFX kit for the F-11D, but was wondering if anyone knew if the "main display" screen for the hengstler counter would not be allowed for Centurion level approval? It's not required to have it for the kit to work, but I don't want to add it in and whenever going for Centurion level later on have to remove it. Thanks for any input.
-
We have a new green-cheek conure that we named Neeku after the character on the show Resistance
-
Hello, hello! Requesting 501st access https://www.501st.com/members/displaymemberdetails.php?userID=30303 Thanks!