


mlarsen
-
Posts
63 -
Joined
-
Last visited
Content Type
Profiles
Forums
Gallery
Articles
Everything posted by mlarsen
-
mlarsen's ANH TK Build (AP trimmed kit)
mlarsen replied to mlarsen's topic in Build Threads Requireing Maintenance
My armor is showing some battle damage. My TD clip is rubbing up against the armor. I need to add more soft velcro to the metal clip to prevent further rubbing. Any advice on how I can fix this? -
Request your Centurion Certificate here:
mlarsen replied to justjoseph63's topic in Request Centurion Status
Matthew Larsen TK-12929 Centurion Letter Sha Sha http://www.whitearmor.net/eib/certificates/12929-centurion.png -
TK-12929 Requesting ANH Stunt Centurion Status (AP) [448]
mlarsen replied to mlarsen's topic in Request Centurion Status
Thanks for your feedback! I plan to work on belt and sniper knee when time allows. -
TK-12929 Requesting ANH Stunt Centurion Status (AP) [448]
mlarsen replied to mlarsen's topic in Request Centurion Status
Any additional things needed? -
Armor Maker: AP Helmet Maker: AP Blaster Type: Quest Designs Height: 6'1" Weight: 175lbs. Boots Maker: Imperial Boots Canvas Belt: AP Hand Plates Type: AP Electronics: ICOMM with Aker Neck Seal Type: Darman's Props Holster Maker: AP Link to EIB approval. Based on my EIB I moved the shins down and eliminated the black between the chest plate and shoulders the best I could. I also tightened up the strapping to eliminate seam on the left side and removed the return edge on the shoulder bells. Removed some paint on buttons based on EIB review. Centered the knee plate a bit better based on my EIB review. Raised brow based on EIB review and fixed screw placement, cleaned up vocoder.
-
mlarsen's ANH TK Build (AP trimmed kit)
mlarsen replied to mlarsen's topic in Build Threads Requireing Maintenance
Got it thanks! -
mlarsen's ANH TK Build (AP trimmed kit)
mlarsen replied to mlarsen's topic in Build Threads Requireing Maintenance
I agree, the AP decals don't go pass the raised button, I like the look of the decals much better. I jumped the gun and removed them based on my EIB review. Oh well maybe I can get another set of decals. -
mlarsen's ANH TK Build (AP trimmed kit)
mlarsen replied to mlarsen's topic in Build Threads Requireing Maintenance
Painted the ab buttons this evening. Is this what they are looking for with Centurion approval? -
mlarsen's ANH TK Build (AP trimmed kit)
mlarsen replied to mlarsen's topic in Build Threads Requireing Maintenance
Working on feedback from my EIB for Centurion application. Raised the brow a little, I was able to just pull up the brow and it stayed in place. Tightened the strapping on left and right sides. Removed some return edge from the shoulder bells, maybe could do some more. For the ab buttons I used the decals provided in the AP kit. What have others done? Ab button paint shall not extend beyond the bottom of the actual raised button. I may remove them and paint by hand. -
TK-12929 Requesting ANH Stunt EIB Status (AP) [940]
mlarsen replied to mlarsen's topic in Request Expert Infantry Status
Here are some additonal photos showing the white inside of the hovi mic tips. Let me know if you need anything else. -
TK-12929 Requesting ANH Stunt EIB Status (AP) [940]
mlarsen replied to mlarsen's topic in Request Expert Infantry Status
Added additional photos to the original post of the white elastic connecting chest and back plate as well as the ab plate without the belt. -
TK-12929 Requesting ANH Stunt EIB Status (AP) [940]
mlarsen replied to mlarsen's topic in Request Expert Infantry Status
I will add additional photos of the white elastic connecting chest and back plate as well as the ab plate without the belt later today. Hopefully these photos are ok, I am really not liking how dark/green they appear. Need better lighting I guess. -
Armor Maker: AP Helmet Maker: AP Blaster Type: Quest Designs Height: 6'1" Weight: 175lbs. Boots Maker: Imperial Boots Canvas Belt: AP Hand Plates Type: AP Electronics: ICOMM with Aker Neck Seal Type: Darman's Props Holster Maker: AP Full Body: Armor Details: Helmet Details: Blaster: Accessory Details: Added chest/ab connection showing elastic and front of ab plate without belt:
-
mlarsen's ANH TK Build (AP trimmed kit)
mlarsen replied to mlarsen's topic in Build Threads Requireing Maintenance
I got my TK ID! TK-12929 I have a Quest Designs E-11 blaster. Can I go on to EI without weathering my blaster? I plan to do so eventually. -
mlarsen's ANH TK Build (AP trimmed kit)
mlarsen replied to mlarsen's topic in Build Threads Requireing Maintenance
I made my own helmet fans with a 4 AA battery pack attached to the helmet with industrial strength velcro so I can remove if needed, cords are clean and hidden. Where do most of you place the battery pack. I put it on the right side but now the helmet leans to that side, some additional padding may help. There isn't enough room in the back of the helmet for the battery pack. -
TK-12929 Requesting Access! https://www.501st.com/members/displaymemberdetails.php?userID=31201
-
mlarsen's ANH TK Build (AP trimmed kit)
mlarsen replied to mlarsen's topic in Build Threads Requireing Maintenance
And some more fittings. As always any feedback is greatly appreciated. I feel like I am getting close to basic approval. Need to apply some glue to keep the drop boxes in place. Thighs should go down a bit? Need to make sure thermal detonator is aligned better and I may trim the bottom thighs were the gap is and upper shins to allow for better movement. I also need to make sure the rear shins are better aligned when I velcro them shut. -
mlarsen's ANH TK Build (AP trimmed kit)
mlarsen replied to mlarsen's topic in Build Threads Requireing Maintenance
Time for the sniper knee. How does it look? It is off centered a bit but it lines up on sides and the front looks balanced horizontally. -
mlarsen's ANH TK Build (AP trimmed kit)
mlarsen replied to mlarsen's topic in Build Threads Requireing Maintenance
I agree I think the rear cover strips could be better. Rounded at the tops and bottoms? For the gaps use Plasticweld, let dry, sand smooth and paint white? -
mlarsen's ANH TK Build (AP trimmed kit)
mlarsen replied to mlarsen's topic in Build Threads Requireing Maintenance
I am assuming there is too much gap between the lower rear thigh pieces and will need to be filled in? -
mlarsen's ANH TK Build (AP trimmed kit)
mlarsen replied to mlarsen's topic in Build Threads Requireing Maintenance
I thought I would take some initial fittings before I work on the other thigh. Should I trim more of the thigh? I can fit about a finger in on each side of the knee, some padding on 1 side should keep it more aligned. Need to make sure I space the elbow and wrist so an even amount of black shows. Align drop boxed better at the end of the belt and pull them up a bit. I plan to glue the elastic to keep them in place. Gap between thigh and cod piece ok? I have a belt with a piece of black elastic on it and I still need to keep pulling up the thigh piece. Maybe nylon strapping would work better. Reduce black in shoulder gap in picture below. Again make sure drop boxes are better aligned in picture below. Keep spacing between the elbow and wrist the same. Align ab and kidney plate better. Align rivets better and paint white in picture below. Keep spacing between elbow and wrist the same. Align drop boxes better. As always any feedback is greatly appreciated. -
mlarsen's ANH TK Build (AP trimmed kit)
mlarsen replied to mlarsen's topic in Build Threads Requireing Maintenance
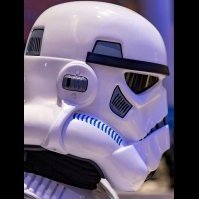
I cleaned up my helmet some last night. Still some more cleaning up to do but it is getting there. Removed blue strip that was half hidden under ear pieces. Added the phantom teeth. Painted hovi tip mics white with scuff marks. I need to clean up the vocoder some, I don't like the way it looks. Also did some work on the shins and applied white industrial strength velcro to the back covestrip. -
mlarsen's ANH TK Build (AP trimmed kit)
mlarsen replied to mlarsen's topic in Build Threads Requireing Maintenance
Mine is a hair over, about 194mm. I didn't glue the end caps on and they can come off. I could remove a few mm on each end cap or is this close enough? -
mlarsen's ANH TK Build (AP trimmed kit)
mlarsen replied to mlarsen's topic in Build Threads Requireing Maintenance
Got it thanks, that is what I was thinking. I like your suggested design for the shin closures. -
mlarsen's ANH TK Build (AP trimmed kit)
mlarsen replied to mlarsen's topic in Build Threads Requireing Maintenance
Complete overlap of rear shins and connected with velcro (no velcro on coverstrip) is not allowed correct?
