

Alleged
-
Posts
32 -
Joined
-
Last visited
Content Type
Profiles
Forums
Gallery
Articles
Media Demo
Posts posted by Alleged
-
-
TK 99611 reporting for duty and requesting access, please!
https://www.501st.com/members/displaymemberdetails.php?userID=28437
- Brad
-
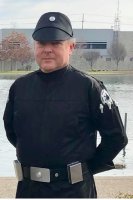
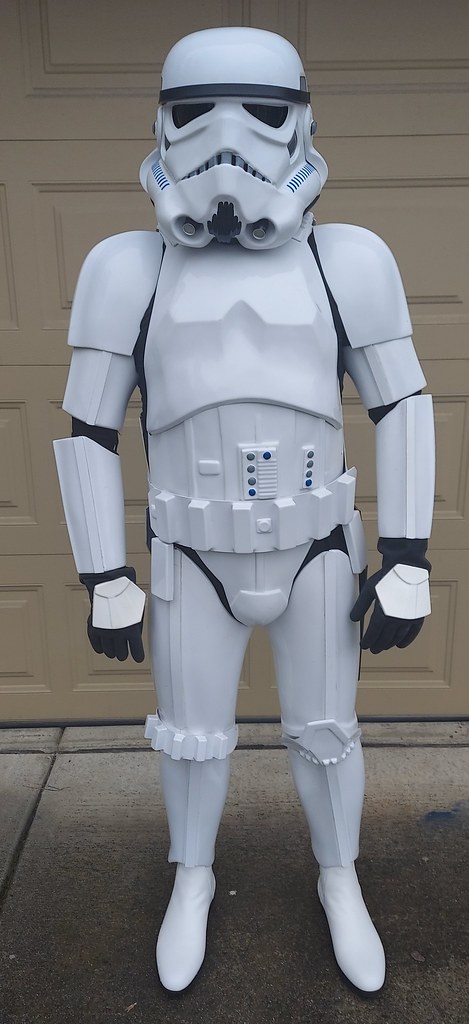
I haven't been updating this thread like I intended (pandemic, day job, etc.) but I got approved yesterday! I can troop! (maybe...) Still a ways to go in my journey, but this is a big step forward. Thank you to everyone who has commented or provided encouragement. I had SO much help from everyone.
Front
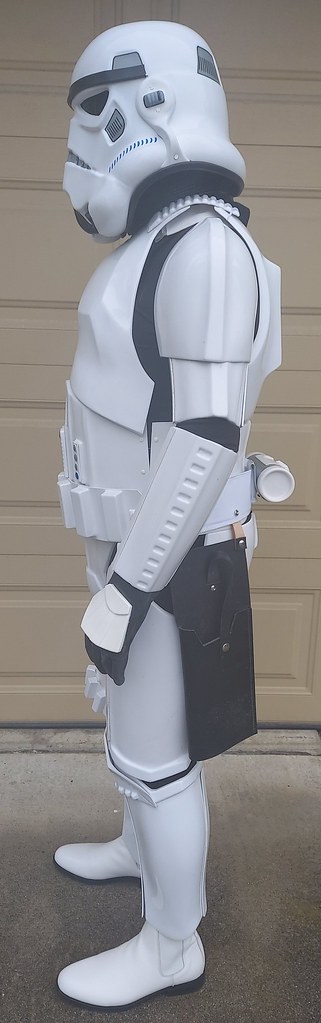
Right

Left
Rear

Action
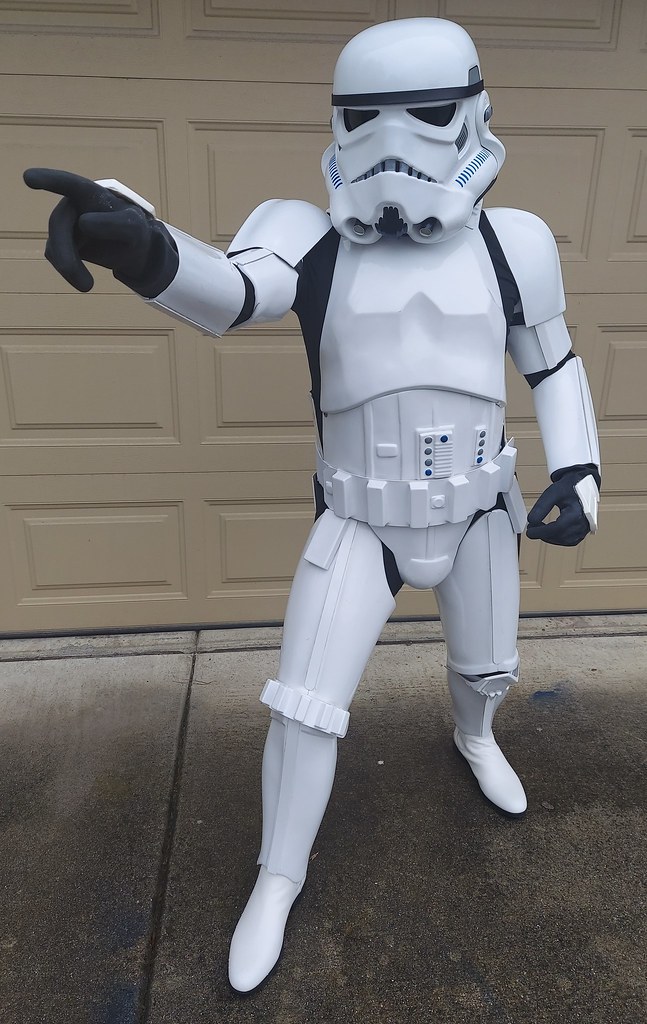
I need to work on my shims to clean up the seams, and I'm going to make another TD. But I'm really happy so far! Again, thank you to everyone on FISD who helped me with this.
-
 1
1
-
-
So like a lot of people, the vast majority of my time has been spent adjusting to a new reality for living and work. I'm a science teacher at a high school in the US, so for me that meant figuring out how to best serve students remotely, while observing social distancing as much as possible.
That work is getting done, as well as some volunteering for my community. Trooping for now is out, armor building has plummeted in the list of priorities.
But today, I allowed myself some research into the next step (and final part of my build that I haven't started at all.) Yes, the helmet. Always the CRL is the guide. My friend Sha-Sha suggested that I start with the guide linked below. It's for an ATA (and I have a WTF kit), but I like the step-by-step instructions:
Next, I studied a video based on the WTF helmet:
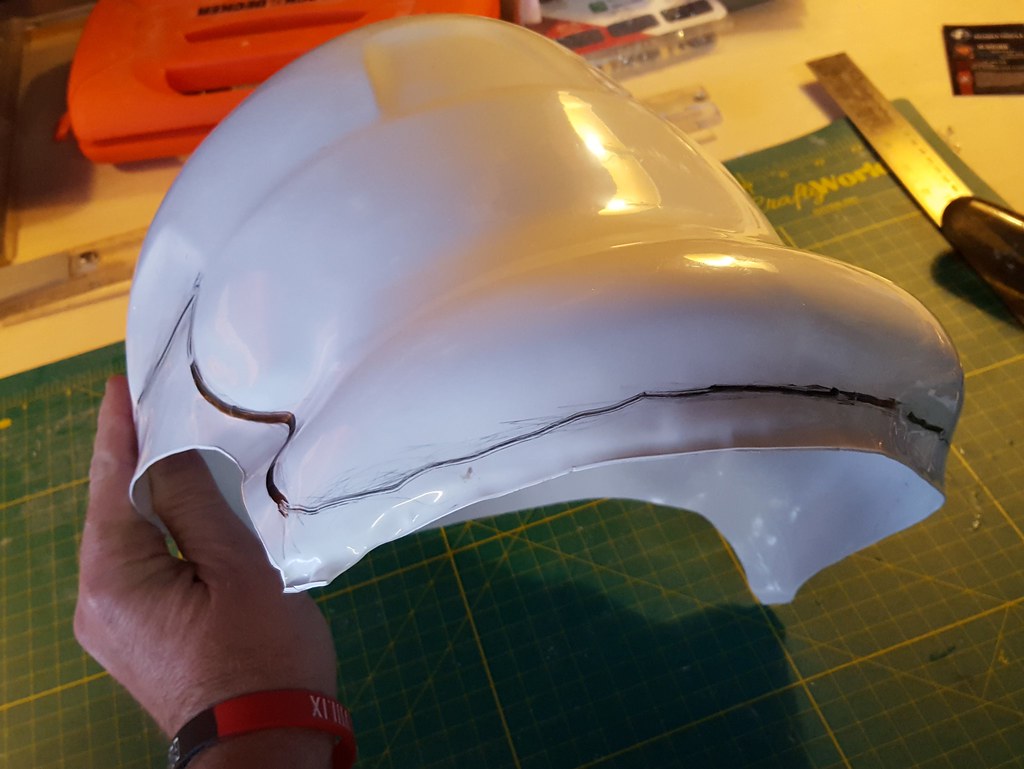
And so I have marked my armor with an expo for rough trimming. I am hoping for some guidance from the detachment regarding where I *think* rough trimming should start.
Below, the expo marker on the top is just on a what seems to be a natural "bend" in the mold. I think this is supposed to be the "top."

Below, the expo is just below the bend in the "brow." This is about 2.5 cm (~ 1") below the very top of the armor.

Below I just followed the contour. I amagined a line extending along the bottom of the trapezoid, across the brow.

...and the other side.

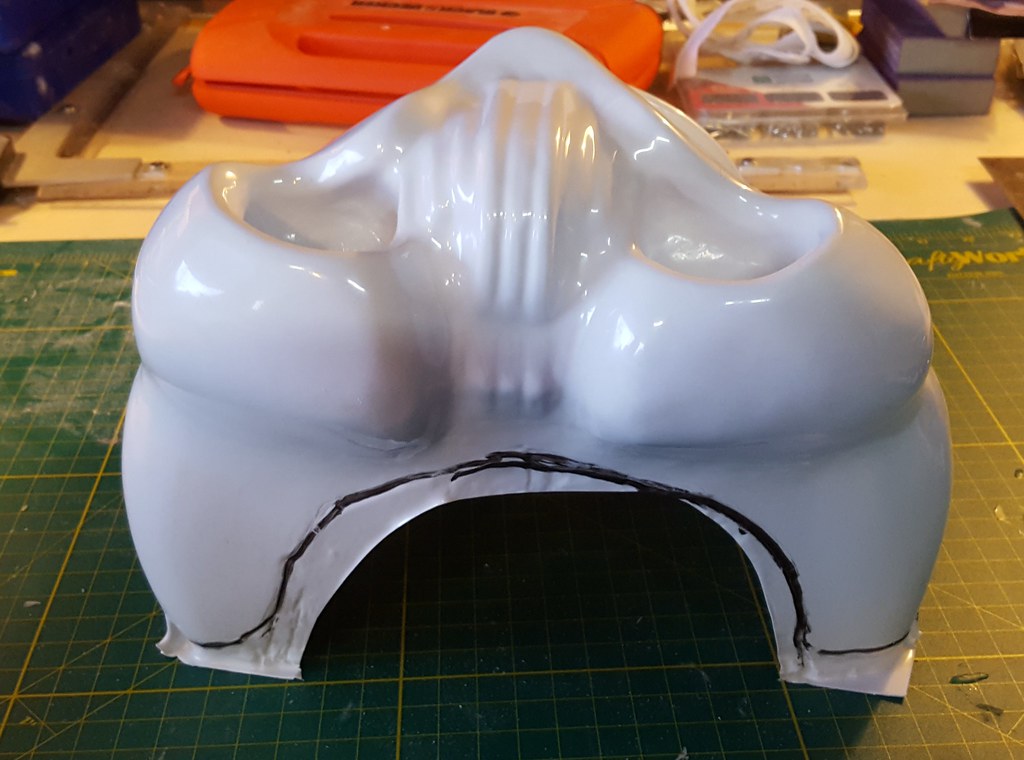
This is what appeared to be correct for the bottom of the back of the helmet.
I centered this with measuring tape (it's straighter than it looks in the picture. This is about 1 inch from the bottom the front part of the armor.

The bottom of the face plate rough cut from the maker wasn't all that symmetrical, this is what I htink would be OK for rough trimming.
Thanks for reading, and commenting. Wishing health and comfort for all.
-
Hello everyone, I found the reference below for, among a lot of other useful information, the dimensions of the main ammo belt for an ANH Stunt TK, and I'm looking for a slightly higher resolution graphic (older eyes.)
So, confirming that on the main belt, the ends are trimmed 1 1/2 US inches from the end "ammo pack." The corners are trimmed at a 45 degree angle 1/2 US inches from the corners. The buttons on the end are centered and 3/4 US inches from the end on both sides of the belt.
Measuring 3 times before trimming anything and all, and I mostly want to make sure the end is 1 1/2 inches and not 1 1/8 or 1 1/4.
Thank you.
-
21 hours ago, snipedoc2001 said:
Looks excellent, keep up the good work. Keep an eye on the gap between the thighs and the cod when actually putting your straps together. Its a bit too big in the pictures that you posted. Keep it up, it looks great!
Yes, that is next on the agenda, thank you for the suggestion! And I can feel in in my lower leg mobility when my thighs sit too low. Raising them forthwith!
-
Some progress over the last couple of weekends - finished the torso, constructed some suspenders, and attached 3" stretch fabric (with two snaps) for the thighs. The thighs straps will eventually attach to the belt via a snap or sewn loop, but for now it's velcro until I get a better handle on how I want my belt to sit, and how high I want my thighs. Not my actual undersuit, and sorry about the white legs!
And I can get in and out of it, and (for now) the snaps are all behaving.
Next up: shoulder bridges.
It is kind of a momentous occasion because I am finally starting to strap all of this on my body! I can see the end of this project.

Here are the suspenders with web belt, used to attach the thighs.

Here are the thigh with snap attachment to the 3 inch stretch fabric. (Thanks to Dennis from Central California Garrison, and Sha Sha from Golden Gate Garrison for this tip.)
-
24 minutes ago, gmrhodes13 said:
Was hoping you'd check the measurements first, you may have cut off a little too much, here is an overlay

I thought I had it, here is a closer look. It might be a perspective thing. If all else fails I have another plate from my first attempt (it's in the rear of this image) that I could rework.
In any case, I'm very grateful for your detailed feedback. Thanks again.
 24 minutes ago, gmrhodes13 said:
-
1
-
-
45 minutes ago, gmrhodes13 said:
Just compare the gaps between the end caps and central plate, looks a bit small
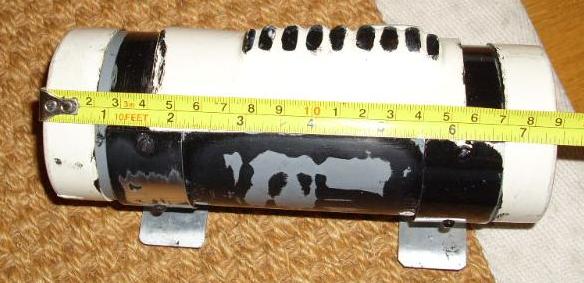
Ah, I see what you mean. I've trimmed the ends of the plate, not I think the proportions are better.

-
Early Thanksgiving greetings fellow troopers, sorry to fall of the map for a few weeks but life intervened. I bolo'ed the first TD, but I acquired a second kit. It's assembled below, nothing is attached or glued permanently, but if possible I'd like a readout on the positioning. The clips are aligned with the end caps, I *think* that addresses the lack of gap comment from a few weeks ago. The length is perfectly 7.5". The plat "sits" on the tops of the clips as per suggestions.
If the positioning is good, I will deburr one more time with fine sandpaper and start attaching stuff.
Happy Thanksgiving all, and thanks for the space to work on this at my own pace - sometimes I troop with my other costumes when I should be working on this, it's just too much fun!

-
1
-
-
Excellent feedback, thank you! Yep, you're right - the TD came up 6 7/8", a bit short, and I think I will remake it. Next one will be much better and faster now that I know how to do it. Glad to be making fixes now instead of closer to being finished.
-
1
-
-
It was bound to happen. Got up early to work on armor on Sunday, I knew I needed 3 holes spaced on the ab armor, 10 mm from the edge, evenly spaced, and I dutifully drilled them.....on the RIGHT side.
Once my temper was back under control, I knew I had plenty of resources here at the FISD/whitearmor.net to help out with ABS paste, and filling gaps. Some patience, sanding, polishing, more polishing, and elbow grease later, it looks almost as it was before, and all is right as rain. The top hole simply became the male snap fitting I needed anyway. The bottom hole will be covered by the belt. As for the middle hole, well, if you're closer than one foot and looking for it, you'll see it. Must be a blemish from blaster damage.
The kidney shims are looking MUCH finer (see above re: ABS paste, sanding, polishing, more sanding and polishing.) If I want to make the seam go away, I'll need to paint as the ABS paste bubbles (it always does) and takes on a slightly different color. It may be best to think about this later as I need to attend to other parts of the build.

In happier news, snap plates are in place (thanks to the kind instruction from Dennis of Central California Garrison)

I made these from stretchy snaps, which now think was a mistake. I intend to replace these with regular webbing. The stretchy snaps are hard to take off, and they are failing a good percentage of the time (better quality snaps are on the way).

A little more bending in the hot water bath, and I think these are ready to glue on the chest plate.

...and finally, with cutting and painting support from the Torres family, and spiffy TD clips from Ukswrath, the thermal detonator is complete!

Next steps: now to replace the stretchy straps with webbing, install the split rivets and webbing on the LEFT side. :-/ More progress next weekend. All in all, it seems like I am making progress, and it won't be long before I'm ready to start hanging this on my body.
-
7 minutes ago, gmrhodes13 said:
>You can also end up with a different color too, had this happen with different abs paste and I had to eye match some paint and air brush the seam and feather it outwards, gave it another polish afterwards.
Thank you so much, I worked on this so long and so late that my mind was going places - bad places, as in I really wrecked something. But this sounds promising. If the color difference is too noticeable, I'm sure I can take your advice and paint.
7 minutes ago, gmrhodes13 said:-
1
-
-
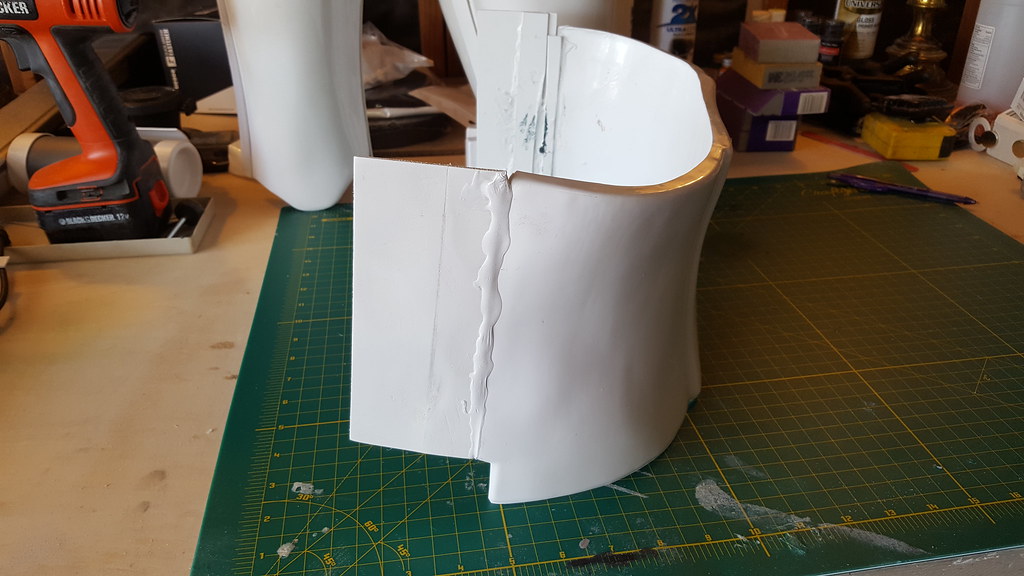
I spent much of the last 3 days measuring, trimming, and sanding theab, codpiece, posterior, and the kidney. I need to shim my kidney piece, so I read up on shimming and joining pieces with ABS paste. It's my first go at it, and I'm sure I used way too much, which I now need to deal with. The kidney piece is of course "curved", and the extra material supplied by WTF is actually a bit thicker than the armor, so I had to use more ABS paste than I would have liked. (The good news is that the sizing was right.)
This piece was deliberately made a bit tall, as I intend to further trim and (carefully) use a heat gun the "bend" the extra to match the existing kidney return edge.
Obviously I have to sand the excess hardened ABS paste, and "blend" it as best I can before smoothing and polishing. The faint dark line is where I joined some existing cover strips (didn't have one wide enough for the shim I need.)

The other side came out a little better, but will still need to be massively sanded/leveled.
I'm a bit out of my comfort zone, so my plan for next weekend looks like this.
1. Allow ABS to cure for a few days (it's hardening, but relatively soft and "gummy" in the thicker spots.)
2. Sand down the "globs" - A Dremel tool attachment seemed promising in grinding down the worst of the globs. Then sandpaper by hand? The objective is to avoid further damaging the finish in the kidney.
3. Once smooth and as level as possible, , use 3M wetordry sandpaper (2000 wet) to blend the joints.
This is where I'm unsure.
4. Once smooth, I have to polish and buff. I have the Novus 1, 2, and 3 products as recommended by others here. But I'm thinking the polishing shouldn't be done by hand, perhaps by a rotary tool of some sort?
Are there other recommended methods?
-
That moment when you realize you don't know what you don't know.
I see I can take a bunch off of the front sides of the chest plate (leaving the bottom alone as it seems that rivets are mounted underneath. I found myself stuck, so I paused to find a number of great threads on what to trim next, and I think I know how to proceed with the ab plate, kidney, posterior, and codpiece. I can see that after trying on the kidney and ab plate, it looks like I"m in for some shimming :-/ and I am looking for the best tutorial - this one (by MoSc0ut, also with WTF armor) seems quite complete.
I am also looking ahead to snaps and strapping, and found some good stuff on strapping, and snap placement.
And since have have pieces of this project running in parallel, I'm checking to see if this spray paint works for the thermal detonator. And I was considering sourcing TD clips, though I see they can be made with 1" aluminum strip. (Referenced here.)
-
2
-
-
It does, a huge load off my mind in fact. Thank you. Looking at ATA and ANOVOS build threads for next steps with chest, back, ab, and posterior trimming.
-
1
-
-
Dear friends and Legion-mates,
Please pardon the long post.
This was the end of week one as a public school teacher in the San Francisco Bay Area, and Silicon Valley Comiccon was unfortunately not an option for me. So I chose to grade papers, work on lesson plans, and spend a couple of hours on my TK build. I made some progress (see pics below) but I'm at a point where I need to solicit input from those that have come before me.
With the help of ukswrath, justjoseph, and gmrhodes13, I acquired knowledge and hardware (rivets) to finish assembling my right thigh. I also trimmed, assembled, and glued the sniper knee on my left calf:
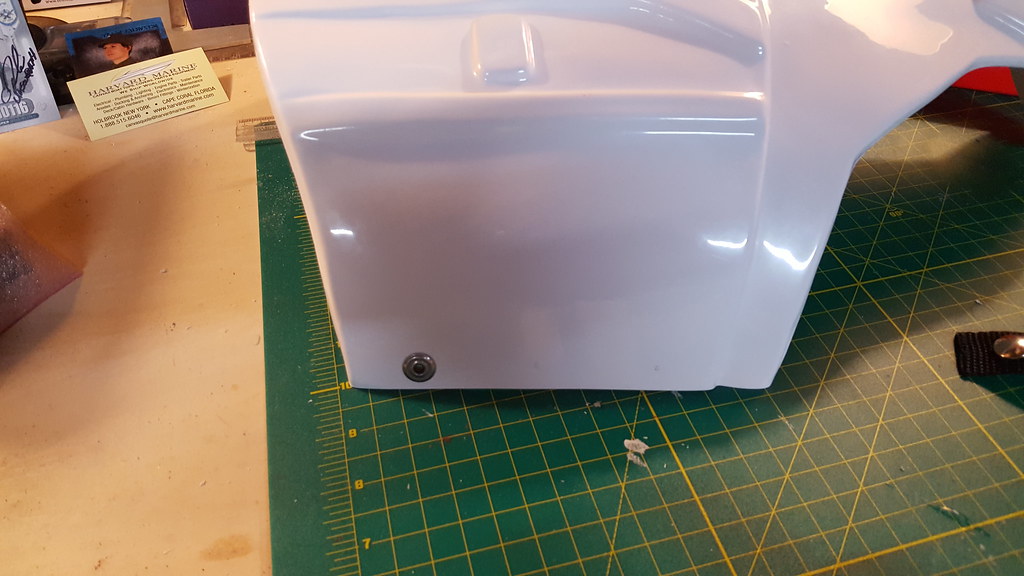
My issue: the ammo belt just isn't sitting right. According to the CRL, the ammo belt should be attached in the upper corner by a rivet, and secured to the thigh ridge. Did that on the wearer's right (please excuse the unpainted rivet, it's gotta be white):
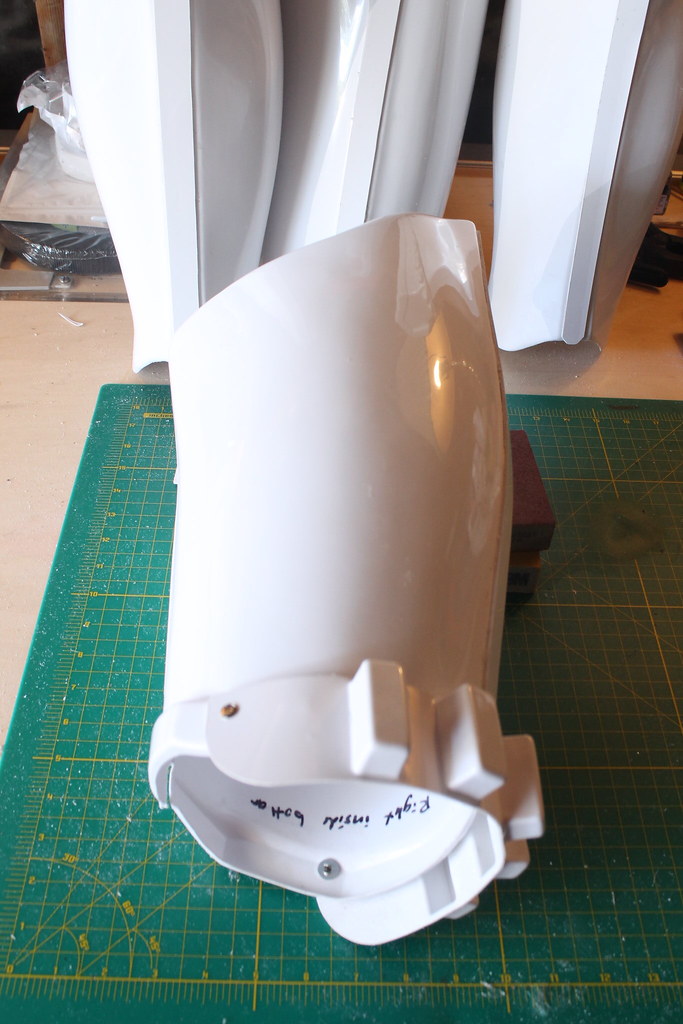
...and I assume the rivet should be in the same location on the left (inside) side of the wearer's right thigh, which is what I did:

However, after looking at the result, the ammo belt seems pitched and it sits somewhat more of an angle than the reference photos suggest is correct. The belt is also not perfectly perpendicular with the thigh piece itself, and when looked head-on, sits at an obvious slant. The thigh pieces themselves aren't perfectly straight, nor is a human leg I *think* that to make the ammo belt perpendicular in this particular set of armor (WTF) I would have to drill a hole ABOVE the ridge of the inside part of the right thigh, which is at odds with the CRL. Before I start drilling more holes, I thought this would be a natural place to pause and get some wisdom from the detachment.
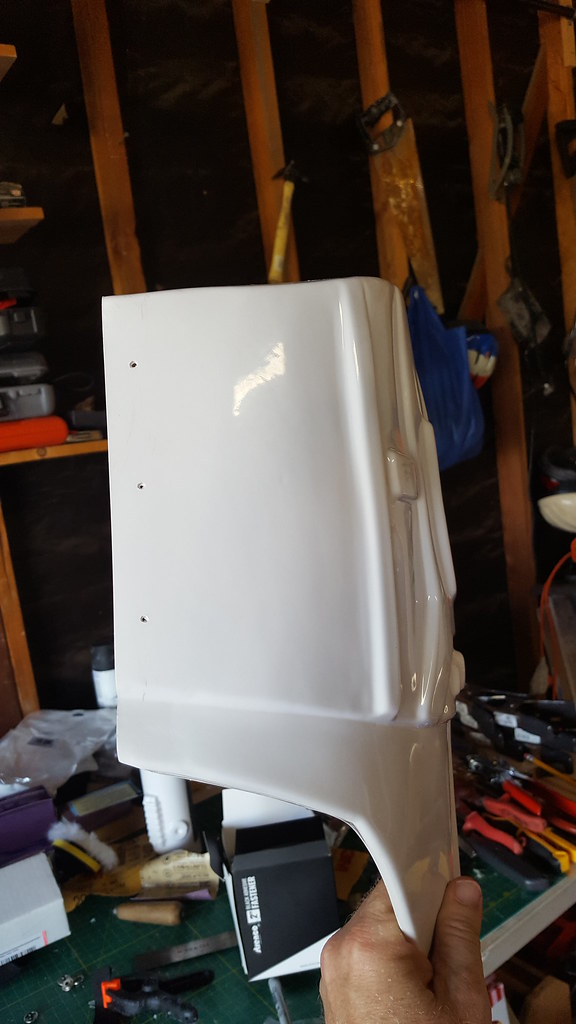
Other pics, trimming the back. From the natural lines of the mold, these SEEM to be the places to do rough trimming:

The plastic didn't give any indication as to where to trim the left rear, so my "guess" is below. Hope I didn't overdo it!

Same deal, the upper part of the right back seemed obvious, but not the lower part. This seemed like a good place to start.
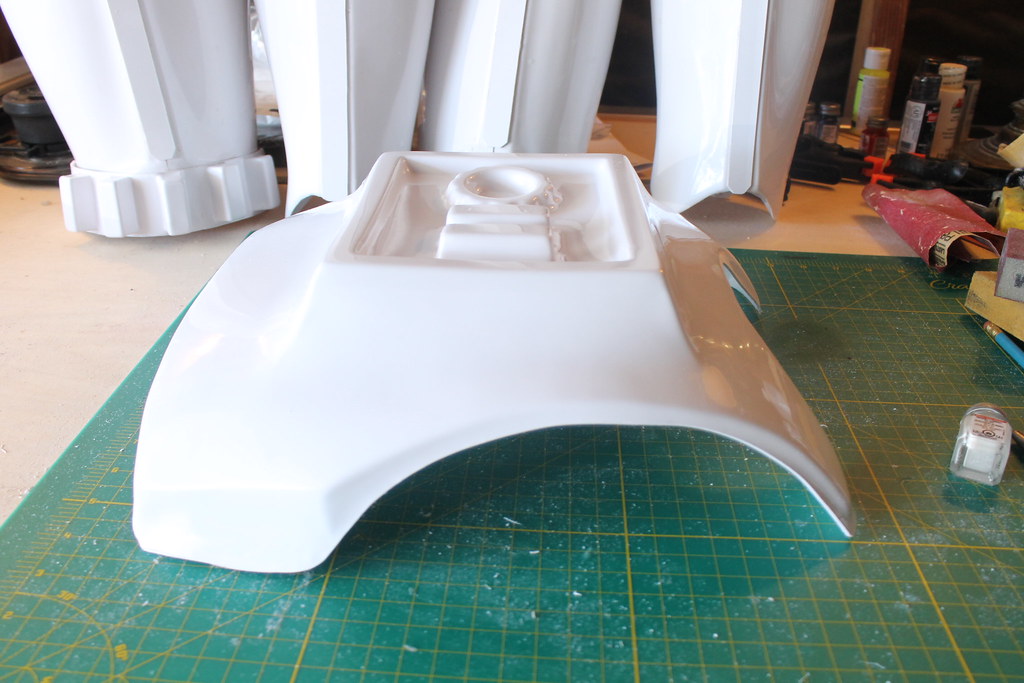
...I think the bottom of the back needs further trimming, but I am unclear how much return to leave. See below:

...and the chest:


Thanks for reading all of this, and I hope everyone has a great week.
-
On 4/8/2019 at 8:38 AM, TK-42134 said:
Welcome. I’m a Central California Garrison Member. Perhaps we will troop together one day.
I look forward to that!
-
I'm working on removing the return edge at the bottom (curved Lexan scissors are my new friend), and will definitely work on the new edges with fine sandpaper. Thank you!
-
1
-
-
16 hours ago, ukswrath said:
Have fun
Too bad we didn't live closer you could bring those bad boys over
That would be awesome. I will take a rain check. In the meantime, I burned some midnight oil and got some work done yesterday. After a lot of sanding and trial-and-error, I got the halves to line up, and as per the WTF shin learning on the previous post, yes, the "shorts" and the "longs" match. This view is front on, right and left respectively.

I also did the rough timming on the sniper knee, which I will match once I close up the back. (The backs are slightly trimmed but unfinished as I intend to finalize the fit with the help of some Legion mates at a build party tomorrow.) Cover strips rounded off per suggestion earlier.
More perspective:


The thighs are a different story. The left and right is easy to identify, but these were far more difficult to quite fit as perfectly as I would wish. They are lined up at the bottom, and there are no "gaps" in the middle of the cover strip, but there remains a slight protrusion on the top of the right outside. This was my third attempt (I tore apart my first two and retried.) I can see now that armor is curved, and the cover strips are mostly straight, and that slight imperfections are accepted. The plan is to grind/smooth the top of the right thigh to match the height as I really don't want to tear this apart again.
Thanks everyone for reading, I really feel like I made some progress last night.
-
1
-
-
Just got through the WTF shin-gate thread, that was a can of worms! Thanks for the clarification Tony (and thanks Sha-Sha for blazing the trail.) I can see that doing the rough trimming first is going to help me match these correctly, so that's what I'm off to do tonight. Thanks everyone!
-
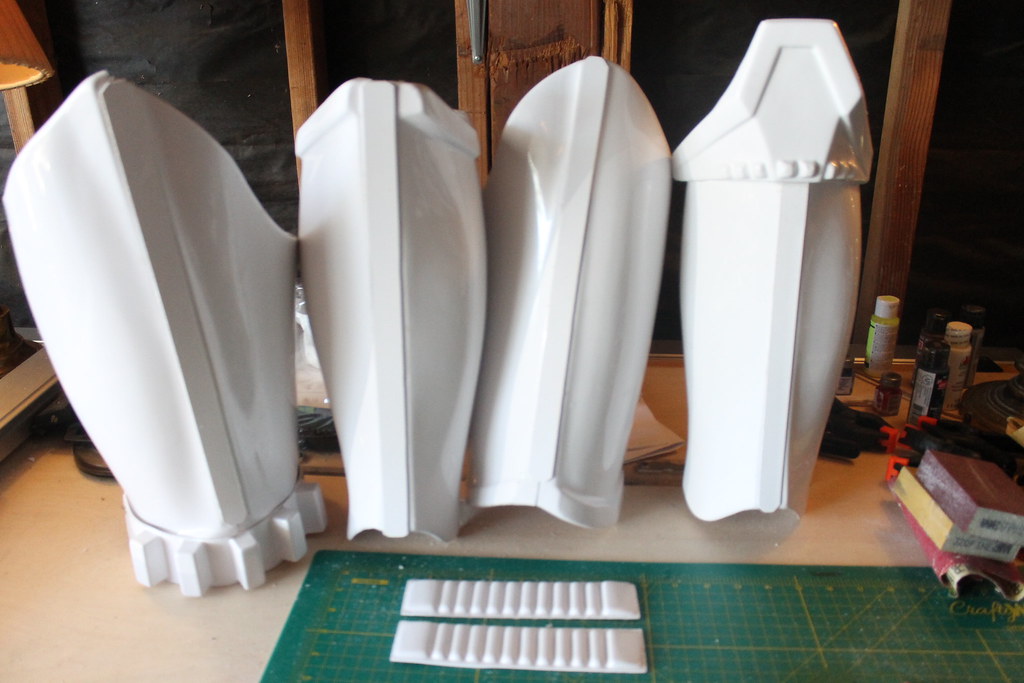
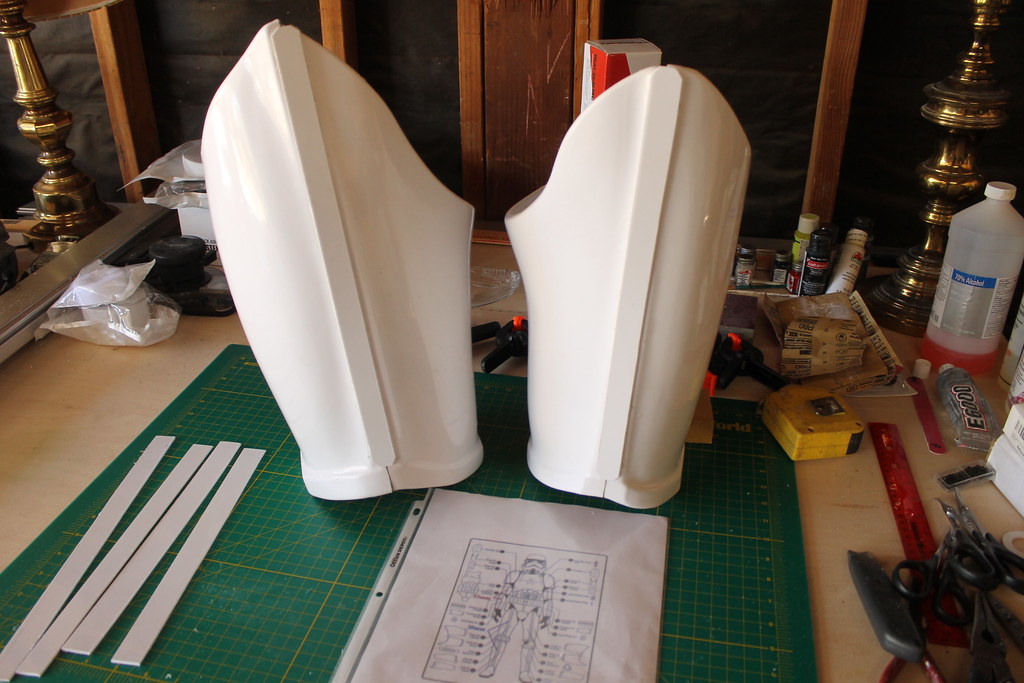
Thank you so much everyone. Bells, biceps, forearms, thighs are done. Had a devil of a time aligning the cover strips to the thighs, then finally realized it's impossible to get it PERFECT due to the curvature of the armor. Thanks to justjoseph63 I should have rivets in hand soon to attach the ammo pack to the thigh - in the meantime, I'm starting on trimming shins which I will hopefully finish at an armor party this weekend.
The next question is kind of an embarrassing. This is a Walt's Trooper Factory Kit, and I before I go too far I want to make sure I have correctly identified the orientation of the shins. I *think*, from left to right, I have left outer, left inner, right inner, and right outer (top of the image is down). Hopefully correct before I continue trimming?

-
46 minutes ago, gmrhodes13 said:
The stems and slit on Option 1 may be a little long but I've use similar and just added a washer or two.
You can also hit Joseph @justjoseph63up for a set https://www.whitearmor.net/forum/topic/34902-centurion-level-rivet-sets-for-sale/
Ah, just the info needed. Ordered, and thank you!
-
1
-
-
Please excuse me if this is not the best way to do this, I am looking for 5/16" rivets for the right thigh ammo pack and other parts. I think these are it?
-
On 7/3/2019 at 10:24 AM, 68Brick said:
Nice work Brad. You can soften the ends of those cover strips. They look very square and will scratch you!
Yes, got that G2 at the build party and it's on the list to do. Thanks so much for your feedback.
Brad's ANH TK (Stunt) Build Thread
in ANH Build Threads
Posted
Thank you everyone! I received so much help from troopers in my Garrison and from around the world. There are some adjustments being made, but yes, I am very interested in submitting for EIB, so thank you for the link and the checklist. I will also post in the "sound off" area, too!
-Brad
TK/IN/ID/IC 99611