


TKModder421
-
Posts
252 -
Joined
-
Last visited
-
Days Won
2
Content Type
Profiles
Forums
Gallery
Articles
Everything posted by TKModder421
-

My first build!! ANOVOS ANH stunt TK
TKModder421 replied to TKModder421's topic in ANH Build Threads
Would I be affecting my chances of EIB or Centurion approval if I cut down the width of the cover strip? -
My first build!! ANOVOS ANH stunt TK
TKModder421 replied to TKModder421's topic in ANH Build Threads
OK, thank you! I'll give it a try and see what I can do. Thank goodness for E6000!! -
My first build!! ANOVOS ANH stunt TK
TKModder421 replied to TKModder421's topic in ANH Build Threads
So after 24 hours I removed all the clamps, magnets and tape and the right thigh turned out great! The left thigh didn't turn out as great though I didn't notice when I was clamping down the cover strip but the ridge where the cover strip rest on has a curve to it. I put a green dotted line on it so you can see it a bit better While normally I wouldn't worry too much, when I was trimming I made the ridge 10mm on both sides all the way up, but I didn't take into account that there was a curve. So now when the cover strip lays on there flat, I end up with this ridge being exposed on the right and a slight overhang on the left side of the cover strip. I'm aiming for upper level approval so I'm gonna rip it off and try again. But I'm wondering what would be the best way to fix this problem. I've noticed on thigh reference pics that a lot of the cover strips have a bend to them to follow the cut lines I assume. Should I attempt to heat up the strip and add a bend to match the ridge or what I should do?? Help!!! -
My first build!! ANOVOS ANH stunt TK
TKModder421 replied to TKModder421's topic in ANH Build Threads
Attached the cover strip to the right thigh You can see my magnets are off center near the top, that was to press down the strip where there was a gap Here's the left side -
My first build!! ANOVOS ANH stunt TK
TKModder421 replied to TKModder421's topic in ANH Build Threads
Borrowed a giant stock pot from a friend. Worked perfectly for the hot water bath on the thighs -
My first build!! ANOVOS ANH stunt TK
TKModder421 replied to TKModder421's topic in ANH Build Threads
I'll definitely take a look at more inexpensive options Yes! I'm actually asking friends right now. We'll see what I can come up with Thanks Jose! -
My first build!! ANOVOS ANH stunt TK
TKModder421 replied to TKModder421's topic in ANH Build Threads
Right, I'd probably have to buy one. -
My first build!! ANOVOS ANH stunt TK
TKModder421 replied to TKModder421's topic in ANH Build Threads
Like a deep stock pot like this? No, unfortunately I don't. Is that the best option for big pieces like legs?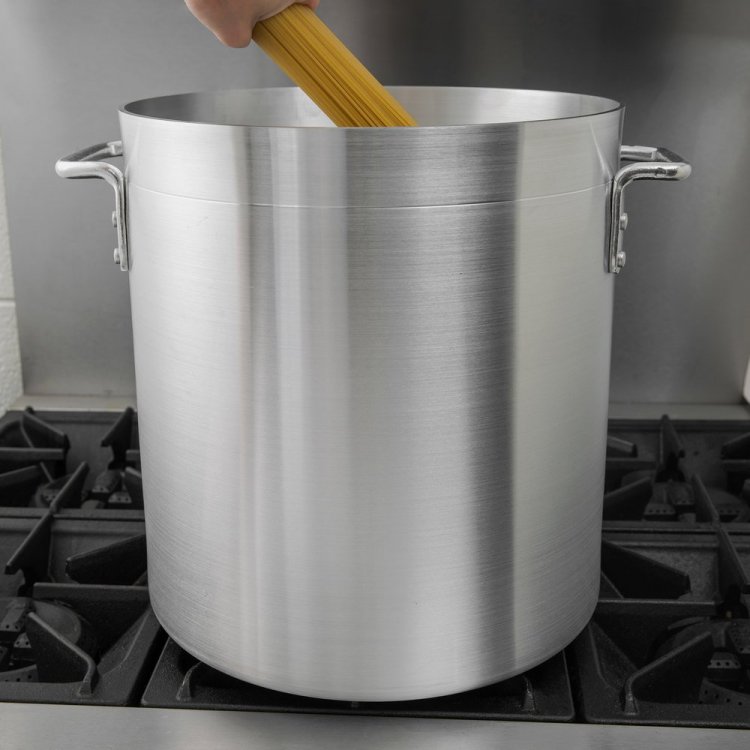
-
My first build!! ANOVOS ANH stunt TK
TKModder421 replied to TKModder421's topic in ANH Build Threads
Yeah, thank you, that's what I was thinking. I really risk warping them badly or causing damage. I only mentioned I had one in case someone had some advice on using it and getting the results I want -
My first build!! ANOVOS ANH stunt TK
TKModder421 replied to TKModder421's topic in ANH Build Threads
So, I trimmed a tiny bit more out of the top, but they still feel about the same walking around in them, there's just a little less flapping around at the top, so that's good. One thing I am concerned about though is now that the thighs are trimmed down they are fairly narrow, so the butt joins aren't going to be flat for the cover strips. I ran into this problem when trimming down my forearms but I was able to give them a hot water bath and got them to be round, which provided a much flatter surface to glue the cover strips to. Should I do the same for the thighs? The hot water bath I did before was in a pot on the stove, so obviously these aren't going to fit in the pot. Any suggestions? I mean is this even the correct route or should I just apply the strips and force it flat? Or would that make for weak joins? PS. I also have a heat gun that I could use, I'm worried that I risk messing up more with a heat gun though -
My first build!! ANOVOS ANH stunt TK
TKModder421 replied to TKModder421's topic in ANH Build Threads
OK! thank you Andrew and James! So just for clarification, about a 3 inch gap front to back should be ok? -
My first build!! ANOVOS ANH stunt TK
TKModder421 replied to TKModder421's topic in ANH Build Threads
Haha Andrew, I laugh when I put on the under suit because of how much more skinny they make my legs look! Ok! so I did what you suggested. How much play should I have in the top of the thigh? I'm not sure how much more I should trim down. I don't want to risk cutting them down too much and making them uncomfortable or even disproportionate to the rest of the armor, but of course I don't want them flopping around looking funny either. Comments? Suggestions? Here they are on... As you can see here at the top front of the thigh I still have a good gap It's still wide front to back but, side to side isn't bad -
My first build!! ANOVOS ANH stunt TK
TKModder421 replied to TKModder421's topic in ANH Build Threads
My next moves are gonna be on the thighs. My concern is that the thighs are awfully large... well, tbh I've got really skinny chicken legs How much should I be trimming them down? Any good threads on fitting for thin legs? -
My first build!! ANOVOS ANH stunt TK
TKModder421 replied to TKModder421's topic in ANH Build Threads
Alright, time to update this thread I finished up the cover strips on the forearms and biceps as well as added some to the inside to further reinforce the joins Biceps Inner cover strips Arms all done!! -
My first build!! ANOVOS ANH stunt TK
TKModder421 replied to TKModder421's topic in ANH Build Threads
Ok, so after letting the glue dry and cleaning up my giant glue mess it looks pretty good. But I have a concern... So my concern is there's a little gap running up along the front side of the cover strip. It's kind of hard to get a good pic of it, but here's a few... up in there real close! You don't really see it unless you get up in there. But is this normal? Something I shouldn't worry about? Or should I tear it apart and try and get better contact on the edges? -
My first build!! ANOVOS ANH stunt TK
TKModder421 replied to TKModder421's topic in ANH Build Threads
Haha I know, I know! Yeah I was definitely wanting to add inner cover strips but I wasn't sure exactly what scraps I could use. The way I trimmed all my pieces I'm not sure I actually have any scraps that are long and wide enough to be usable as cover strips. I may have to just buy some sheets of white ABS that I can cut into inner cover strips. I did give the forearms a hot water bath, they were far too oval prior. before after I was considering a heat gun if I've got spots that aren't flat enough to get good contact with the cover strip, but so far it looks like I should be fine -
My first build!! ANOVOS ANH stunt TK
TKModder421 replied to TKModder421's topic in ANH Build Threads
Alright, back to the build! So I did the necessary trimming and have started gluing the coverstrips on the forearms. Started with the front side of the right arm This is my first go at trying this and I got a little messy with the glue LOL. Thank goodness E6000 peels right off!! Gonna let that dry and give you an update when I move on to the other side. -
My first build!! ANOVOS ANH stunt TK
TKModder421 replied to TKModder421's topic in ANH Build Threads
Ok, I'm also looking for feedback about my best option for applying the cover strips to the forearms. Since I've trimmed them down, the opening at the top of the forearm (nearest the bicep) no longer lines up. What do you all recommend I do? Should I trim off some of the larger side at the same angle as the dip (red line) and make the cover strip (green rectangle) come up to the new butt point (this is the direction I'm leaning) Or do just make the cover strip go all the way to the top of the larger piece? -
My first build!! ANOVOS ANH stunt TK
TKModder421 replied to TKModder421's topic in ANH Build Threads
Yeah, I agree. I'm leaning towards just taking some off the top inside of the forearms -
My first build!! ANOVOS ANH stunt TK
TKModder421 replied to TKModder421's topic in ANH Build Threads
OK!! So I finally have enough of my soft goods (undersuit and gloves) to do fitment adjustments on the arms I previously had done some initial trimming to cut down the circumference of the biceps and forearms. But because of the amount I took off the forearms, the openings became very oval, which is going to pose problems when trying to attach the cover strips, since I wouldn't have a flat surface where the two sides of the forearms meet So per advice from Joseph I gave the forearms a hot water bath. They're much rounder, more comfortable and provide a much flatter surface to attach the cover strips. I've done some duct tape rigging to get an idea of how the shoulder, bicep and forearm will fit. Currently I'm using the plastic hand plates from the ANOVOS kit, but I've ordered some soft hand plates from Joseph. So here's my right arm... I like the length of the forearm when my arm is straight, but when my elbow is bent the wrist opening cuts into my wrist and handplate which either slides under the opening... or outside the opening So I'm still trying to decide on my best plan of action here. Do I trim only the dip in the inside opening of the top of the forearm (maybe 1/2")? Or do I take a combination of a little off the wrist (maybe a 1/4"+) and the dip (1/4")? -
My first build!! ANOVOS ANH stunt TK
TKModder421 replied to TKModder421's topic in ANH Build Threads
Alright!! So I received my undersuit and I'm ready to start moving forward with prelim fitting and some trimming. I did some test rigging with duct tape and found my right arm to sit pretty well and have a good range of motion. But when I did the same with the left arm (especially bending my elbow) I wasn't getting the same range of motion. My forearm was running into the bicep and the bicep wasn't sliding up my upper arm any further. So I was trying to figure out why that was happening, and I noticed that the bicep piece wasn't sliding any higher because it was pushing up into my armpit as far as it would go. I took off both arms to compare the biceps and what I found was that the inside, top opening of the left bicep doesn't dip down as far as the right bicep does. You can see it much better when you line them up So I guess my question is what course of action should I take? If I trim down the top inside opening I'll be getting close to that thumb dent, but I don't have enough length on the top of the opening to be trimming off the bottom opening without possibly leaving a gap between the bottom of the shoulder bell and the top of the bicep. I hope that all made sense Thoughts?? -
My first build!! ANOVOS ANH stunt TK
TKModder421 replied to TKModder421's topic in ANH Build Threads
Awesome!! Thanks guys! I'll update my progress soon -
My first build!! ANOVOS ANH stunt TK
TKModder421 replied to TKModder421's topic in ANH Build Threads
Oh ok! Helmet removal is the base line I should use for arm movement? -
My first build!! ANOVOS ANH stunt TK
TKModder421 replied to TKModder421's topic in ANH Build Threads
OK, so I got my undersuit, so I'm ready to start with the rough fitting. Starting with the biceps first. How do I want these to fit exactly? I'm probably going to take in the top a bit but the bottom is comfortable when my arms are down but get snug when I flex my bicep. Is this a concern? Should I give myself a little more room at the bottom? -
My first build!! ANOVOS ANH stunt TK
TKModder421 replied to TKModder421's topic in ANH Build Threads
Good idea!! Do you recommend just a temp strap with tape cut to the right strapping length?

