
fishgoh0nk
-
Posts
360 -
Joined
-
Last visited
Content Type
Profiles
Forums
Gallery
Articles
Everything posted by fishgoh0nk
-

Fish's ANOVOS Build Thread - Aspiring for L3
fishgoh0nk replied to fishgoh0nk's topic in ANH (Stunt and Hero)
I posted in jonhaag's shim shin, or shin shiminey shin shim sheroo, asking for some guidance regarding paste on thighs. I'm thinking instead shimming using method 1, maybe I can shim method 2, and require less pastes. -
Need Guidance on Shimming Shins
fishgoh0nk replied to jonhaag's topic in Assembly, Mods, and Painting
Hey Jon, did you ever get to fill in the gaps on your shims with ABS paste? Could you comment, if so, how they turned out? I'm having some thigh shims I plan to cover up with some scrap splint and filling in the gaps with ABS paste - I'm curious as to how flexible and resilient ABS paste would be on the thighs. Thanks! -
Fish's ANOVOS Build Thread - Aspiring for L3
fishgoh0nk replied to fishgoh0nk's topic in ANH (Stunt and Hero)
Yea, I kind of figured the the paste would be bested used like bondo - cosmetic touch up only so I planned my shimming around avoiding too much paste. I also hear a lot of people have discoloration, bubbles etc... -
Fish's ANOVOS Build Thread - Aspiring for L3
fishgoh0nk replied to fishgoh0nk's topic in ANH (Stunt and Hero)
cool! that'd save me a lot of time! too bad about the right thigh though... 1.25 inch shim gap... I plan on using a piece of scrap to do the same... and then some abs paste to fill in the gaps? Can you recommend a better solution? -
Fish's ANOVOS Build Thread - Aspiring for L3
fishgoh0nk replied to fishgoh0nk's topic in ANH (Stunt and Hero)
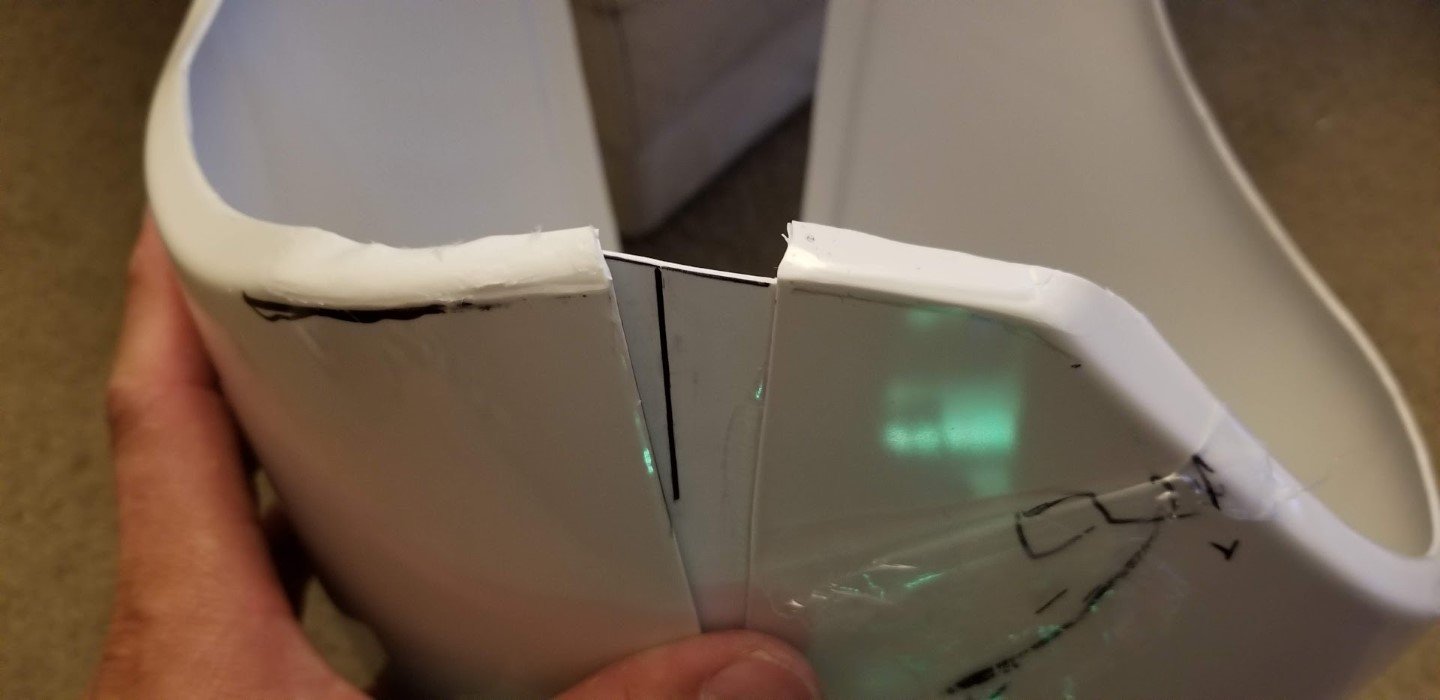
Made a little strip of cover to fill the void made by the shim. The rear cover strip DOES cover this entirely, do you guys think I should bother with ABS paste between the cracks if it's not visible? In place Cover strip comparison (will cover the cracks, bother with ABS paste?) -
Fish's ANOVOS Build Thread - Aspiring for L3
fishgoh0nk replied to fishgoh0nk's topic in ANH (Stunt and Hero)
Thanks for the heads up! Planning to get a size 11 for myself when they start taking orders in July. Progress update - glued the rear shim, planning to sand, and apply some ABS paste into the valley, repeat sanding/polishing to smooth out the paste and then gluing the cover strip directly on the valley to maintain center. Oh! and I got Justjoseph's silicone handguards! They look really good! In fact... the gelatinous feel of them kind of makes me want take a bite out of them... reminds me of a delicious piece of fresh coconut meat... but will probably taste like a tidepod... -
Fish's ANOVOS Build Thread - Aspiring for L3
fishgoh0nk replied to fishgoh0nk's topic in ANH (Stunt and Hero)
Thanks! Got reassurance, so I have finalized the size I want to hold at. Left thigh being glued: I think I should get shoes/boots before sizing the calves. I'm thinking about the Tankers by ImperialBoots. Would these be acceptable like the Classic 421s? https://www.imperialboots.com/product/tanker-boots/ -
Fish's ANOVOS Build Thread - Aspiring for L3
fishgoh0nk replied to fishgoh0nk's topic in ANH (Stunt and Hero)
Ok, thanks for making that clear! The reason I ask is because I want to make sure I'm shimming for enough leg room to be able to pull the thigh up high enough if I need to. Currently, it's pretty tight for the right thigh when the bottom return edge rests on the middle of the knee cap. I can probably shim larger to allow the thigh to be pulled higher past the knee, this might be the safer route would you agree? -
Fish's ANOVOS Build Thread - Aspiring for L3
fishgoh0nk replied to fishgoh0nk's topic in ANH (Stunt and Hero)
Should the lower return edge clear the knee cap? -
Fish's ANOVOS Build Thread - Aspiring for L3
fishgoh0nk replied to fishgoh0nk's topic in ANH (Stunt and Hero)
My thoughts exactly! Aim high, and see where I end up. I don't think the return edges are digging too much into me, so I do plan on keeping them, the main difficulty I'm having is fitting the quad into the space without flaring the thigh pieces too far. I'm also not sure how high to wear the thighs - is this too high? I'm planning to have this high enough so I can freely kick 90 degrees back, but in doing so, i'll need to trim off more of the rear thigh to accommodate for the glute. -
Fish's ANOVOS Build Thread - Aspiring for L3
fishgoh0nk replied to fishgoh0nk's topic in ANH (Stunt and Hero)
After a little bit of filing and sanding, not too bad - will polish with Novus 123 upon finish.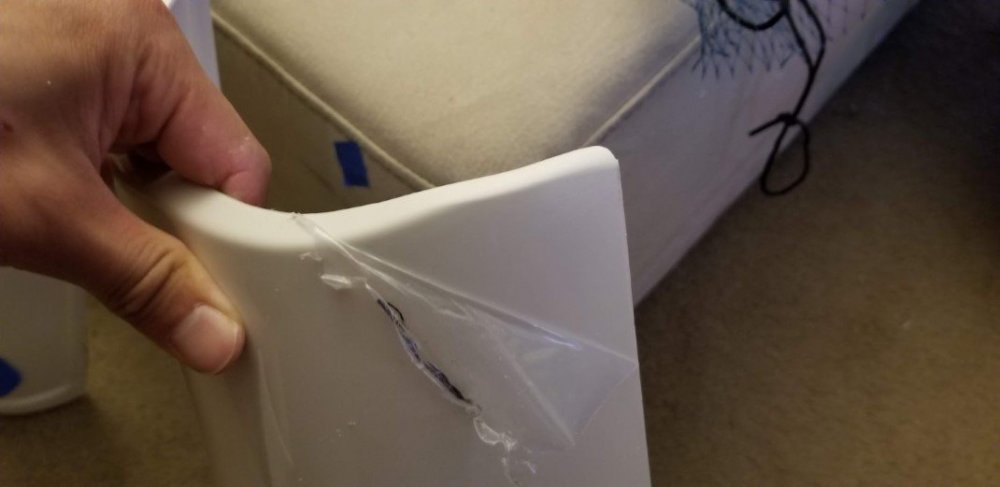
-
Fish's ANOVOS Build Thread - Aspiring for L3
fishgoh0nk replied to fishgoh0nk's topic in ANH (Stunt and Hero)
So... sealing iron - don't forget to take off the plastic outer coating of the ANOVOS kit kids. Left = melted outer cover, Right = naked ABS
-
Fish's ANOVOS Build Thread - Aspiring for L3
fishgoh0nk replied to fishgoh0nk's topic in ANH (Stunt and Hero)
I decided to glue the forearms - 24 hours is 24 hours amiright? Unfortunately, after I glued the right forearm, I realized that I needed to trim down the return edges to 15mm to match my calves and thighs, which will have minimal return edges under the cover strip... but I had already resized the forearms by trimming the non-return edges already... woops! Hopefully 5mm will not cause my arms to no longer fit. I decided to trim the left forearm now so I will have less trouble later, and good news, it still fits, just a bit more snuggly. I will still have to find out if I botched the right forearm after the glue cures, I'll give it a fit, squeeze, and see if I can trim off the 5mm from the return edges without consequence. It'll just be a bit more of a pain as 1 side has already been glued.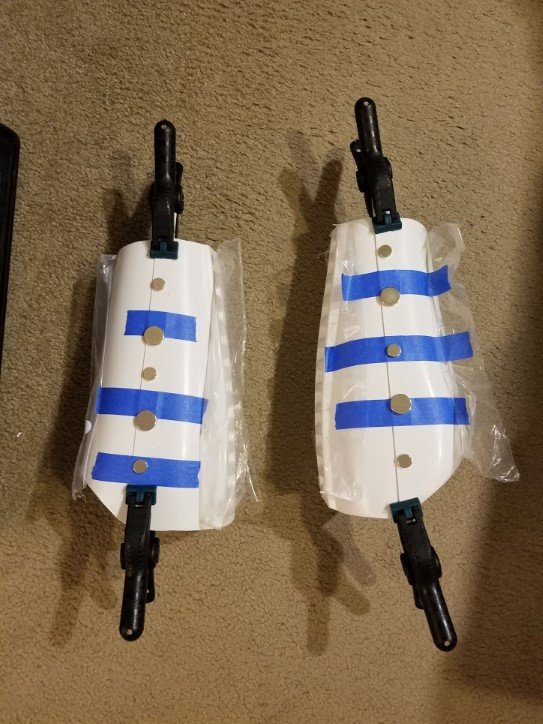
-
Fish's ANOVOS Build Thread - Aspiring for L3
fishgoh0nk replied to fishgoh0nk's topic in ANH (Stunt and Hero)
went looking for shim material yesterday, and low and behold - the trash/recycle bin at the home depot blind cutting area. 2 stacks of free shims!.thumb.jpg.a8001c5e33a20649f095c506f29a4d82.jpg)
-
Update - Lessons Learned: Methods: Heat gun is extremely risky - always keep the heat moving or else things'll warp Heat gun can be used on shims (tow away signs) to soften and contour as well as get a better fit after gluing Sealing iron sock - pressing too hard too early results in waffling. Semi circle file is really useful for smoothing down curved edges. Don't work late at night- a bad brain will result in regrets. Biceps: Left bicep was extremely small, hybrid mix and match left outer + ATA Works inner works very well. Anovos and ATA are really close in color. Shins: Sniper knee requires water bath to get proper fit. Sniper knee with sealing heat iron to form return contour is a good idea. Hello All! I had this ANOVOS kit sitting in my living room(s) (moved once) since 2016 and I'm finally kicked myself in the boot to get started. The ANOVOS booth guy said it'd be approximately 100 man hours to get it built... I'm starting to think he was underestimating... This is my first build ever, please forgive the amount of newbie stench I will be emitting. Shoutout to justjoseph63 for providing some good newbie advice and steering me in the right direction, which includes starting this thread. My build has been in motion for approximately a week now, all parts trimmed out of their molds per UKswraths/uswraths? guide, currently fitting all pieces before any gluing will be done. I'm a guy that likes to go big or go home, like I stated in the title, I'm shooting for Centurion/L3 approval, so hopefully I won't have a troopers accuracy regarding that ; thus, any approvers reading this, please let me know if I made any errors. Forearms Thigh - front Thigh - rear shims Questions - rear thigh shims 1. How does the shim look? Am I messing up? The left thigh shim I think is good, I can trim the splint where I marked with the sharpie, but for the right shim, I planned that I will need to add another splint (shim) to the outer, then glue them with an overlap, that way the overlap will an overlap of shims and be on the inside, then, ABS paste the valley and use a normal sized cover strip. 2. The right thigh seems to be smaller than the left, my right thigh is also bigger than my left. I have big thighs. On the left thigh I can maintain connections between the two side's return edges, but on the right thigh I cannot- I anticipated making a "fake" return edge from ABS paste and scrap, would anyone advise against doing this? 3. I just ordered a Hangar 9 sealing iron and cloth sock to make return edges for the top of the rear thighs - I kind of have a bubble butt, so those will need to be taken down. Would you recommend doing this before or after the thighs have been glued and coverstripped? Calve - front Calve - rear Questions - rear calve shims 1. The inner and outer upper returns don't seem to line up naturally, I plan to trim and shim accordingly to get them to line up, any advice on shimming calves? I don't have enough experience to gauge whether or not I want to use velcro or the bra strap closures. I feel like with the bra strap closures i'll have more athleticism , but i want to be sure the shims will look OK with them. I'll keep updating with more posts - I ran out of 2 inch tape, so I'll need to get some more before I can start fitting again. The 1 inch stuff doesn't hold up to squeezed flesh body pressures. Oh, I already messed up my left bicep trying to shape it with a heatgun - guess I will never do that again. I contacted ATAWorks for a replacement with a right bicep; hopefully I can get that soon.
-
Yet another forearm question (Anovos)
fishgoh0nk replied to inv8r's topic in Build Threads Requireing Maintenance
Yup. thanks sharing that. I had my hands turned the way I did to show the space remaining. Last night, i trimmed off a bit more and use a boiling water pour to round out the oblongness of the forearm cavities. I guess the question is now, do most fit their naked hand through the forearms and then put the gloves on? Don't think there's enough room now for the hand to go through the forearms with a hand plate attached -
Yet another forearm question (Anovos)
fishgoh0nk replied to inv8r's topic in Build Threads Requireing Maintenance
Thanks! -
Yet another forearm question (Anovos)
fishgoh0nk replied to inv8r's topic in Build Threads Requireing Maintenance
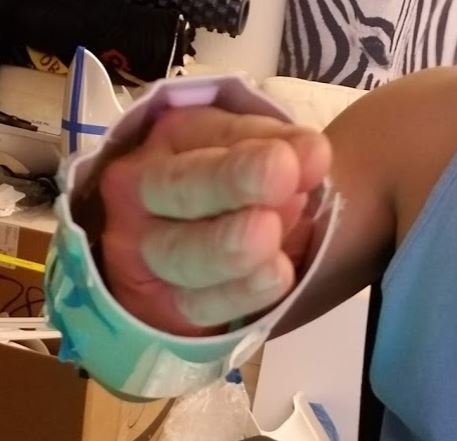
I actually have the Anovos dish washer rubber gloves, not much thickness at all. I guess i'm worried about constant pressure on the joints putting them on and taking them off. If I were to cinch it up, how risky is it to have the joints come apart? I plan to use E6000, single strip join on the butts. Here are some photos of how the fitment is. Even with hand cupped, I barely make it through the cuff without touching.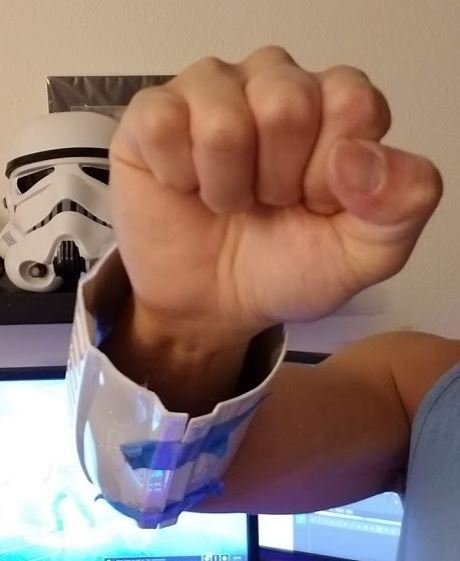
-
Yet another forearm question (Anovos)
fishgoh0nk replied to inv8r's topic in Build Threads Requireing Maintenance
I have a question about this - i think i have decent sized hands, but wrist is a bit small, so my hand can just about fit without having to manipulate/squeeze the wrist openings, but once through, it seems like there's a large wrist gap. Should be the wrist opening be smaller so I would have to put some pressure to squeeze my hand through? Or should it go through with ease?