-
Posts
100 -
Joined
-
Last visited
Content Type
Profiles
Forums
Gallery
Articles
Media Demo
Everything posted by ChrisThePropGuy
-
Hi there, Some of you already know exactly who I am and have been following my other thread for the past few years. For those who dont know me, Im Chris, I run ChrisTrePropGuy. Ive been working on my own moulds for TKs for a few years now and I recently completed them. I didnt have much desire to get one approved any time soon but I wanted to make sure that my kits could be approved before I sold them. Still finishing off the helmet so will post that soon. For those who havent followed along with my thread, it can be found here: Last week I rigged everything up. Im aware it needs a few adjustments but thought I would post up here to see if anyone has some critiques for things I might have missed. FRONT TO FIX: - Affix belt properly - Lower Thighs - Strap under shoulder to hold biceps - Add ab detail and paint SIDE TO FIX: - Add holster Sides look ok to me? the legs will be fixed with aforementioned fixes. BACK TO FIX: - Adjustback plate - Strap codd to butt - New Canvas belt that fits Let me know if I missed anything
-
.thumb.png.69856e02550a2e6d07e44a2b1bda020c.png)
ChrisThePropGuy TK
ChrisThePropGuy replied to ChrisThePropGuy's topic in The Foundry - Armor and Prop Making
So I jerry rigged it together. For 2 days work in between uni home work I gotta say I'm very proud. I still need to adjust and add a few things but I think it's getting there. I'll probs lay shift over to a regular build thread too as it doesn't seem many people check the foundry in comparison. Sent from my SM-G991B using Tapatalk -
Cant thank you enough Jason for the nomination. I never really did what I do expecting thanks but the guys on these boards have shown me nothing but welcoming attitudes and well wishes for my work, its truly humbling. Although Im always gonna be a clone trooper boy at heart, you guys have absolutely been the kindest and most supporting detachment and are one of my favourite. Really made my day to see this pop up on my feed and Im very grateful Ive made an impact on the boards in such a positive way.
-
.thumb.png.69856e02550a2e6d07e44a2b1bda020c.png)
ChrisThePropGuy TK
ChrisThePropGuy replied to ChrisThePropGuy's topic in The Foundry - Armor and Prop Making
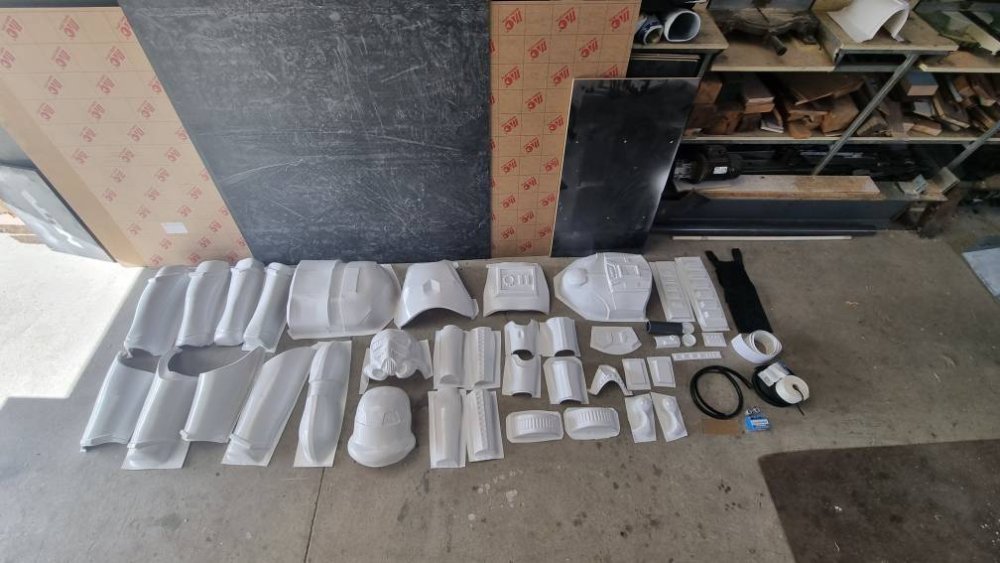
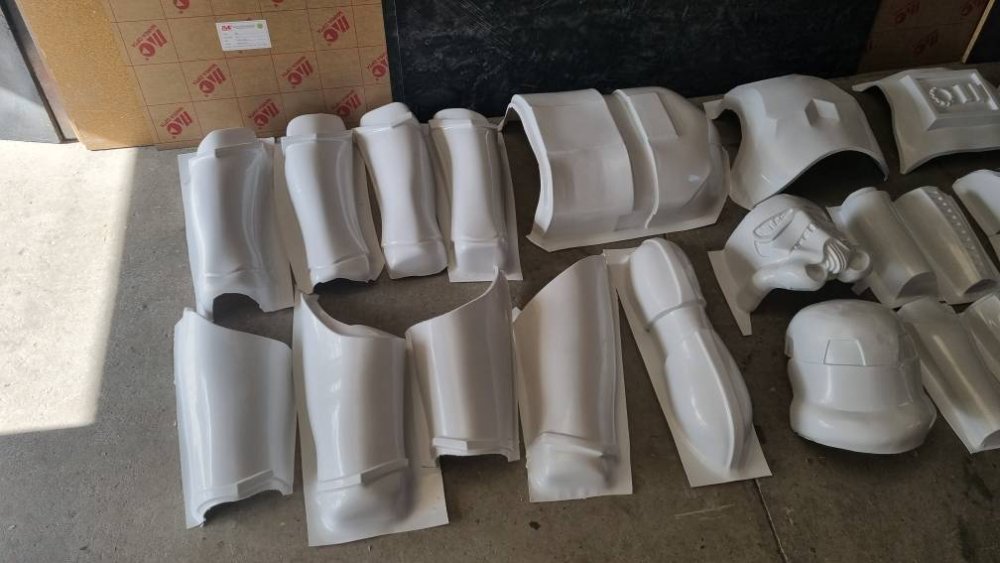
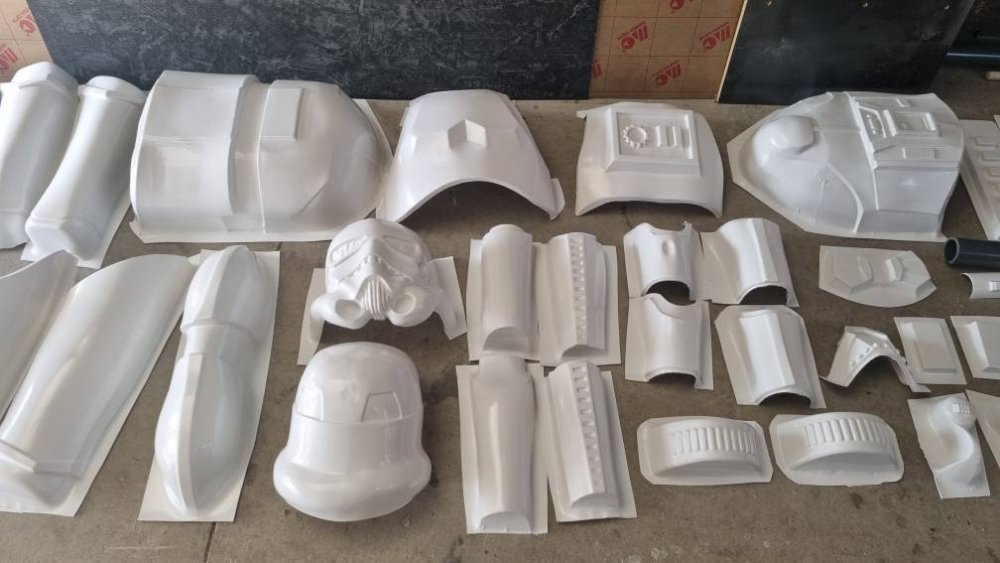
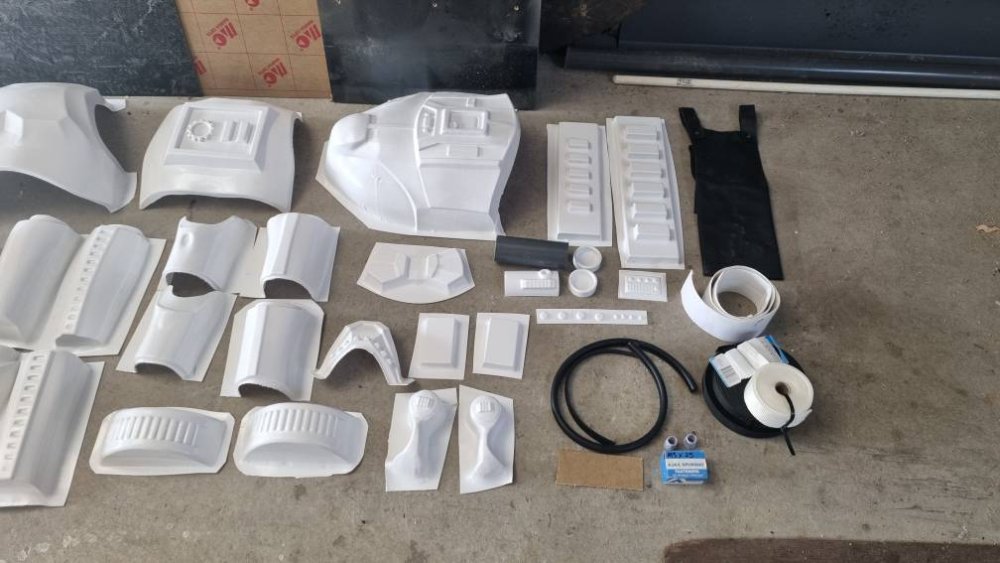
Today's the day! Last mould done and dusted. I knolled all the parts out to get a look and I'm excited to put one together. Will do that this week if I get time. Sent from my SM-G991B using Tapatalk -
.thumb.png.69856e02550a2e6d07e44a2b1bda020c.png)
ChrisThePropGuy TK
ChrisThePropGuy replied to ChrisThePropGuy's topic in The Foundry - Armor and Prop Making
I had some spare prototype parts lying around, my workmate andrew donated the sandy pauldron and the MP40 pouches. After a few hours today I managed to put this together. -
.thumb.png.69856e02550a2e6d07e44a2b1bda020c.png)
ChrisThePropGuy TK
ChrisThePropGuy replied to ChrisThePropGuy's topic in The Foundry - Armor and Prop Making
Thickness is MINT, I used to have issues with ABS in the past but this new plastic is great and I will be switching to this one. ABS is 2mm but its sharp enough and the resulting pulls are super thick. The line is a seam I havent sanded out enough, its hard to see on the mould how well its come out, some imperfection dont show up on the final pulls so I dont go overboard polishing, the first pulls usually indicate where I need to do some more work. SHould have a finished kit maybe end of next week, the last moulds are being printed now. -
.thumb.png.69856e02550a2e6d07e44a2b1bda020c.png)
ChrisThePropGuy TK
ChrisThePropGuy replied to ChrisThePropGuy's topic in The Foundry - Armor and Prop Making
All the parts thus far. Fixed up the ab details today too. Sent from my SM-G991B using Tapatalk -
.thumb.png.69856e02550a2e6d07e44a2b1bda020c.png)
ChrisThePropGuy TK
ChrisThePropGuy replied to ChrisThePropGuy's topic in The Foundry - Armor and Prop Making
The day everyone's been waiting for. Feast your thighs on these bad boys. I got no complaints with definition or detail atm. Need to drill a couple more holes in the forearms but nothing major. Legs are getting pepped atm so should have those and the abs done soon. Sent from my SM-G991B using Tapatalk -
.thumb.png.69856e02550a2e6d07e44a2b1bda020c.png)
ChrisThePropGuy TK
ChrisThePropGuy replied to ChrisThePropGuy's topic in The Foundry - Armor and Prop Making
We have moulds! Ordered Abs to do some pulls this week. Sent from my SM-G991B using Tapatalk -
.thumb.png.69856e02550a2e6d07e44a2b1bda020c.png)
ChrisThePropGuy TK
ChrisThePropGuy replied to ChrisThePropGuy's topic in The Foundry - Armor and Prop Making
There HEEEEEEREEEEEE! TK3 Fileset live, checkout the thread here: https://www.whitearmor.net/forum/topic/50523-ctpg-anh-tk-files-new-version/ -
.thumb.png.69856e02550a2e6d07e44a2b1bda020c.png)
ChrisThePropGuy TK
ChrisThePropGuy replied to ChrisThePropGuy's topic in The Foundry - Armor and Prop Making
Ok so I think ive completed all forms, Im looking to get some feedback on each indiviual part before I start smoothing them and adding cover strips as when I do that I wont be able to go back and fix things. Happy to send the files off to some people who are keen, as a thanks youll recieve the finished files free as well as some extra stuff. Anyway, here is what it currently looks like: Hope detail is visible enough, was difficult finding a colour and ligting preset that would show off the details well enough. Very keen to get some feedback on this, if youre interested to look over the files, shoot me a PM here or on FB. -
.thumb.png.69856e02550a2e6d07e44a2b1bda020c.png)
ChrisThePropGuy TK
ChrisThePropGuy replied to ChrisThePropGuy's topic in The Foundry - Armor and Prop Making
Exams are almost done which is nice, between studying I have managed to work on some more files. Here is a sneak peak at the new V3 files that will be available to purchase soon as well. First up are new leg and arm moulds: Now for the full show off. Its a bummer I cant show the dips and bumps as well as I can in the renders so ill have to show em off at a later stage once theyre printed. The little details and accoutrements are still being worked on but the main parts are almost ready. Please note some small details are missing like arm squares and also theyre still quite sharp and havent undergone the softening procedures yet. Here is a comparison to my old file: -
.thumb.png.69856e02550a2e6d07e44a2b1bda020c.png)
ChrisThePropGuy TK
ChrisThePropGuy replied to ChrisThePropGuy's topic in The Foundry - Armor and Prop Making
It didnt sit right with me to leave the 3D files the same since Ive learned a lot and made so many changes. I had a few hours free tonight and decided to fix it up. I present the V3 (I think its 3, lost count) Files. Some small tweaks to go but the majority is fixed. Changes include: - New eyes - Modified tears - New Vocoder - Correct Faceplate positioning - More pronounced cheeks - New ears (may need some tweaks) Comparison to V2 on the Left, V3 on right. As always let me know what you think -
.thumb.png.69856e02550a2e6d07e44a2b1bda020c.png)
ChrisThePropGuy TK
ChrisThePropGuy replied to ChrisThePropGuy's topic in The Foundry - Armor and Prop Making
Disregard the other helmets in the back, took these for Promo on my page, but youll get a better idea of the shelmet with this sandy paint up. Did a move along style sandy on a B grade I had, I think I got it close though the weathering around the teeth was too dark. Contrast is quite high in this pic. -
.thumb.png.69856e02550a2e6d07e44a2b1bda020c.png)
ChrisThePropGuy TK
ChrisThePropGuy replied to ChrisThePropGuy's topic in The Foundry - Armor and Prop Making
Oh sorry don't take it the wrong way haha, you're encouragement is what gets me to perfect this. The more and more I looked at it I was like, yeah they're wrong [emoji23][emoji23] Stay tuned for next week's post when I notice something else and go back and redo haha Sent from my SM-G991B using Tapatalk -
.thumb.png.69856e02550a2e6d07e44a2b1bda020c.png)
ChrisThePropGuy TK
ChrisThePropGuy replied to ChrisThePropGuy's topic in The Foundry - Armor and Prop Making
JUUUUUUUUUST as I thought I could live with how it was for now, Dan had told me the ears were wrong. As much as I tried to figt the sleepless nights with nightmares of the ears, I sucumbed to redoing them. I also remade the faceplate mould as it was just a little too thin vertically. My solution for this was to recast the mould in bondo and while its still warm and soft push the sides out. This worked ok but it cracked from the force, no big deal, just needed a little more reshaping. As you can see below the finished result looks much more full. And for the ears. I totaly forgot to add the concavity on the sides, I remade the 4 bars and also shortened the length. I might play around with how the scoop transitions into the circle but these are much better already. Sorry for chrome pics, working on a sandy that Ill show off but this at least gives you an idea for the new shapes. What you think? -
.thumb.png.69856e02550a2e6d07e44a2b1bda020c.png)
ChrisThePropGuy TK
ChrisThePropGuy replied to ChrisThePropGuy's topic in The Foundry - Armor and Prop Making
Partially correct. I designed them to be vac formed hence the sharpness in some details, then modified them to be wearable by removing the excess and smoothing them. Sent from my SM-G991B using Tapatalk -
.thumb.png.69856e02550a2e6d07e44a2b1bda020c.png)
ChrisThePropGuy TK
ChrisThePropGuy replied to ChrisThePropGuy's topic in The Foundry - Armor and Prop Making
Well boyos, its time. What better way to spend your second bout of covid than to sit infront of a computer 8h a day and work on new TK files! Many uni assignments have been set aside and neglected to bring you these haha. Also thought id add a little prefece. When I did my original Files they were poorly optimised and were among some of my early work. Im still very proud of what I achived with it, I still think theyre some of the best TK 3D files you can get atm, however they werent perfect. since then Ive studies the TK and learned MUCH more. I now feel more comfortable to do it PROPERLY, as I not only have better knowledge on TKs but also the 3d software. My original models were poorly optimised as I just smoothed vac forming files, they were ok but the file sizes were huge and also some of the softness was incorrect. I am working dilligently to updatethese with a MK2 fileset thats been made from scratch again. The MK1 will be grandfathered and available as a free resource. That being said, onto the show! The torso parts are complete. Ive included side by side comparisons with the original files to see how far theyve come. Please note, some details may look small/thin, these are vac forming models and the plastic has thickness and also needs space to pull into for channels. I learned a lot with making the helmet you cant "trace" the details on the outside and expect them to work on a buck. I dont doubt some of these will need some slight mods but for now they are modeled with manufacturing in mind. I will go back and fix the sizing for the consumer file set. Defos keen to hear critisisms as always. The chest was completely redone as I didnt achieve the correct form the first time around. I think this was due to perspective of some reference I was using but Im pretty confident this is looking good. I used a modified version of my TIE torso. Back again was completely redone. I was missing some details like the subtle bump in the lower back. Also the rectangle is not flat and symetrical whereas the old one was. Abs were my favourite section to work on, almost as fluid and ununiform as the helmet. My lower section was decent however the vertical bar was not offset. I did my best to make the surface as ununiform as possible after doing a few hours of form study on the abs. Finally the rear. Not much changed here, I slimmed down the vertical raised section and made the sides more straight and inline with each other. Also made the parts asymetrical. -
.thumb.png.69856e02550a2e6d07e44a2b1bda020c.png)
ChrisThePropGuy TK
ChrisThePropGuy replied to ChrisThePropGuy's topic in The Foundry - Armor and Prop Making
Ok so I think Im at the point where Im comfortable to send these out to production now, Im still not the greatest at asembling these (or paitning em) but given a few more Ill get better. Here are the final production pics: These should be for sale soon. Again, keen for anymore feedback, I know its not 100% perfect but I feel its a pretty damn good effort. Was certainly a challenge to sculpt a mould to match a cast rather sculpting to match a cast. Very keen to finally start on the armour now. Thanks for everyone who has read along so far! -
.thumb.png.69856e02550a2e6d07e44a2b1bda020c.png)
ChrisThePropGuy TK
ChrisThePropGuy replied to ChrisThePropGuy's topic in The Foundry - Armor and Prop Making
Hyeaaaahboehhhh, big thanks to Daniel for the pointers! I managed to fix up the moulds with the following fixes: - Left and RIght Tear point made higher (LHS peak was too high in pc, has since been fixed) - Left eye made thinner vertically - Made under eyes more shallow - Made front tooth thinner - Changed spacing of outer most teeth - Reshaped eye contours - Made all tooth holes deeper - made rear neck curve more pronounced on LHS - Thinned ears (I still need to make the tops convex rather than flat) - Raised vocoder 2 and 6 I also took onboard the faceplate positioning. The results do speak for themselves: Now to finish it off! -
.thumb.png.69856e02550a2e6d07e44a2b1bda020c.png)
ChrisThePropGuy TK
ChrisThePropGuy replied to ChrisThePropGuy's topic in The Foundry - Armor and Prop Making
Defos need it up to crl spec, I can get some more pics tomorrow. Also FYI, this is vac formed and not printed for those playing along at home. Just thought I'd clarify. Sent from my SM-G991B using Tapatalk -
.thumb.png.69856e02550a2e6d07e44a2b1bda020c.png)
ChrisThePropGuy TK
ChrisThePropGuy replied to ChrisThePropGuy's topic in The Foundry - Armor and Prop Making
Just when you thought you got rid of him, the tantalising and tenacious twenty two year old is back (That sounded cooler in my head, Im not that narcisistic I swear haha). Behold the latest version of the whatever this is. I had run out of Rubber trim and it took me ages to track down a local supplier (spoiler alert, I didnt) so I got these from where Im pretty sure everyone else gets em. I also designed my own sticker set for them, the ones I used on the last prototype were for another makers helmet and were a set I just had lying around. The new ones looks much nicer as they fit better IMO. And yes I know, grey lenses eww. I couldnt find my green acrylic so just used grey for now. I also polished the mold a bit more, still a few small tweaks I wanna do, also need to do some small mods to the dome shape BUT, looking for critiques to see how I can improve it. I kinda dig the "Crap" look now, so wanted to retain all the "lumps and bumps". I hear the HDPE material itself is where the actual spots and striations come from, always thought it was paint lines on the mould, anyone got more info on that? Getting pretty close to happy with this but I feel like its still a little bit off so looking to see what you guys think. -
More than welcome, dms always open. Look forward to hearing from you. Sent from my SM-G991B using Tapatalk
-
I'll change it to crl spec maybe? I see where youre coming from though. I know I can't state it is 501st approved but just not sure how to say it CAN be as it follows what's stated in the crl. Just a thought. Sent from my SM-G991B using Tapatalk
-
Nowhere on the ad does it say 501st approved just a heads up. It reads as "made to follow 501st spec" so long as you can finish it correctly. Made it very clear on the ad that it's not guaranteed. Sent from my SM-G991B using Tapatalk


