FN1313
-
Posts
823 -
Joined
-
Last visited
-
Days Won
6
Content Type
Profiles
Forums
Gallery
Articles
Everything posted by FN1313
-
Hello there glad to see you are getting close on your build! Sent from my iPhone using Tapatalk
-
Hello and welcome, Andrew! Sent from my iPhone using Tapatalk
-
Welcome James, looking forward to seeing your progression. Sent from my iPhone using Tapatalk
-
Hello there Tyler. Welcome! Sent from my iPhone using Tapatalk
-

DarthBiscuit's R1TK Build (Jimmiroquai kit)
FN1313 replied to DarthBiscuit's topic in Rogue One Build Threads
Id recommend some bondo, not the spot glazing putty, but the filler stuff with fiberglass for the exterior side. It’s more durable then resin (the resin just cracked again on my Jim armor rather than being durable) I’d also recommend drilling a hole at the end of the crack to stop the spread then opening it a little with a Dremel so your bondo can actually get in and fill it. Sent from my iPhone using Tapatalk -
Hello excited this is finally happening!
FN1313 replied to indiechixor's topic in New Member Introductions
Ahh, very good! That will be a lot less work. I’m currently working on some armor that is 3D print, so it will be quite the project, but yes you should do well with your armor! Looking forward to more Phasma! Sent from my iPhone using Tapatalk -
Hello and welcome! Looking forward to your progress and as always let us all know if you have questions. Sent from my iPhone using Tapatalk
-
Welcome! And congrats on the armor! As others have mentioned if you find a vendor who makes the same armor or similar that can save some time on having to repaint or such. We look forward to your progress! Sent from my iPhone using Tapatalk
-
Hello excited this is finally happening!
FN1313 replied to indiechixor's topic in New Member Introductions
I just got a 3D printer as well, working on doing some 3D prints. One thing you likely know already is you’ll have lots of post print work to get the print lines out and get the armor up to par, but it is doable and honestly worth it! Definitely start a build thread once you get going so we can follow along and answer questions you may have. Good luck! And welcome to the FISD! Sent from my iPhone using Tapatalk -
Yeah I’ve heard of scaling when you print, and that’s what I figured was the case. Since I don’t have a means to print yet that’s why I haven’t done much. Thanks for the link though. This could help!
-
One final note. I noticed now that I haven't really scaled the models to actual size. If anyone has more experience with this and would like to help that would be great! Otherwise I can probably work on that later and have things a little better.
-
Here's the STLs I've put together for the helmet: https://drive.google.com/file/d/11B2mpkPHhhtnHKbQXKKmGPshHG9IE-Zl/view?usp=sharing If anyone wanted to check them out and see how things look. Notes: I've built the helmet with not every single little thing to be 3D printed. The aerator mesh I've left out, instead I built a two part aerator as seen in screenshots so you can put your own metal mesh or something in between so it looks more real. (I prefer the look of metal) I've also not made Lens material models for the eyes, because I feel there's material out there that would be better to put in the eye area as is. Final note I didn't make a "rubber" bottom wrapping (the black cover for the opening of the helmet) and the reason why I haven't made a 3D print model for that is because I've seen with most helmets everyone prefers to put an actual rubber around that area and actually modelling it into the helmet would have removed that as an effective option. That being said. I could later build some separate part models for that if it's wanted.
-
And here's the helmet put together. Currently I do not have a 3D Printer. I aim to get one someday soon I hope. Over the next time period I'm going to finalize the modifiers on the helmet and then I will provide a few 3D files for download if anyone wanted to give it a go.
-
Added the aerators. I decided to do a 2 part system here. This way you can find some mesh you want and then put it in between and have a metal mesh that is more real looking. I also added some extruded bits in the aerator area to slide guide their positioning of the inner part (it has an opening in the back that should fit over the extrusion bits. And then from there I did the same with the area for the ears.
-
And the chin detail
-
Had a day off from work and rested enough to get some more progress done. I've molded the chin area as well as the teeth. I also cut the openings in the cheek greeblie.
-
Did some vent holes today. I'm pretty sure with the final 3D print these will be spots that will want to needle file some more for better appearance. The blue behind is just a plane to show how it would look, but I'd probably recommend using some other material for this rather than 3d printing something to put there instead.
-
It is good to see Nico's helmet. It gives me some ideas on what I can do with mine for some of the detailed spots.
-
Thanks all! Yeah I will definitely start providing files as they are available so that I can get some further guidance or so as I build things. I figure so long as I get the helmet pretty good I can do practically everything else no problem (much less detail) My goal is to be able to provide a service to everyone in providing something that could be of worth. And being as I don't have a 3D printer yet and hope to get one within the next year it's something that I will for sure love to see comments/recommendations based on how others have printed and what needs adjustment. I hope to someday provide the files for everyone to be able to print their own R1 trooper if they wish.
-
And some added work on the helmet, including the ears for visual reference The biggest changes are extending the rest out downwards to complete the backside top to bottom. I've also reshaped the face so it has the curves and dips in the right parts.
-
I've been working a bit more today Here's the ears so far. The holes I'm going to basically have be a print area to drill out and then fill with either screws that then can be filled with bondo to get rid of slit, or any other items that might work to hold them in place as well.
-
Welcome and glad to have you here! As you'll see there are many awesome resources and build threads available that can guide you on your journey. As well once you have your BBB feel free to create your own build thread. That way as a community you can keep us up to date on your build and we in return can assist as you progress.
-
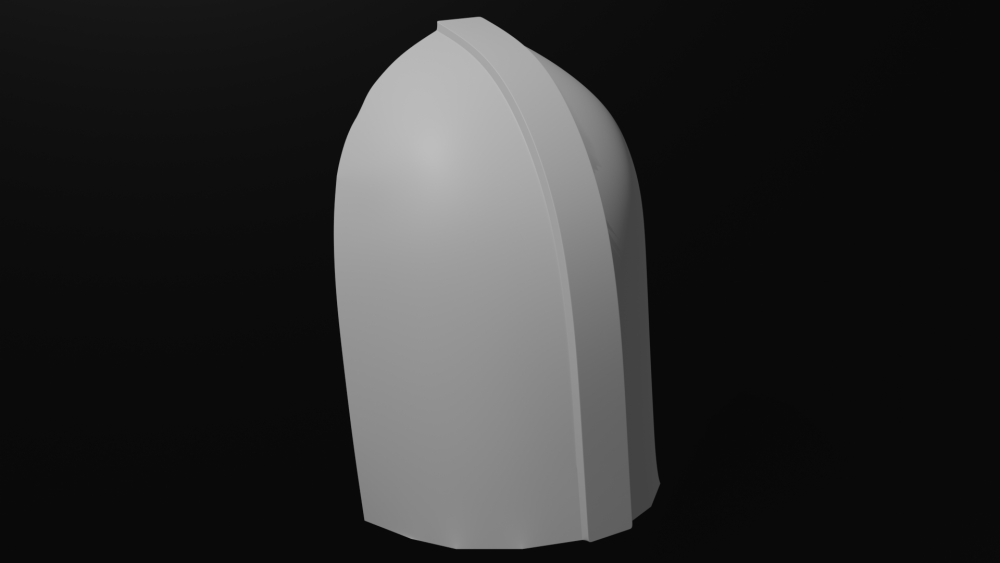
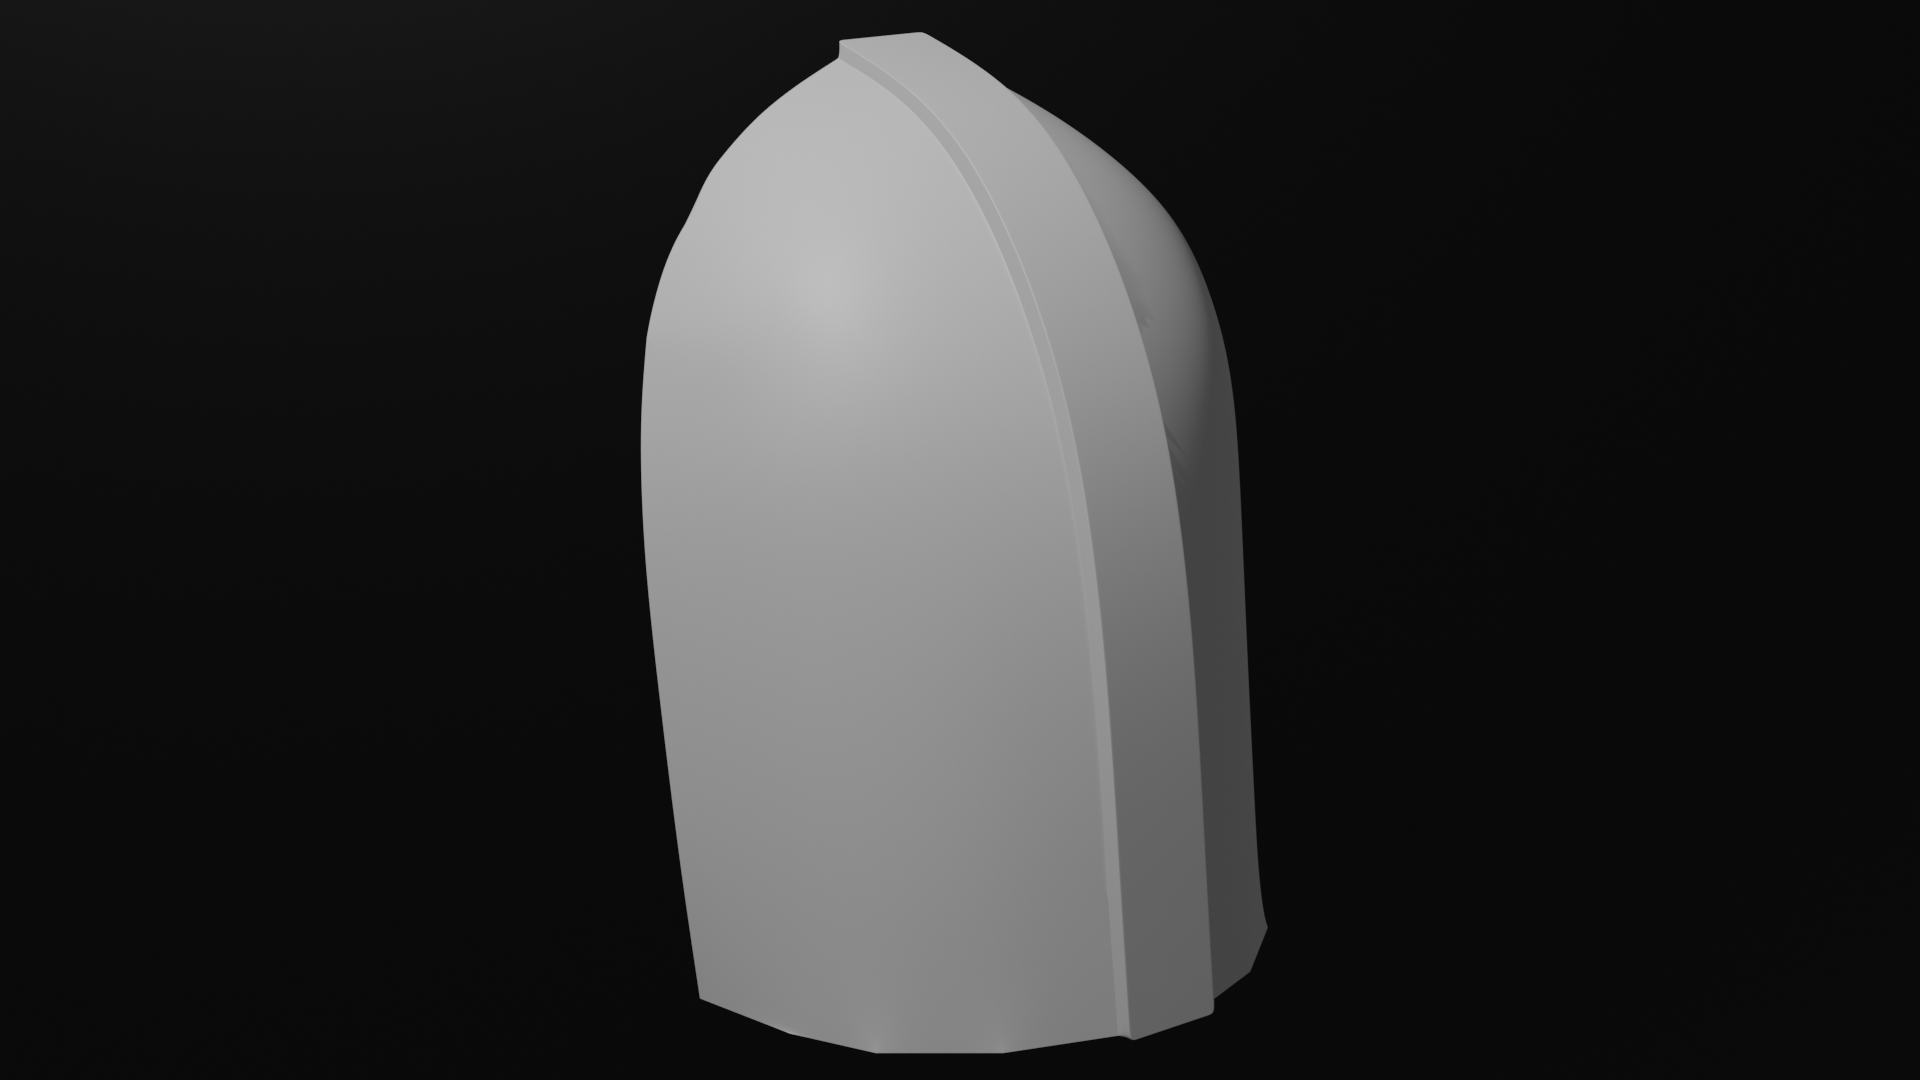
I've also been working on the helmet being as it's probably one of the more intricate parts. Here's a few images of it in lookdev mode and a smoothed out render.
-
Yep I for sure get that. I can understand why people choose to sell for a high price, it’s a lot of work, but since I’m doing what I can for learning modeling while I’m working on trying to develop a game and lots of stuff I figure I might be able to share some files here and there as I get them going. Sent from my iPhone using Tapatalk
-
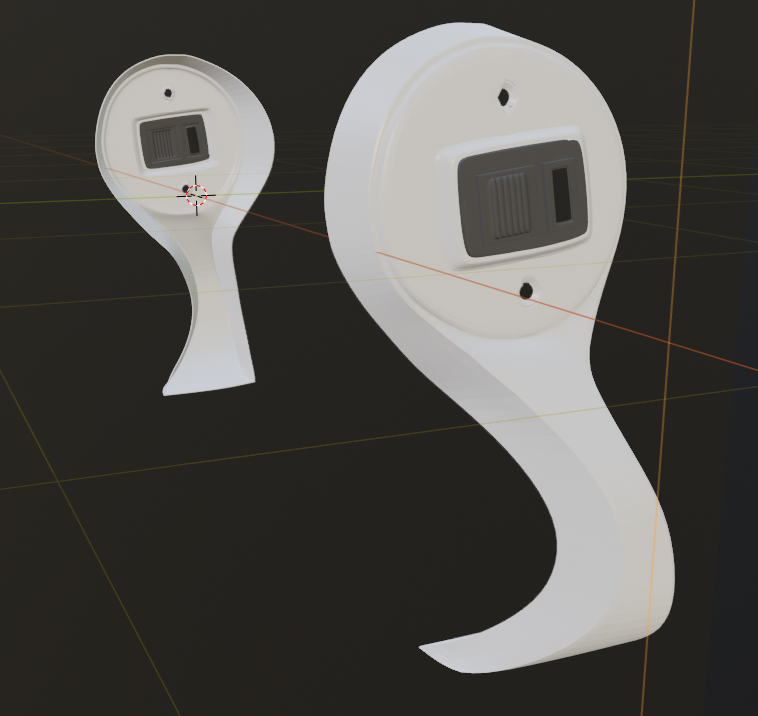
So I looked around and found nobody had any extensive R1TK 3D files. As such I'm hoping to start putting together more that I can try to get available. As of today I put together a render of the shoulder bells. I modelled these off of the CRL images. Let me know what you think. I will start trying to work at other parts of the armor in due time as well.