
Freduster
-
Posts
218 -
Joined
-
Last visited
-
Days Won
3
Content Type
Profiles
Forums
Gallery
Articles
Everything posted by Freduster
-
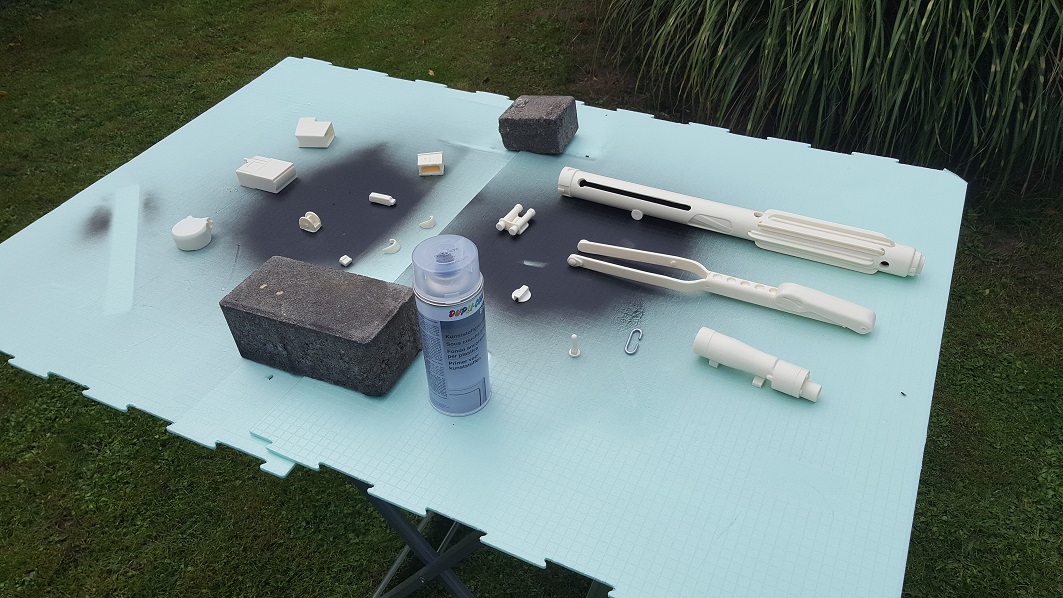
 Right, first update in a long time.. Managed to fill up the holes I drilled with some car surfacer; hopefully I can now redrill the holes which would make the whole thing look a lot better. This was before: And this is after: Furthermore, I decided that I am going to go for a more practicable build, mainly because the main purpose of this blaster will be trooping. So this building thread will most likely not feature any cool new modifications, but probably cut down on some to make the whole blaster as stable as possible. Hopefully this won't scare people of from this thread as I am definitely gonna need more tips concerning the build. Over and out for now, Freddy
 -
Hello guys, just a quick message from me to state that I'm still alive. Just really busy with uni at the moment, exam phase coming up However in the couple of days that I'm not gonna spend with revision I am planning to carry on the work on the scope; I found somebody who has a drilling press at home (one of those things that do the drilling for you in a really precise way, all you need is a precise starting hole and some patience). However, as I have already hollowed out some bits (in a really, really crappy way) Im gonna have to fill it up with some car surfacer - it's gonna be a pain but the experience I'll gain from it will probably be worth it, especially when it comes to building the armour.. That's me for today, mainly wanted to check in again, and it's actually not just a faulty mic
-
Cheers for the advice so far guys! Concerning the spade bits, I have decided to ask an old family friend who has essentially every tool there is on this planet and even in most parts of the galaxis, he should be able to help me out with the tools needed for the scope so I don't have to buy a whole set of bits just for this one scope (money is an issue, sadly). Different topic, how did everyone install the trigger with the nail? Sadly I can't find any evidence in the builds I have looked through, and even in the blaster reference I can't find anything specific.. Did you just cut the outstanding bit of the nail and then glue it? Sadly no progress today apart from a bit of research - I feel like I have taken some big steps during the weekend though, and since bloody ANOVOS just announced that my kit probably won't arrive before March I've got plenty of time to finish the blaster anyways. Until next time, Freddy
-
Hi Dan! First of all, thanks for the kind words I think I'm gonna re-paint some of the parts that I either damaged or that need to be repainted, but in general I was planning to keep this type of colour. The blaster will be for trooping purposes mainly, so apart from some subtle weathering I won't put too much work into the accurate paint. Concerning today's progress: Cleared out more of the spare resin in the folding stock - I am probs going to hollow out the part right underneath the holes and then put only a little part of the aluminium tube from Tino's completion kit in there to make it look a bit more realistic. Also i started to cave the scope but I am struggling.. This is what it looks like right now, but I can't think of the right way to carry on - any hints? Third of all, I struggled a lot with the trigger mod again, I think I made the hole in the trigger too big, so now the trigger has just gone all wobbly and stuff. Trying to fix this with a little bit of black plastic on either side of the trigger to counter that, but I'll see how that works tomorrow since the glue is drying. That's it for tonight! Freddy
-
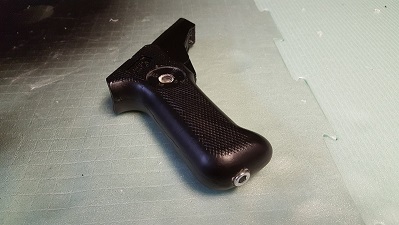
Ooooh right, well that makes it a lot easier i've attached the grip with other screws already, but the nail will probably still help quite a lot! Now since I've figured out how to insert pictures, finally some proper pictures of the rest of my progress tonight: Did a lot of work on the trigger mod: Drilled all the holes and used the dremel to "clear" them out until everything fitted together smoothly Added the spring, the trigger and a place holder nail to see how it all fits together And for my last trick today I glued the grip onto the receiver tube and rounded it all up with two screws to make the blaster "core" as stable as possible. I'll see how much else I can get done tomorrow night and Monday (loving my uni, Mondays and Fridays off ) before having to take a 3-day break to live a normal life, before then getting deeply into it again next weekend! I really want to get the trigger sorted tomorrow though, but I feel like I'm on a good way. It's still quite wobbly, but I guess I'm gonna have to get some modelling clay soon anyway.. @T-Jay, if you have any recommendations on what clay works well and (even better) where around here to get some, hit me up! Cheers and over and out for tonight, Freddy
-
New day, new progress: replaced more resin screws with real ones, mainly to get them out of the way as I am pretty scared of losing them. For the rest of the day I am gonna do some work on the trigger mod (I am going for the average nail & ballpoint pen spring mod) because for some reason I just really want to attach the grip to the tube. I feel like that step is going to make the kit look a lot more like a blaster
-
Found out a few hours ago that once you get started and hyped for the blaster, it's really hard to stop Since I am working according to the Blaster Reference my first job was to drill the extra holes into the receiver tube. Aferwards I carried on with replacing the resin screws with real screws; the two in the grip as well as the two by the muzzle. For tomorrow I'm probably gonna start working on the trigger mod, so I'll have a look through my tools and will hopefully find a fitting nail. Also I might attach the grip to the tube, but I'm not really sure about the best and easiest way to achieve that, so if anyone has been there (and I know you have ), please don't hesitate to hit me up! P.S.: Is there any clever way to overcome the 71,68 KB size limit for pictures?
-
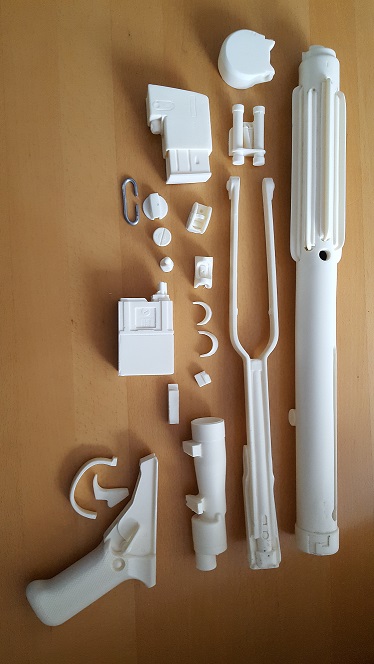
Alrighty, first update in a long time... If only I could study psychotherapy for Ewoks or something cute, humans are just waaay too complicated The first couple of images I'm gonna put up here are from when I received my kit and when I started to spray paint the single parts (first person I asked about crafting was my dad who apparently has never built an E11 before, so I've got most of the blaster parts painted already). Hopefully this won't cause too much trouble, but I'll see about that later. I decided to use the FISD Blaster Reference as a step-by-step instruction, but I'm also gonna look at Dan's (CableGuys's) build as I find it really easy to follow due to the ton of pictures (cheers for that, and congrats on your beautiful work! BlasTech would be proud!). First up on the menu therefore will be the Receiver Tube, bit of drilling should get me heated up for the rest of the blaster!


-
What's up FISD, my name is Freddy, and I'm a student and long-time Star Wars fan from Duisburg, Germany. I've recently picked up an ANOVOS ANH Stormtrooper kit as well as an ANH E11 Blaster Kit consisting of a DoopyDoo's resin kit and T-Jay's completion kit. After a lot of reading and research I am going to start building it properly in the next couple of days, and as T-Jay suggested, I am also going to document my progress here. As I am an absolute beginner when it comes to cosplaying and crafting stuff in general (I was always more of a "I'll just buy it finished" sort of guy, but students don't have that much money to spare...sigh), I am really looking forward to getting advice from this all-international community with soooo much experience! So yeah, I'll keep you updated, and if anyone has tips and tricks, hints etc. for me, all of it is appreciated, I'll accept any help I can get! Looking forward to a brilliant and fun time together! Freddy (hopefully an approved TK soon)