

REAPERofDAISYS
-
Posts
171 -
Joined
-
Last visited
Content Type
Profiles
Forums
Gallery
Articles
Everything posted by REAPERofDAISYS
-

Tiny Trooper 48” Trooper sized down
REAPERofDAISYS replied to REAPERofDAISYS's topic in Hard Armor (General Discussion)
Got the boots together. Just got some cheap shoes from Walmart. Took out the laces and then painted them with Angelus shoe paint. Same thing I did with my shoes for my TK. Then it was just cutting a small plastic piece to cover where the laces are. Attached those with Velcro. Dirtied it up to match the suit and it’s good to go. Sent from my iPhone using Tapatalk -
Tiny Trooper 48” Trooper sized down
REAPERofDAISYS replied to REAPERofDAISYS's topic in Hard Armor (General Discussion)
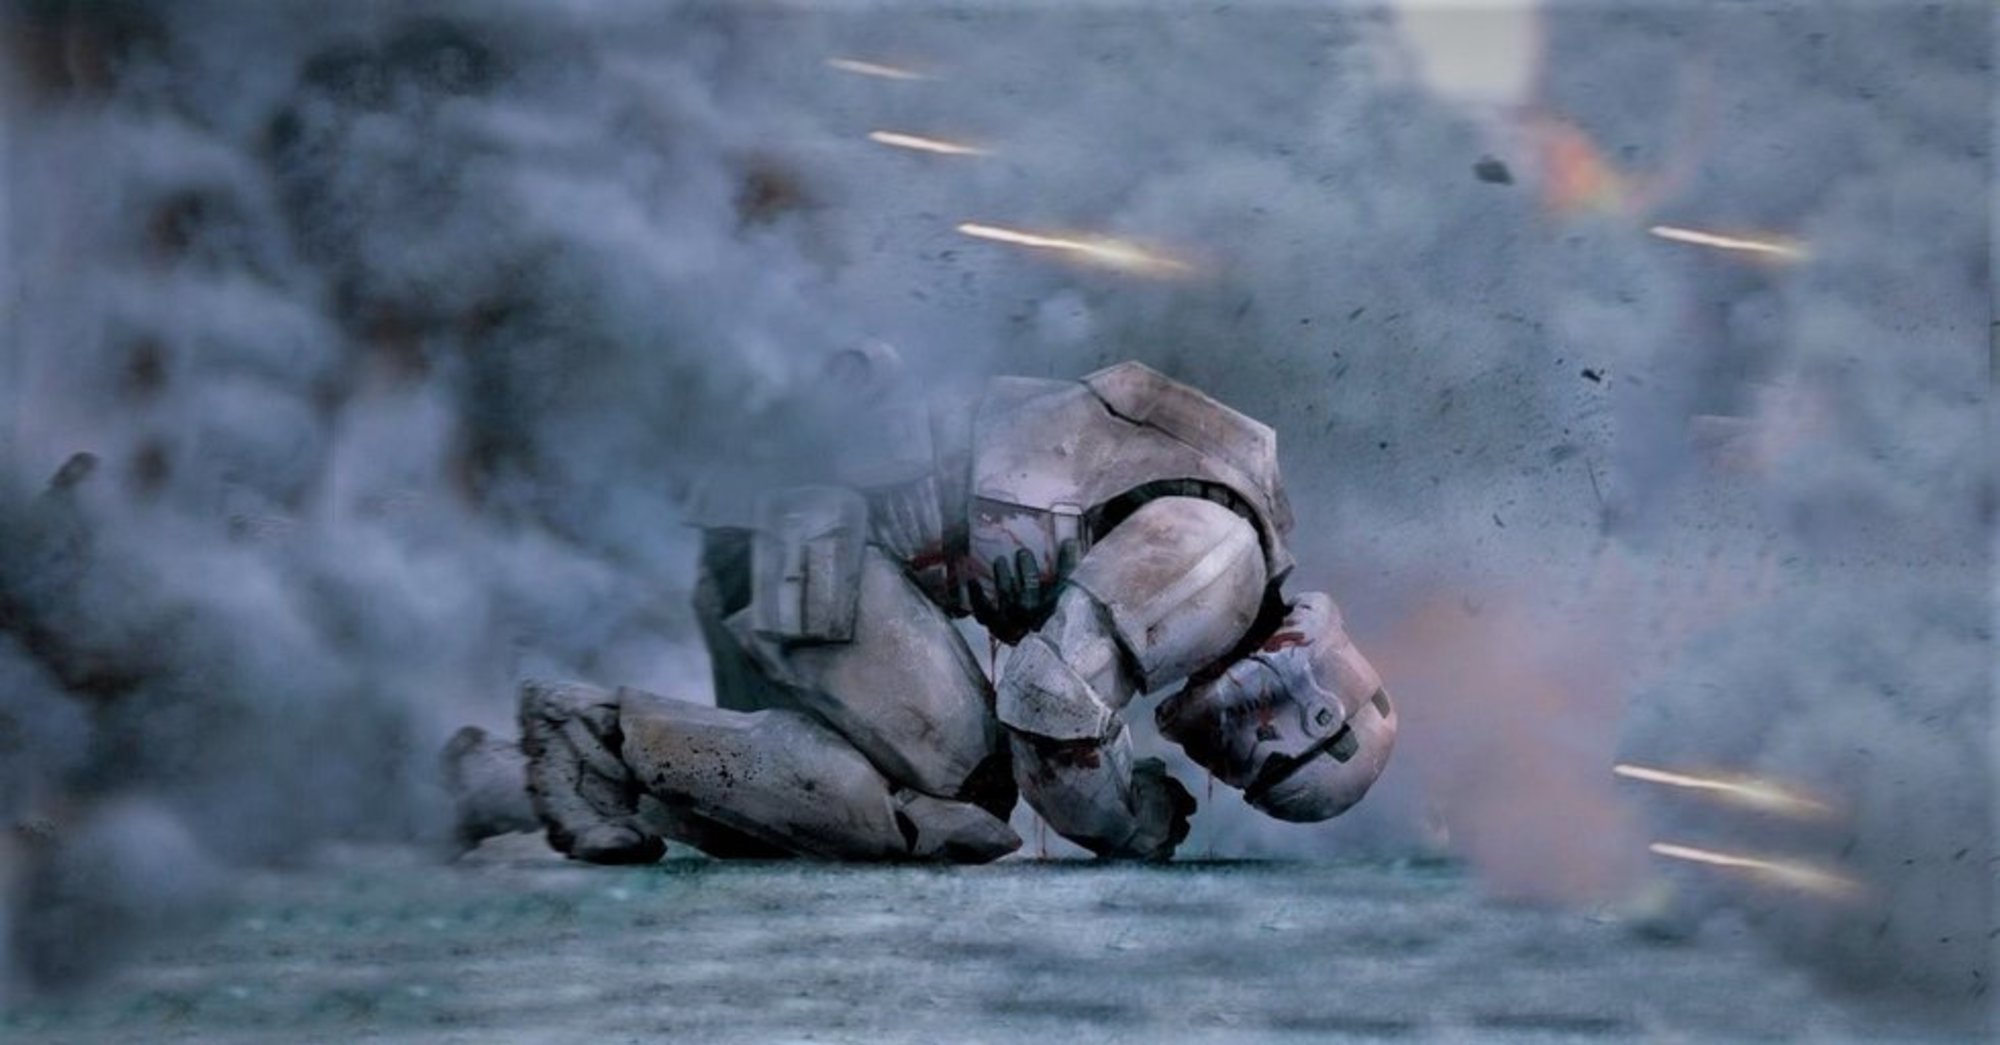
Weathering level 1 is complete. Didn’t find any good way to add burn/ blaster marks. So I just made it dirty. I used cheap hairspray and dirt from my driveway. First sprayed a layer of hairspray then took a small paintbrush me sprinkled the dirt/ dust on it. Then kind of smash dabbed the dirt around. Then I just took an old rag and lightly swept off the loose dirt. Then dabbed around until it got to where I wanted. Took awhile but I’m pretty happy with how it all turned out. And of course my daughter wanted try it on. All that’s really left to do it fix up some of the strapping. I’m going to make some loops for the shoulders, that will go around the chest armor though the neck hole. Just to hold them as high as possible due to my daughters smallness. Also need to add padding at the chest back connections to keep the plastic from digging into my daughters skin. And sadly I may have to make new forearms. They don’t really fit with a long sleeve shirt. Also she doesn’t like the helmet and says it needs to be bigger. It does fit but she doesn’t like it. So I’ll need to get a larger one of those too. Sent from my iPhone using Tapatalk -
Tiny Trooper 48” Trooper sized down
REAPERofDAISYS replied to REAPERofDAISYS's topic in Hard Armor (General Discussion)
Finally got some paint on this. Tried white plasti-dip. I do NOT recommend it at all. Bad choice on my part but worth trying I thought. But I will use this as an opportunity to try out some weathering. So now my plan is to do some crazy weathering. Dirty and battle hardened. Blaster bolts and burn marks all over. Sent from my iPhone using Tapatalk -
Tiny Trooper 48” Trooper sized down
REAPERofDAISYS replied to REAPERofDAISYS's topic in Hard Armor (General Discussion)
Bunch more progress. I plasti dipped the inside of the helmet. Used a small plastic garbage can for the midsection front and back. (Ironically made from the same plastic and almost a perfect match) Used one of those plastic tubes for cleaning wipes for the thighs. Then added a few little strips to just give some definition. I’m really happy with how the forearms turned out. Had some fun with the dremel adding the details. I used a thick chunk of cardboard tubing to make the TD, I glued some plastic to the ends, and a little piece of packaging to imitate the original better. Sent from my iPhone using Tapatalk -
I think I am finally done with painting the boots. It took somewhere between 7-9 layers. I lost count at some point. After how much effort this took I did decide to get some clear protective coating for this. I’ll be going with the same brand Angelus for that. Just to avoid any issues. Sent from my iPhone using Tapatalk
-
ATA ANH Stunt Build
REAPERofDAISYS replied to PlasticSpaceman's topic in Build Threads Requireing Maintenance
I will warn against cutting too much off he helmet early. Especially if you are larger in head size. I have a large head and when I cut my ATA bucket I simply cut where the lines were already. And I almost didn’t have enough material to hold it together and still fit my head inside. And I can confirm that my ATA bucket has the same kind of bumps on the back as well. Sent from my iPhone using Tapatalk -
Tiny Trooper 48” Trooper sized down
REAPERofDAISYS replied to REAPERofDAISYS's topic in Hard Armor (General Discussion)
Starting to piece things together. For the shoulder I’m simply adding small pieces of plastic cut from other areas across the split, and glueing them in place with E6000. I do not think this will need anymore support to hold together. For the shins I’m trying to decide if I will use Velcro for front and back, or glue the front together and Velcro the backs similar to ANH shins. Sent from my iPhone using Tapatalk -
Tiny Trooper 48” Trooper sized down
REAPERofDAISYS posted a topic in Hard Armor (General Discussion)
After seeing Suttontechs 48” trooper toy conversion for youth armor I decided to do my own. Immediately I realized that this was way to large for my daughter. She’s not even 4 yet. Did his stop me? Nothing stops the first order! Took apart all the screws and got a look at the insides. Started with curved Lexan scissors, dremel, and a jigsaw when able. I plan to replace the grip for the blaster. It was connected to the hand. For the shins I kept the bottoms attached for now. I may have to remove them due to my daughters extreme lack of height. Getting the insides completely removed has been a long process. Lots of cutting and grinding. Quickly realized you can’t let the dremel go fast or it melts the plastic and creates a mess. The main body I needed to completely remove the midsection to shorten it. Not sure if I will use these but I went ahead and cut the hand plates off. May just Velcro or use elastic to attach them. To give an idea how tiny this will end up being, the helmet actually fits. So I went to work on that and gutted it and cut the eyes out. Right now the parts I will need to replace with smaller alternatives are the thighs, ab, kidney, and forearms. The rest can just be big. For the forearms I’m just using the same PVC pipe I used for my TK thermal detonator. My goal is to simply get my daughter able to wear this now. But leave everything original. That way as she grows I can just substitute the larger pieces when needed and she can hopefully wear this for years. I don’t think the helmet will make it more than one year. But I also have a 2nd daughter on the way so this should get plenty of use. Here is everything I have currently. Still need to make thighs and find some plastic to cover the midsections. Also I’m going to be painting this all. I don’t like color of the plastic. I’m toying with making this into a executioner, but I can’t decide. As always any advice, critiques, or questions are welcome. Sent from my iPhone using Tapatalk -
ATA ANH Stunt Build
REAPERofDAISYS replied to PlasticSpaceman's topic in Build Threads Requireing Maintenance
Look up justjosephs63’s “supply list for your tk build.....” thread. It will get you pointed in the right direction as to what you need including tools and supplies. Sent from my iPhone using Tapatalk -
I got these off SportsDirect.com Sent from my iPhone using Tapatalk
-
unfortunately I don’t. I think a few more coats will be enough. If not I may have to find a cheap airbrush to get it done. Sent from my iPhone using Tapatalk
-
Here is coat number 3 And the 4th I’m trying to make sure I apply the paint in different directions with each coat, that way I am getting maximum coverage. Probably going to need at least 2 more coats. Sent from my iPhone using Tapatalk
-
Started painting the boots. First thing I did was to wipe them down with acetone to remove and polish so the paint can adhere better. It’s kind of hard to tell but one boot is shinier than the other. This is one coat applied. Sent from my iPhone using Tapatalk
-
Angelus Protective Coating
REAPERofDAISYS posted a topic in Boots, Soft Parts, and other Accessories
I got Angelus white acrylic leather paint to paint my boots. I’m just wondering what (if any) protective coating is recommended? Sent from my iPhone using Tapatalk -
Blue- I will try the nylon and see if that fixes it. Green- I may try to undo some the the sewing and cut the Velcro shorter. But that seems like a lot of work for so little. Maybe another day when I’m feeling ambitious. Here is where it is sitting now. I added snaps below the ones I had to bring it up. Sent from my iPhone using Tapatalk
-
Trying the 48” Trooper toy conversion
REAPERofDAISYS replied to suttontech's topic in Hard Armor (General Discussion)
This is so awesome! I just ordered one of these to make for my daughter. Besides the rubies helmet did you have to replace any other parts? Sent from my iPhone using Tapatalk -
Finally seeing it all come together. So now the fine tuning is key. I need to tighten both shoulders about the same amount. I think I will try to tighten about to this point. Maybe just a couple mm less. Then I have this shot where I have 3 concerns. (In blue) how bad is this gap? I don’t think I can get EIB or centurion with it so I’ll have to figure something out. (In Yellow) does the belt need to be curved more so it lies more flush with the canvas belt? (In green) I don’t think this is a problem but might as well check. The Velcro is just barely to long and sticks out a few mm, but not really past the TD. Sent from my iPhone using Tapatalk
-
You were absolutely right my belt was too low. Added the lower snaps and here where it is now. I think it’s high enough according the the CRL which says at or just below. IMO this counts as just below. But correct me if I’m wrong. Sent from my iPhone using Tapatalk
-
Well I got one of the shins together. I can’t tell if this looks ok or not? Part of me thinks this is good, the other thinks not. Sent from my iPhone using Tapatalk
-
Finally made the step I have been avoiding today. Glued the cover strip on the back of the shins! It is now just a matter of if it all comes together like it should. I plan to use industrial strength white Velcro on the cover strip to hold it together. If that doesn’t work I may have to go with hooks or jimmy up something. Other small stuff. I went to add the snap on the ab. Unfortunately I already had a snap on the opposite side in use. Easy fix, I just cut off the tip with some pliers. Then I smashed it down flush with a hammer. Finally put it into the snap setting base and hit it a few more time to level it out. Little dab of E6000 and boom. Another thing. Added some scrap ABS to the top of the snaps in the shoulder to prevent them from pulling out. One already did but I’m hoping this fixes it. If not I can always make new ones. Sent from my iPhone using Tapatalk
-
Ah. Looks like I will be adding another snap to the belt, bellow the ones I just put in. I’m finally trying to glue the ab buttons again. The first time I couldn’t get it to hold down well enough and had to remove it. So here is my “creative” solution? See if this works. Basically used everything besides the kitchen sink. Sent from my iPhone using Tapatalk
-
That is really nice! Honestly that’s pretty close to what I would like to do. Who wants pristine battle armor? Sent from my iPhone using Tapatalk
-
I’ve used 220 when I’m getting aggressive. Bump down to 400 for finer. None of the sanding so far is done. So it’s all work in progress. Once I’m happy I will be using up to 1500-2000 to smooth it out. Sent from my iPhone using Tapatalk
-
Got to love accidental weathering. That actually does bring up something I was wondering. How much weathering is allowed while still being approved for a standard ANH TK? Sent from my iPhone using Tapatalk
-
Here’s another shot. Ignore the messy ABS paste on the other side. The main reason it seems noticeable to me is because it’s all along the same line so it seems to pop more. And I finally got my belt attached. Pretty happy with the position. Sent from my iPhone using Tapatalk
