Hikuro1983
-
Posts
55 -
Joined
-
Last visited
Content Type
Profiles
Forums
Gallery
Articles
Everything posted by Hikuro1983
-
 Requesting access https://www.501st.com/members/displaymember.php?userID=25589&costumeID=279
 -
Lee's Shore/Tank Trooper Build - WIP
Hikuro1983 replied to Hikuro1983's topic in Other 501st Costumes
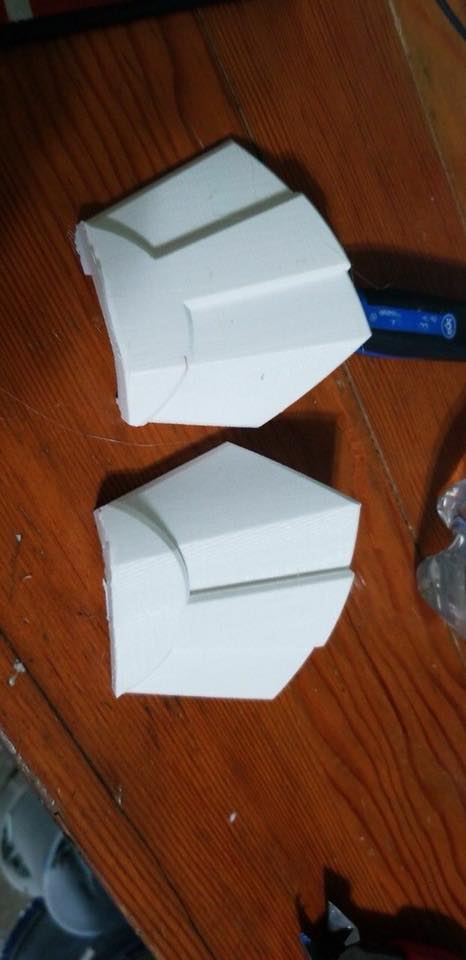
Good advice, signed up. Do got a couple of updates. The hand plates, and a shoulder bell are printed. Checked for scaling, and while the shoulder bell might be a bit big, everything thus far matches very closely to other kits I've come across such as Jim Tripon and 850 AW's. That's very encouraging. With any luck I'll be heading to my friend's house friday to pick up the first set of parts.

-
Lee's Shore/Tank Trooper Build - WIP
Hikuro1983 replied to Hikuro1983's topic in Other 501st Costumes
Wow, wow wow........WOW. It's been almost 2 years since I last posted anything on this project and a lot has changed. I'm actually going to be restarting this from the ground up....it'll be tough but it can be done. Since decommissioning this project back in December of 2017 a lot has changed. I'm nearly 60 pounds lighter, nearly 10 inches thinner around my waist. I'm now a full fledged 501st member with my first costume being a Tie Pilot and am about to hit my Double Ace wings after just 9 months of trooping. With that, I'm about to finish a new set of armor I got from a friend as a Clone Commando and that's inspired me to go further beyond and increase my costume selection. Back in March I took my mother on her birthday to Emerald City Comic-Con, there I came across the Anovos booth, I know I know, aNOvos....but when they got things in stock, you kind of wanna buy something. Luckily I came across not only a special forces FOTI, but a Tank helmet. I couldn't resist and ended up buying it. Since then I've been buying my time to further understand what I need to accomplish my next objective. My garrison CO and good buddy, Luke Killiam, is the only person I know who is active in his Shore Trooper armor that he got from Jim Tripon. The last 6 months I've helped him put that blasted suit on almost a dozen times, getting a really good feel over the construction and strapping of the suit. Thus the time has come to take a serious step into a new direction. As I'm preparing the submit my RC-Delta, I'm beginning the process of not only working on a Tank Trooper but ALSO a Shore Trooper using Sean Field's 2.0 files again. I sadly don't have anything from when I first did this project in 2016, it was all thrown out in frustration. Now, I'm confident, I'm skilled, and I'm hungry to start again. So starting now, until completion, this page will refocus the drive and intensity of doing TWO kits at the sametime. Ambitious? You bet! Easy? Only if you're a fool or the fool who follows. This will be stressful, this will be exhausting, but by god it'll be fun and I can't wait to start showing off progress. As of right now, I have a Tank Trooper helmet, Jodphur pattern on order and will make my own, and a tank trooper under shirt provided by Imperial Boots. Four rolls of filament have been sent to my friend who currently has my printer in his possession, and with 3 printers at his house, I'm rather hopeful he'll be cranking parts out. I'm hoping by my next paycheck I will get my boots and gloves purchased to complete my tank troopers under suit and purchase more filament to deliver to him. My goal is to have a fully printed set of armor by end of June, with a ready to wear and submitted set of armor by end of July as my first year anniversary hits. Following that I'll begin work of my Shore kit which will be ready by September just in time for Rose City Comic-con. Hope you all look forward to the updates as they happen!
-
looks good man, I'm working on the same file myself, I'm fairly concerned about the smaller pieces from Group A and where they all go. Hopefully it'll be fairly cut and dry or I'll be a bit bummed out.
-
Lee's Shore/Tank Trooper Build - WIP
Hikuro1983 replied to Hikuro1983's topic in Other 501st Costumes
Yeah it's been fairly heart breaking in the last couple of months when it happened. I sent it off to a friend of mine and he pretty much rebuilt the circuit board and stepper motor and got it working again. With any luck I'll have it back Monday which'll be great. But I don't think I'll be doing much of anything still on this project. I don't want to be a fat storm trooper looking weird with a 60 inch gut hanging out like I went to the mess hall more than doing patrol. But I'll eventually get back into this project I think. Mean time, I've looked into an alternative cosplay and making plans to pursuing it soon. -
Lee's Shore/Tank Trooper Build - WIP
Hikuro1983 replied to Hikuro1983's topic in Other 501st Costumes
Hey I'm sorry everyone I've been so incredibly busy with work. Sadly the printer died, so I pretty much have to call the project quits for now -
Warning, evade this seller!
Hikuro1983 replied to Ghoulcinder's topic in Hard Armor (General Discussion)
Sorry if I'm necroposting, but I saw that there was a BOGO deal on this......so since a lot of you are saying stay away, then I guess I should just stay away huh? That's to bad, I was ready to go on this. -
Lee's Shore/Tank Trooper Build - WIP
Hikuro1983 replied to Hikuro1983's topic in Other 501st Costumes
Things are going to be quiet for a little while. I'm currently doing a commission print of an E-22 for a friend and might be getting the printer tuned up cause it's acting kind of odd. But I have the forearms done and bicep and shoulder parts scaled and waiting. I think my friend and I are getting together next weekend and we'll be getting the casting done for both our helmets. He's currently getting the mold ready which is drying right now. I got pictures but photobucket is being a pain and I'd really like to show you guys how it's all looking. Guess it'll have to wait. I got tons of Sahara Beige coming in, and we'll be using flex film for the visors versus butchering an expensive motorcycle visor. I"ll hopefully have something to show before the end of the month when I kick things back into gear. -
Lee's Shore/Tank Trooper Build - WIP
Hikuro1983 replied to Hikuro1983's topic in Other 501st Costumes
Congrats for enlisting there! Rifle is done Great, build, looks fantastic, really happy with the turn out of it. I began printing my new forearms but they are alas incorrect in size and way to large. Thus I'm taking this knowledge and finding a middle ground that'll work. I took the new measurements based on some reference images I found to find a common point. I then took that data and looked at my cura model provided by Sean.....while the length of the forearm is about where I would like it, the width and depth is terribly off and I can't believe would of been his size either.....it's like Schwerzenneger size. I liked the overall width and depth of the first forearm I did, maybe just a smidge to tight. I upped it almost half an inch wider....this'll give me more than enough clearance over my wrist but will also feel a bit more comfortable at my upper arm. Not too mention the print time is almost 20 hours less with this new size than the recent print that was to large....wow 20 hours. I'm looking it over now and it feels right. The next part is rather tricky as I have to size the armor parts similarly. Since some of these are to large as one whole print I have to work on a strategy to keep everything consistent in size. -
Lee's Shore/Tank Trooper Build - WIP
Hikuro1983 replied to Hikuro1983's topic in Other 501st Costumes
And one last bit of progress! -
Lee's Shore/Tank Trooper Build - WIP
Hikuro1983 replied to Hikuro1983's topic in Other 501st Costumes
Sean Field's files. He's got the entire shoretrooper suit and accessories modeled for 3D Printing. You can find them on facebook by joining the Shoretrooper Fam there for free download. That's pretty much how I've been working on my armor. Progress report here we go! I started around 9 this morning back at the office where I wasn't the only one doing their own project so things were fine. I ended up having to buy more torque screws but double the price....I didn't realize I needed so many until yesterday. Homedepot sells them at a 3 pack for 49 cents I was paying .79 PER screw. I'm short I think 3 screws to make it official.....aw well. Painting was also very slow.....the weather is still fairly cold here in the portland area and being a giant warehouse full of empty space makes it difficult to warm everything up. So instead of taking maybe 20-30 minutes for paint to dry was more like 1-2 hours. I got all the neccessary areas painted with atleast 2 coats....now it'll be just touch up work, flat coat and dry brushing with final assembly. I'm certain some areas just aren't right but I truly don't care. It's just been a fun build overall so I hope you guys like the progress photos I"m posting right now. -
Lee's Shore/Tank Trooper Build - WIP
Hikuro1983 replied to Hikuro1983's topic in Other 501st Costumes
ALLLLLLLRIGHT! How are you guys doing?! Things were great here this week! I actually made some progress in something and will continue to do that throughout my weekend. I spent the whole week undergoing reprints and modifications to make my E-22 rifle work easier for me during the assembly process. So let's go over it a bit shall we?! So let me tell you, instructions on this rifle are kind of slim to none. Sean did do a small pictorial overview of the rifle, but he also missed a lot of steps....Everything had kind of been a guessing game. BUT the vast majority of this thing was assembled from his overview so I'm grateful he had it. I did run into some snaffu's though along the way. Even though I had carefully sanded the barrel where a 1 inch PVC pipe was going to feed thru, the barrel snapped into 3 chunks. Trust me, I probably would of gotten yelled at by someone at work where I'v ebeen building this if anyone was there at 5AM hah. I made it work the best that I could though, I fixed the areas that snapped with some super glue and activator spray and gave it a light sanding while working the pvc pipe into postion. After that everything was pretty straight forward for the vast majority of the assembly process. Which now brings us to here as I"m now in the primer and sanding process. I wanna make a note here to anyone who assembles Sean Field's 3d printed files. He suggests using a 5/64 bit for putting in your M3x10 screws. I'm going to say no, go up 1 more size from that. Which I think was 3/38 I don't recall. Just look at your drill bit set, see 5/64 and go left one and that'll about do it. Also again, when it comes to gluing your pieces, I can't stress enough how using a product like 2P10 is great on PLA prints. Lay down small bits of glue onto one side, then spray the other side with the activator and merge your pieces it'll bond insanely fast and it shouldn't snap off without a lot of force. Tomorrow I'm heading back into the office.....I'll be doing another deal of sanding and primering and installing the remainder of M3x10 screws I have available and then begin my full painting process. Sunday I'll be dry brushing and installing the shoulder sling parts and I'll be done with the rifle. After that, I'll start moving onto reprinting the forearms and improving on those. Maybe Jeremie will have some updated shots for me if he was ever able to start the sanding process on the bucket. A bit of sand news though, after ordering the last of the Montana Gold from Amazon, I received notice that due to weather (....bunch of crap) my paint won't arrive until the middle of next week. I'm a bit peeved about it honestly seeing how I ordered it to be overnighted and I'm not in the least being compensated back for that. -
Lee's Shore/Tank Trooper Build - WIP
Hikuro1983 replied to Hikuro1983's topic in Other 501st Costumes
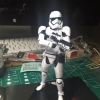
okay surprised but there was a little bit of progress on something yesterday! I had an event to go to today and since it was in my friends neighborhood I figured I'd drop off the parts for the bucket. Shortly after I got home he sent me a couple of pictures of the bucket assembled and it looks great! Now mind you, there are some areas needing touch up cause the printer failed in a couple of locations, but they're VERY easy fixes. We talked about areas of the helmet we wanted to have molded differently. So the rebreathers, the front face plate and the blast shield will be molded separately for easy painting and assembly. That seems to be something we haven't seen other casters do.....they seem to just do it all in 1 go or just 2 parts making it insane to tape properly and paint. I'm nearly done printing the rifle as well. Scope and Light parts will be done in 2 more hours or so and it'll take 3 hours to print the magazine for the THIRD time. I need to go to the tool shop, get a miter saw or something to help cut the pvc pipe. But for now, you guys enjoy the bucket pics! -
Lee's Shore/Tank Trooper Build - WIP
Hikuro1983 replied to Hikuro1983's topic in Other 501st Costumes
Sorry it's taken so long to get back to you, I don't recommend gorilla snot, it doesn't hold very well to heavy objects like say a helmet or a blaster. I do recommend like what was mentioned, a super glue with an accelerator. I use a product I was introduced too at work called 2P10, it comes in a super glue with a large aresol can for the accelerator and does marvelous job at bonding almost instantly. I do recommend caution though when using it and to wear gloves.....it bonds to skin like no other. Thanks even though I've posted so very little progress. Thanks for the offer to help, we'll see how my pal Jeremie holds up, he's great at what he does but he's also a busy fellow. 3D printing has it's ups and downs but I'll be happy to help with whatever I can, but welcome to the crew! I'm still fighting my cold, but I'm hoping with a little luck I can show some progress on the E-22 rifle. It's mostly printed, just doing reprints for bad parts. I collected some inch and half inch pvc piping per instructions and some bolts. So all I need to do is start to slowly assemble it and paint it. I'll be out all day helping out with some stuff, and handing off the shoretrooper helmet to my pal so he can eagerly start getting to work. I've also decided under everyones advise to reprint the forearms, I'm looking at this like Halo armor which is really really really different from imperial stuff. So I'll be trying to make corrections to the measurements as soon as I can and begin reprinting once I've tooled with the file on blender. -
Death Trooper Armor and Helmet 3d printed
Hikuro1983 replied to DarthBeavis's topic in Other 501st Costumes
WOW, 100% infill? that's gonna be some serious weight on that bucket. Also a serious amount of filament taking in also the amount of support going on it as well. -
Lee's Shore/Tank Trooper Build - WIP
Hikuro1983 replied to Hikuro1983's topic in Other 501st Costumes
finished the helmet parts on tuesday, did a quick test fit, and things came out decent despite a few hiccups along the way. So the helmet will be going to a friend soon for final assembly and casting. Sadly though my adventure will come to a halt as I've gotten extremely ill since new years eve and haven't improved. Damn shame. But in the meantime since I can't really do much I just began building the E-22 rifle which will be a slow go. -
Lee's Shore/Tank Trooper Build - WIP
Hikuro1983 replied to Hikuro1983's topic in Other 501st Costumes
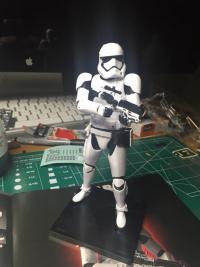
Not much progress can be posted at this time, except here I thought you guys might like this, My Endor gloves arrived today that were on sale. I'm really happy with the overall look right now, infact since I'm printing on white PLA I got more of a storm trooper look going on rather than a shore trooper but that'll change pretty soon. It's nice to see the overall appearance is coming together and I'm still no where close to finished. As for the helmet, things ar eprogressing well but I have no images to show off until sometime next week. Parts are taking a long time to print and I hit atleast 1 snag. The cheek parts are not really as printer friendly as I was hoping. Kind of had suspicion that they'd be difficult but yeah, I didn't want to come home to a bird nest of white plastic. With that I'll be printing again all weekend versus doing a test assembly. -
Got my black series amazon exclusive helmet for christmas, I dunno why but the shadow trooper helmet feels roomier than the standard, and the microphone worked just a bit better. I mean it was still crap but it worked just a tiny bit better.
-
Lee's Shore/Tank Trooper Build - WIP
Hikuro1983 replied to Hikuro1983's topic in Other 501st Costumes
wasted night of printing yesterday, several attempts went out the window, thought I had a good one so I went to sleep and woke up to a mess. Support fill snapped early into print it seems and part of the thinnest area of the helmet part started warping pretty badly. Looked like a few layers had been skipped over as well for some reason. I was pretty upset so I shut the printer off for the day and went to work. Got home a bit ago and looked some things over. Levels are fine, everything is for the most part fairly balanced and tight. No nozzle clogging. I think what was one of the biggest problems was my spool reel is to tight, so there are two options, one is tough the other is easy. I wanna get a new reel and downloaded a nice file, but half the model is a 38 hour print, that's most of my weekend. THUS I decided the easy route for now would work. Got some pam out of the kitchen drawer, sprayed and wiped it on the axle reel and inside the spool. Then I went and added an extra 10% of support fill and started printing. So far everything is looking good, there's a little warp at an edge because the area I'm printing right now is almost bigger than the print bed allows so it can't sit properly. I don't see it as a problem as it's only on the rafting side and the actual model seems to be alright, and so long as it stays I'll be able to fix it later during clean up phase. If everything works out I'll have a photo tomorrow to mark the progress. -
Lee's Shore/Tank Trooper Build - WIP
Hikuro1983 replied to Hikuro1983's topic in Other 501st Costumes
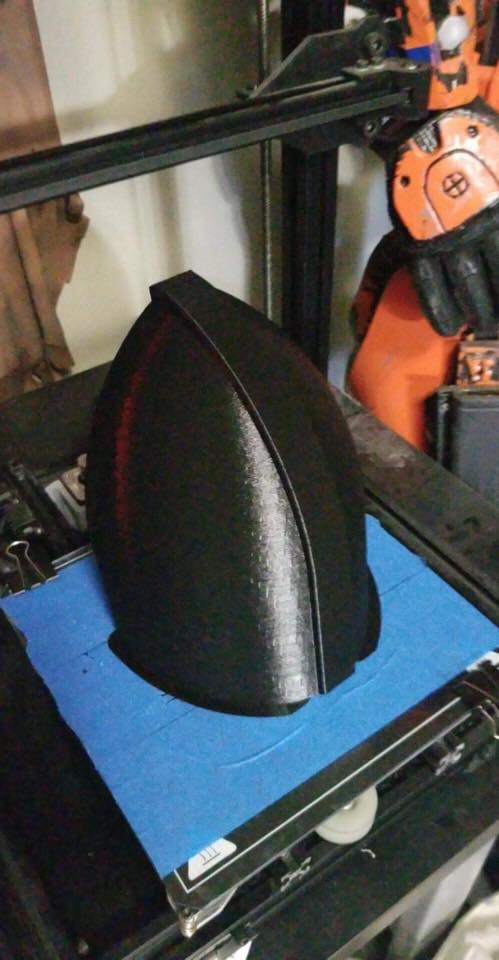
Last few days of progress, it's been a pain I've had a few reprints from early start up. Filament doesn't want to lay down correctly and kind of just strings around not sitting on the print bed the way it should. so it kind of looks like wheaties I guess you could say. As you can see up top on the right side or the helmet's left, the center dome didn't print very well, that's the bed printed side of the object....I think if I tried to reprint this whole thing it would turn out a bit different. Had a fear for the opposite end last night. A piece of the support structure snapped off cause it prints so thin. Today's print is a really large one, barely fits on my print bed....almost overhangs just a bit but in an area that should be safe. I had to reprint it twice from the beginning cause the strands don't sit in place. I reset my firmware an profile and tried again, looks like I can sleep with the way it is now, but I dunno. -
Lee's Shore/Tank Trooper Build - WIP
Hikuro1983 replied to Hikuro1983's topic in Other 501st Costumes
Depends on your settings. I'm on .06mm at 15% infill and I've gone through an entire spool of 1.75mm PLA on 2 forearms and hand plates. I'm now on spool #2 doing the helmet at .1mm at 15% infill and have done 3 parts so far knocking me down a third of my filament. It also varies on the brand you buy....so far my average cost per spool is 25 dollars, thus I'm in 50 bucks right now, and I got another 75 dollars worth sitting ready to go. So if you measure things out right, know if your settings are what you really need them to be.....I think you can probably get away with maybe 500 dollars worth of filament. -
Lee's Shore/Tank Trooper Build - WIP
Hikuro1983 replied to Hikuro1983's topic in Other 501st Costumes
I'm adding a shell thickness to a 2, which makes it pretty strong dependent on 1 factor, your print settings. For instance, the hand plates are strong, super strong, I can drop them and nothing is going to happen. My forearms, they're strong as well but if you apply enough force they'll crack and break. You can add fiberglass inside to add support if you want too, but it's really not needed. Now I'm doing the helmet, and that's something different. The shell thickness is the same, the print settings are the same as what I did with the forearms. BUT, because my level of print support isn't as great as I'd like, I have a few print errors which means it's no where near the strength level it should be. I could fix that later during the assembly process, OR I can reprint the part. I'm thinking for now I'll leave it alone and fix it during the assembly phase. Pal of mine and I are gonna try and create a casting mold from it, he's done it to a few of his 3D Prints and they look great compared to the old days of pepakura. Since Sean is very cool about what you do if you sell the molds give something back to charity, and that's what we agreed upon. There are numerous charities in our area and a couple really stand out to us that we've helped in the past. So that's probably what we'll do if the casts are successful and we decide to branch out and sell these to people whom don't want to go through the process. It's a wait and see thing right now. -
Lee's Shore/Tank Trooper Build - WIP
Hikuro1983 replied to Hikuro1983's topic in Other 501st Costumes
Look on facebook for Shoretrooper Fam. It'll be located on their pinned post. Two forearms and hand plates are complete Trying to start work on the helmet cause I need to mold it and cast it for myself and 2 friends for our armor....but the printer is having an issue. -
Lee's Shore/Tank Trooper Build - WIP
Hikuro1983 replied to Hikuro1983's topic in Other 501st Costumes
Yeah they're Sean's files, they're great, very well thought out and for the most part printer friendly. I've been printing parts all week but some of them fail due to a printer issue.....I think when that spool fell on my printer the other day it caused a slight print head issue and it's not laying filament correctly without a little help. Once the rafting is done it does a pretty good job after that. So when I get to these bigger parts I'll be a little worried. I have a Wombot Exilis XL. It was recommended by a friend of mine after he ditched his Robo3D for this. It does 50 micron on a 10x10x13 print bed and can handle PLA and ABS and with a few adjustments just about any kind of other filament like ninjaflex and such, but I mostly just deal in PLA, it isn't as picky as ABS can be, or as deadly fume wise. Sadly with the holidays and this project I don't have a lot of time to myself...I pull off a lot of hours as a graphic designer and photographer and come home and work on my next set of prints, but when I have a slow period after the end of this year, we'll talk. As for the prints, I completely finished a forearm and left hand plate, print quality looks great. Forearm is just a bit tight on the top but roomy on the wrist area. Handplate is fine, maybe a bit big but I don't see a need to reprint. I tried to do the right side this morning but when I came home the print pulled off.....that's when I noticed that my rafting layers aren't setting down correctly which makes me think the printer spool did some damage when it fell and knocked the head out of alignment. I might talk to my friend and see if he can look at it sometime. But as long as I lift the head slightly and let it do it's raft, the rest of the print works just fine. my work area is very cool though, they love seeing this stuff, even our store owner was swinging by and looking at this stuff wondering what I got cooking, even messed with a black series trooper helmet I was customizing. Won first place at a costume contest at work on halloween so yeah, get a kick out of it. Guy at work asked if I'd work on a shoretrooper for him while I'm doing this, honestly I don't see why not if he pays for his own supplies. I mean god its so much cheaper than buying a kit right now. -
Lee's Shore/Tank Trooper Build - WIP
Hikuro1983 replied to Hikuro1983's topic in Other 501st Costumes
Sounds cool and since you're also new, welcome to the darkside I'm in the outskirts of Woodburn. Tried joining the Cloud City Garrison but I have yet to hear anything from them which is a bummer cause they're doing a special screening of Rogue One tomorrow. I've read some reviews and talked to some friends who had horror stories about Do3D. Stuff like how there were hidden faces and back typography on some of their files, and when they would bring up there were issues whomever they talked too gave them a hard time and wouldn't fix the model. Speaking of fixing, I had a mishap today. When I got home from work the spool roller came undone and my spool fell, snapping filament at the base. I only had 10% left to go and my print would of finished. It fit fairly well, maybe a bit big. So I took it from a .88 to a .87, only losing maybe a quarter of an inch at best. I'll see how that comes together and test fit it with a long sleeve shirt or something to be sure, then print the next. To help prevent the roller from doing this again I zip tied both ends.....hopefully this will fix the problem until I create a new spool holder.