Jonnyboy0121
-
Posts
6 -
Joined
-
Last visited


-
Wow, huge difference. Thanks for the info!
-
Gotta love those doggy stormtrooper costumes!
-
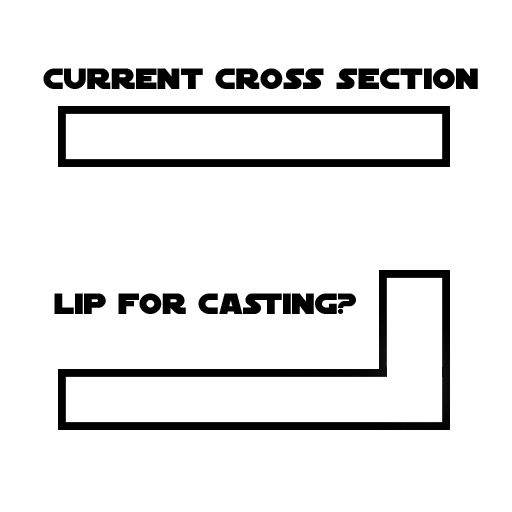
Thanks for sharing this, ask382. I had a chance to look at the helmet file and it actually appears to be very similar to the in one in fisherk's pepakura file link and is the one I'm currently editing to make printable. I think what I did was open the .PDO file in pepakura viewer and then export the .OBJ of that out. Here's kind of where I'm sitting at right now with modeling touch ups: I've been using a technique to smooth the model in 3ds Max called turbosmooth. It still needs a lot of work and I've only gotten the chest, helmet, back and shoulders bells about mostly done. I'm considering revisiting the models to either make them thicker or add that lip on the edges for easier casting... but we'll see. I may just go ahead and cast a small piece to see how it turns out or if I need to adjust my plan. Thanks for the tips TK bondservnt. I've been researching how to make molds and cast copies and what you suggested is part of my plan. I'm actually following a guy on youtube - Mynock's Den that has some great tips and tutorials. I plan on trying out his method to see if it'll work for me too: https://www.youtube.com/channel/UCrOtBpRxS9TBn2Nmv_QEYuA/videos Some of the finer details of molding and casting are beyond me at this early point but that is probably just a lack of experience. I assume once I try my first mold I'll learn a lot from it and be able to make more informed decisions on how I should print the armor.

-
Thanks so much everyone, I'll keep you posted on progress. I found the .OBJ file here: http://www.therpf.com/showthread.php?t=242693&highlight=fisherk2 I believe Fisherk2 used that ripped game model and went ahead to make a pepakura version of it. He was kind enough to share it as well: http://www.therpf.com/showthread.php?t=244012&highlight=fisherk2 I cross-referenced the geometry and it appears like the topology is the same as the ripped game model on all the pieces except the helmet. So I'm not sure where to give credit for that. The files aren't quite ready to be 3d printed and require a bit of rework just fyi. Hope that helps!
-
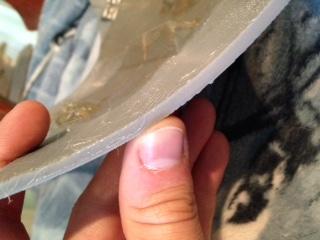
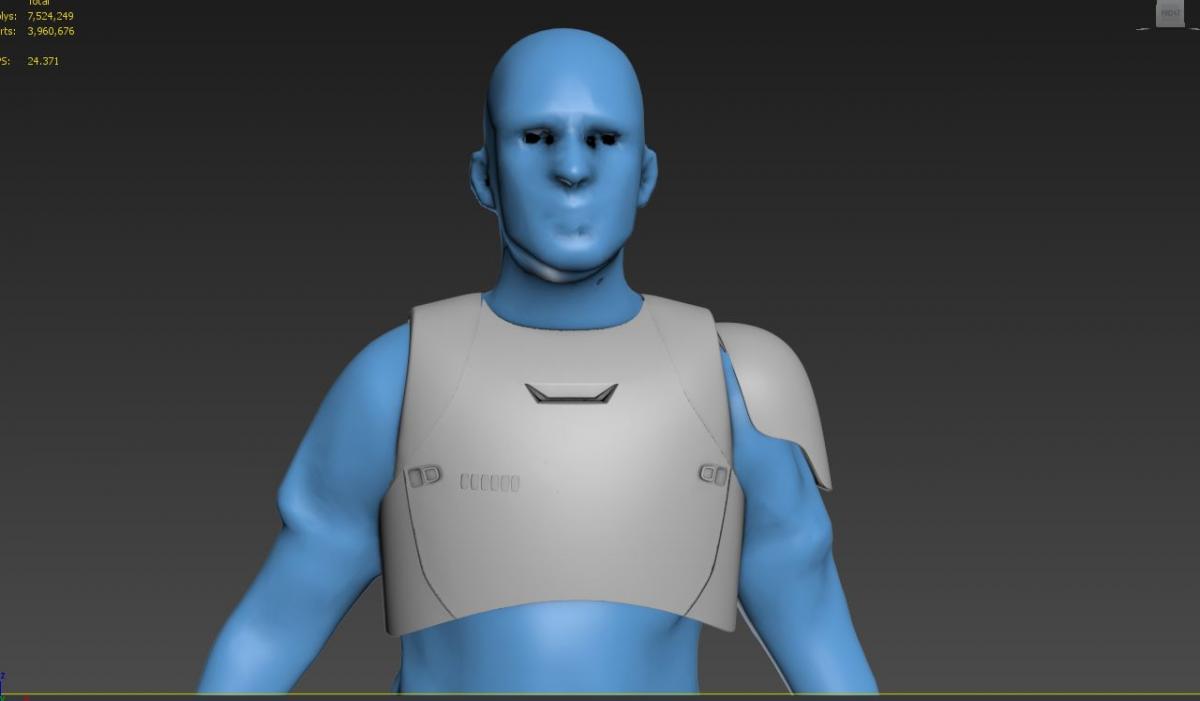
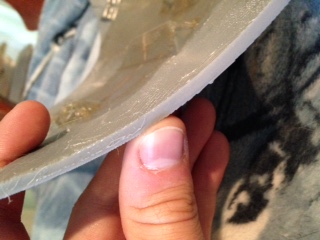
Hi all, First time poster here - I'm currently working on a extra small version of Stormtrooper armor. At 5'2 and 120 lbs I have enough trouble finding well fitting clothing as it is. So, I've decided to 3d print my own customly sized suit. I started from various files I was able to download on the RPF forums, which I believe were originally ripped from a Star Wars app. I scaled them down to fit over a 3d scanned version of myself, made them high poly and 3D printable and printed out so far the chest, back and shoulder bell armor. I'm wondering if anyone has input in regards to the fit of what I have printed. A 501st coworker of my thought it looked proportionally small on me but unfortunately doesn't have access to his armor for reference at the moment. What do you think? I have about a 1 to 1.5 inch of space inbetween the armor and my body. Also, I see that the common way of approaching the yoke is to combine the part that extends over the front of your body with the back piece with glue and bondo. I heard there are issues with that area of the yoke cracking and was wondering if anyone has attempted slush casting the back plate as 1 piece? Would that even be possible? Another question I have is molding itself. As I have it currently I printed the plates as flat pieces. I did this so the pieces would print quicker and use less material. But I'm wondering if what I should have done was model a lip on the edges of plates, so at least the edges would have a thickness to them when casting. My thinking is it'd make controlling the thickness of my slush casts easier as well. What do you think? My next steps I believe are resizing and reprinting. After that I plan on moving on to the helmet. Thanks in advance for your advice! Edit: added larger photos