SpiceCredits
-
Posts
354 -
Joined
-
Last visited
-
Days Won
9
Content Type
Profiles
Forums
Gallery
Articles
Everything posted by SpiceCredits
-

SpiceCredits ANH Stunt Build Thread [AP]
SpiceCredits replied to SpiceCredits's topic in Build Threads Requireing Maintenance
I found a perfect example in Centurion request showing how much to take off. Thanks for letting me know about that! That'll be done tonight! -
SpiceCredits ANH Stunt Build Thread [AP]
SpiceCredits replied to SpiceCredits's topic in Build Threads Requireing Maintenance
I appreciate the feedback and you checking up on my posts! Looks like you're the only one watching. lol -
SpiceCredits ANH Stunt Build Thread [AP]
SpiceCredits replied to SpiceCredits's topic in Build Threads Requireing Maintenance
Awesome. Will do! At the forearm dimple (1 of 11), the one closest to the wrist... How close to that do I cut? I don't trim so close that I cut into the dimple do I? Does the inside of the dimple stay surrounded by it's corners, or do I open into that with trimming. That's one thing that always seemed confusing or strange to me. I'll Check out some Centurion requests to get a better idea. Thanks for letting me know! I started to do it, but it felt awkward in my eyes. -
SpiceCredits ANH Stunt Build Thread [AP]
SpiceCredits replied to SpiceCredits's topic in Build Threads Requireing Maintenance
Ok, I finished trimming and sanding the left forearm, bicep, and shoulder bell. Afterwards, I tried both arms on in a rough tape-fit. I added detailed shots of the return edges this time. The right arm is basically the same in regards to return edges. Please disregard the outer bicep's top return edge. I took these pics before I trimmed it down WAY more. I thought having them bigger there would be OK since it wasn't seen and because is sorta cradled my arm more... BUT I notice it rubs this time AND I didn't even keep in mind that the strapping there would be problematic. lol Derp. Shoulder bell Forearm at the wrist Forearm at the elbow Bicep at the elbow Bicep at the shoulder Rough fitted with tape -
SpiceCredits ANH Stunt Build Thread [AP]
SpiceCredits replied to SpiceCredits's topic in Build Threads Requireing Maintenance
Sweet! Thanks again! -
SpiceCredits ANH Stunt Build Thread [AP]
SpiceCredits replied to SpiceCredits's topic in Build Threads Requireing Maintenance
Thanks for the suggestion on the stripe placement! Is that the same as using the pencil width method? In my head I feel like the templates may adhere closer to the ABS eliminating most bleed. I'm sure both will have their bleed though, like you said. Maybe I'll just save money on buying a template and use tape. I'll just pencil the decals I have on to the tape and cut them out as a template. Also, I saw on your thread that you had some issues with trimming a bit too much over your eye on your bucket. I did the same. It leaves a little gap between the lens and the top of the eye. I'm wondering if I should leave it as is, or whip out some more paste and gain some mm back. I'm not to putting the lenses on yet, so I'll probably send a photo once I get there and see what everyone thinks. -
SpiceCredits ANH Stunt Build Thread [AP]
SpiceCredits replied to SpiceCredits's topic in Build Threads Requireing Maintenance
Thanks so much! I was way nervous to do them, but the AP trim line for them is damn near right on! They were a task for sure, but not near as difficult as I had expected. -
SpiceCredits ANH Stunt Build Thread [AP]
SpiceCredits replied to SpiceCredits's topic in Build Threads Requireing Maintenance
Here's a quick question while it's on my mind. I'll be painting tube stripes this weekend… Does anyone have a preference between painter's tape for masking and the Trooperbay masking templates? Is one better than the other in regards to paint bleed, or are they about equal in that aspect? I'll be laying dow a very light (almost dry brush) amount of white as a base to help, and letting that fully set before adding the blue. -
SpiceCredits ANH Stunt Build Thread [AP]
SpiceCredits replied to SpiceCredits's topic in Build Threads Requireing Maintenance
Thanks! I've seen the velcro thing done on the clips as well. I think that's probably a good idea to add in the future as well. I'm pretty sure that will happen. I didn't think I wanted to use velcro for my shins (once I get there), but I am coming around to the idea more and more. So, I'll probably need some velcro anyway. The wrist's return edge has been removed as of now. I have maybe 3-4mm return on the tops of the forearms as of now. It doesn't catch a lot, but it just barely does. It looked like a lot of the reference images had pretty much zero or zero, and I have seen some other builds with guys my size having none, and it looks good. I like the idea of having some return edge there though. Maybe I'll keep it there for now (forearm tops and bottom biceps), and wait till I have both arms done and then see how it looks and feels after? I can always remove more later if I still feel the same. I'll be doing the left arm tonight, and I'll post pics of the return edges of the pieces. I'm going to make them identical to the right arm anyway. -
SpiceCredits ANH Stunt Build Thread [AP]
SpiceCredits replied to SpiceCredits's topic in Build Threads Requireing Maintenance
Here's my TD. I realize that the lighting above my dining table/workbench isn't very optimal for photos. I'll try to take more in natural light. Here's a shot right before the E-6000 and screws were tightened. Here it is all completed -
SpiceCredits ANH Stunt Build Thread [AP]
SpiceCredits replied to SpiceCredits's topic in Build Threads Requireing Maintenance
Thanks! I can assure you you'll be smitten. Hope yours makes it soon! Good luck to you also! -
SpiceCredits ANH Stunt Build Thread [AP]
SpiceCredits replied to SpiceCredits's topic in Build Threads Requireing Maintenance
So, I trimmed, fitted, and sanded the forearms, biceps, and shoulder bell for my right arm. Forearms and biceps trimmed to support 15mm cover strips. Afterwards, I decided to try on a rough fit of the full right arm with some tape. I think it's looking good, but would love some feedback. Sometimes you can see something differently when you're attached to it. lol I'm thinking of removing more return edge from the top of the forearm—probably to almost none…I don't like that the return edge catches just a bit when I bend my elbow. I'm also going to remove more of the return edge from the bottom of the biceps as well, think. Wrist's edge has been removed.Thoughts? Do I need to remove more? Feedback welcome. Thanks! P.S. Some pics may be blurry, due to the one-handed photographer. -
SpiceCredits ANH Stunt Build Thread [AP]
SpiceCredits replied to SpiceCredits's topic in Build Threads Requireing Maintenance
I'm currently fitting and trimming my forearms, biceps, and bells. More to come soon! -
SpiceCredits ANH Stunt Build Thread [AP]
SpiceCredits replied to SpiceCredits's topic in Build Threads Requireing Maintenance
I think that's what I am going to be doing as well. I'd have to agree with you 100%, and that's why I decided to start a thread here also. Plus, not everyone is as consistent with checking FB as they are here. There are just more people here and it's more TK specialized which will help out more. Thanks! Yea, I really wanted to do brackets, but with that edge and a couple other reasons, I thought snaps would be better and hold up longer in the future. I initially wanted a complete screen accurate armor only, but have changed my mind with all my research and for what I want to use it for. I'l just get it as close as I can, but also keep trooping in mind. I'm happy with my ears as well, thank you! I was really glad they came out the way they did for my first attempt. lol I was dreading it. Same for the paste job. lol I ended up having to repair a "butt crack" too. I was a tad too forceful when trimming my butt piece and i hd a small tear that I had to paste too. It also came out well and is not noticeable. It was tiny. I have since learned to be much much much more careful while completing my build. Yea, the nous has really saved me with fixing up those paste jobs. I fell like I am a pro at it now. LOL hopefully you don't have to ever need to do it, but it wasn't all that tough to do. Seriously, if I can do it anyone can! I'll definitely be posting here as I go. I planned on having the helmet painted and done this week, but I need to buy a few more brushes and some thinner. I have been shelling out money on this thing, and will need to wait till I get paid next before picking up a few more things. Not to all newcomers: Purchase as many supplies as you can while waiting on your kit! I wish I had. I thought I'd buy supplies in stages, but that didn't work out well and it causes me to wait longer. :/ -
SpiceCredits ANH Stunt Build Thread [AP]
SpiceCredits replied to SpiceCredits's topic in Build Threads Requireing Maintenance
And here I am fitting my ab and kidney plates. The return edge seems to be a little bigger than most here, but it helps it to be a little more snug and keeps me from cutting more from the ab and kidney...which I don't think is a good idea. The cuts are at red line as is. Also, I know this is such an image dump at the moment. I'll post more normally as I go. I just wanted to get all the images I had made up here while I was filling the thread out. -
SpiceCredits ANH Stunt Build Thread [AP]
SpiceCredits replied to SpiceCredits's topic in Build Threads Requireing Maintenance
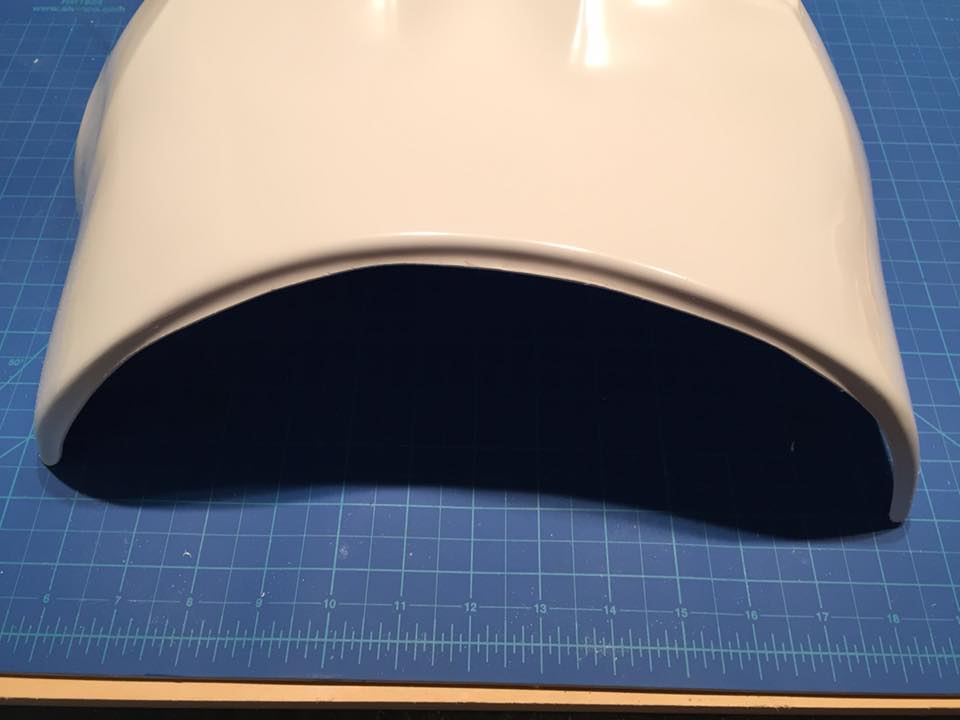
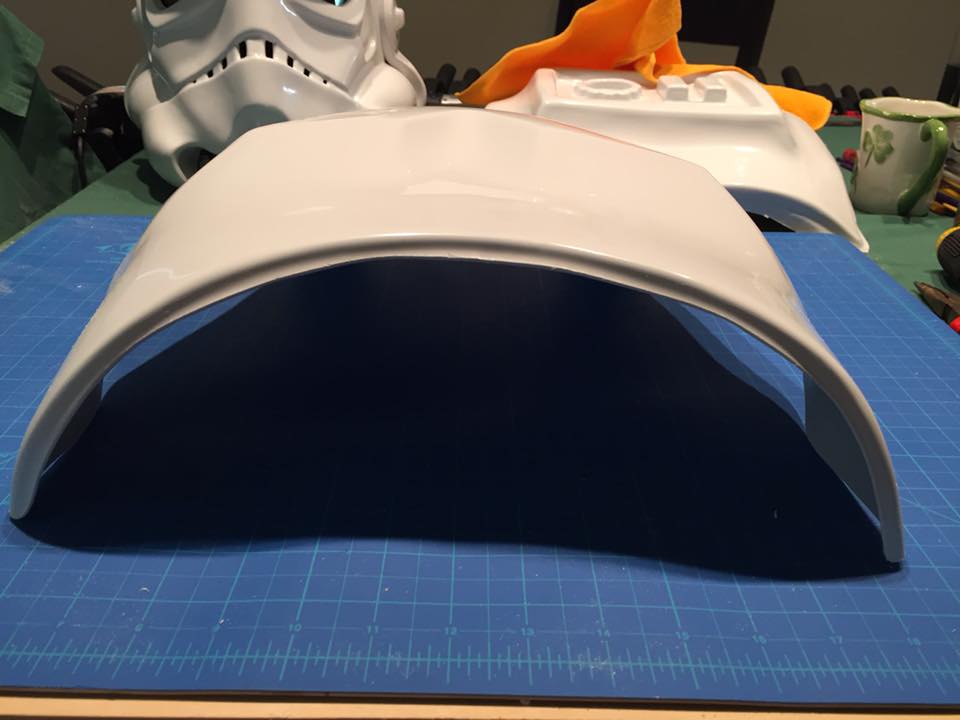
I trimmed out the chest piece, but the return edge seems pretty small (partly due to lighting), I've since gotten rid of most of the lip, while leaving enough return edge (5mm). I'll be using the snap method of assembly, so I don't think it's too bad. I was thinking of using brackets, but this has pretty much made my decision for me. lol I don't want to try it out with the return edge I have now. -
SpiceCredits ANH Stunt Build Thread [AP]
SpiceCredits replied to SpiceCredits's topic in Build Threads Requireing Maintenance
Here is a photo of my first layer of grey. I plan on finishing up the paint in the next few days. -
SpiceCredits ANH Stunt Build Thread [AP]
SpiceCredits replied to SpiceCredits's topic in Build Threads Requireing Maintenance
Next came the ears and mic tips… *Spoiler Alert: Lots of angles Front facing Front Left Front right Rear left Rear right And more detail shots… -
SpiceCredits ANH Stunt Build Thread [AP]
SpiceCredits replied to SpiceCredits's topic in Build Threads Requireing Maintenance
Thanks to DarkTrooper for setting me straight with photos. It should be smooth sailing from here on out. lol On to the good stuff. When cutting out the eyes, I had a skip with my Dremel and nicked the brow a little. I got real familiar with ABS paste, very early on. Luckily with the brow trim, it goes unnoticed. P.S. that was the last time I used the Dremel to sand. It's been hand sanding ever since. And the final result…this was my first time doing anything with ABS paste and wet sanding. I was pretty proud of myself that I didn't screw it up worse! lol -
SpiceCredits ANH Stunt Build Thread [AP]
SpiceCredits replied to SpiceCredits's topic in Build Threads Requireing Maintenance
Ah, ok! Thanks! I'll do that and then update everything. Thank you! -
SpiceCredits ANH Stunt Build Thread [AP]
SpiceCredits replied to SpiceCredits's topic in Build Threads Requireing Maintenance
Ok, so I feel pretty dumb right now. It says I only have 16KB left for images, and I barely have any on here. How am I supposed to post everything? Can anyone help me out by chance? Did I miss the instructions somewhere? -
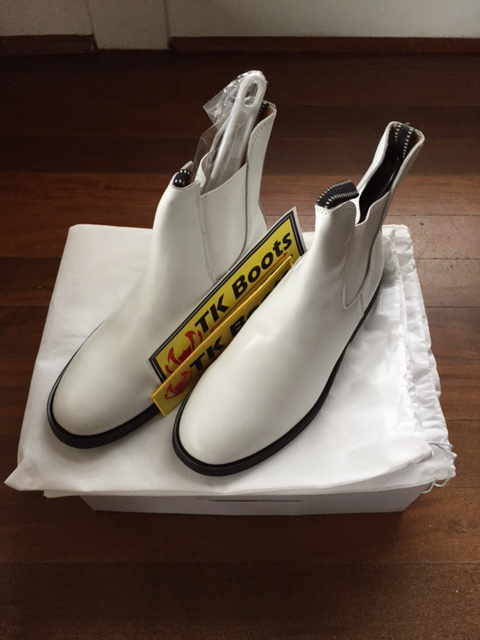
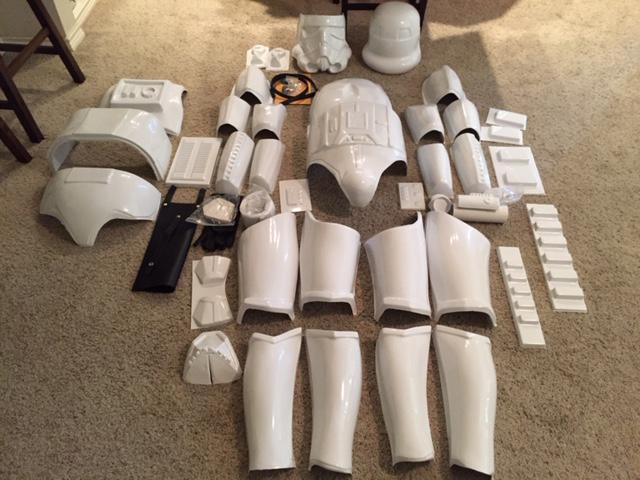
Greetings all! I've had my kit for a couple of weeks, or something like that. I initially wasn't going to create a build thread, and I planned on sticking to my garrison's Facebook recruit page for questions and feedback. However, I think having input from other members may be a great idea overall—more eyes, the better right? So here we go… Here's a little info on me and the build: Height: 5'9" Weight: 145lbs. Kit: Untrimmed AP (with Centurion in mind) Neckseal: Darman's Boots: TK Boots Ab Buttons: ATA (due to mistake) Centurion Level Rivets: justjoseph63 (Joseph) Thigh Garter: Pencap510 (Ty) Holster: AP (replacing black straps with tan) Supplies used thus far: Ruler Pencil Shop knife Lexan scissors (curved and straight) Dremel (drilling, one-time sanding) Sandpaper (Hand-sanding now) ABS paste (whoops!) Paint Brushes E-6000 Needle files Hand sewing Please feel free to ask questions, give feedback, and ask for any photos if you'd like to se something I am not showing. EDIT: I may be having trouble with getting photos on here, so bear with me. lol -------------------------------------------------------------------------------------------- BBB Day and my kit spread over my small one-bedroom apartment floor! Tk Boots arrived! Darman's neckseal keeping my neck warm at work.

-
AP Chest: Bottom Return Edge Issue
SpiceCredits replied to SpiceCredits's topic in ANH (Stunt and Hero)
Thanks guys! I appreciate the help and advice! I'm going to trim it down a little more and try to get rid of that lip. I think I should have about 4/5mm in the middle once done. Is it OK to have more edge on the sides and less in the middle, or should it be uniform around the entire bottom? -
Hi guys and gals! I was working on trimming and sanding my chest piece when I noticed this problem. I thought I would ask you guys what you thought before doing any damage. It seems that I may have a problem with return edge thickness once I remove the lip from the remaining flashing here. I don't think I'll have enough meat left to assemble brackets, so I'm going to go with snaps instead. If I remove this lip, will I still have enough return edge thickness for it to look good? I also read having 6-8mm of edge is the norm. Can anyone confirm? Has anyone had a similar issue? I don't know how much I trust myself to use heat either, so I am hoping all can be saved. Thanks!!!


-
Same here and CANNOT WAIT!!