


jamo
-
Posts
28 -
Joined
-
Last visited
Content Type
Profiles
Forums
Gallery
Articles
Everything posted by jamo
-
 Requesting clearance - TK11500 - Jamie Milner from the Southern Cross Garrison https://www.501st.com/members/displaymember.php?userID=21760&costumeID=124 Sent from my iPad using Tapatalk
 -
That is the one. Thanks for the advice Joseph, it is very much appreciated Sent from my iPad using Tapatalk
-
Thanks for the reply. Dimensions are the key, and based on the tutorial by ukswrath, the dimensions should be roughly 22" x 15" x 4" (in metric, 560mm x 380mm x 100mm). I guess I'm really asking what is the tolerance level on these dimensions?? There aren't many oil drain pans available, so I'm also looking at options of slimline jerry cans, and other water/liquid containers. Sent from my iPad using Tapatalk
-
Well done Matt Sent from my iPad using Tapatalk
-
Hi, I am in the process of converting from an approved ANH Stunt to HWT. My main problem is the back-pack. I am located in Australia and the Wedco oil drain pan base is not available here (unless prepared to pay for extremely high shipping rates from overseas). As an alternative, I'm looking at the locally available products and the only one I can find is the Toledo brand. I would appreciate any advice on this as an alternative, or if any other local FISD members know of a better product from Australian based suppliers. Jamo Sent from my iPad using Tapatalk
-
Posted on the Southern Cross Garrison forum earlier today was an explanation that Anovos is still negotiating a shipping deal for Aus/NZ and when this is done they will announce in a newsletter. Sent from my iPad using Tapatalk
-
Building an MTK kit for a TK. From the photo below have I got the shins correctly matched for the inner and outer right leg and left leg?
-
Jamo's ANH-S TK (first) build [MTK]
jamo replied to jamo's topic in Build Threads Requireing Maintenance
Thought that may be the case, so thanks for confirming it. Cheers! Sent from my iPhone using Tapatalk -
Jamo's ANH-S TK (first) build [MTK]
jamo replied to jamo's topic in Build Threads Requireing Maintenance
More pics: Comments?? suggestions?? -
Jamo's ANH-S TK (first) build [MTK]
jamo replied to jamo's topic in Build Threads Requireing Maintenance
Thanks Sent from my iPhone using Tapatalk -
Some action shots: I love the z-6 rotary blaster cannon - now that is a bfg. Has anyone considered this character for costuming? The variances I can see are the 2-sided black pauldron, black forearms, black greaves, black boots, black ammo belt, pouches left and right hips, and the 2 x vertically mounted thermal detonators, with no backpack. I'll try and get a close-up shot of the 2 x detonators from behind.

-
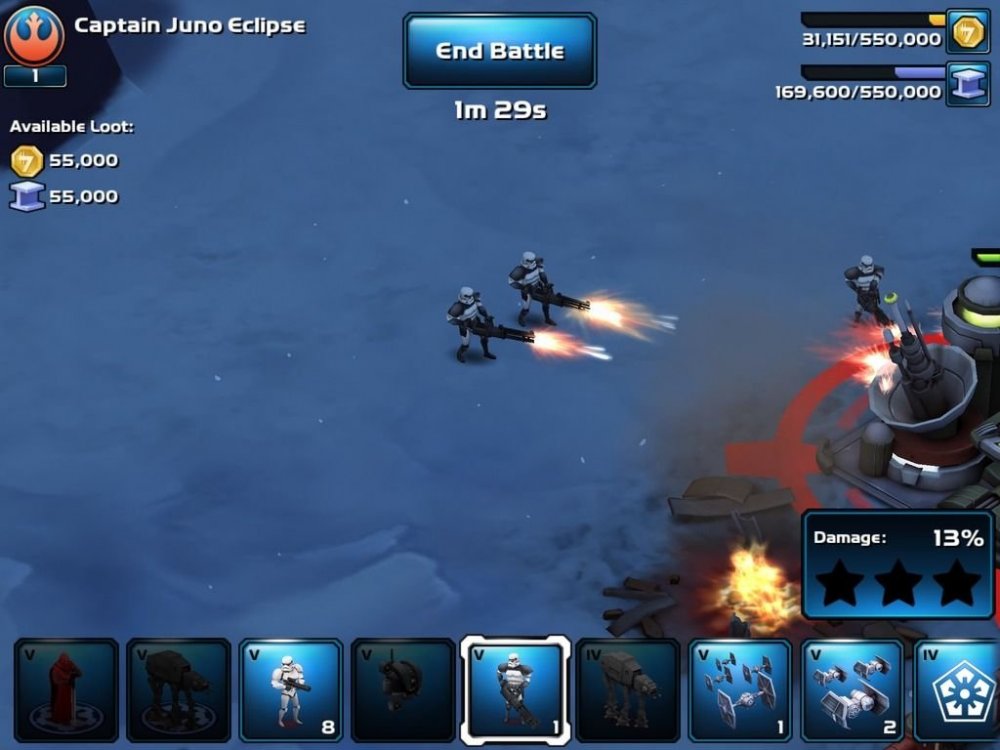
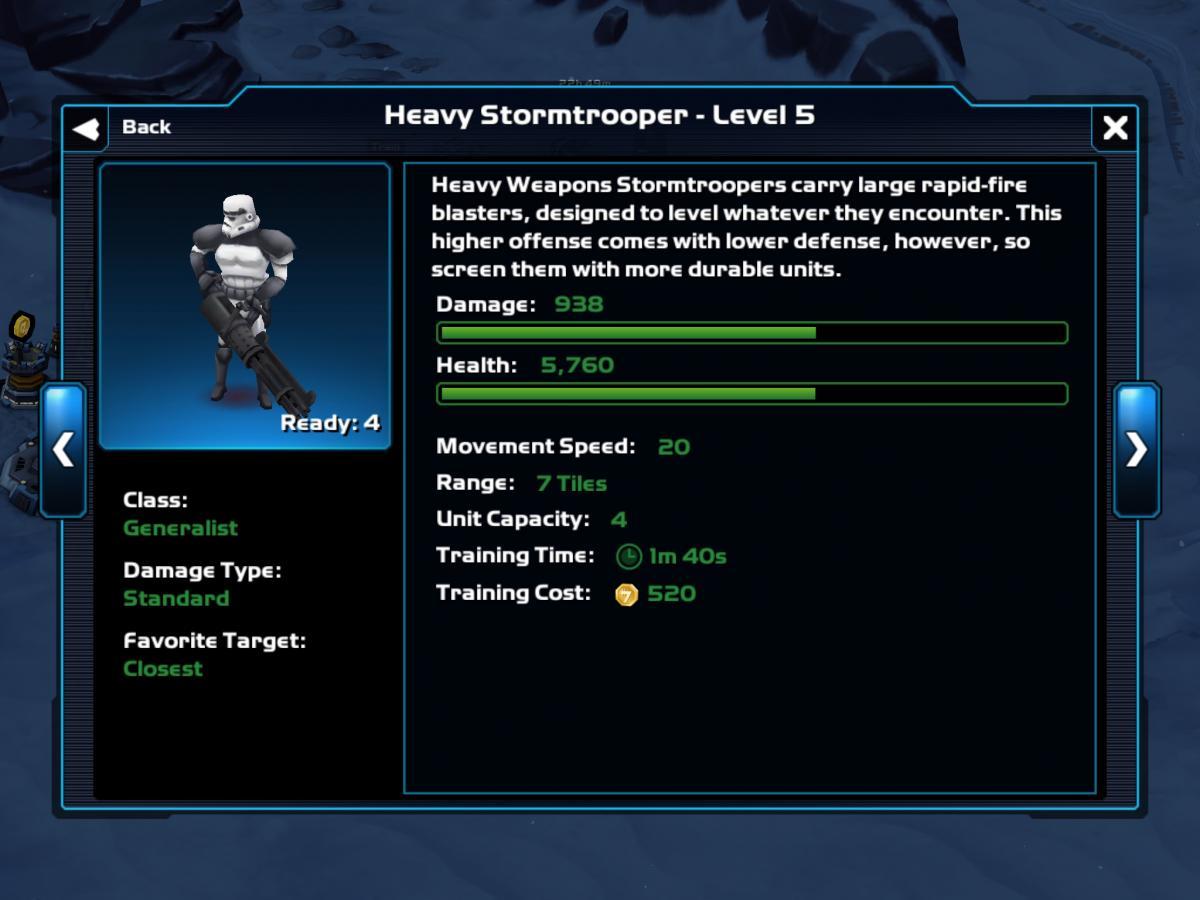
Has there been any discussion on a new variant of the HWT? It comes from the game Star Wars: Commander (released in 2015), and is called a Heavy Stormtrooper.
-
Jamo's ANH-S TK (first) build [MTK]
jamo replied to jamo's topic in Build Threads Requireing Maintenance
It has quite the hiatus since I last posted - well being busy with work, family, etc certainly does slow down the armour building. But recently I have been hard at it, so here come some pics: Completed 'clam-shell' Left Side rivets inside view of the rivets Right Side Snap Cod rivet Butt plate snaps I've also finished (but not photographed yet): - the shoulder bells (elastic strap around the bicep has been glued in, next to glue is the elastic that connects to the shoulder - you can see these pieces of elastic in the 'clam-sheel' photo) - the biceps, inner piece glued to outer piece for both left and right with cover strips and extra internal strips, just need to make and glue in the 'hook' that hooks onto the shoulder bell elastic - trimmed the forearms ready for glueing the cover strips: here is where I have a questions about sizing as I have skinny forearms and plan to glue in foam to stop the forearms pieces moving around, but how much foam is too much? - trimmed down the ammo belt piece -
Jamo's ANH-S TK (first) build [MTK]
jamo replied to jamo's topic in Build Threads Requireing Maintenance
Looks good. No Walmart here in Australia, but the equivalent to your home depot stores (bunnings) should have something. -
Jamo's ANH-S TK (first) build [MTK]
jamo replied to jamo's topic in Build Threads Requireing Maintenance
Back to work on the torso. Trimmed up the top edge of the ab/cod to about 10-12mm and then the bottom edge of the chest plate to 10-12mm. Located and marked the centre bracket location on the chest, and transferred this to the ab/cod. Drilled and then fitted the brackets. Side brackets will go in once the ab/cod is trimmed at the side. So taped it up for the time being. pic on the inside (note the part optic illusion) pic on the outside OK. So, now time to get serious. First fitting to check out how the armour is 'hanging' and what the sides look like (I was expecting a lot of trimming).... Yup ... lots of trimming!!! IMO - the ab/cod has a lot to come off. Normal technique seems to mean it comes back so that the butt line flows upwards and continues. But (no pun intended) the butt plate is looking/feeling big on me. Options: do nothing, or mod the butt plate. I'm thinking the join line, and butt plate edge needs to be like this. Maybe even a little more - help please! Also, I think the butt plate needs some head treatment to make it contour to me a bit better (the side wants to flay out) and also the edges between the kidney and butt are not quite sitting together well enough, some more heat there too I guess. Not sure whether to keep on trucking ahead on my own or sit out and wait until an upcoming build weekend involving members of the local garrison...... -
Jamo's ANH-S TK (first) build [MTK]
jamo replied to jamo's topic in Build Threads Requireing Maintenance
Thanks Joe. I still have one end open and haven't trimmed the belt to length yet. Will try and find something that I can slide through as an insert, maybe a PET type material, or very thin ABS. Ideas?? -
Jamo's ANH-S TK (first) build [MTK]
jamo replied to jamo's topic in Build Threads Requireing Maintenance
Forgot to post up these extra pics whilst I made my belt. Started out with about 0.6m of "pop top" - cotton drill fabric. Measured out 3 x 3" doubled over sections (making 3" wide x 6 layers). (notice the excess on one side - I'll get back to that in a second). Cracked out the wife's sewing machine and off I went stitching an edge to each side. Once stitched I then trimmed the excess from the side - giving a frayed edge look to one of the edges. Final measurement - it comes in over 80mm but under the 83mm max allowed under the CRL. -
Jamo's ANH-S TK (first) build [MTK]
jamo replied to jamo's topic in Build Threads Requireing Maintenance
Thanks Scott, I've always liked the look of the brackets and read favourable comments on them, so went for it. And sourcing from Mr No Stripes meant that the brackets are nice and consistent in size and shape. -
Jamo's ANH-S TK (first) build [MTK]
jamo replied to jamo's topic in Build Threads Requireing Maintenance
I should also add that I felt I needed to leave some extra room for the L & R sides at the kidney to butt plate connection, so moved the brackets here inwards by some, in case I need to trim the sides down even further. As this is a first build, this aspect to fitting the armour is a difficult one for me, and I've found it a little hard to ascertain from photos. I'm hoping to meet up with the local garrison soon to get the required help. -
Jamo's ANH-S TK (first) build [MTK]
jamo replied to jamo's topic in Build Threads Requireing Maintenance
Time to post some more progress. Pics from the trimming process: back plate back plate edge Inside view - kidney and butt Chest Chest edge Ab plate Ab edge Cod area inner biceps inner bicep edges outer biceps shoulder bells shoulder bell edge These are all the initial trims - each edge needs to be adjusted to the required size, which I am basing from here: http://www.whitearmor.net/forum/topic/20366-size-of-return-edges-on-the-chest-ab-and-kidney-plates/ That trimming was last weekend, and this weekend I spent time reducing the edges down on the back plate, kidney plate and butt plate in preparation of fitting the brackets and elastic from Mr No Stripes. The completed pics are below: Also, as can bee seen from the first pic of the strapping system, I glued on the 2" wide white elastic at the top of the plate that will connect with the top of the chest plate. -
Jamo's ANH-S TK (first) build [MTK]
jamo replied to jamo's topic in Build Threads Requireing Maintenance
Thanks Jason. Will change the arms and legs in the build sequence. I'm definitely taking my time where trimming areas that affect the overall fit - i'm a skinny guy so in the end I think there will be quite a bit coming off, but I am going to trim less at first and, if needed, then trim some more until it feels right. -
Jamo's ANH-S TK (first) build [MTK]
jamo replied to jamo's topic in Build Threads Requireing Maintenance
First task complete - taking inventory: I'm planning on carrying out the build in the following sequence: Torso: ab plate, chest plate, kidney plate & butt plate Ammo belt, TD, drop boxes and holster Thighs: thigh guards and thigh belt Shins: shin guards, knee ammo pack and sniper plate Arms: biceps, forearms and shoulder bells - then attach shoulder bells to the torso Helmet Handguards Does this sound like a good plan? -
Jamo's ANH-S TK (first) build [MTK]
jamo replied to jamo's topic in Build Threads Requireing Maintenance
Thanks guys, caution acknowledged - I'm planning on using the E6000 extensively for cover strips. If I find that I build my confidence during the build the zap-a-gap might get used for other things later on. I'm also going with the wire system from Mr No Stripes for the torso parts. -
Hey everyone, I had my big brown box delivered this morning. Yay! Obligatory box photos below: Supplies are ready to go: This will be my first ever TK armour build - ANH-S (NB: in future I will be considering a HWT conversion).


