


mitcheg1
-
Posts
243 -
Joined
-
Last visited
-
Days Won
3
Content Type
Profiles
Forums
Gallery
Articles
Media Demo
Posts posted by mitcheg1
-
-
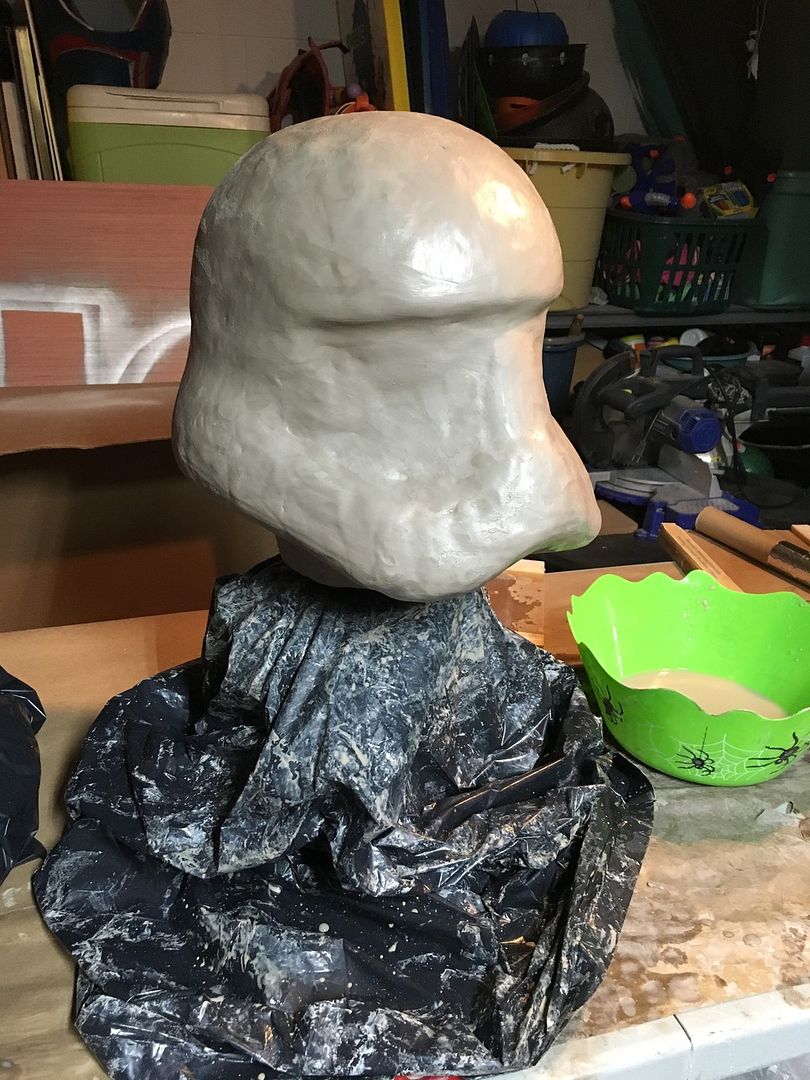
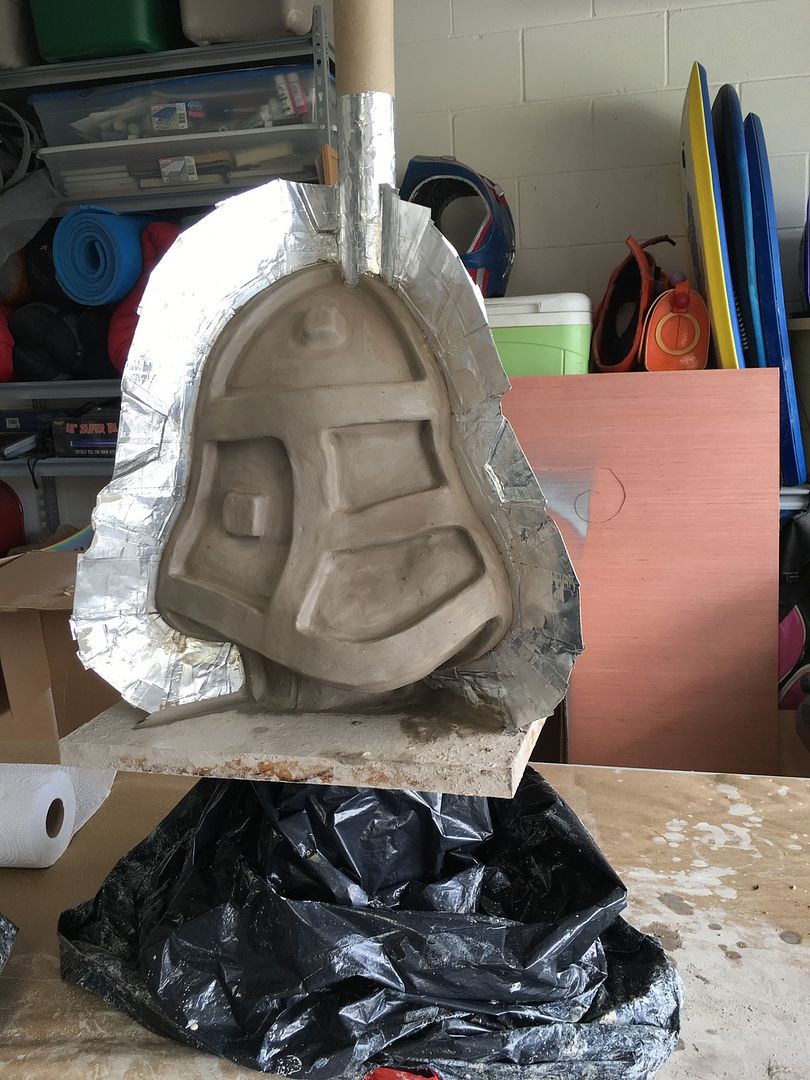
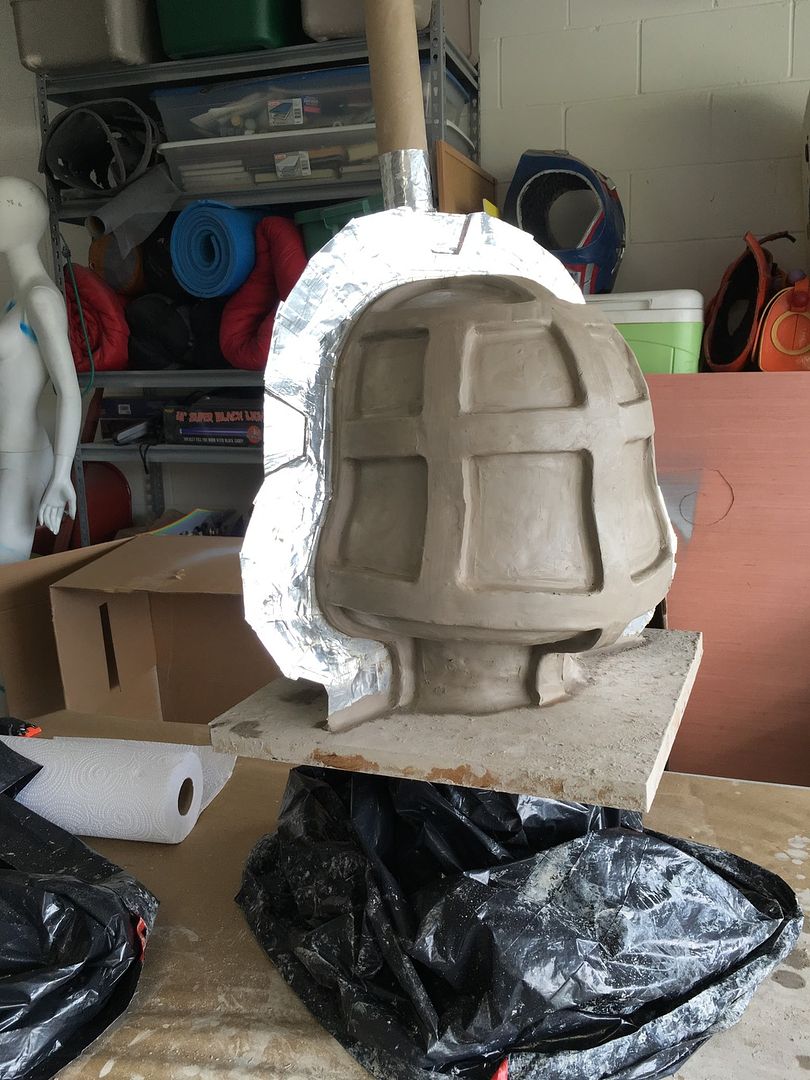
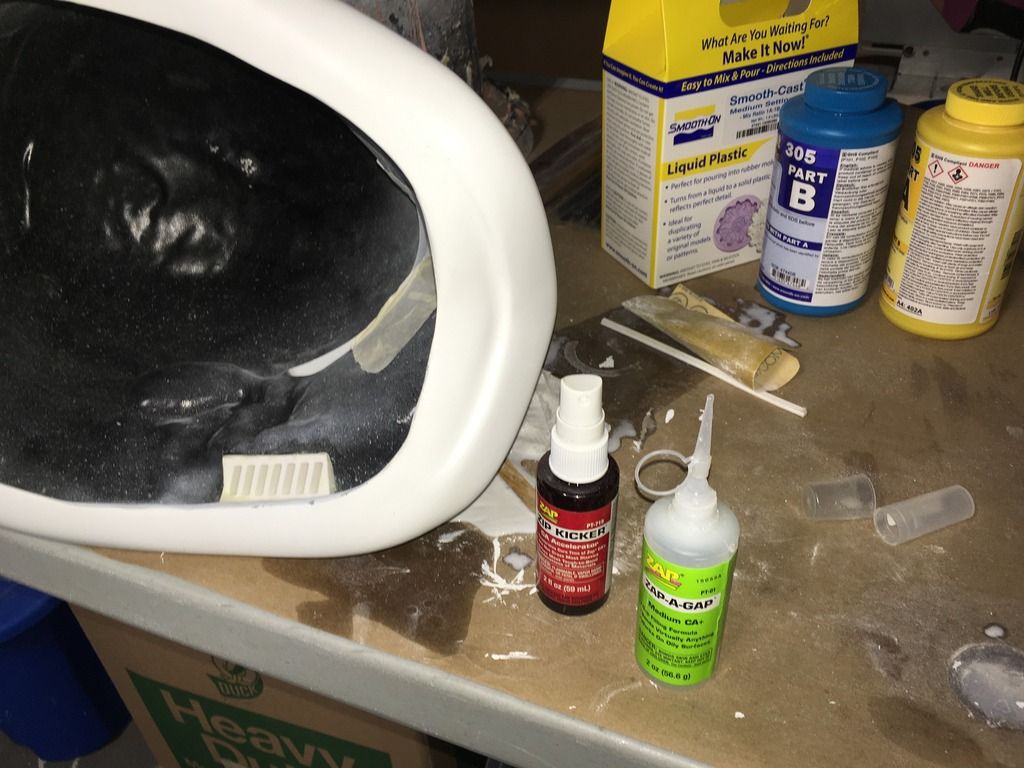
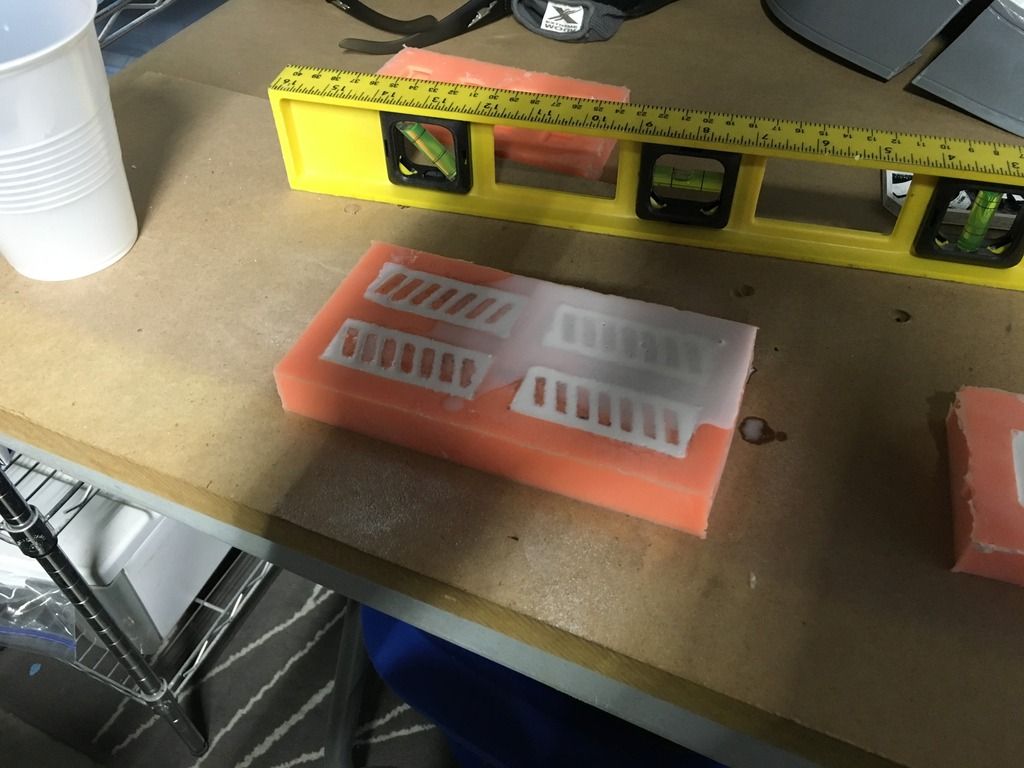
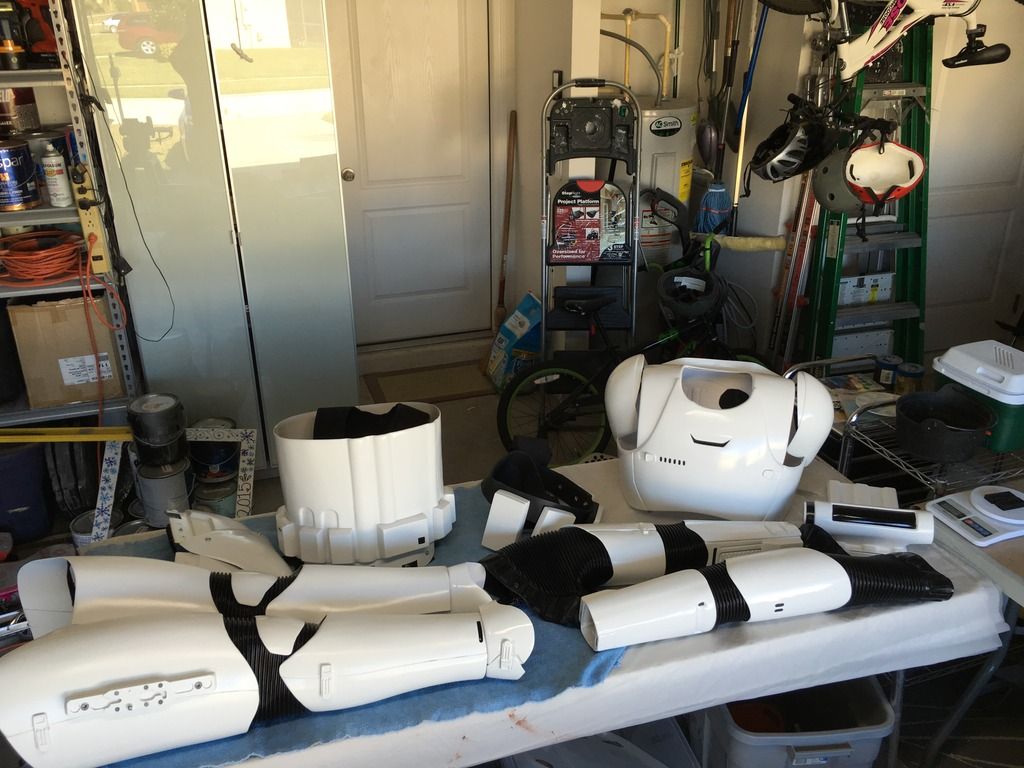
Now that I've upgraded my bucket decided to try my hand at something new! Matrix mold! I followed Sorenzo Prop's tutorial on Youtube. Hopefully this will resolve several of the mold imperfections I've struggled with.
https://www.youtube.com/playlist?list=PLNg7kAd_NUwsQ4wcjLSpVqZFaeY7Q9uqp
-
 1
1
-
-
Check out my accuracy upgrade thread.
Mitcheg1 Bucket Accuracy Upgrade
http://www.whitearmor.net/forum/index.php?/topic/36121-Mitcheg1-Bucket-Accuracy-Upgrade
-
I will post a finished pic once I've painted my bucket.
I've been asked about making the blocks available and am willing to do so. PM me if you're interested. I'm looking at $7.50 shipped in the US, which pretty much covers the shipping cost.
-
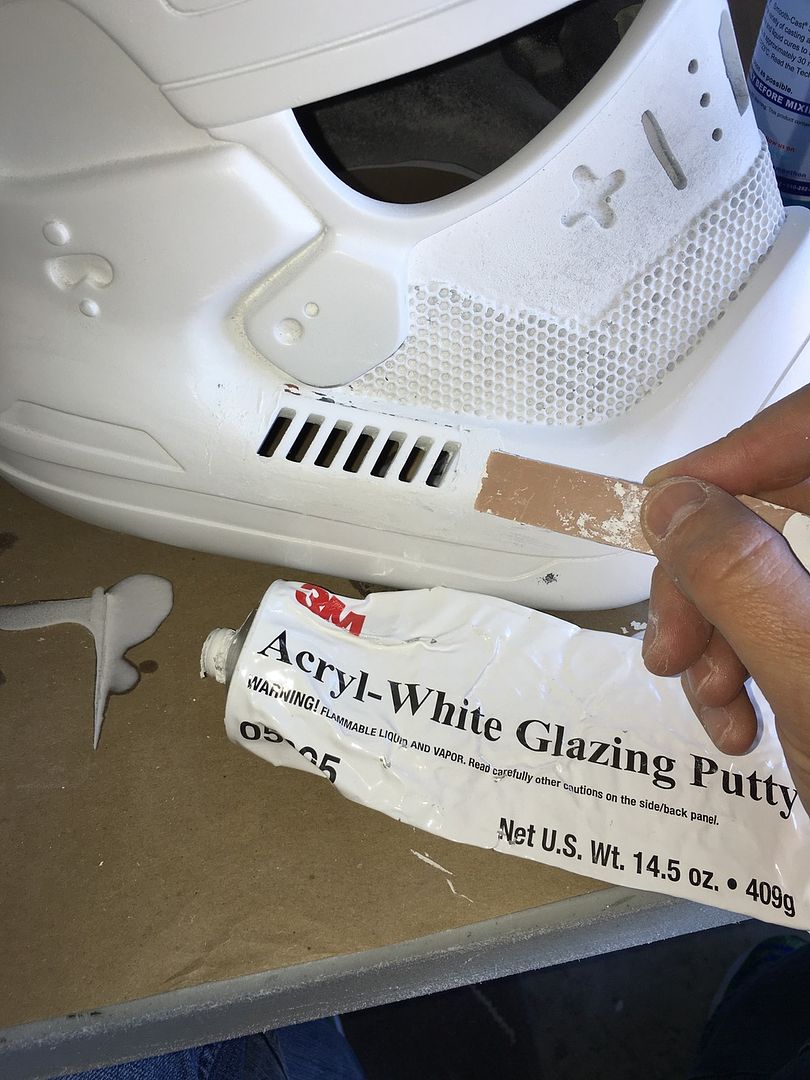
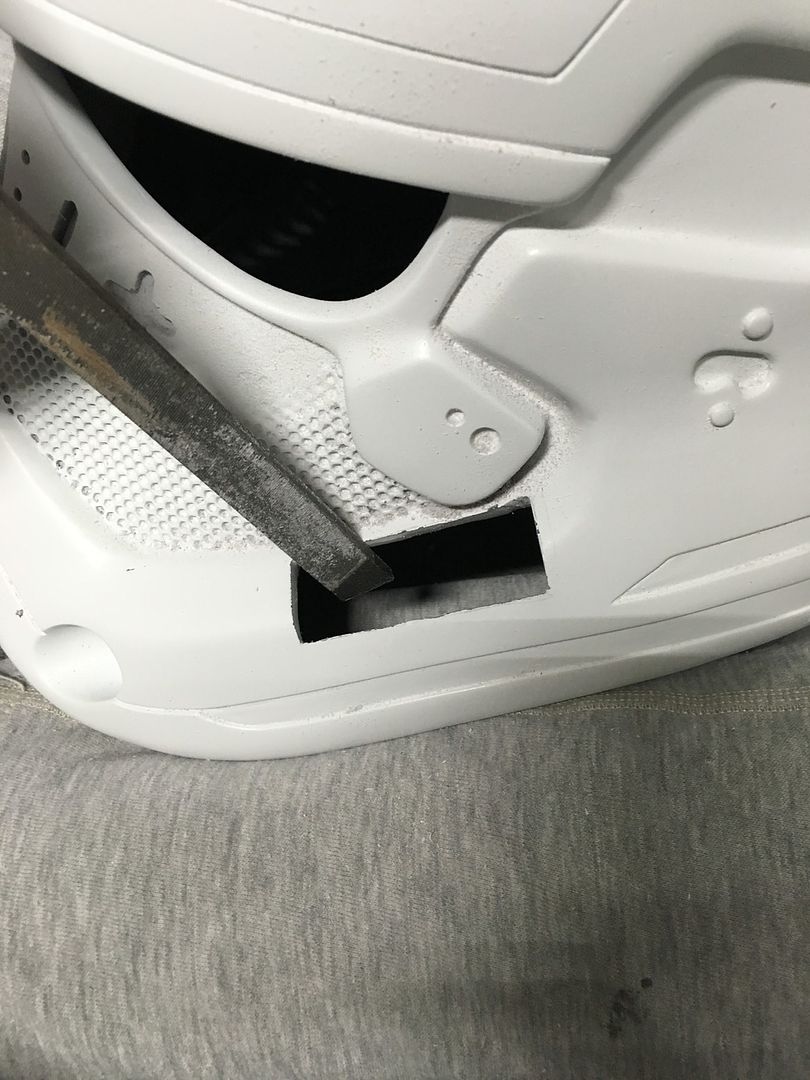
Once the block fits snuggly, I make sure it aligns with the original curves. This means the back end should be fairly level with the helmet, the front side will sit high and the block should be tilted to be parallell with the original surface that the stripes were in.
Once I was happy with the alignment, I use CA glue with kicker to secure the block from the inside of the helmet.
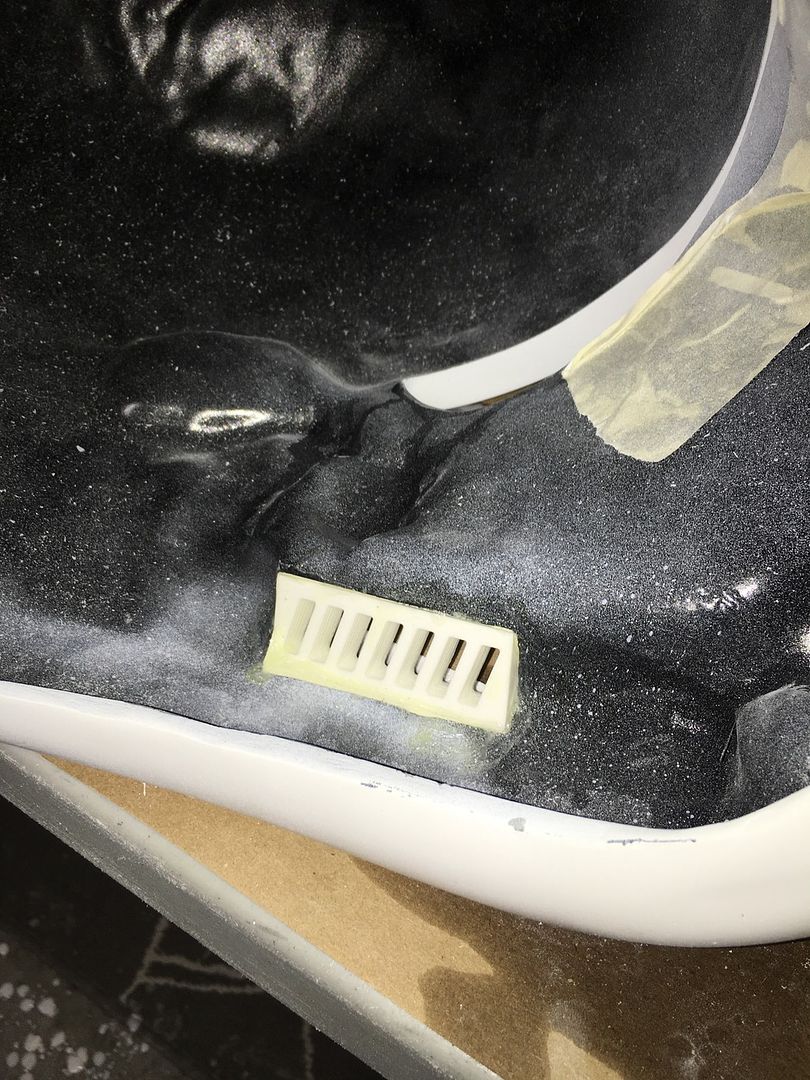
Once the glue has cured, it's time to use the mouse sander to restore the shape of the helmet.
My sander did the majority of the work, but I did have to switch to hand sanding with 100 grit and a popsicle stick to get a smooth transition.
There will be small gaps between the block and the bucket, but there shouldn't be a step. Finally, I use glazing putty (3M acryl-white glazing putty is my favorite) to fill the gaps and sand to smooth.
-
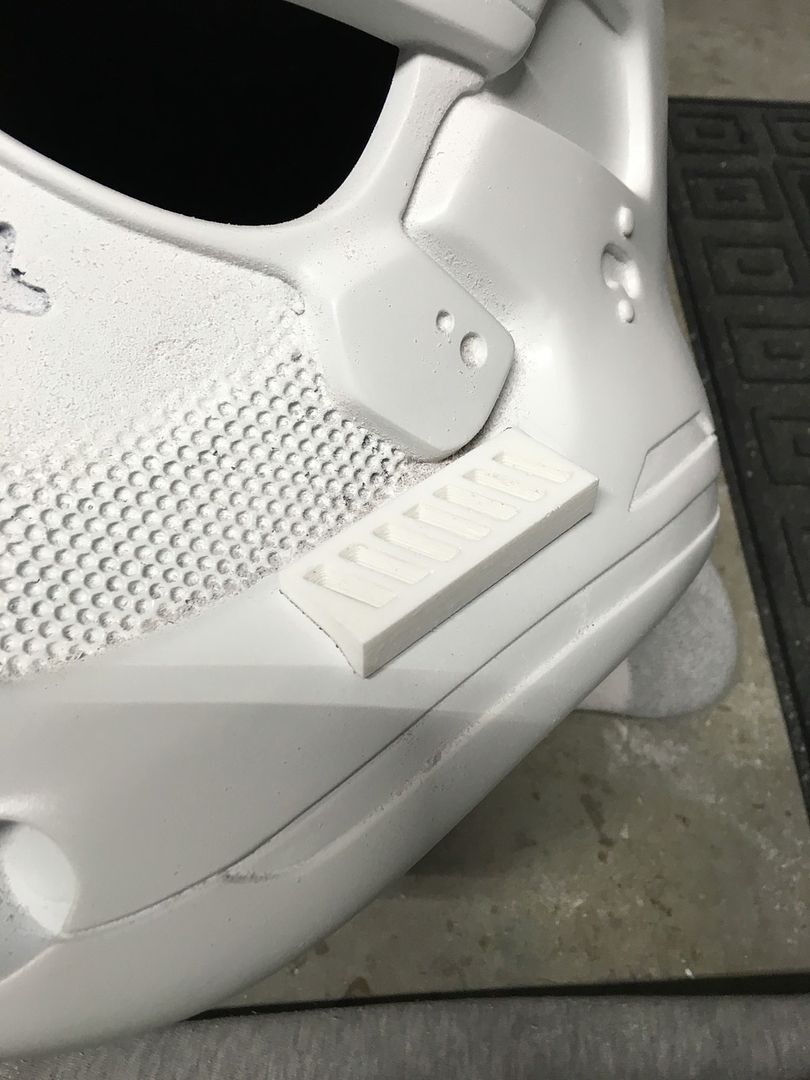
Once I had the parts molded, I used my belt sander to clean-up the sides, including top and bottom. I aligned the kill stripe blocks with the helmet and traced the outline so I knew what would need to be removed.
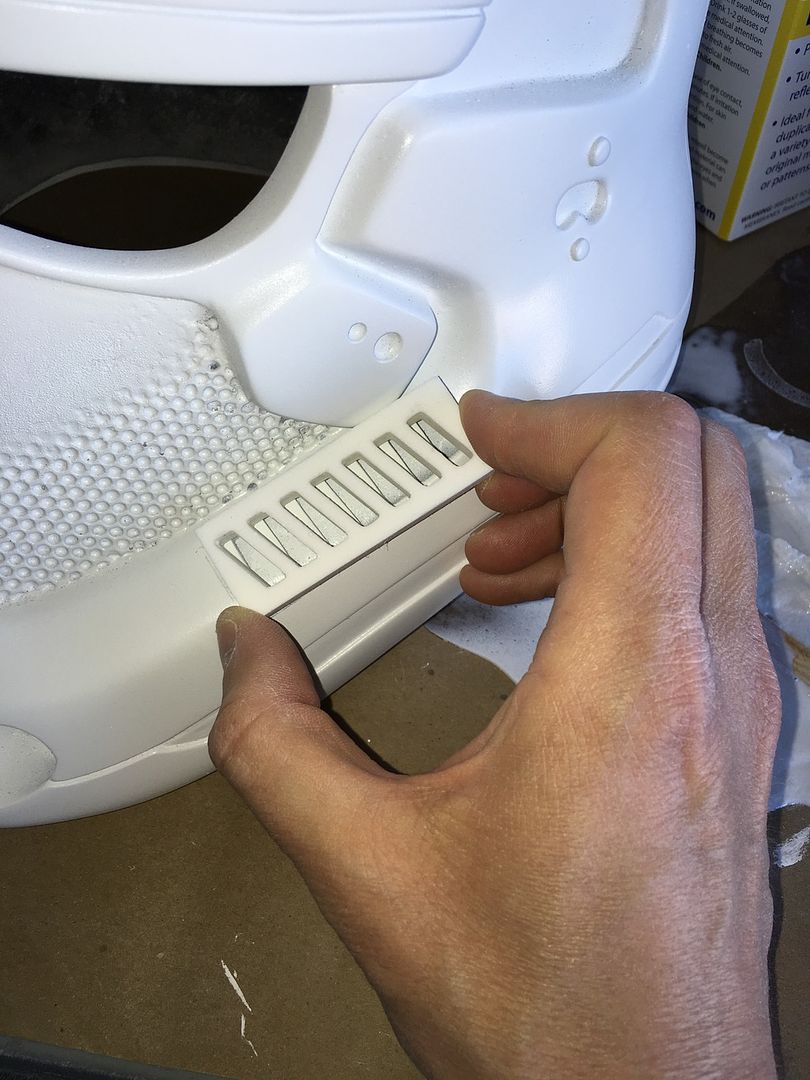
My favorite tool for this kind of work is my dremel with an end mill style bit.
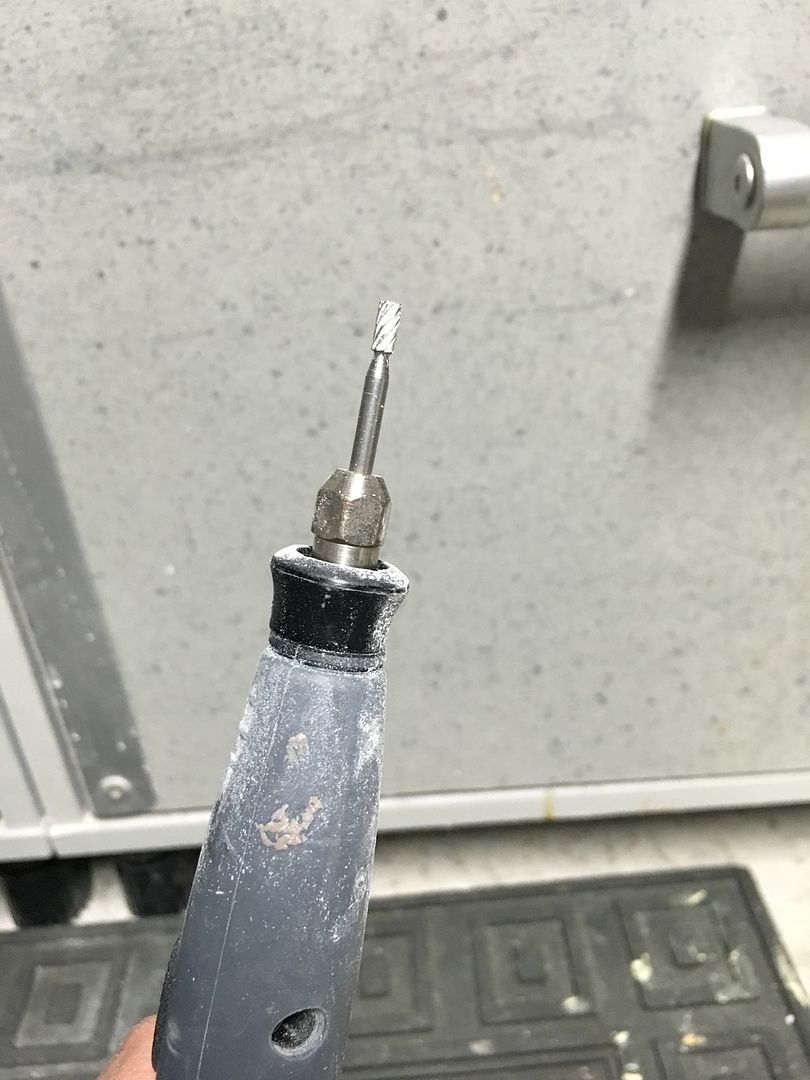
Using the dremel, I remove the majority of the material, but don't cut all the way to the line.
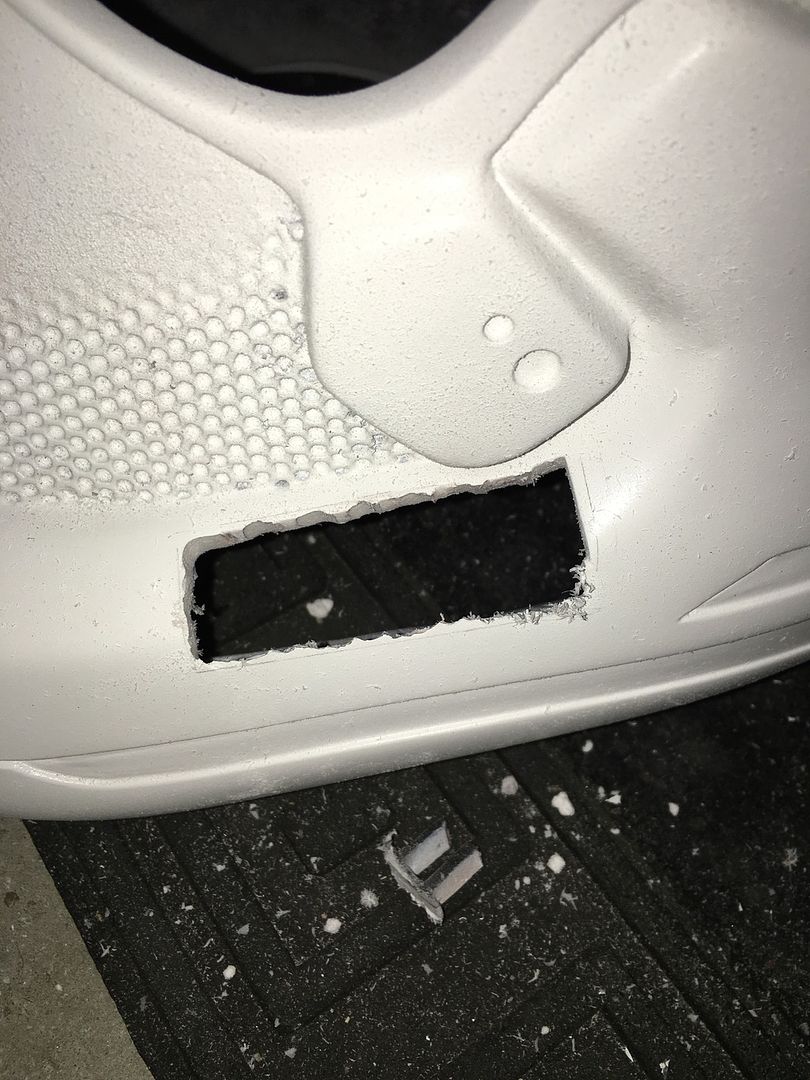
I use my files to get a clean edge and continuously check to see if the block will fit into the new space. FYI, it should be a very snug fit, so I don't file away too much!
Note: I did go back to the belt sander several time to get the fit I wanted without removing too much of the helmet.
-
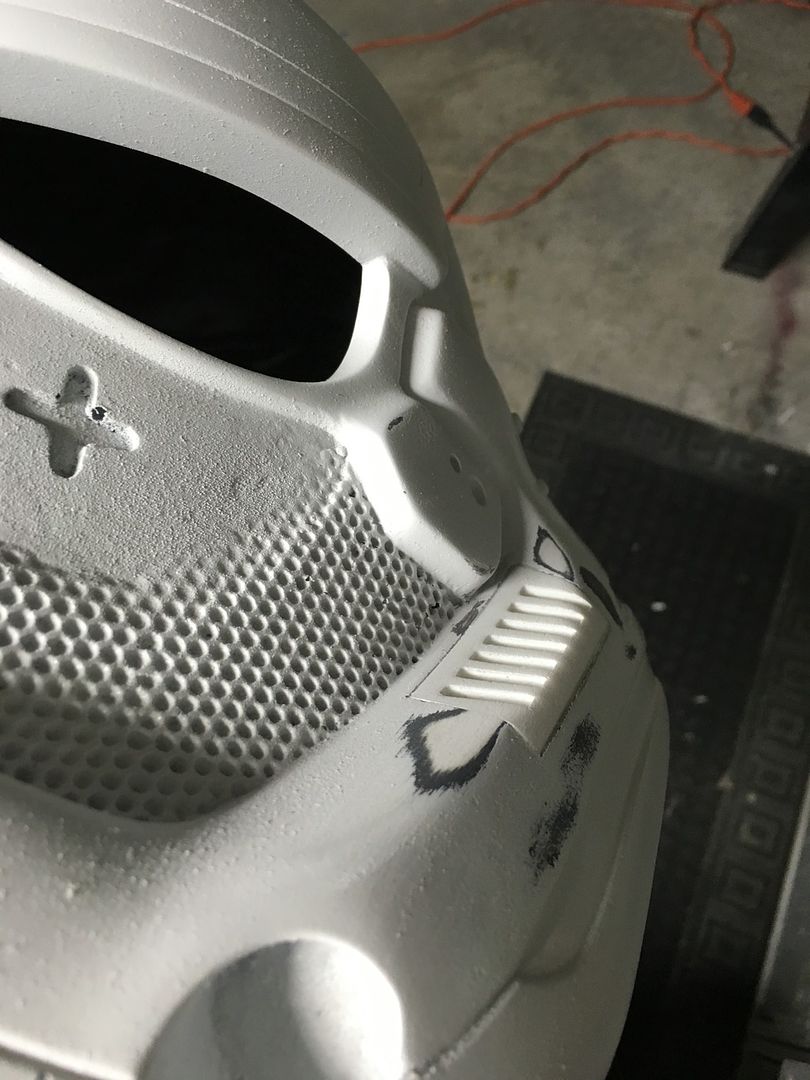
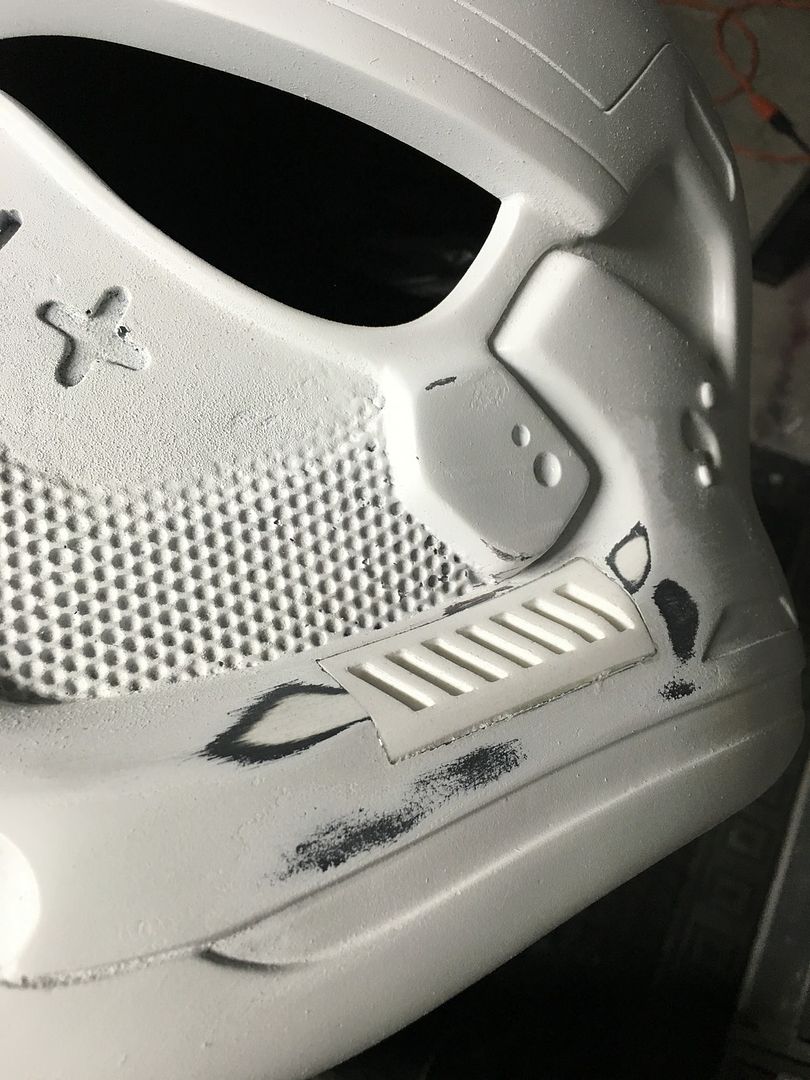
Since the release of TFA, I've been bothered by the fact that the kill stripes on my bucket are at more of a right angle, while the TFA bucket's are more oblique.

So I decided to make the following modification. I designed and 3D printed a simple block with the kill stripes, then created a mold and cast them in Smooth-Cast 305
-
Most likely I will. Nominal fee plus shipping. I will post detailed pics once I finish my bucket upgrade.Looks good bud. Will these updated kill stripes be made available? And how did you go about cutting and gluing in the new stripes?
-
Had to make a minor edit to my profile pic!
The Empire is dead! They failed. The First Order will bring order back to the galaxy!
-
2
-
-
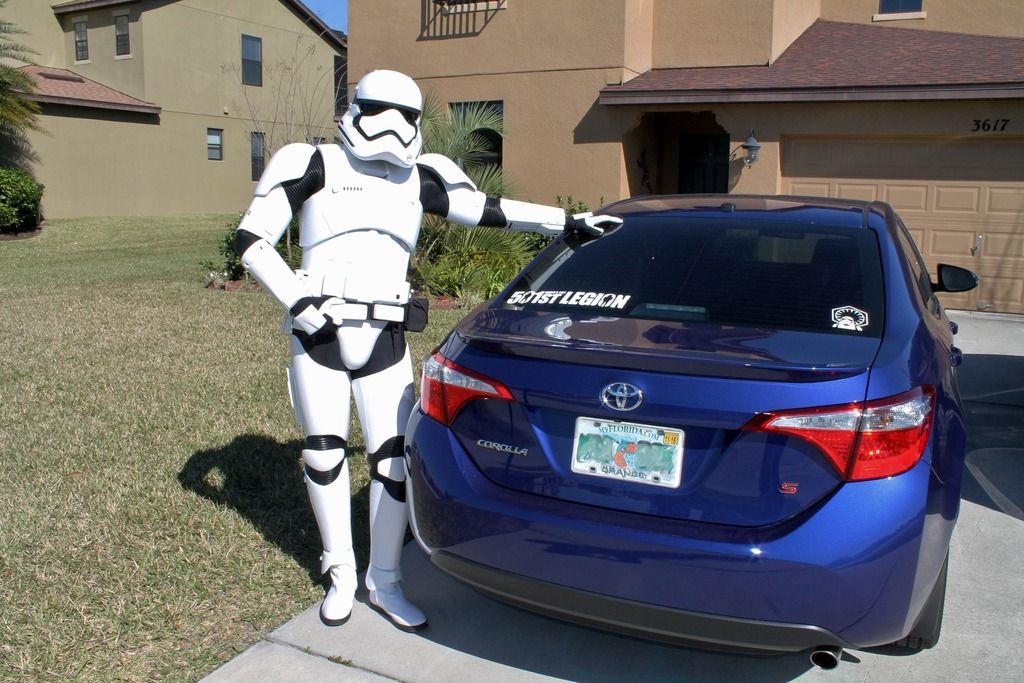
It's official! TK-33724 is officially approved!
So excited! It was a long journey that started shortly after Celebration.
-
6
-
-
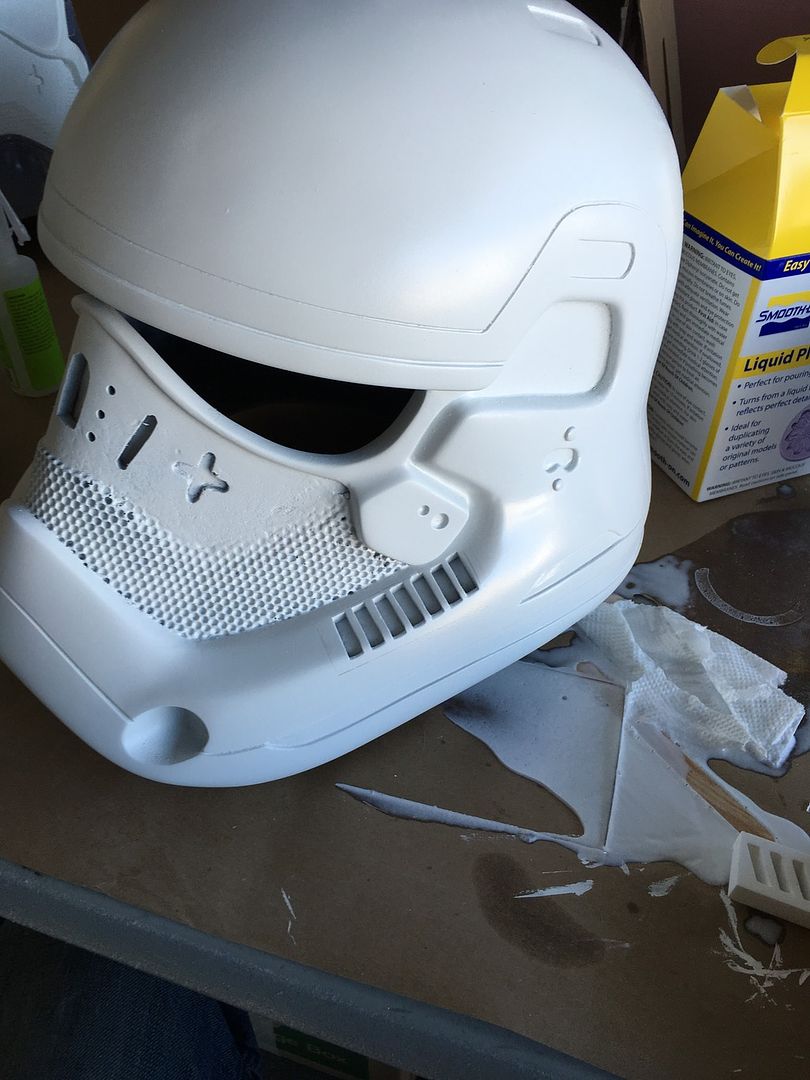
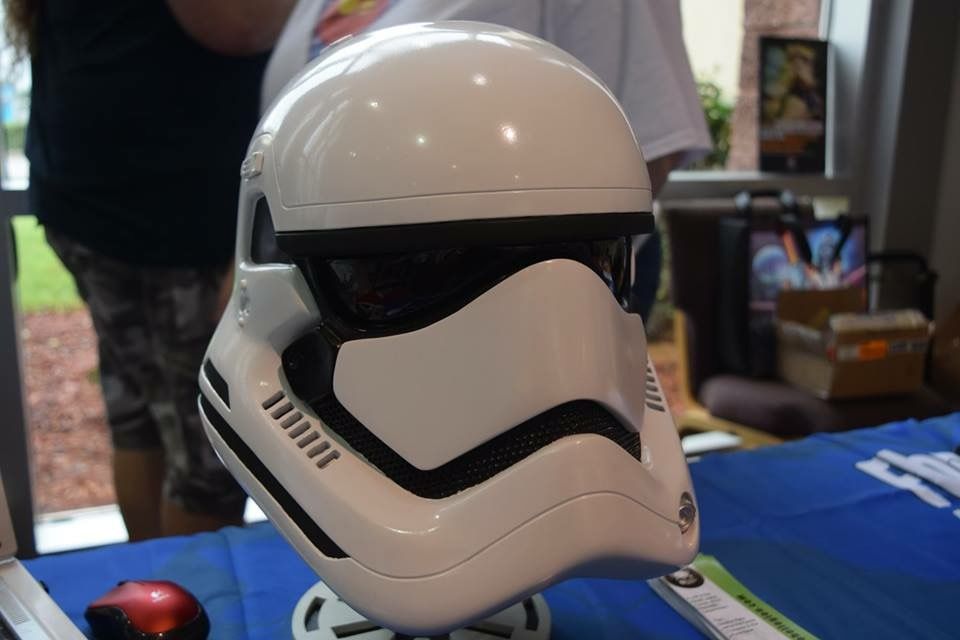
Now that I've finished my armor, finally getting around to upgrading my helmet's kill stripes. Made a mold of the 3D printed pieces and cast them in Smooth-Cast 305. Then cut out the old stripes!

Glued in the new ones and sand to smooth! I think it looks pretty good!

-
I used Smooth-on's Rebound 25 Platinum Cure brush-on Silicon. I have a love/hate relationship with it. I got really luck with my first mold, but I am planning on trying out a matrix mold technique next time.
-
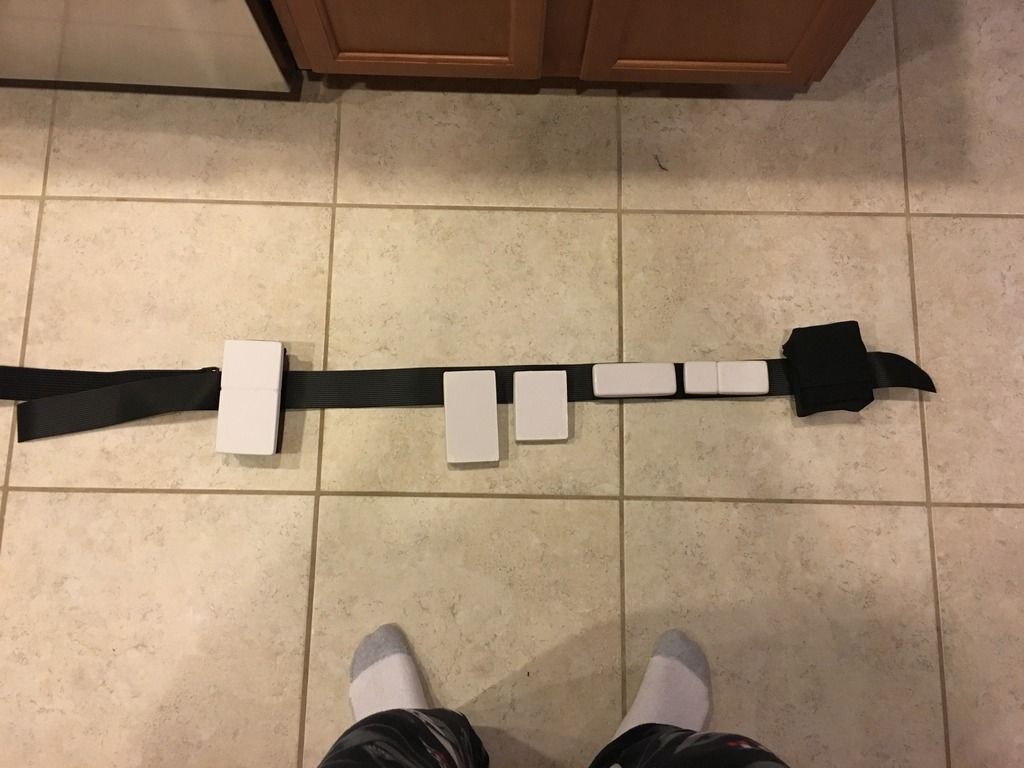
Little White bag day. Nothing to special. Do I need to glue it to the nylon? Seems redundant? I'm sure there is a reason though.
I found that once the belt boxes were secured through the various layers of the belt, it stays together quite well. Check out Tony's build thread (UKSwrath) for guidance on this.
-
Haven't read all of the responses but wanted to throw in my two cents. It would seem the biggest argument here is whether the yoke and abs should be seemless or not. The biceps and forearms probably fall in the category as well, since they have seems that should be cleanly covered. The thighs and shins have definite seems that should be there (and curved) for true screen accuracy. But whether the CRL should enforce this or nor is not what I'm chiming in on.
The argument is that the CRL should be flexible, because it's too expensive to fill and paint... You spent $1800 on an armor kit and $20 worth of bondo and $30 worth of paint is exorbitant? This strikes me as odd. The FOTK, unlike our classic TK brothers are sleak and clean (iPhone trooper right). That's what makes them stand out as the next generation of stormtrooper. Just my two cents.
-
6
-
-
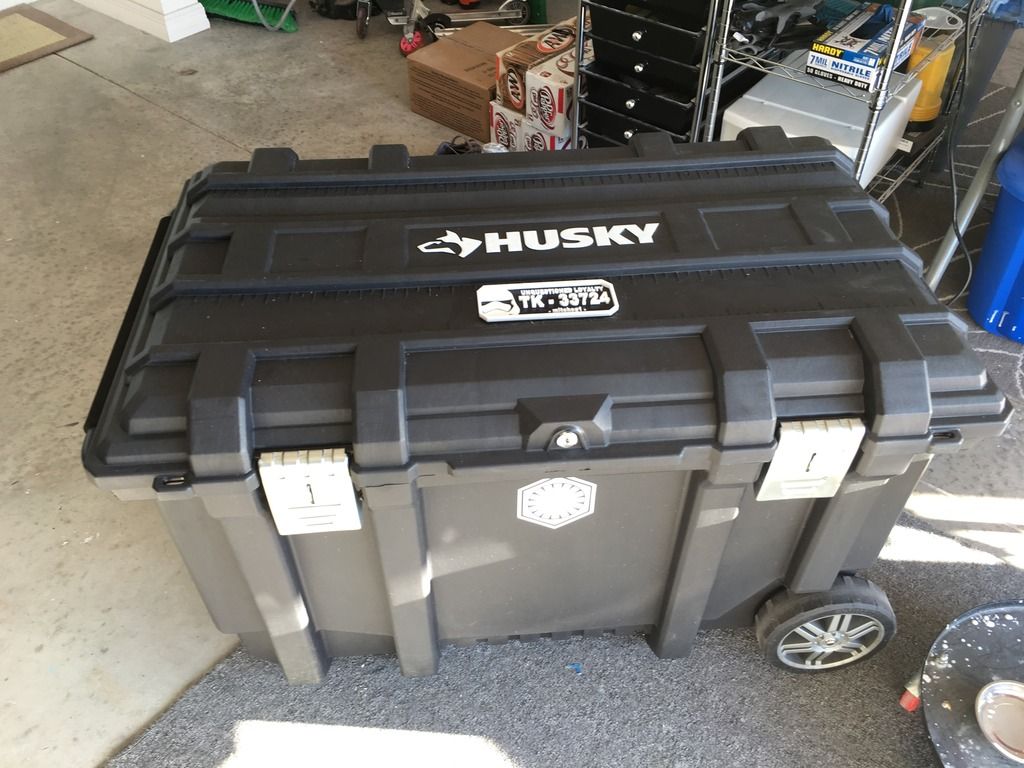
Tote for my TK/FN! Thanks Artshot and JeepFrog for the nameplate!
-
1
-
-
How was your experience with the rustoleum cans?
Sent from my SM-N910V using Tapatalk
I had no issues with the Rustoleum and was pretty pleased with how glossy it turned out.
-
Late night addition!
-
5
-
-
Thanks Wyatt. Yup, that's it!
-
All good! I welcome the comments and questions.
-
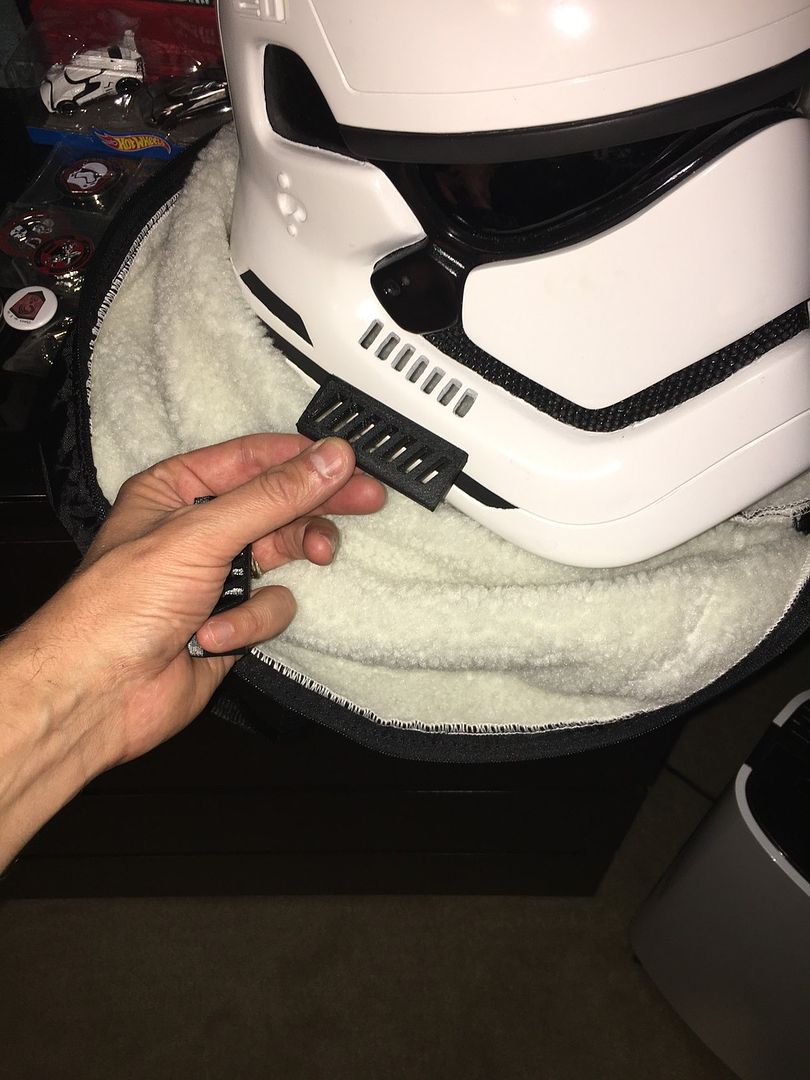
The belt is ribbed and made of a rubber like material!
I noticed the shins were riding a bit high. Plan to shift them down a bit
-
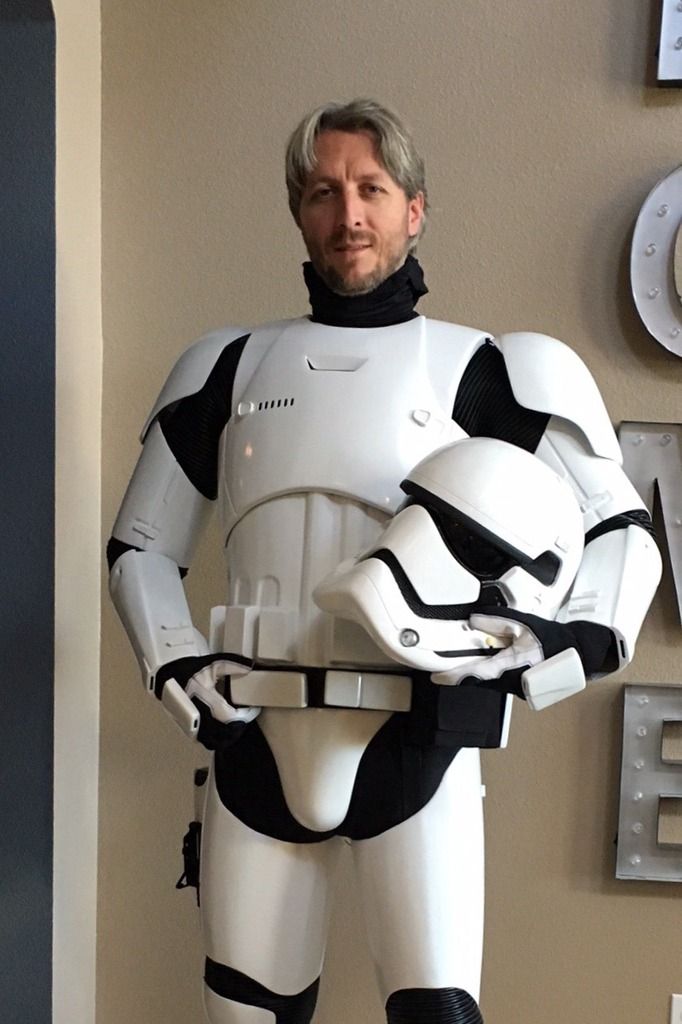
Bucket: mitcheg1 (yours truly)
Armor: KB Armor (TK9948)
Gaskets: Imperial Gaskets
Boots/gloves: Imperial Boots
Pouches: gmrhodes13
Assembly Instructions: Ukswrath
Undersuit & balaclava: UA compression pants/shirt
Neckseal: Darman
I think that pretty much covers it.
-
Submission photos!
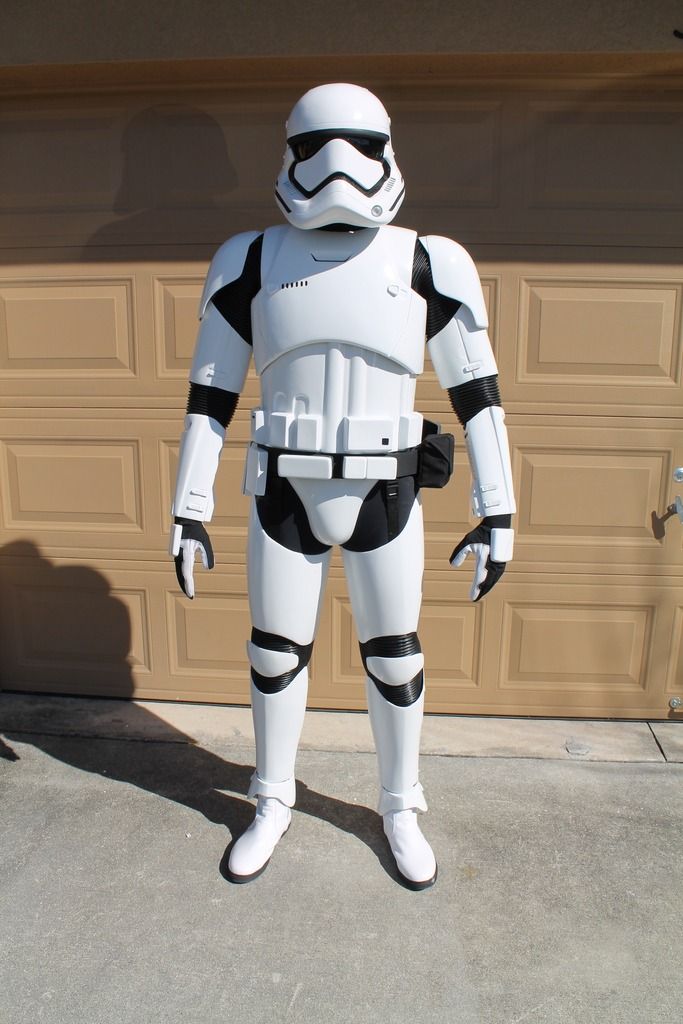
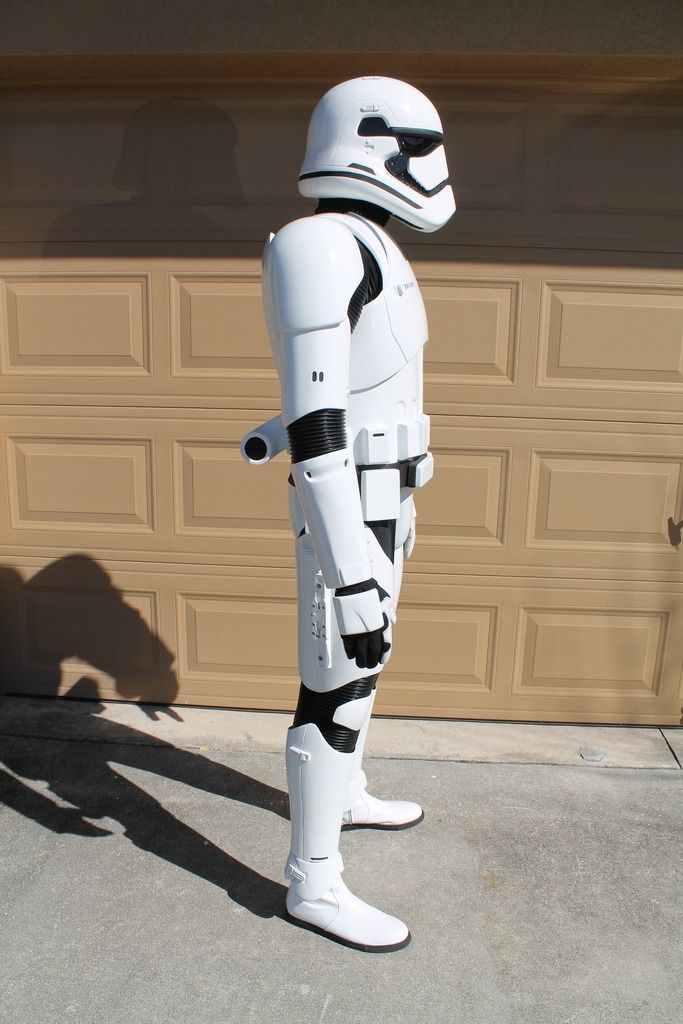
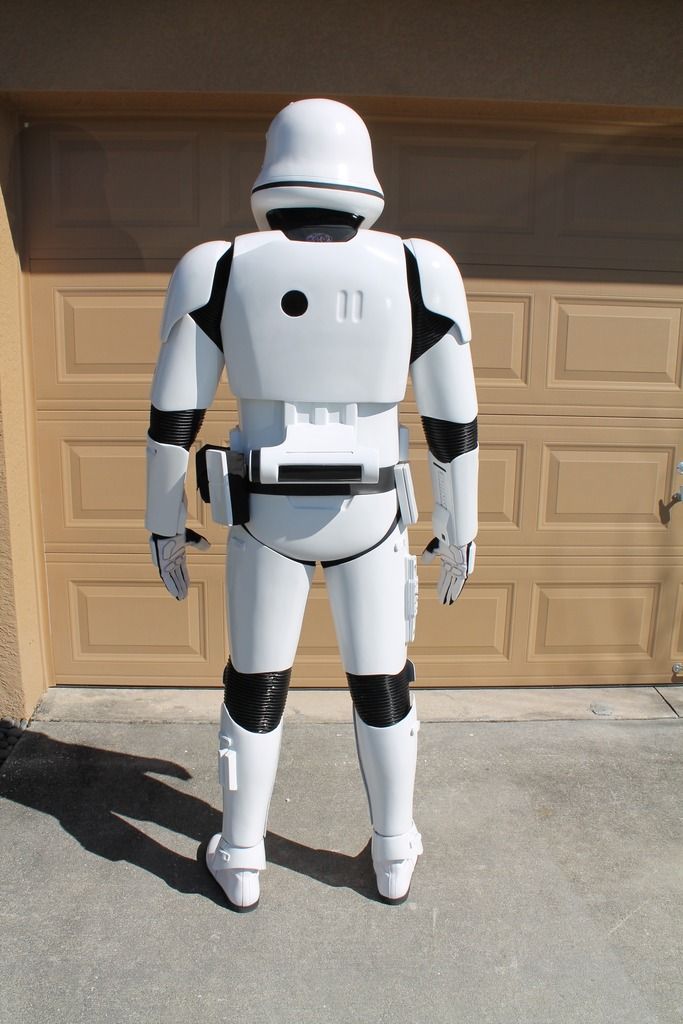
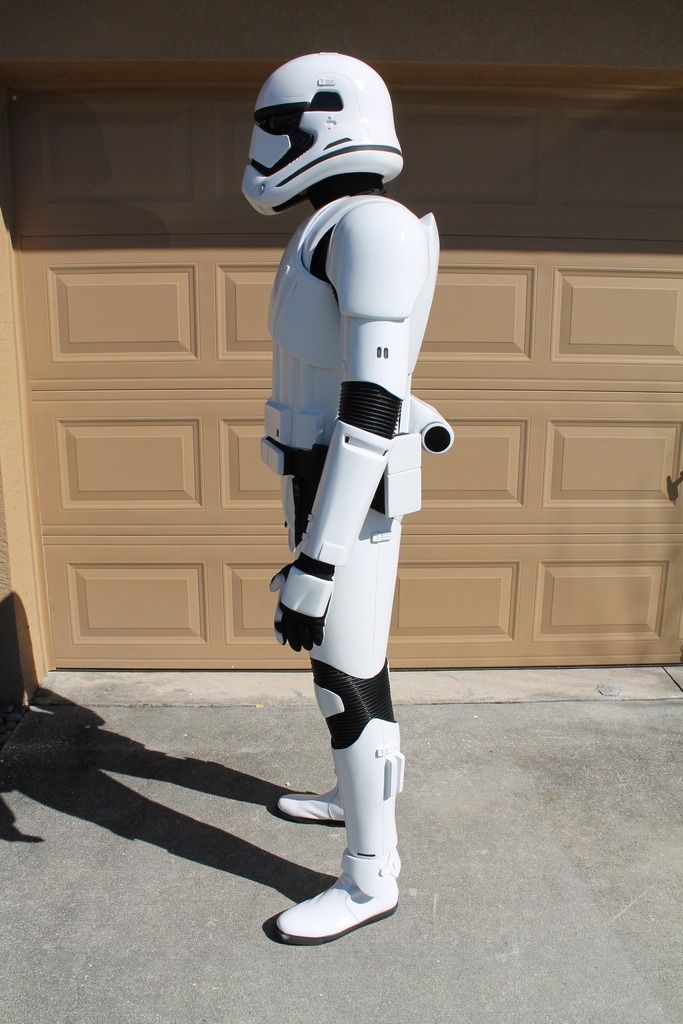
The First Order wants you!
Represent!
-
4
-
-
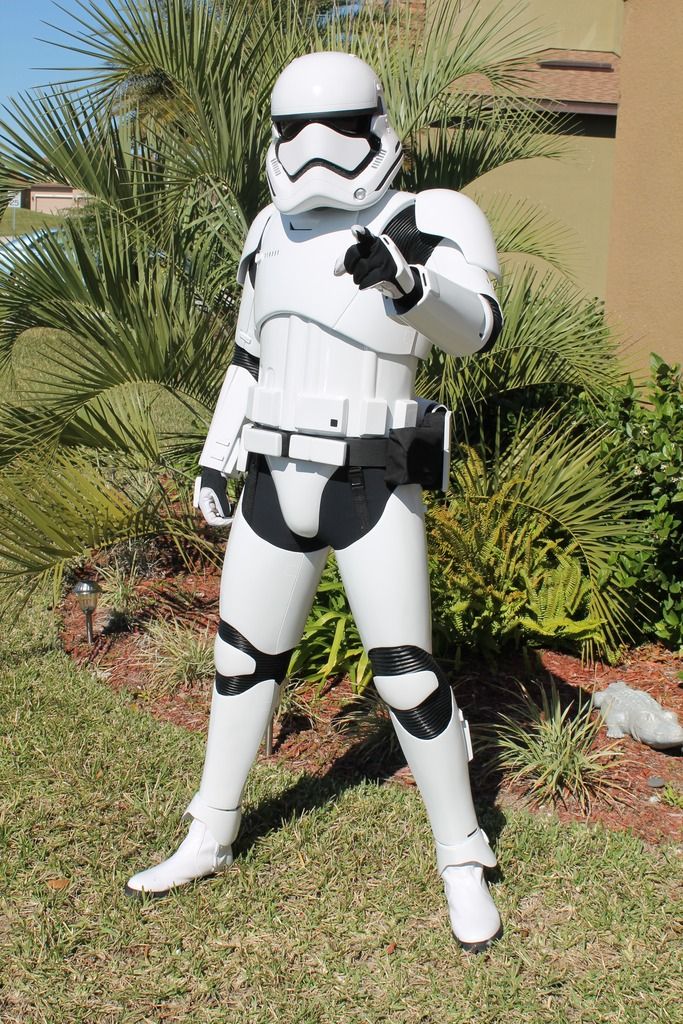
Hallelujah! I'm officially done!!!
Now as soon as my wife gets home, I'll suit up and take submission photos!
-
5
-
-
White paint is now complete! Need to finish some of the strapping and I'm done!!!
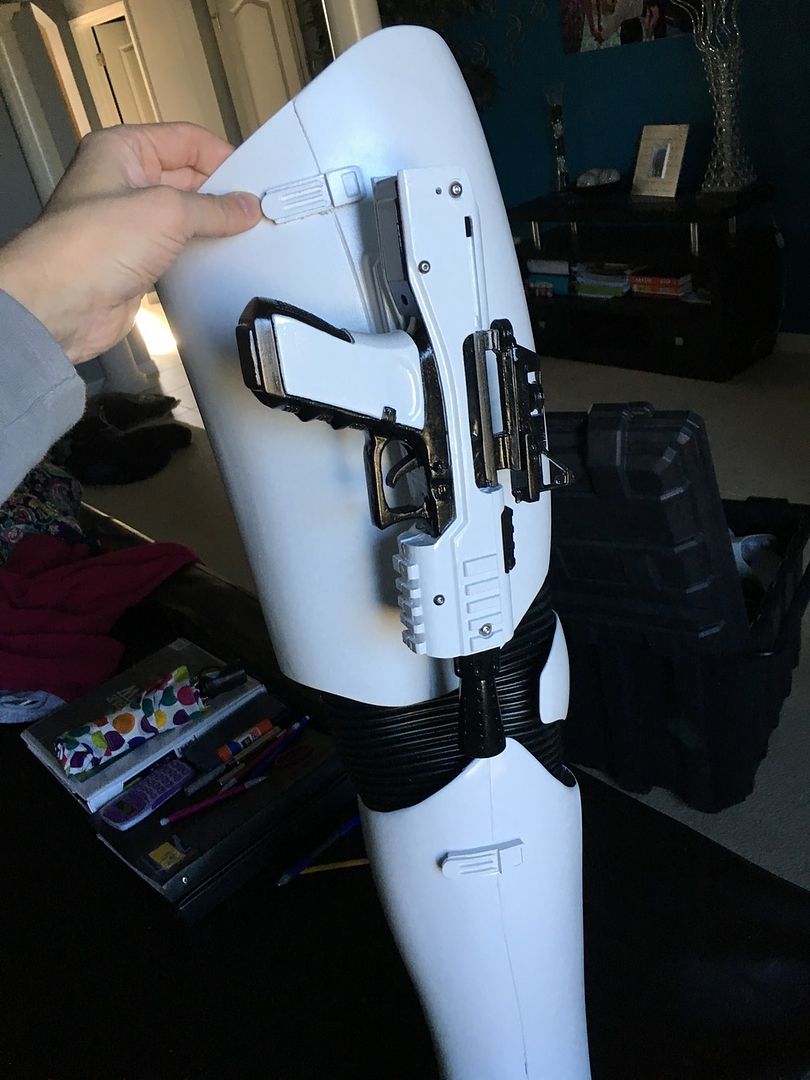
Here's the thigh with holster hardware in place!
-
My pic above looks like I'm "Guido Trooper"!
"Heeeey! How you doin'"!
-
1
-


Hand Made First Order TK
in Build Threads Requireing Maintenance
Posted
More enhancements in the works.
I made a minor tweak to the beak to pull it in just under the visor. It's very subtle, but feel it's more screen accurate. I also am trying a different mold approach as I've struggled with getting good beaks.
I have also spent some time fine sanding the visor buck. Trying to get a smoother surface to improve visibility yet retain the bubble visor look.
Looking forward to getting new parts out of these molds and see how they turn out!