

rduda
-
Posts
93 -
Joined
-
Last visited
Content Type
Profiles
Forums
Gallery
Articles
Everything posted by rduda
-
Bucket is from Planit Sith, I think it looks really nice. It came with requested pain style and lenses and foam were already done when I got it. Packed good too no problems, today I get my jumpsuit legs altered and hopefully the armor and chest will come. Still waiting on some small pieces like gloves from wompa wear.
-
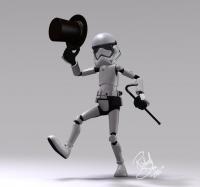
So I got my tie helmet today, tubes and armor are a few days behind. It's from Planet Sith, hope it meets regulations once finished, but I think it looks sweet!!!! Front View Side View. I put my spare S tube on, saw on the certifications it was optional. Me in all my glory!
-
Started imperial tech and tie-fighter get up, got hat, jumpsuit and boots so far, suit I got from Amizon cosplay store and I'm surprised on how nice suit is!! I have short legs so the need altered a lot in the leg length.
-
I trimmed the back plate, that looks better now. I think I may have made my thigh armor a bit too tight.<br> So either I need to loose more weight faster or adjust, and by doing so I'm thinking increasing the back abs strip to be bigger. But that would make my armor in accurate. I'm mentally stuck on this problem, any thought would help me a lot, please comment and give me your thoughts.
-
I need to tie down the shoulder Plastic straps still too...
-
Snapps finally coming together!! Need to trim some arms I have no mobility, and need to move a shoulder snap back father, its of forward and is pulling on the shoulder strap. Anyone see anything to bad?? Well over than the baggy green shirt.
-
Were using a Maker Bot 3D printer here with ADS plastic set at a medium resolution. The first pice I printed is the front Top right side, took 2.5 hrs (wow! that was long) but the piece is a lot thicker and stronger than i thought it would be. The nose piece only took 40 minutes Small nose detail printed in a few minutes. and so did the pins to hold the mask. This project may take some time, there were over 12 pieces for the helmet and over 25 for the rest of the armor parts on the biker scout, and I only go to the school 2 or 3 times a month. Maybe I can find a student to print them for me and I'll pay him...
-
 Im almost done my am armor, I'll watch and share if it can help, good luck!!!
 -
Sorry I haven't posted any progress lately I have a lot done, but my work has slowed me down a bit but I'm so close!!! But today I'm taking the time to explore 3D printing some armor! I have found some Scout armor files all set up for printing, and several new helmets including death trooper and shore trooper. This ma take weeks to print everything but since the printer to I'm using prints in abs plastic I'm hopefull the skills on my current build will help me here. More to come today!!!!
-
Kitten helping sanding First round sanding kidney plate , bad lighting. looks better in sunlight, but no polish yet.
-
ABS Paste, no real formula, so I took a handful of ABS strips and cut them into tiny pieces and put them in a glass jar with 2 or 3 teaspoons of Acetone (which I guess is a type of paint thinner). Waited about hour and mixed a little. Came out nice and white still, some chunks but I work through that… here are my shims on kidney plates not sanded yet, want the plastic to dry good. Thanks CTID for the help! I cut to manny teeth out in the beginning so now the paste has it's second job. Holster went together nice and easy, but I noticed how much weight the Blaster is tugging at your belt… now I know why I see most trooper carrying there blaster.
-
-
Woo, been a long summer, but with the pass of the pro football hall of fame game fall is here!!! Well soon. And I've added a lot of snaps and cuts to berthed summer (told yea this would've a long build). But I finally ordered the last of my supplies! Within about 2 to 3 days I got my latest TrooperBay order, new world record for the post office California to Ohio, I was surprised to say the least! Neck seal, white rubber hand guards, and a few conector type parts blue paint holster and head sock, I'm so happy all that's left is attaching the large parts and I'll be ready to troop this October!!!! More than enough time for Rouge One.
-
Where can you get ABS past?
-
Here are my shims on the Kidney plate, Seems like I'll need to trim them down some, but at least there on now. Do you think this will hold or do you think I should make an overlap on the inside? Made 14 snaps, only messed up 2 of them, not a bad margin of error so far. Only enough claps to glue on 2 snaps at a time… Mean-while, trooper cat Boo isn't happy to give up the chair so I can load my entry into the forums, don't worry he's not hissing, just yeowning, I bore him.
-
I decided to add some shims onto the side of the kidney plates, so I have about an inch of glued plate now drying underneath both sides of the kidney plates leaving about two 2 1/2 inches on both sides extended. Though sometime soon I hope to remove the shims should I attach the snaps the same way I would a final set of armor with in regulations or with the shims can I be a little bit simpler? And fix once I take the shims off???
-
Remember the Death Stars!!!

-
Looking good, I have the AM 2.0 too, I'm 5' 9" 250 lbs and working on my gaps too, did you trim any off the chest front shoulders yet? If so how much?
-
Look! Something came in the mail today!! What could it be? http://i288.photobucket.com/albums/ll182/richardjduda/IMG_0632_zpsols1luio.jpg YEAAA!!! MY TK Boots are in! Fits Great and Look more Awesome than I thought they would be, Great Product!!! One more Step Closer!! Imperial note: Little Wookie Stuffed Bears make great companions for your force sensitive cats. Got the curage to do some major cuts this weekend, I got short fat legs and and had to take a good chunk off the thigh armor. First cut was a little short, need another 1/4" Used a drummel and it was fast and easy, the rough edges were just melted bits from the heat of the drill and popped off and sanded nice and clean, and I think I took off the right amount all the way around, those photos to come later, stay tuned!!
-
Thank you all for the help, I need it... The boxes off the belt are low, I trimmed the belt extra and left the boxes hanging, that's on the todo list. I'll start the snaps next for connecting the kidney plates and butt, what is the proper distance or space for between the shoulder (chest and back plate)? How do you determine how much to cut?
-
Playing with snaps on the chest and back plates. Side View, is this about right?? Should I have some more space between the top shoulders? Trimmed and sanded the shoulder straps. Boy this is hard with only 2 hands!
-
I got my sealing armor in the mail today, I'll cut a little at a time to see where it starts to fit, I the mean time I'll see if there is any good video on the iron, then I'll practice on some scraps to see what I can do, if it works good I'll do a little edge but otherwise I'll keep is smooth if it can pass muster. If I can't find a video maybe I'll make one to post of my experiment!
-
Did some trimming and sanding on the inside biceps… ...and now they go on much easier but i just think my limbs are too short I have limited movement. After 24 Hrs the nylon snap seems permanent, much stronger than I thought it was going to be, so I'm going that way on the snapping system. The shoulder straps look like they defenetly need trimmed, from photos it looks like 1/8" away from the rectangle bumps… then the big bump rectangle in front. ...then the big bump rectangle in front. Here I taped the chest and back together to see where they lay and fit raw before any trimming: I ordered a sealing iron, I'll trim the edges so there parallel with each other and use the sealing iron to match the edges together along with the trimmed shoulder, got a plan while waiting for the iron to come in. Any thought so far from any one?
-
Biceps are glued and together! But due to the rectangle shape its a little tight, so when reading Kredal's build I saw the boil and reshape trick, I think I'll try that and I'll let you know what happens there sometime this week. In the meantime I got some nylon straps and wanted to test that on the snaps, so I E6000'd one for a test… now waiting. Lastly being a little shorter in the thighs I'm going to have to do some severe cutting to get the thighs to fit: Is it OK to just sand the top after cutting, or is it necessary to bend the ABS back in?? Let me know what you think. Does any one know how to bend it in? Is this the best place to cut for size on thigh? Thread link? Help!! Thanks for reading and helping every one, just in case I haven't said anything yet.
-
I got over the cutting a fitting fears and I'm going as fast as the E6000 can dry!!

