

Somatophylax
-
Posts
255 -
Joined
-
Last visited
-
Days Won
2
Content Type
Profiles
Forums
Gallery
Articles
Everything posted by Somatophylax
-

TK-? My AP build
Somatophylax replied to Somatophylax's topic in Build Threads Requireing Maintenance
Greetings, After a break yesterday, here's the progress report for today. I got a set of rivets today (thanks Eric!). So I measured and drilled holes and installed the rivets on the ab & kidney plates. I have to paint them white now. as well as the crotch area (don't you just stare at my crotch please) Note that all these rivets are purely decorative because I'll use snaps to attach the sides and under parts. So here are all the necessary snaps being glued. I also have a pair of rivets for the thigh battery pack. But I'm not sure how to proceed to install them. The tutorials and treads I've checked so far all show the final results... but not how they did it. So it will come soon. FINISH LINE LIST: - For Legion membership: - Crotch and ab/kidney rivets to install (when they arrive) - Battery pack on right thigh - Sniper plate on left greave - Paint the ab/kidney/thigh rivets white - Take pictures and apply for membership - For Centurion level: - Paint the tube stripes (i.e. paint over the current decals) - For trooping: - Install Echo's fan system in the bucket (when it arrives) - Install the iComm/acker system in the chest - Install padding in the bucket - Velcro on boots/greaves to prevent them from spinning Cheers! -
TK-? My AP build
Somatophylax replied to Somatophylax's topic in Build Threads Requireing Maintenance
Good evening Empire! Here's the current progress report. I received my Hovi Mics from Keith. With that I can finally finish the bucket for Legion membership. Brow trim installed: Neck s-trim installed. That was not easy to install. I eventually figured out the correct side to insert. At the end, which was much too long, I cut the extra off while leaving a bit over half an inch extra. I then squeezed it in and pressure should make it stay in place. Hovi Mics installed: Ta-dah! For Legion membership, a completed bucket! I also tried the thighs with the snaps I glued in last night... all with PenCap510's garter belt. All seems good I admit I can barely bend down with those on. I don't know if it's normal or if it's because I should have shortened them. Putting on the boots AFTER wearing the thighs will be quite challenging. Talking of challenge... I decided to test a full leg assembly. And a closeup of the knee plate. Now... what do you think? Does it look like it is in the right place (with the masking tape I mean)? If so, then I guess I will have to start glueing that thing. FINISH LINE LIST: - For Legion membership: - Crotch and ab/kidney rivets to install (when they arrive) - Battery pack on right thigh - Sniper plate on left greave - Hovi-mics on the bucket (when they arrive) - Install s-trim and brow - Take pictures and apply for membership - For Centurion level: - Paint the tube stripes (i.e. paint over the current decals) - For trooping: - Install Echo's fan system in the bucket (when it arrives) - Install the iComm/acker system in the chest - Install padding in the bucket - Velcro on boots/greaves to prevent them from spinning Cheers! -
TK-? My AP build
Somatophylax replied to Somatophylax's topic in Build Threads Requireing Maintenance
Hello fellow troopers, A bit of work today. The shoulder bridge I glued yesterday seems good. So I glued the second one. Then, I took the garter belt I ordered from PenCap510 (thanks man!), and measured where the snaps should go in the thighs. And here there are. Tomorrow, I'll be able to walk in the apartment with the thighs in place I also put glue in the 3 snaps that hold the ammo belt on the canvas belt. Once dry, I shouldn't have any problem with the ammo belt snapping off because of the tension. FINISH LINE LIST: - For Legion membership: - Attach the holster to the belt - Thigh snaps with garter belt - Crotch and ab/kidney rivets to install (when they arrive) - Battery pack on right thigh - Sniper plate on left greave - Hovi-mics on the bucket (when they arrive) - Install s-trim and brow - Take pictures and apply for membership - For Centurion level: - Paint the tube stripes (i.e. paint over the current decals) - For trooping: - Install Echo's fan system in the bucket (when it arrives) - Install the iComm/acker system in the chest - Install padding in the bucket Cheers! -
TK-? My AP build
Somatophylax replied to Somatophylax's topic in Build Threads Requireing Maintenance
Damn! Had a bit of an incident it seems. While sorting the magnets and preparing them for storage, I accidentally dropped one and it found its way to a nearby magnet... then another... then another... creating a chain reaction where all 30 magnets got together. Not only I find it very difficult to take them apart. But it looks like about a third of them shattered and their pieces are hard to get off. I need a beer! -
TK-? My AP build
Somatophylax replied to Somatophylax's topic in Build Threads Requireing Maintenance
Hello gang, Not much done today. I decided to finish up the belt. So I cut off the "back loop" on the holster (it had a loop ESB style). I then installed eyelets on the holster straps, and on the belt. And then I used rivets to attach the whole thing. And here is the finished belt. Then, I thought I'd do something easy to finish off the evening. I tried to glue the shoulder bridges on the chest plate. That was NOT fun! The darn thing kept sliding off track. And because of the shape, my magnets wouldn't hold on it. After trying for about 20 minutes, I finally was able to set it with 4 heavy clamps. So I decided that it was enough for today. I'll do the other one tomorrow maybe. Cheers! -
TK-? My AP build
Somatophylax replied to Somatophylax's topic in Build Threads Requireing Maintenance
Ok. I think I will do my first angry post but I'll try to leave out all the 4-letter words I've been using in the last 30 minutes. How the **** am I supposed to fit the sniper plate on the left greave? 30 minutes of trying to figure out a proper position. Nothing works. I read MANY treads about that issue with the AP... and unfortunately it did not help me understand how to best do it. Here's my attempt with tape only: I need a beer. -
AP Armour with ANH Centurion as Goal - Build Thread
Somatophylax replied to MechaPumpkin's topic in ANH (Stunt and Hero)
Hi there! So... Does it work with the velcro to prevent the greaves from spinning? I'd be interested in doing the same. Thanks -
TK-? My AP build
Somatophylax replied to Somatophylax's topic in Build Threads Requireing Maintenance
Thanks -
TK-? My AP build
Somatophylax replied to Somatophylax's topic in Build Threads Requireing Maintenance
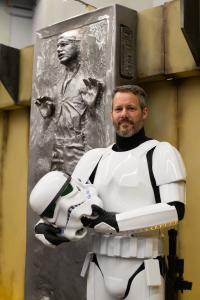
Hello all! I took some pictures this morning to see how the overall look of the armor looks like. So here's one. And one with my princesses. And we all have our "family car stickers" that fit with the overall idea. I think my CT action figure agrees (I use that one when my girls want to play Barbie. CT is just better than Ken). Then I had a break this morning when my brother and his family came in. My sister-in-law took my daughters for dress & shoe shopping. So, he stayed with me and helped me on the torso armor and the belt. I re-taped the torso (since my rivets are still in the mail) and double-checked the shoulder bridges. That was good because the left one needed some realignment. Then I started adding the ab snaps to attach the canvas belt. Then, we measured (and re-measured) where the snaps would go on the belt and ammo plate. Finally I attached the dropboxes. I also glued the snap covers on the ammo plate (not pictured). I have a little issue with the ammo belt. When I move, I can easily just snap out on the sides. I'm not sure about doing a heat-bending thing on it. Maybe I'll just put some glue in the snaps and have it fixed permanently. Any thoughts? A second issue is that the greaves tend to twist around. I saw someone put velcro in the front/back of his TK boots, and inside the greaves. I'll see if that would fix the problem. Technically, I'm almost done. Here's the list of the remaining tasks: - For Legion membership: - Attach the holster to the belt - Thigh snaps with garter belt - Crotch and ab/kidney rivets to install (when they arrive) - Battery pack on right thigh - Sniper plate on left greave - Hovi-mics on the bucket (when they arrive) - Install s-trim and brow - Take pictures and apply for membership - For Centurion level: - Paint the tube stripes (i.e. paint over the current decals) - For trooping: - Install Echo's fan system in the bucket (when it arrives) - Install the iComm/acker system in the chest - Install padding in the bucket ComicCon Montreal is in 3 weeks. I will be there (assuming something bad doesn't happen with the postal service and the missing parts). Cheers! -
TK-? My AP build
Somatophylax replied to Somatophylax's topic in Build Threads Requireing Maintenance
-
TK-? My AP build
Somatophylax replied to Somatophylax's topic in Build Threads Requireing Maintenance
Thanks Mutter, I already ordered a set of rivets from Echo (with his fan system). I had not noticed that the crotch rivet was included. So that's a nice surprise. The pic of the greaves over the boots.. I'm actually wearing them. It doesn't show because the background is too dark with me wearing my black undersuit... but I'm really wearing them. And I did use industrial-strength velcro. However, initially, once they were glued (from the front), there was a big misalignment in the back. But after leaving them closed (with velcro) for a day, they kind of took a better posture. So I guess it will be alright. -
TK-? My AP build
Somatophylax replied to Somatophylax's topic in Build Threads Requireing Maintenance
Greetings fellow troopers, Nice little run tonight. First, I put the final outer strips (on the back) on the thighs. I glued the ab button plates in place. Then, I started doing something that scared the hell out of me... making holes in the armor itself I installed the upper-right corner snap on the ab plate as per the Centurion requirement. Then, I put in the 2 snaps for the butt attachment. I didn't do the crotch one yet because I've seen snaps and rivets there depending on the build. So I need to clarify this first. And if it's a rivet, then what size, what kind, and where can I get it? And, just for fun... I decided to have a test drive (ok, I didn't really drive) with the TK boots and greaves. Looks good I think. Although I still have to attach the sniper plate on the left one. That does NOT seem like a fun thing to do. That's all folks. This will be my weekend with my daughters... so I'll take a break until Sunday night. Cheers! -
TK-? My AP build
Somatophylax replied to Somatophylax's topic in Build Threads Requireing Maintenance
What would be the alternative to velcro? I've read about a hook & loop thing. But I never saw a pic of what it looks like and I never understood the descriptions of that solution. -
TK-? My AP build
Somatophylax replied to Somatophylax's topic in Build Threads Requireing Maintenance
Good evening! So... I did some trimming and re-glued the thighs for a second time. I hope this time it will look good. Note: I saw after I took the pic that one of the magnets was out of place. It's ok now I also added the velcro strips at the back of the calves. Although I am unsure about something. When I close them, it kind of look funny. The rear outer strip is 25mm wide. This leaves half of it (about 12-13mm) as the width of the velcro strip to put there... right? And it looks like it might be too narrow to have a good grip when I close them. But it might just be my imagination. At least, the velcro is only visible from the "inside" (left on the right leg, and right of the left leg). So they're not that visible from the other people's point of view. Cheers! -
TK-? My AP build
Somatophylax replied to Somatophylax's topic in Build Threads Requireing Maintenance
Hi, This is a preliminary test of the thigh pieces, taped in order to have them with a much better fit. I am daunted by the task ahead. That's a LOT of plastic to remove! I am unsure where (i.e. on which side(s)) to remove it... because it might be awful to close the thighs once the trim is done. Any ideas? And a look at what I might do: -
TK-? My AP build
Somatophylax replied to Somatophylax's topic in Build Threads Requireing Maintenance
Oh, I see. That would have looked like a bermuda-short version of the armor. I really appreciate your intervention... and very timely too! -
TK-? My AP build
Somatophylax replied to Somatophylax's topic in Build Threads Requireing Maintenance
Ok... Well, I decided to abort tonight's operation on the thighs. Thanks to The5thHorseman's eye, I checked them out again and it's obvious that they will be too large on me. I'm talking at least 2 inches too much in diameter!!!! I don't know why I did not notice it before. So I pull the back seam apart while the glue was still fresh. I'll have to work on them tomorrow night when the glue is dry. But I'll have a fair bit of trimming to do. Sucks, really But I guess now is the best time to think about it... and not in 24 hrs when it would have been much harder to separate. I guess this is my first major setback. *sigh* -
TK-? My AP build
Somatophylax replied to Somatophylax's topic in Build Threads Requireing Maintenance
On the other hand... Should I wait for tomorrow and hope it's alright? Or should i break it apart now while the glue is only 3hrs fresh? Stéphane -
TK-? My AP build
Somatophylax replied to Somatophylax's topic in Build Threads Requireing Maintenance
Thanks for the input. For the thigh fit, I admit I hadn't thought of it that way. It sort of looked ok as it is. I did trim away a little bit, but not much. Is that why the back of the thighs only has a ridge on one side... in order for us to trim a lot? I guess I'll know tomorrow if it looks bad or not. I'll keep you posted for sure. Thanks -
TK-? My AP build
Somatophylax replied to Somatophylax's topic in Build Threads Requireing Maintenance
Hello everyone! Today's update... I received my E-11 blaster decals and so put them on. The surface for the ammo counter had room for only 4 digits. Do you think this will be a problem? The CRL doesn't mention how many digits it should have. I finally put the interior strip on the thighs. This means I'll finish them tomorrow. Yeee! And I put the outer strip on the calves. These will support the velcro strip that will close the calves when I wear them. And I made a little paper template for the shape of the grin on the bucket. I then cut it out (although a bit larger) in the mesh piece I got from TrooperBay. And I "finished" it up with a slim strip of white duct tape all around to solidify it. Here's the results.. inside and outside view of the mesh in the bucket. And now the green lense that came with my kit. I'll try it out for now and decide later if I replace it with the darker, thicker one I got from TrooperBay. That's it for now. Cheers -
TK-? My AP build
Somatophylax replied to Somatophylax's topic in Build Threads Requireing Maintenance
Good evening, A quiet evening, so I helped myself with a little paint job. I did the ab plate buttons. Like most other troopers here, I followed the popular paint code scheme. The only painting I have left will be to paint the tube stripes. I applied the decals already. And I intend to make the Legion application with that. Later, when I shoot for Centurion, I'll paint over the decal with the appropriate color for that "hand painted" look we want. Good night! -
TK-? My AP build
Somatophylax replied to Somatophylax's topic in Build Threads Requireing Maintenance
Hello guys and gals, "Eh, yoto!" ...because he's holding a thermal detonator!!! So I finished the D.T. this morning. Drilled the holes, placed the clips with washers and nuts, and put the end caps. The caps are so tight I wonder if I really to glue them. Then I build up the courage to cut off the required "kidney notch" if I want to succeed with a Centurion application. So here it is... 22x22mm! I then put the front outer strips on my calves... Soooo shiny! ... and the interior "back" strips for the thighs. That means I'll be able to start closing the leg sections very soon. I received my package from TrooperBay today. So I have the missing paints (the 2 blues mainly), the s-trim, the mouth mesh, and a higher-quality green lense for the eyes. To be continued... Cheers! -
TK-? My AP build
Somatophylax replied to Somatophylax's topic in Build Threads Requireing Maintenance
Greetings troopers, Quite a big day today. But it's already over as I'll soon head to my daughters' dance recital tonight. Lucky for me, I'm off tomorrow. Oh well, more armor work I guess I worked on the thermal detonator first. I attached the ABS plate on the tube. I also went to the local Reno-Depot store and found the screws I was looking for. I don't know if they're the slotted pan-head variety... but they look damn close. And I painted the heads black. If you look on the picture, there's too much aluminum after the final hole in the belt clip. So I removed the surplus (not shown here). Then I worked on the bucket with some more paint. I retouched the vocoder with a little more black. Then I drew the black outline around all the grey areas. For the lines inside them, I decided to use the decals that came with my kit. I used my cutter to take away the black lines and thus made templates out of them. Then, by using a pencil, I drew the lines with the templates. And then painted over the pencil marks. Here's the result. I still have the tube stripes to do. I was thinking of applying the transfer decal and then just paint over them. That would give me the perfect template AND the hand-painted look I want. At this point, my brother came in to help me. He's interested in the legion and might consider joining as a Sith Lord. It seems there is no Count Dooku in Montreal. So he helped me with the shoulder measurement (with chest/back plates). With that I was able to finish off the shoulder straps. And now... ta-dah! It's not complete by far. But it's nice to finally show a lot of progress. And an action shot while I'm at it. So then he helped me figure out where the shoulder bridges will be glued. We delimited the area with masking tape. Now I know where to put the glue. I also experimented with boiling-water ABS bending (since I had such a bad experience with a heat gun). I was able to manage a slight bend in the shoulder bridges. It's not much. But it's there and it will help in the end I'm sure. And.... that's where I am right now. Stay tuned tomorrow for some more work. Cheers! -
TK-? My AP build
Somatophylax replied to Somatophylax's topic in Build Threads Requireing Maintenance
You're welcome! And thanks for the comment -
TK-? My AP build
Somatophylax replied to Somatophylax's topic in Build Threads Requireing Maintenance
Hi again, Ok, why wait for something I can do right now? I finished up the arm assemblies by installing a cross-section elastic in the shoulder bell to cover the bicep and hold it all in place. It will make sure the thing doesn't flap up and down. So I used pieces of industrial-strength velcro and made little squares for the insides of the shoulder bells, and on the piece of elastic. And voilà ! Final arm assemblies! I feel better now. My thumb doesn't though. Still hurts really bad. Darn hammer! Cheers!
