

Tai
-
Posts
31 -
Joined
-
Last visited
About Tai

-
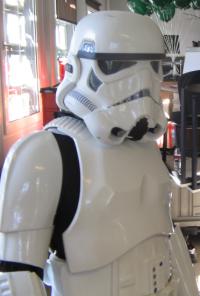
I know, boring pics, but... Shoulder Bells:
-
I think, I'll do it professionally. At the moment, I'm doing the final work before I can paint the armor. (Helmet moding and getting the tricky parts sanded. ) Actually, I was already at my neighborhood painter months ago. He'll use some special paints, I wouldn't get at any shops. That alone is already a big plus. On the other side, if I would paint it by myself, I would need one year or two more for finishing my armor, because I would never get it properly. XD But some smaller parts I will do by myself at a later time. The pauldron or the blaster for example. I should post some pics after the long time, shouldn't I? I hope, I can do it within the next days.
-
Well, well. Made my last post a long time ago. Problems at work, some time in hospital and the holidays. I hope, I can now start building again. But before I do, I need to confirm that I did it unterstand it the right way. Option B is the deal instead of Option A for the step details on the biceps, right? Or something else I miss?
-

KCP First Order F-11D Studio Replica Blaster
Tai replied to kcpstudio's topic in Weapons of the First Order
I'm interested as well. Still need one for my FOTK. But I'm curios about a few things. Will there be kits only, or finished blasters, too? If yes: Will there be installed electronics? (I can't do things like that and haven't someone in my area, who could do that for me. ) And the most important thing: How about shipping to germany? I'm affraid to get problems with the german customs... About the price. Well, I think, I'll start to save money now, so I can afford it. -
Thanks! Yeah, right? I originally planned to finish my armor for April / May because I had my first troop there for this year. After that, I lost 2 more troops as a FOTK and it looks like that I will miss the next in three weeks, too. That's so terrible, if you want troop with others as a FOTK (or the only one as that), but you can't.. Anyone else with this kind of situation? Another problem is, that I could probably finished my armor already, if I wouldn't do the modding work for more screen accuracy (or better overall look) or at least I would have painted it.
-
Sorry for the long time gap since my last post. I have too much to do and couldn't do anything for weeks now. Still have to paint my armor. Anyways... Biceps:
-
Starfox2010's TFA Stormtrooper Build
Tai replied to Starfox2010's topic in Build Threads Requireing Maintenance
I had the same problem. And sadly you can see it, even after putting tape on it (I tested it). Because of this fact, I used some putty on the tubes edge for simulating the straight look. -
Thank you, Walter. I don't think, that my build is that good. But it should work for troops. You do a great job at your build btw.. Shins: I also heat bended the gluing tab into the box indents for a bigger surface (= more gluing strength).
-
Good luck on your build!
-
Chest Plate: Finished resin center update. Even without glue, it sits pretty well. Inside: Outside: With glue and flash light. Finished (Outside): Finished (Inside): Seam needs fine tuning, but finished: Ready for filler and painting.
-
Thanks, Rick! Tighs: Finished and ready for filler and paint.
-
Next one are the tighs. But they will be my next post. This time it is just only a preview of that, what I did at weekend. The first test fitting of the "whole" armor. Actually before I apply the putty during the next days. Gaskets were shipped last week, so the parts looks pretty oversized and I can't do much during the wait time. What do you think? For the second (and first not scrapped so far) armor, it looks pretty good, I think. I'm pleased with the results so far. The First Order C3PO, lol.
-
Backplate / Yoke: After gluing. After filling the gaps with glue and trim / sand off.
-
Starfox2010's TFA Stormtrooper Build
Tai replied to Starfox2010's topic in Build Threads Requireing Maintenance
Mine looks the same at this point, maybe 2mm shorter. I guess, it needs bondo / filler to fix this or leave it just the way it is. Or better sanded out, I think, I will do that. -
Thermal Detonator: Inside after gluing. Finished. But as you can see, the top section is broken. Anovos should redesign the base plate a bit. (Or it is just me.) I decided to rebuild the broken section with glue. Aplied on painters tape, put on the gap, turn upside down and let cure. After cure time remove painters tape. Finished again and ready for filler. Maybe it's just me, but it could be possible, that the return edges on the left and right side of 10D are supposed to be NOT cut of. My gaps are like the same shape they was. And this would explain these little indents left and right of the base plate. What do you think?
