

AsBlondeAsLuke
-
Posts
379 -
Joined
-
Last visited
-
Days Won
3
Content Type
Profiles
Forums
Gallery
Articles
Media Demo
Posts posted by AsBlondeAsLuke
-
-
On 7/26/2014 at 1:57 PM, Berbs42 said:
------------
It's here!!
It was very difficult to keep it a secret from Renee, but I succeeded, and she was home when the UPS truck pulled up and she's extremely excited!!
She's the love of my life, and like I said earlier:
- Berbs
You, sir, are an absolute genius. Let us review:
1) You managed to keep this a secret
2) You correctly referred to the special woman in your life as the "love of your life"
3) You purchased her armor as an expression of the love between you
All signs of genius.
Well done.
Looking forward to seeing you both in armor!
-
 1
1
-
-
Congratulations Jason! Nothing more exciting than seeing the UPS driver bringing a box of new armor up the driveway. I wanted to run out and help him bring it in, but thought I'd contain myself and let the nice man do his job.
-
Thanks! So excited to start building. My husband said 8 is a very lucky number.

-
Look what arrived today! A box from Kevin!
----------
Thanks Kevin! Woo hoo!
-
I cheated on my RS helmet. I used a sharpie fine point, when doing the stripes you go over the line enough to make it as thick as you want and the results are great.
Do you have a picture? I was considering using a sharpie, but wasn't sure how it would look. At this point, I'm almost done painting, but it might be a nice option for touch-ups so small it is difficult to reach precisely with the brush. Plus, I already know this isn't going to be my last helmet. Already thinking toward my next project.
-
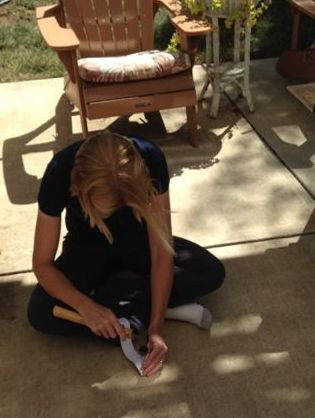
Tim, you're totally my hero. Not only are you rocking that apron, but you know how to use a sewing machine. Enjoying the posts on the strapping. Jealous of how good you look in that apron. Eric, you, too. You two are going to start a trend. TKs everywhere will be wearing them to keep their armor clean.
-
1
-
-
I think I have the answer to your final question here. We've had a "long time" to perfect the fit of the armor - you, in particular have clearly perfected it - so you can reach it. I'm just thinking that even though they had their armor engineered to Imperial Standards, maybe their engineers never solved the problem that you did. Perhaps that engineer was working on the reactor in the detention area at the same time he was supposed to improve the TK armor so they could reach their TDs, but that "dangerous leak" led to him having a brief "chat" with Lord Vader and he was... no longer employed by the Empire.
A brilliant theory. It explains why it is so hard to reach the TDs. Well, that is the standard we all strive for in armor fit. To reach the elusive det before something blows up. Preferably not us.
-
Looking GREAT, Diana!
I have to laugh at your comment about your armor being "OK" when you finished it.
I'm just about ready to take (and submit!!) my approval photos within the next 36 hours or so, and I've already got myself a pretty decent list of "necessary" improvements - many of which I believe will be centered on strapping/fit as opposed to "construction." That's pretty impressive that you can just reach everything. I'll admit that. I feel like I need to take on a bit of yoga in order to more efficiently get into my armor as it exists currently.

Great stuff. Thanks for sharing, as always!
Tim, woo hoo! What exciting news about your approval photos. You have been such an ardent supporter of everyone here on the FISD. Yes, it is hard to believe that there can still be so much left to do after you first get approved. But, Kyle did tell me that the armor is never actually "done." It is this aspect of working on the armor that I enjoy the most since there is always something you can do to make it better.
With regards to getting into the armor, it is the tiny little adjustments that made my armor fit so much better and eliminated the need for the yoga moves. I used to almost pop a rib everytime I tried to snap my cod. (Sorry, Steve. That was not an intentional cod mention, I swear.) But, just the minor adjustments made in the strapping now allow everything to go on with ease. It truly is a pleasure to be able to suit on and off without help. I can even finally reach that elusive thermal detonator. When do we get to throw those things at people anyway? The stormies carry them around in the movies. You think they'd use them more often. They're walking around with bombs on their belts.
-
Once I saw the masking material for the tube stripes I winced...then I saw the peel back pic...ouch. Don't worry about it. That material is just tough to get a good seal on the double curved surface of the cheek tube. I gave up trying to use it as a template long ago and just use it as a guide. I place them and trace each one with a pencil then paint it.
I am still blushing from all your cod talk........*shivers*

Hi Steve- How funny you mention using the templates as a tracing guide with a pencil. That is the way I originally had it! And, then my engineer said: "You are doing it the hard way." He had a vision for his masking templates. So, I think more like you do.
I am quite comfortable with the hand painting of the lines over the pencil since the lines are meant to look hand painted anyway. -
Two more weeks of working on the armor. I've been going through the list of everything I need to do to complete the requirements I will need for Centurion.
It's been a pleasure to continue to make improvements and I had a chance to go out trooping in my improved armor. I could feel the difference.
I had thought my armor was good when I first finished it. No, it was OK before. And, then, I thought I had done a good job when I finished it for EIB. Now, I realized the job was only half-done. By tearing certain parts of my armor apart and rebuilding it again even better, it made a huge difference last time I suited up. I could feel it with every click of the armor.
Shins are re-done and re-shaped. Cod is now tucked in, re-snapped and tightened up. I'm going to miss the cod jokes, though.
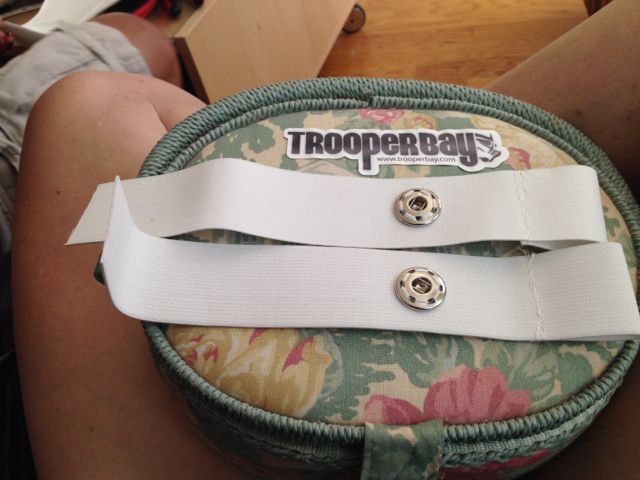
There were several items we decided to fix while we were making the Centurion improvements. One area was improving the strapping. I set about re-doing my shoulder straps for the third time. Yes, third time is the charm. My first set had snaps that kept failing. Set # 2 ripped during the May the 4th troop from overhappy people. So, I replaced the straps with a set from TrooperBay that didn't end up fitting my shoulders, (too wide.) I'd been using the too wide straps for a while now, but kept wanting to replace them. So, finally, I have my new set. And, they're beautiful. Time to add the snaps on!
The little tasks that seemed so hard at first now seem so simple, like figuring out how to do snaps. Got them in one try and they work perfectly. Love them.
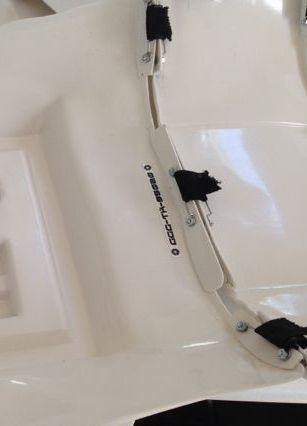
Another area that was worked on that was purely "interior" had to do with "armor bite." I would get welts on my back and hip after every troop which we figured came from the extra shims we added in. So, we Dremeled all of these back and rounded off all of the edges. Nothing worse than a couple of hours of cumulative armor bite poking right into your hip bone. Gah.
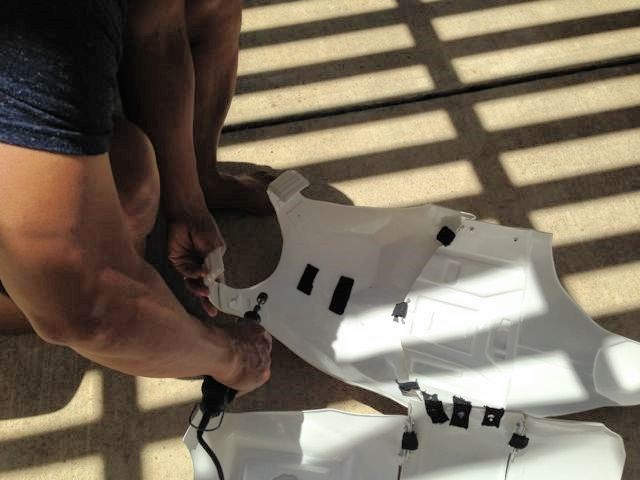
Also on my "wish list" was getting rid of an extra snap on the interior of the chest armor. (The lesson here once again is that Zap-A-Gap is very unforgiving stuff.) So, the Dremel took care of this and made it go away. Thank you nice Dremel.
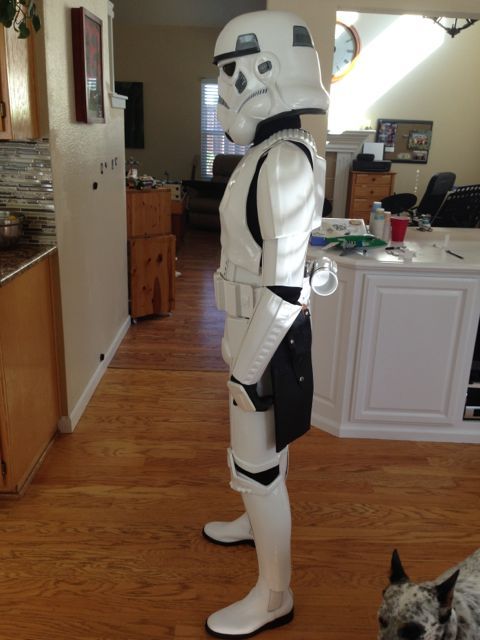
So, I had a chance to try out my new and improved armor at the Marin County Fair. Best part of it was how quickly I was able to suit up. I timed it at home before I left and I could get into the armor (fully unassisted now) in less than five minutes and out of it in less than two minutes. This is much faster than before and I could reach every button, snap and piece myself with ease. My armor felt great. In the picture above, I'm the TK on the right. And, in the picture below, I'm the TK on the left. OK, so I didn't get my belt on perfectly straight, but hey, these people (below) were still delighted to see us. Making people smile like that is what makes trooping fun. And, you should have seen how quickly I was dressed. I was like lightning trooper.
Ah, so, but enough fun with trooping, back to building. Another project I wanted to finish for Centurion was my RS bucket.
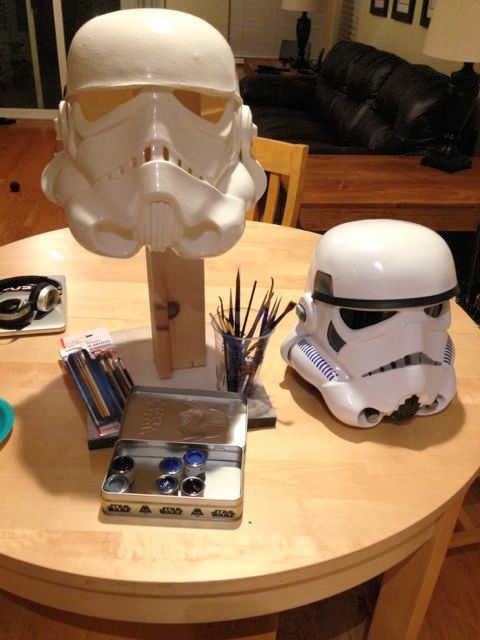
I had a perfectly good bucket, (my Scootch), but I always promised myself I would finish the RS bucket. One major difference between the two projects is that while I had painted the entire Scootch bucket (many folks use Krylon paint or something similar), I left the RS bucket in its raw, beautiful state.
Alright, this is mainly because Kyle started calling me "Q-Tip Head." He felt my Scootch Bucket was too white. He's not wrong, though. You can see the difference in color between the two in this picture, (below). This comes from the white plastic paint I used on my Scootch. So, beware the different shades of white. Doesn't matter that much, anyway, since the plan was always to retire that helmet and make it a display helmet. But, an off-white next to a white can look a bit shocking.
First brush strokes on the new helmet. Could anything be more exciting? No. I think not. My son said I was "seriously nerding out." I think that's a good thing?

Lenses going in.
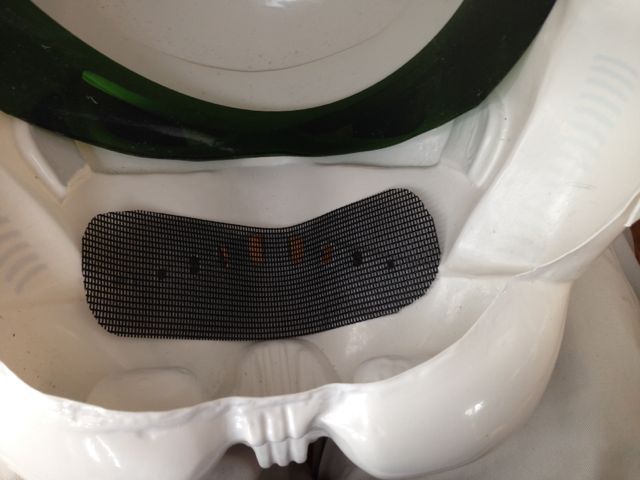
Mesh.
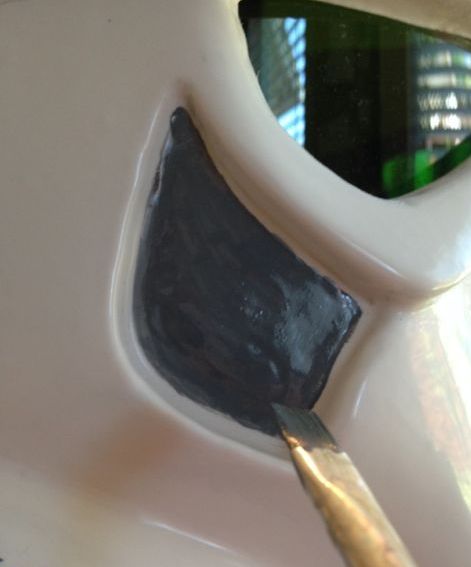
Takes multiple coats to get the color right, and I usually let it dry a day between each coat. On hot days, it might dry a bit faster. Painting is not something you want to do in a hurry.
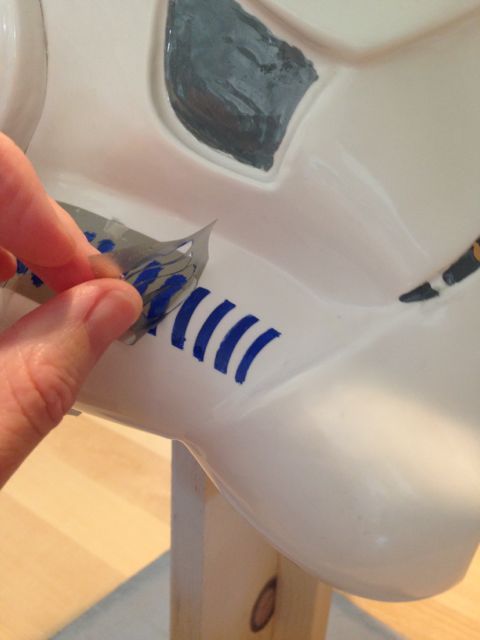
Tube stripes are on. Those tiny little dots of extra paint can be cleaned up with a toothpick.
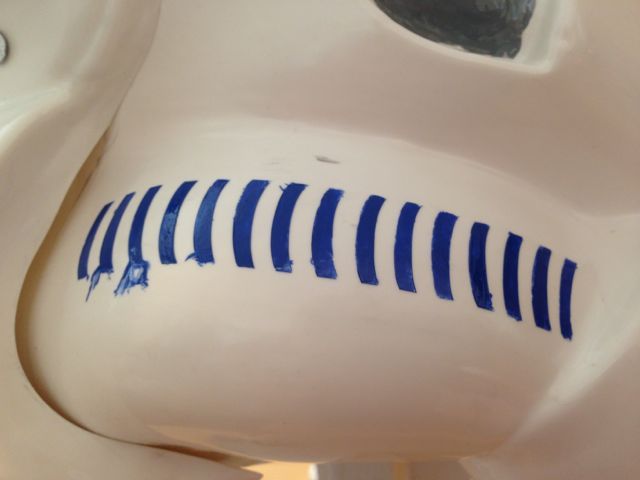
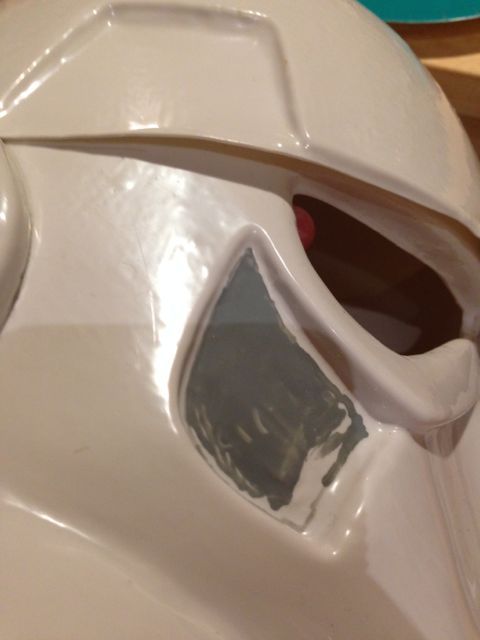
But, ack, we have a bleeder on the other side. A toothpick won't help here.
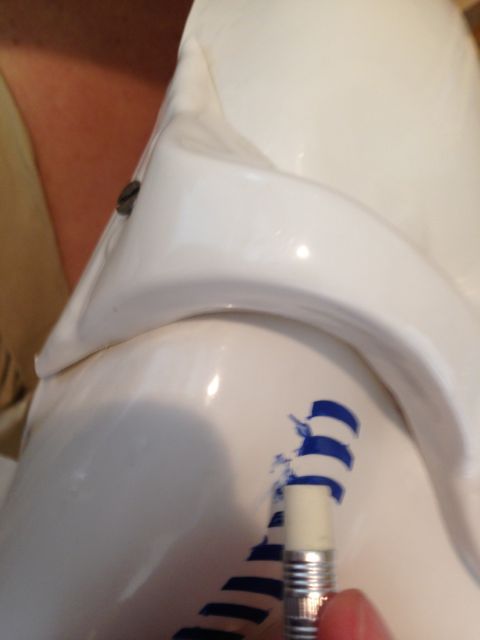
This is when I like to use my good friend, the white eraser. Works well on fingerprints, smudges, paint smears, etc. Love the white eraser. I keep one in my trooping bin. I also use a bit of paint thinner for clean up jobs like this one. Paint thinner acts like a reverse paint brush and I actually "paint it on" with a paint brush in tiny little careful strokes, cleaning the paint brush on a paper towel between every stroke. (Sorry, do not have a picture of this.)
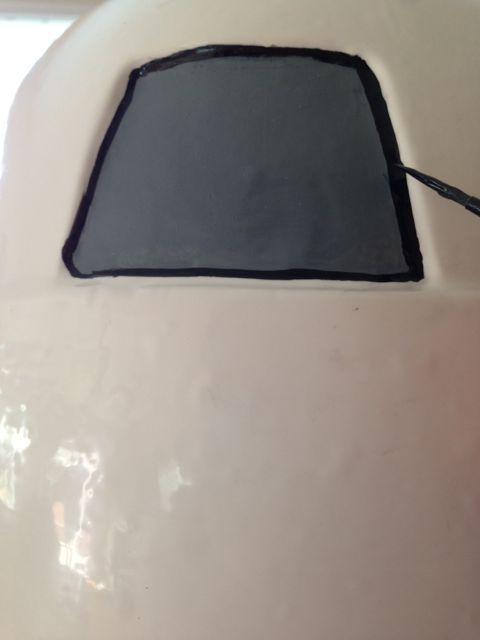
After fretting and sweating over outlines on my last bucket, I realized I was going about it all wrong. You don't draw the outlines. You simply trace them on the bucket. Do you see how there is that natural indentation on the bucket anyway where the paint brush fits in? Look how my paint brush is sitting in that indentation. By placing my paint brush there, I am simply tracing into that groove. You follow that and you have your outline! It's almost like Paint-By-Number. Actually, it is exactly like that. Ack. Why didn't I figure this out sooner?
Needed templates for the back, so made our own using painter's tape on the back of a kitchen plate.
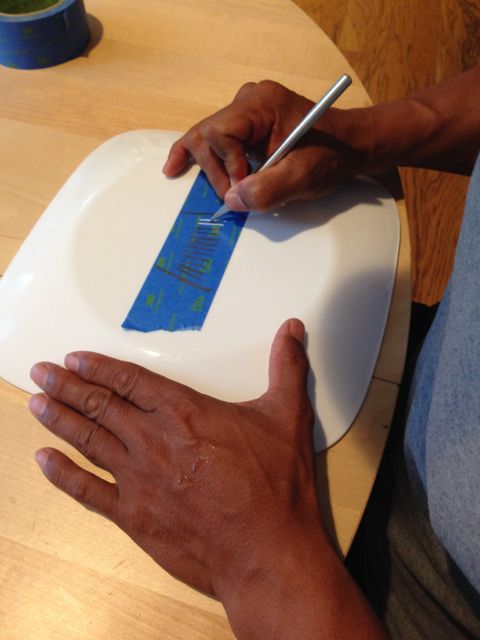
Decided to wait until morning to actually do the painting, though, so we'd have natural light for painting. Once these lines are on, the painting will be done and the bucket will essentially be finished. Simply need to add the trim.
-
Congratulations Centurion! And, Wow! You look so good in your armor!
-
Glad to hear you hand painted. Good for you. That's the spirit. Welcome!
-
Welcome! Sounds like project number two should be pretty ease after that Fett.
-
Ha ha ha. Love it. The sandwich is a good idea. I don't know what it is about trooping, but I'm always starving halfway through the troop.
With regards to space, I have the opposite problem in my bucket. I bounce around like a pinball in there. Still trying to work out the ideal padding to get it to fit right. Just got some new pads and will try them this week. See if it keeps me from sloshing around in that cave of a bucket.
-
Nice to see this thread. I was just talking about audio, fan and speaker set-ups yesterday with two other folks in my garrison so this is very timely. We were all discussing how nice it would be to have everything (all the audio) fit into the helmet so you wouldn't have to deal with wires down into the chest. I suppose the downside is the additional weight and making it all fit? Just wondering why this set- up isn't more common.
-
Nervous? Ha ha. None of the rest of us felt that way. We were all born knowing how to build armor.
Relax, we're here to help you through. Welcome onboard. -
Looking forward to great things out of Mashpee. Welcome onboard.
-
Welcome onboard!
-
Wow!, just spent a few hours reading through your build, I am stunned by how great your armour came out, all of the work in reducing the size from out of the box was well worth it.
Now i just need to get myself sorted and order myself a set of armour, I was initially going to go with RS armour, as there in the same country as me, but after doing research and reading and research, I think I will be opting for the RT Mod armour as it's more accommodating for the well upholstered person
Your build has definitely inspired me, Thank you.
Art
Well upholstered. I love that term. I'm very glad you found armor that fit you well. You are going to look awesome in your armor. You went about the process perfectly by doing research, research and more research. Well done!
-
Thanks Diana for the link to the helmet liner! I am looking for padding to go in my ATA helmet, and these look like they'll do the trick! I ordered the medium one and should get it by the end of the week.
Ah, glad I could help. As I mentioned in my earlier post, I cut the webbing in one or two places to get it to fit the shape of the stormtrooper helmet better. It allowed me to position the pads to any angle. I always put my pads in with velcro, so I can move them around later. I've fussed with my audio a lot and being able to move the padding around helps with different audio set-ups, (mic on the left, mic on the right.)
-
Toni, your English is still much better than my Spanish.
. Welcome! -
Great pictures! Thanks so much for sharing!
-
Welcome. Glad to hear your armor is arriving soon. Looking forward to following your build.
-
Welcome onboard!
Jes Gistang - research thread
in Legacy Stormtrooper (Joker Squad)
Posted
OK, don't want to provide any spoilers here, but Berbs or Jason, did you open your t-shirt and look at the back? Won't post a picture until you have seen it for yourself.