AsBlondeAsLuke
-
Posts
383 -
Joined
-
Last visited
-
Days Won
3
Content Type
Profiles
Forums
Gallery
Articles
Everything posted by AsBlondeAsLuke
-
 Thanks, John! I'll take some fitting pictures this weekend. I'm not sure what to do about the chest plate. I can't figure out if I should leave it or resize it before I add the brackets. I have a big block of time on Sunday when I can work on the armor. (I'm originally from New York. I was born in Sleepy Hollow. I worked in mid-town.)
 -
@ukswrathHi Tony! We miss you here. If you were here, I would have dropped this build off at your house, and it would've been redone to perfection months ago. A fellow trooper from the garrison was admiring my sweet fan setup in my helmet after a troop on Friday night. (Her fans failed, and I was showing her how I could switch on one fan or both fans with your awesome system that slides right into the base of the helmet.) So, I've gotten more done on the build. @gmrhodes13 Thank you for the helpful links and build threads. Restrapping the abdomen and dropping five pounds fixed the issue with the side closing up. If it still looks wonky, I can always add a shim. I'm always up for a good challenge. Continuing on with the story of fixing this build, most of the snaps had to go. They were very hard to close even after I oiled them and my husband couldn't get most of them snapped either. It felt like it took so much pressure to close the snaps it would snap the plastic. Not good. They had to go. Straps in the shoulders worked fine, so those got to stay. Everything else was tossed into my "maybe I'll have a use for it in another build" drawer. So, this overlapping medieval strapping system was transformed into something that looked like the side strapping on my other TK and now does not overlap. This also helps the other side align better. My husband and I both decided the backplate needed to be trimmed down to look proportionate to my frame. Not a lot, but it did need to be resized. We are fortunate we have done this once before. We keep using the other set of armor for reference to know how big the pieces should be. So, this is the untrimmed backplate as it looked when I was trying it on at an armor party in the beginning of August. (One shoulder is not fully strapped in these pics.) Trimmed off just a little bit since you can always take off more later. I'm double-checking the CRL for what it says about return edges on the backplate. It doesn't. We decided to add a return edge since we will need it to install the "bracket" strapping system. Creating a nice straight return edge using the heat gun and a wooden cutting board. The cutting board helped ensure the new return edge was nice and straight like it had been created from a mold. My husband used a Dremel and pliers to remove the extra snaps. I couldn't watch as I was worried he was going to Dremel through the armor. But, all four snaps came off, leaving the piece clean and ready for brackets to be installed. While the heat gun was out, some gentle reshaping of the kidney piece to bring that side piece in more, (to "close the gap.") Comparing the new backplate to the old one to double-check how we are doing with sizing. The new backplate has more return edges under the arms and on the sides. But, as long as they aren't digging in and it looks proportionate, they can stay. On the old armor, we created shims to hold the brackets. This worked well as the brackets never broke or cracked the armor even during ten years of heavy trooping. It is one of the few areas of the armor that hasn't cracked. So, we are going to do this method again and add the extra shims to the return edge to hold the brackets. The armor is starting to look more like something that will fit me and that I'd actually want to wear. My husband couldn't keep the names of all the armor pieces straight, so I helpfully added labels to help with my vocabularly. The brackets and screws were tricky to track down. TrooperBay doesn't make them anymore and my original ones came directly from RS Props. (I bought their strapping system.) Fortunately, we have a stormtrooper chat within our garrison and I've been posting over there about this build. One of my garrisonmates knew of someone through his First Order build group that knew someone that could get these brackets. To make a long story long, I got the right brackets, screws and straps. I'm undecided about what to do about the connection between the kidney and the buttplate. The current straps seem to be holding it well My husband thinks it needs two more straps. On my original TK, the kidney and butt plate are connected by brackets. Open to advice on what to do about this area. This particular area of the armor seems to fit well as it is. OK, that's enough for today. I'll do a post to catch up on the progress of arm and thigh strapping in another post.
-
Hello All- It's been a decade since I posted a build thread here. I'm still wearing my other kit, and I love it. I will be trooping in it again tomorrow. I love everything about my existing kit, and the mobility I have in it is amazing. Here's a pic from May the 4th/Free Comic Book Day where I started mopping the floor during a torrential rainstorm. (The one day it rains in six months is May the 4th. Go figure.) But, my suit is starting to show its age.) It keeps cracking. I keep repairing it. And I've sanded it so many times that it has lost its shine on the chest plate (mainly because I have persistent cracks on the chest plate and straps that I keep repairing.) You can see these flaws on this close-up shot taken a few weeks back during "National Night Out." Now, in retrospect, I probably should've just gotten another RS Props and had them build it. But, because my RS Props yellowed a lot over the years, I thought I'd try a Walts Kit. Because I am in the middle of a very complex Bo Katan build that is determined to suck the life out of me, I outsourced the building of this kit. I didn't realize that even with outsourcing the kit, it still requires a lot of work once it comes back in order to make it fit properly. (Flawed thinking on my part.) The "big box" arrived in May 2024. It was always an exciting day. It reminded me of when my RS Props arrived a decade ago. I remember being very intimidated then by all the parts and having no idea how I would ever assemble the kit. (I also thought the helmet was "eggshell thin" and would surely break if I handled it the wrong way.) There was just as much mystery and anticipation at this box awaiting me on the front porch. (I can't remember what was in that second flat box. Likely more paint or brushes for the never-ending Bo Katan build that is determined to kill me.) The good news is that the kit was packed well. The shins and thighs fit, and the helmet was protected nicely in a pillowcase and then in bubble wrap and then in packing peanuts. Nicely done. The "black" helmet made me laugh. The kit was built to my measurements, and like most things I've had built to my measurements, it mostly / kind of /sort of / maybe fits. You can probably see the issue right away before I even put it on. I set it down side-by-side next to my old kit. (Yes, admire how the old kit is held together by sludge and duct tape. It is truly a screen-accurate wonder with all of that duct tape.) For a kit that is supposed to be a "woman's small," it looks very large to me. Why is the back plate so big? And the chest plate? And the cod? What small woman has such a big damned cod? And, what is with the suspenders?! The Uncle Mike's belt, you see, is my own because I quickly decided the click-click-suspender method of holding up the thighs was not for me. The pair of scissors you see is for cutting out the suspenders. There are a LOT of SNAPs in this armor. (I nicknamed it the "snappy snap" armor. I might have been willing to put up with it if the pieces aligned correctly. Sadly, they did not. You can probably tell just by looking at this photo how the clamshell is not aligning properly on the one side. The strapping was just... off. OK, well, you can see the issues. I've made some progress since these pics were taken, but that's enough for today.
-
Hi Matt! I am also from your local garrison. Welcome! Building from 3D prints is a very long yet rewarding process because you genuinely get to say: "I built this from scratch." I don't have expertise on the Imperial commando, so as Sha Sha suggested, read all of the other builds for guidance. Sometimes you can learn a lot just from what went wrong on someone's build and when they are kind enough to share that experience to spare the rest of us from making that same mistake. Printing in smaller pieces and gluing it together is an excellent way to go. I learned that from building clone helmets. Trying to print them in one piece meant a bunch of frustrating half-finished prints. With some glazing spot putty, you can get those seams quickly filled in. I just started using an autobody filler to speed up filling in the print lines faster than Bondo alone. I just started using this filler, in conjunction with glazing spot putty for the deeper print lines, to speed up finishing. https://imgur.com/XzDu2fr Here's what it looks like, combined with glazing spot putty on a current project (a gauntlet for another costume.) https://imgur.com/7iQ8djF Looking forward to meeting you, Matt, and following your build.
-
Diana's RS Props Build- ANH Stunt
AsBlondeAsLuke replied to AsBlondeAsLuke's topic in Build Threads Requireing Maintenance
This is perfect! I love the measurements. Thank you, @TheSwede If I could hug you, I would. -
Diana's RS Props Build- ANH Stunt
AsBlondeAsLuke replied to AsBlondeAsLuke's topic in Build Threads Requireing Maintenance
Thank you! What size do I need? Appreciate the help. The only time I’ve used rivets before was during the original build back in 2013. Thanks again. -
Diana's RS Props Build- ANH Stunt
AsBlondeAsLuke replied to AsBlondeAsLuke's topic in Build Threads Requireing Maintenance
Hello everyone- Thank you for the excellent belt advice. RS was kind enough to send me a new ammo belt. (Thank you!) After a busy summer of trooping, I am sitting down to assemble the new belt. I have a question, though, regarding rivets. (It's always the rivets, right?) Last time we assembled the belt, we used pop rivets. I remember the rivet gun being painful on the hands. What are the other rivet choices for this area? I was reading through both the CRL and the Centurion requirements and I couldn't find anything that spelled out requirements for the rivets in this area. I assume this is because you can't see these rivets? My existing belt next to the one. The old one is an an impressive feat of engineering at this point.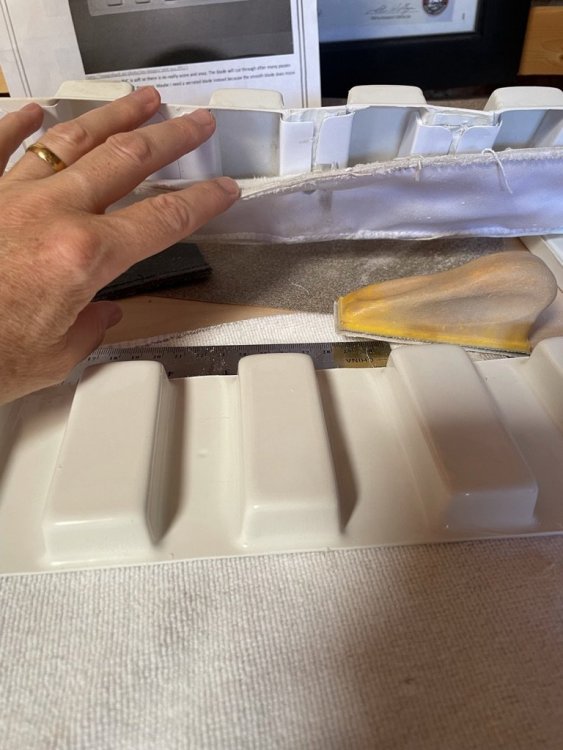
-
How's your mobility / flexibility?
AsBlondeAsLuke replied to TheBlooperTrooper's topic in Hard Armor (General Discussion)
Love this reference for the mobility cuts. Thank you! -
Diana's RS Props Build- ANH Stunt
AsBlondeAsLuke replied to AsBlondeAsLuke's topic in Build Threads Requireing Maintenance
Adam, so good to hear from you! My trooping buddy! It's funny as I had the opposite problem in the beginning. My hand guards were almost sand trooper beige and my armor looked whiter by comparison. You can see this in the pics we took together up above the Golden Gate Bridge. This bugged my OCD to end until I figured out a very simple solution. When I polish my Chelsea boots, I also give the hand guards a light coat of white shoe polish. It worked wonders. I continue to "polish" my handguards to this day. https://imgur.com/a/FcNyJ2e -
Diana's RS Props Build- ANH Stunt
AsBlondeAsLuke replied to AsBlondeAsLuke's topic in Build Threads Requireing Maintenance
Sound advice if I've ever heard it! Thanks so much, Rob! My husband has been trying to convince it's time to retire the armor and get another set. But, I do love this armor. It just looks so amazing when I wear it. Thanks again. -
Diana's RS Props Build- ANH Stunt
AsBlondeAsLuke replied to AsBlondeAsLuke's topic in Build Threads Requireing Maintenance
Thanks so much for the advice @gmrhodes13and @fragarock. Greatly appreciated. I have decided to take both of your guidance. RS Props is sending me another belt and I've started color matching some ABS scraps. By finding the right color paint this will allow me to paint the ammo belt I already have from another armor maker. Between these two options, hopefully I'll end up with a nice backup belt. https://imgur.com/a/0ZkCQyu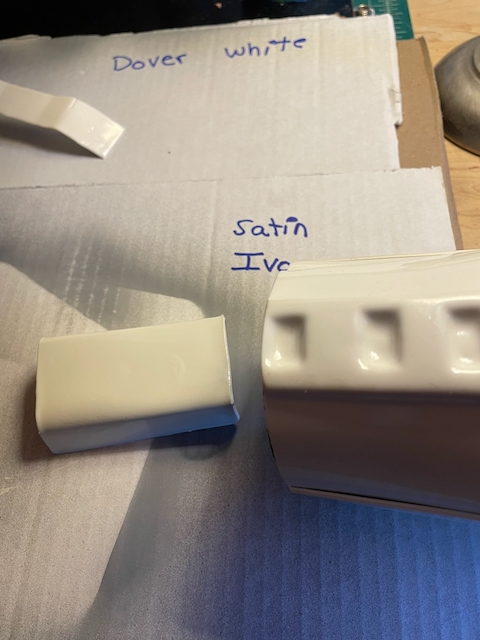
-
Diana's RS Props Build- ANH Stunt
AsBlondeAsLuke replied to AsBlondeAsLuke's topic in Build Threads Requireing Maintenance
Hello All- I wasn't sure whether to post this under my original thread or under the "Belts and Other Soft Parts forum." But, I am having issues with the bendy bendy parts of my armor as my RS Props armor is getting older. Over the past three years, I've been developing cracks in my shoulder straps, belt and smaller ones in my butt and beloved cod piece. The belt seems to have taken the worst of it as this is the piece that gets snapped on and off repeatedly. The belt has developed numerous little cracks that I have shimmed and added ABS paste to again and again. But, I'm worried the whole thing is going to cave in like a sink hole. So, I contacted RS Props to ask them to send me a new ammo belt thinking it would be as easy as trimming it, popping off the old and adding in the new one. Eh, not so fast there. Here was the response. >>You purchased from RS originally? This may be a problem, with it being from so long ago we cannot guarantee the ABS will match as it does change over the years. It will be a slightly different colour. Ah, now while I'm disappointed, I'm not too surprised. A garrison mate gave me their spare ammo belt a year or two ago, but I haven't figured out a way to use it yet as it it a different shade of ABS. https://imgur.com/s41lCbR Any ideas? I know I'll eventually have to replace the whole kit, but other than the micro cracks, I still like the look of the whole kit.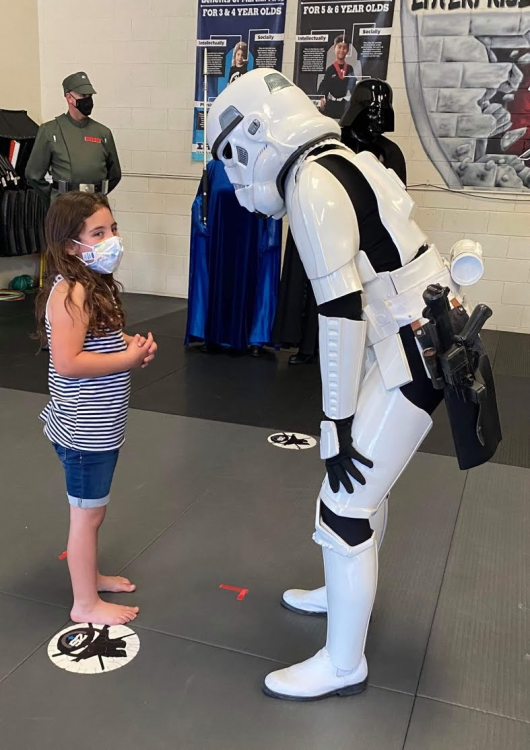
-
fragarock's RS Stunt build - Not to scale
AsBlondeAsLuke replied to fragarock's topic in ANH Build Threads
Hi Frank- I can get you added in to the FB page. It's a private group, but a very friendly one. Please look me up on FaceBook as "Diana Wolf Torres" so we can connect and I can get you added in. The group is almost at 500 members already. So, rest assured you are in great company. There are a lot of awesome building tips and tricks being exchanged on there and the best comeback lines to "Aren't you a little short for a stormtrooper?" -D. -
fragarock's RS Stunt build - Not to scale
AsBlondeAsLuke replied to fragarock's topic in ANH Build Threads
Wow! Nice progress. I am enjoying following your build. At the time I posted my thread, there were not a lot of smaller troopers out there. Now we have an entire community on FaceBook with almost 400 members and merchandise, clothing and patches just for us troopers who are guaranteed to get the line "Aren't You a Little Short for a Stormtrooper?" about six or seven times a troop. My little armor has held up beautifully and I've trooped in at least 50 times. I repair it on a regular basis with Zap-A-Gap and sludge, but I am still out there several times a month representing the 5'6" and under crowd. I had those dents, too. It didn't affect the final look. I was so afraid of how "thin" the helmet was that I didn't build it for six months. I was approved with a different helmet. However, my RS helmet has stood up beautifully and I am not easy on my gear. It has travelled everywhere with me and stood up to more than one rough troop with swarming kids or sports fans who've had a bit too much to drink. I shimmed in the places it looked like it might crack, and I quickly repair my gear as soon as I see signs of wear and tear. Oh, and while it took me over a year to do it, I did "cut the cod" to get a better fit for my shorter frame. It made a difference in the look and fit. (And, now I can actually sit down in the armor, although I wouldn't recommend doing this too much since it can put stress on the butt plate.) -
HOW TO: Whiten Handguards
AsBlondeAsLuke replied to AsBlondeAsLuke's topic in Getting Started - Read this First!
Heh heh. Great catch. They're Velcro-ed on, so I can swap 'em out with different gloves. On this particular troop, I think I put them on after I put my bucket on. Probably not the best idea. Thanks for the eagle eyes. -
The handguards I received from RS-Props a few years back were never bright white, but neither was the armor kit so I didn't worry about it too much. But, as time passed and I logged more troops out in the California sun, my handguards yellowed faster than the rest of the kit. So, rather than abandon them after so many great troops together, I got a bit creative. It turned out there was very simple solution. Shoe paint. Available for a few dollars at the local drug store, it is flexible and just the right shade of white to match the armor. It is crazy easy to apply and dries in a few minutes. You can apply a single coat, or multiple coats. Your preference. I ended up doing three coats on my handguards, but only because shoe paint is a lot of fun. I attached "before" and "after" pics so you can see the difference.
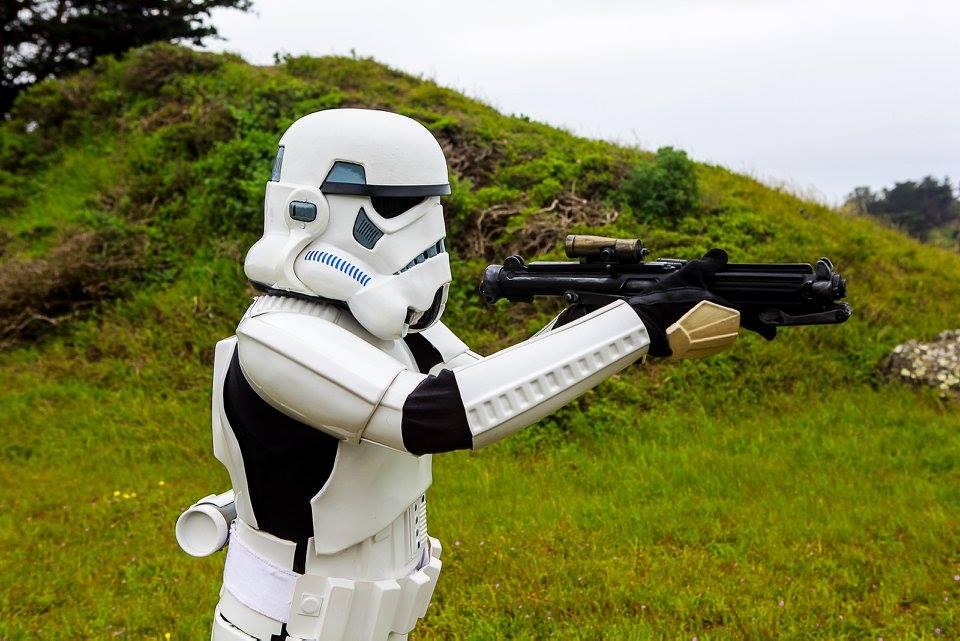
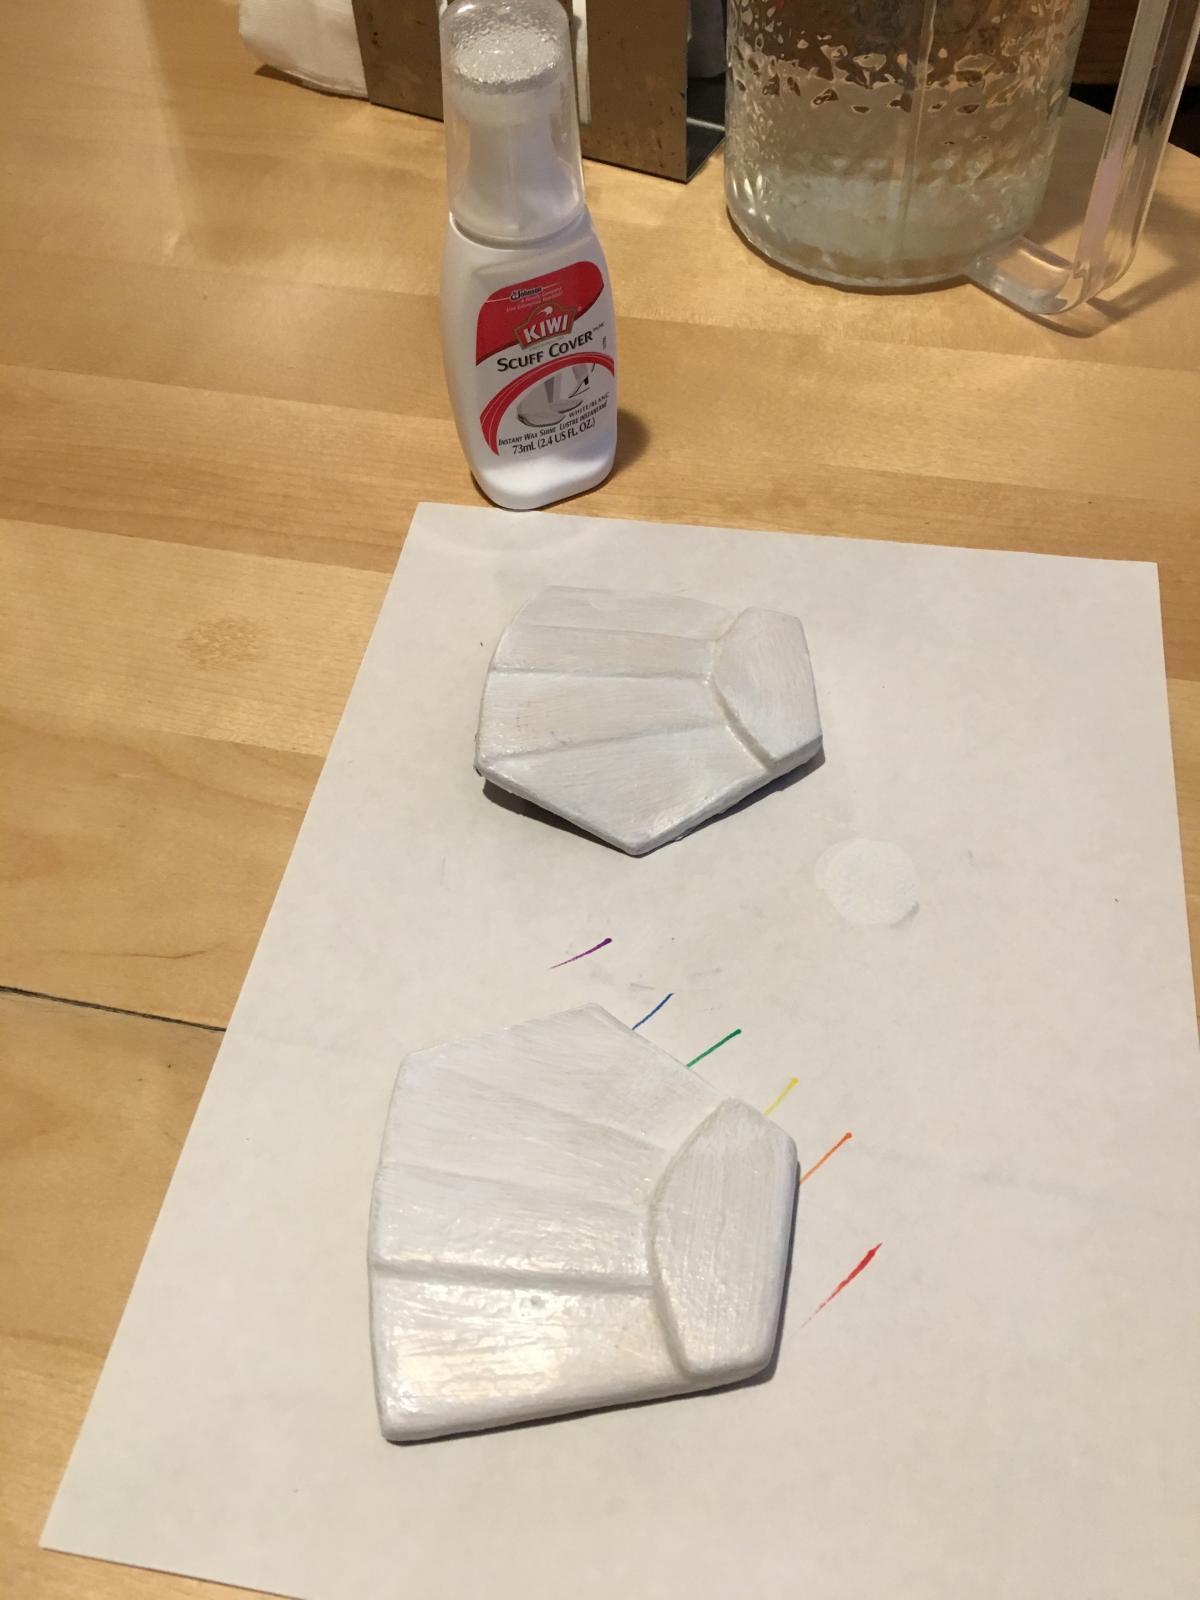
-
Diana's RS Props Build- ANH Stunt
AsBlondeAsLuke replied to AsBlondeAsLuke's topic in Build Threads Requireing Maintenance
Michael, Great to hear from you and I'm glad you enjoyed the thread! My TK number, TK-95020 is based upon the zipcode in Gilroy. This year, we finally added a few more troopers in Gilroy and I started a "handler training program" and just trained someone in Gilroy into the program, as well. Nice to be able to finally get more folks way here in the Outer Rim where I live with my family. I always see folks with the Star Wars stickers on their car, but it was just a question of connecting with them. I see that you are in Germany. My Mom is from Bavaria. I ended up in the newspaper there in Germany a few months back. I guess it appeared all over Germany, because all of my relatives kept sending me the link. This one is from my cousins in Passau. http://www.pnp.de/mobile/?cid=1898927 -
Not strange at all. Always best to ask the question than not ask it when you are not sure. My RS kit came with glue, and I was advised to throw it out. (For some strange reason, I haven't. Sentimental reasons, I suppose.) We tried the E-6000, but quickly discovered you actually need patience to allow it to dry. And, my spouse is not a patient man. So, we ended up going with the CA-Glue. This is very fast setting glue, and even faster if you add the Zip-Kicker. An excellent choice for those who are impatient. A very poor choice if you might mistakes.
-
Diana's RS Props Build- ANH Stunt
AsBlondeAsLuke replied to AsBlondeAsLuke's topic in Build Threads Requireing Maintenance
Hello All! I've been wanting to provide an update for a while, but admittedly it was a busy year. My TK ended up seeing a great deal of action in 2015, but held up beautifully. Not a single crack and I was out trooping most every weekend. I was also XO of the garrison for a year, which kept me busy. Things have quieted down for a bit, so I wanted to touch base again with everyone here and say hello. Kevin Doyle, of the 501 Mile Walk, came and stayed with me on his journey down the California Coast and then back up again. I was amazed at the things he could do in his armor, such as sit down in my Prius, or walk 40 miles a day, or sleep in his armor. So, I asked him to take a look at my armor, and he suggested some modifications. He said that my armor "fit me better than 99% of the armor he'd seen." But, he did still make some suggestions and the advice proved very helpful. His tips are summed up in this YouTube video. But, it basically comes down to making very small modifications. It is amazing how much you can improve the fit of the thighs and the shins by taking off very small amounts of plastic. Then, go out trooping. Give it a try. Then, try taking off a little bit more. He stressed not to take off large amounts. It is those minute modifications that can make a huge difference. My ability to go up and down stairs (which was already pretty good) has improved even more thanks to the modifications. And, I can even (more or less) sit down in my armor now. Kevin also suggested I cut my cod. Of course, you folks here on the boards have been suggesting that for a while, but for some reason, the first time I heard the term, I took it literally to mean "trim down the codpiece." It made no sense to me, because I thought I would lose all the detail on an important piece. So, I didn't do it. Kevin showed me what it looked like on his armor, where the cod was cut and suddenly it all made sense. Oh. Cutting the cod is more like a C-section for a stormtrooper. It still took me another month to get the courage up to do it. But, I did cut it. And, my once famously big cod, has finally been tamed down to size. Here are a series of photos which were taken by our garrison combat photographer in November. Ta da! My once famous cod. Now tamed down to size. This was one of my favorites from the pictures of that day. I might be little, but I'm fierce. -
Undersuit Product Opinions
AsBlondeAsLuke replied to bobio's topic in Boots, Soft Parts, and other Accessories
I'm digging that Tomsuit. I might have to check it out. I'm intrigued by the idea of the integrated gloves. Once you are in the armor, you are committed anyway. I always make a bio break before suiting up and one after, and once I'm in the armor, I'm in it for the duration. So one piece, two piece, doesn't matter. But, I do like the idea of the integrated gloves. Tugging up the gloves drives me crazy. -
LoveMonkey's AM 2.0 Build Thread
AsBlondeAsLuke replied to LoveMonkey's topic in Build Threads Requireing Maintenance
Looking good! The process is never really over. You'll always be wanting to make improvements on your kit. And, then, of course, there will be the inevitable urge to start another build... -
LoveMonkey's AM 2.0 Build Thread
AsBlondeAsLuke replied to LoveMonkey's topic in Build Threads Requireing Maintenance
I use two squirrel fans pointed directly at the lenses to prevent fogging. I've also found that I fog more with certain balaclavas. I bought a high end balaclava on Amazon, spending 3x as much as on the others, and I no longer fog. Better materials, maybe? Superior design? Not sure. But, it is awesome to no longer worry about fogging. Sent from my iPhone using Tapatalk -
Undersuit Product Opinions
AsBlondeAsLuke replied to bobio's topic in Boots, Soft Parts, and other Accessories
I use two under suits. For hot weather trooping, I wear an Under Armor top and bottom. When it is cool enough, I wear the nice, thick undersuit which came with my RS. (Better protection from armor bite.). When it actually gets COLD here, I combine both and wear the Under Armor under the thick suit. Sent from my iPhone using Tapatalk -
"Split Butt Plate"?
AsBlondeAsLuke replied to ProjectFirestart's topic in Tutorials, Tips and HOWTOs
LOL. I have mastered this one. Although, getting up from this position requires considerable leg strength and dexterity.