


Darth Voorhees
-
Posts
1,667 -
Joined
-
Last visited
-
Days Won
1
Content Type
Profiles
Forums
Gallery
Articles
Media Demo
Posts posted by Darth Voorhees
-
-
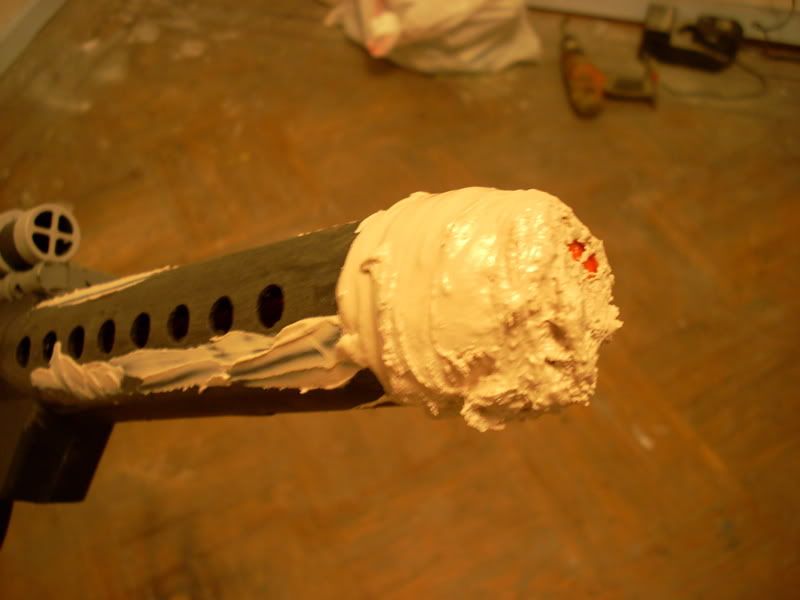
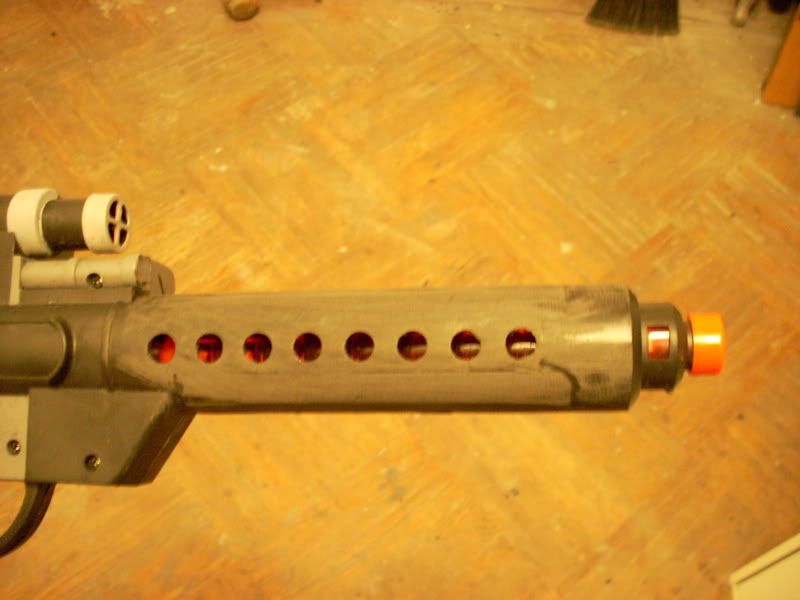
Now while bondo is hardening it gets ot a point where it is still soft but will maintain its shape. Its VERY carveablw with an x-acto/hobby knife, or large box cutter type tool. So what i did was carve a basic round shape out of the bondo beforte it completly hardens, like this:
then i repeat the process, trying a bit more to get the shape i want
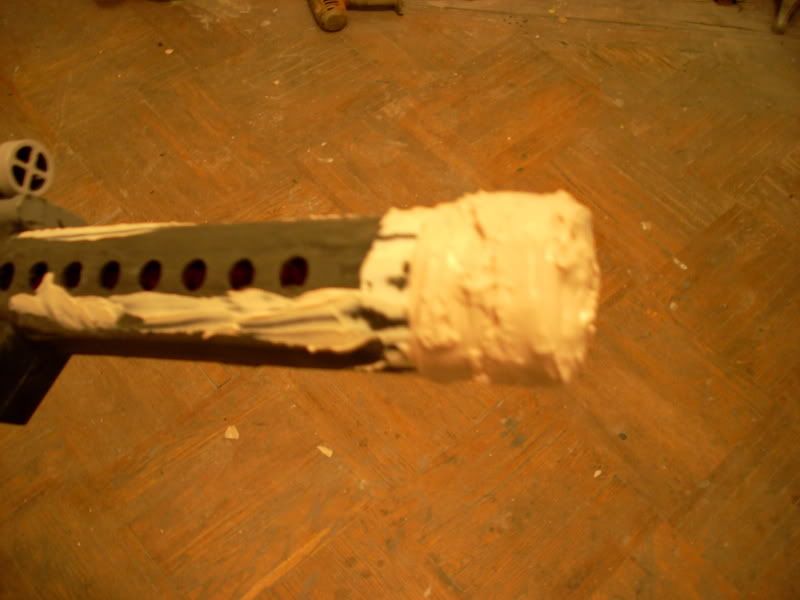
and here is is after the second "carve"

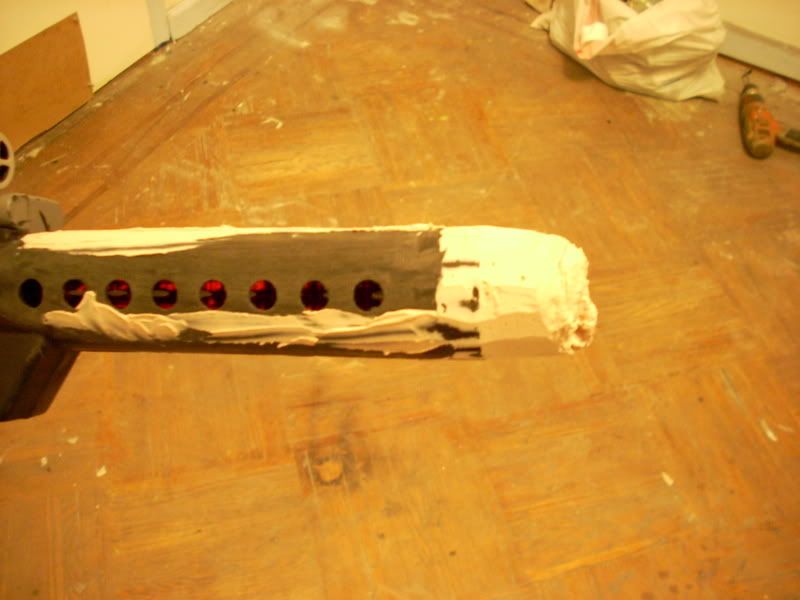
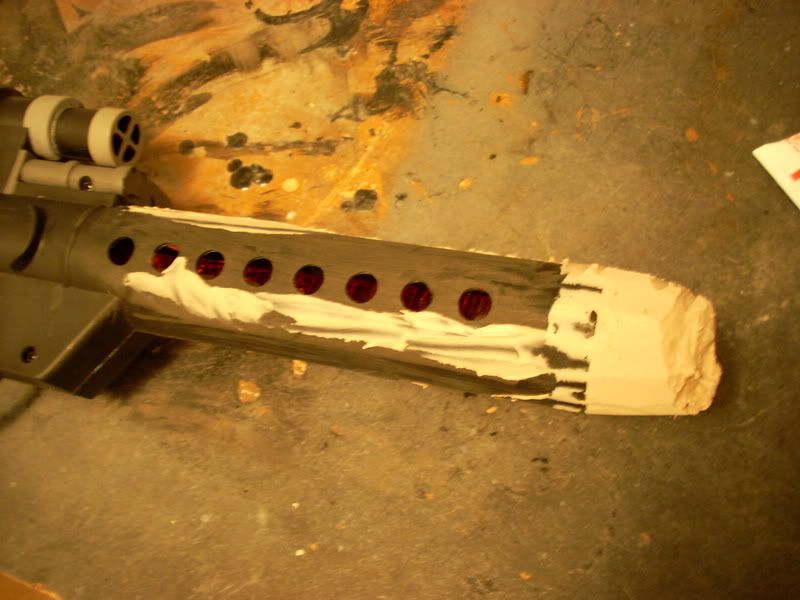
I then sanded it with 80 grit sandpaperon a sanding block, to get to this:
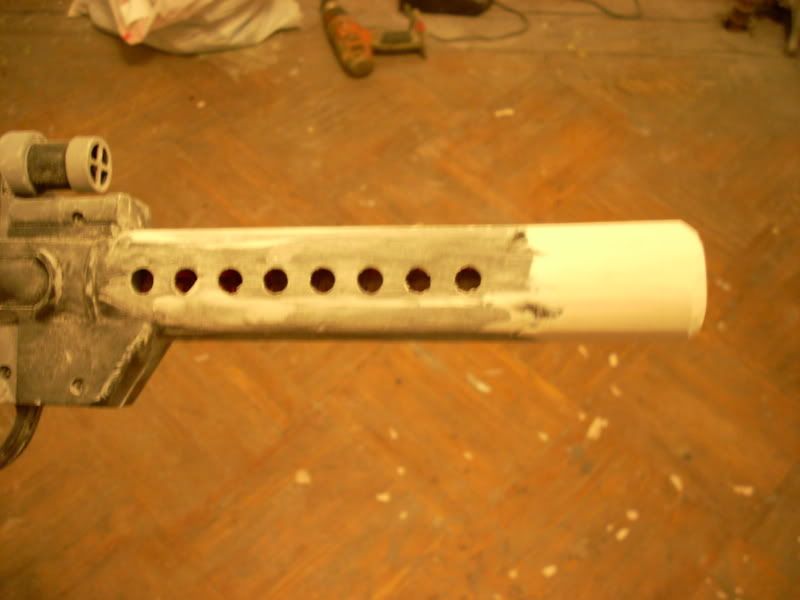
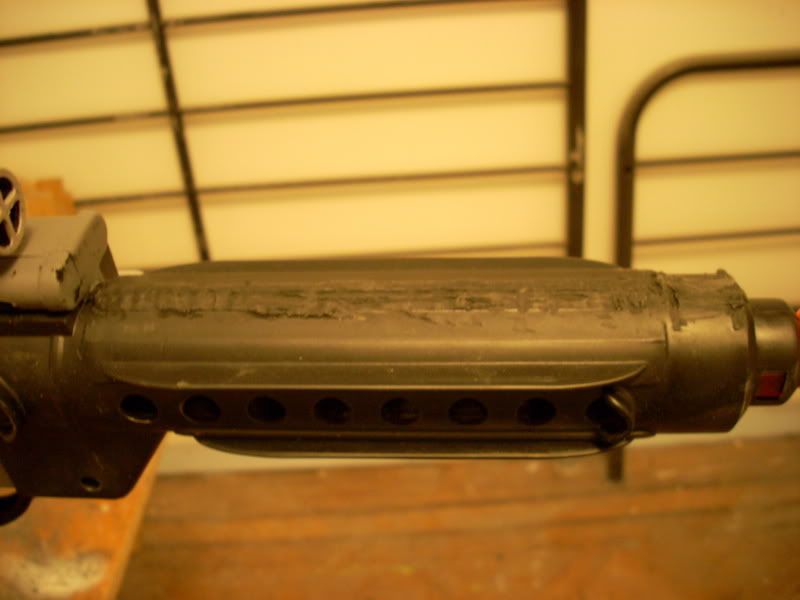
I then shortened it to a good length to fit Stompers T-track using the holes already in the barrel as a guide
-
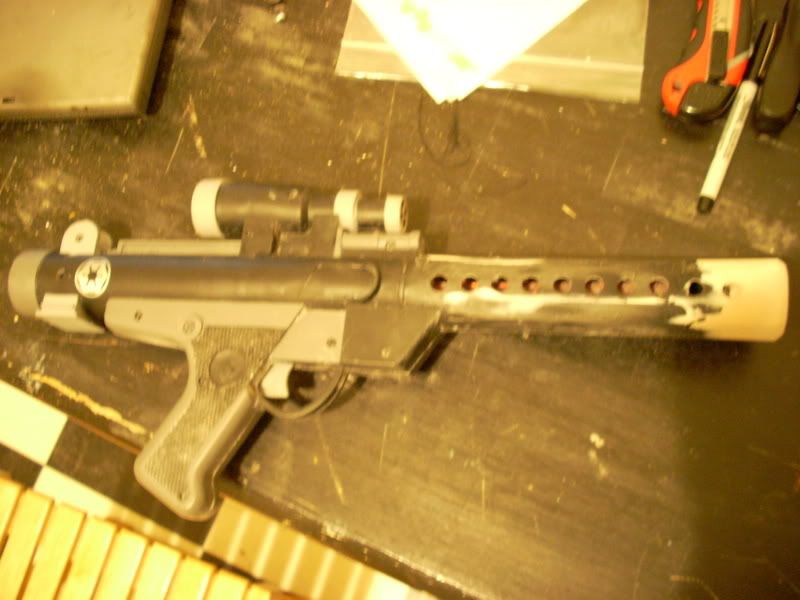
hello all...i recently got my resin mod kit for my hasbro blaster, and my T-track from Stomper and thought id share with you all my mod of the Hasbro Blaster. I decided to go a bit futher with my mod as i just like to do this kind of stuff. This is my first blaster mod and im happy with the result thus far. Basically my plan was to remove all the stock molded on t-track, and add about an inch and a half to the length of the barrel. Then i would add Stompers t-track. So heres how i went about it...
we started with this:
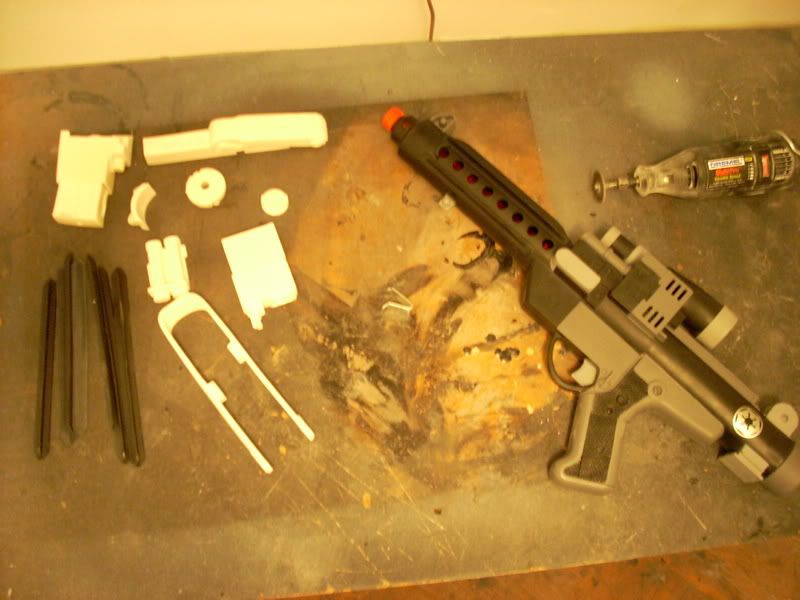
this is my blaster, completely stock, my resin mod kit i got off e-bay, and my dremel. You should also have some automotive body putty. I have standard bondo auto filler that i am using. Not the spot filler, although i will use that also later on.
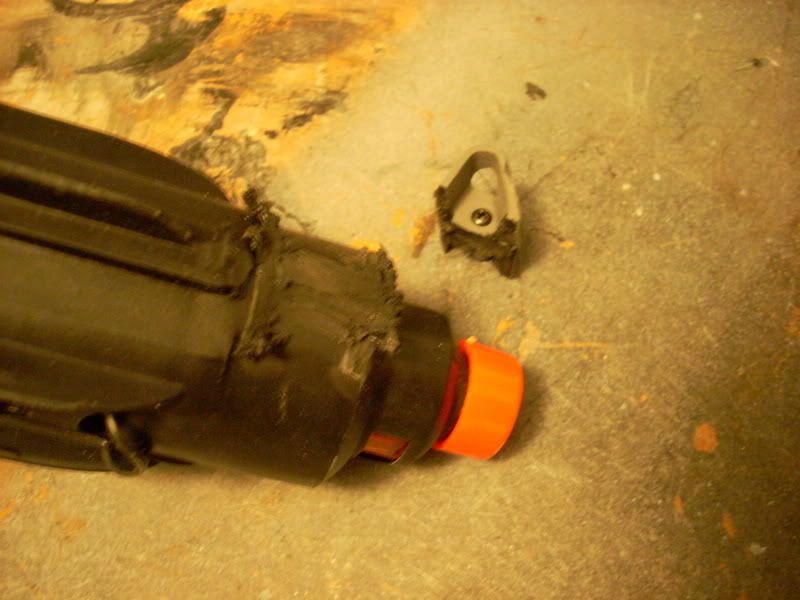
So the first thing i did was, with the cutting wheel on my dremel, remove the , well i dont even know what its called lol, ill call it the aiming guide by the nose of the blaster
here it is removed.
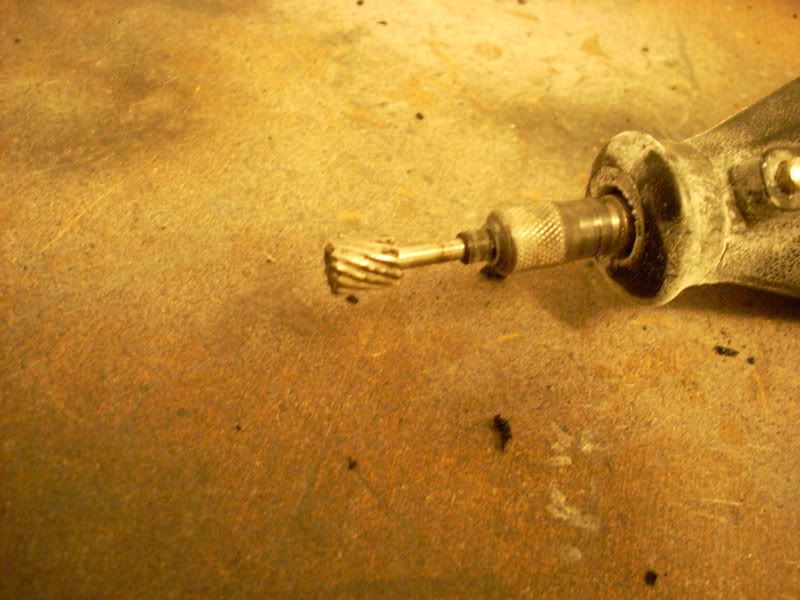
Then with the cutting wheel, i proceeded to remove all the molded on t-track, by first cutting off the vertical "fin" on each and then smoothing it out with the cutting wheel.
then i further smoothed it out with the grinding tip.
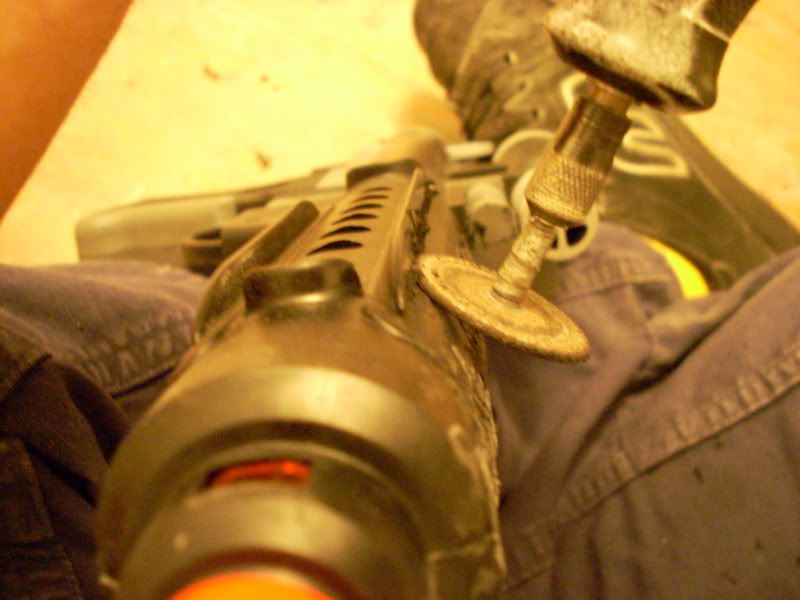
make sure while cutting the top fin off the side t-tracks that you do it on an angle so you dont make a big hole in the side! Hold it on this angle:
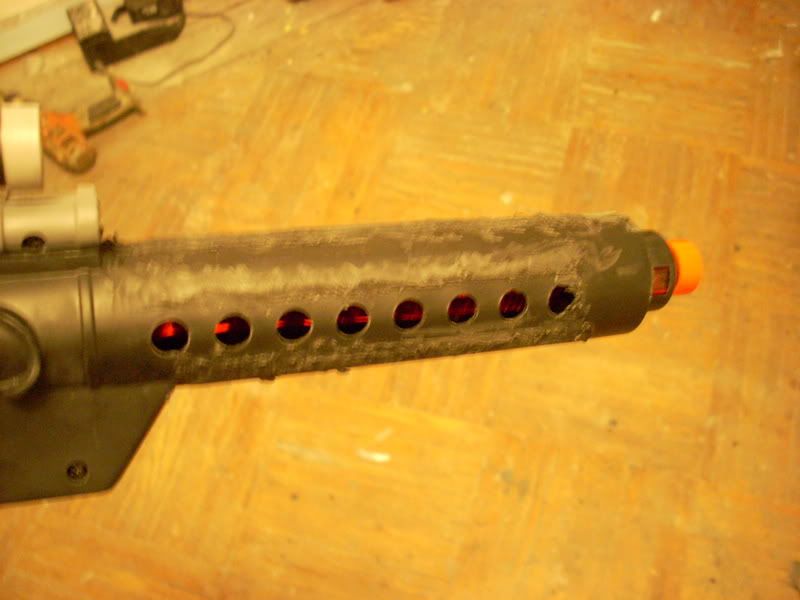
So heres what it looks like with all the t-track removed
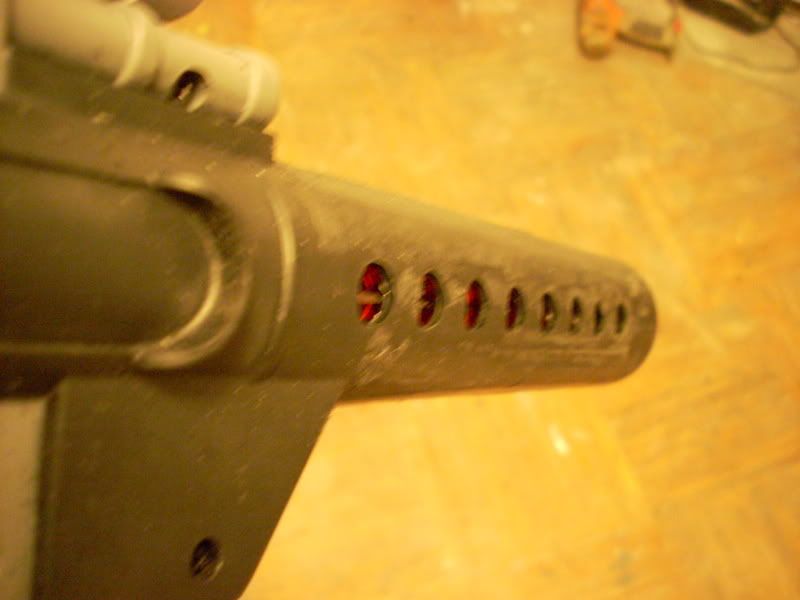
Then i basically globbed on some bondo on the end on the barrel, and a little bit on the sides to some imperfect spots.
-
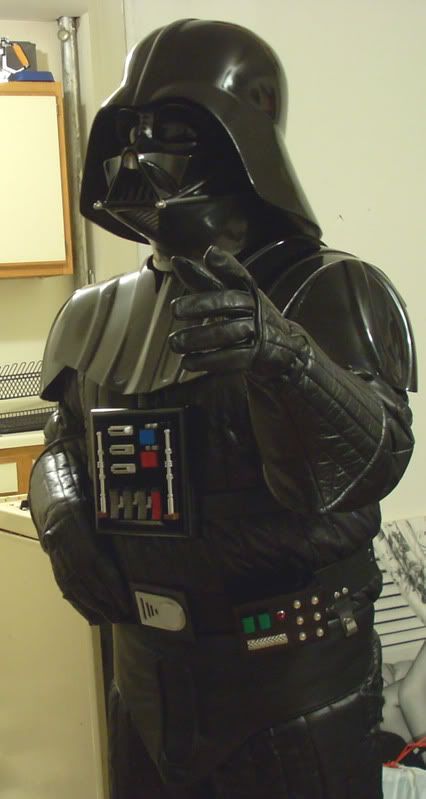
36 here! I remember seeing star wars in the theater in 77. i was 6(going on 7). i dont fully remember this, but my mom said when vader first came out of that smoke, i cried, for about 3 seconds, then she heard a few sniffles, and i was silent the rest of the movie. She said shes never seen a 6 yr old so quiet and focused in a move theater hehe. Ive always wanted trooper armour and a vader suit since. Im about 90% done with vader and 97% with my trooper.....this will be a day long remembered....
-
Did you try registering with their forums?
http://www.empirecitygarrison.com/forum/
You could also go to the rebellegion.com site and reach out for Mary Alice, she's in echo base and in charge of like both so she could most likely help you out. I'm sure there is a link somewhere for you to get started...
Yea i tried that, you have to enter your legion approved ID number to register. I even tried dodgin that, but it didnt work lol
I have had contact with Mary Alice once, but havent heard from her, or any of the other member since. i thought a forum type atmosphere would be better just to get to know some of the peeps in the ECG. Looks like i may have to wait till im accepted in the 501st to get to know them.
-
yea it seems alot of them do...i may try and dig harder on that site, maybe im missing something lol
-
haha interesting stuff....ya learn somethin every day they say

-
not that i could find <_<
it would be nice

-
haha yea, i know ..lol..but my point was more that the testors paint has that same number.

-
Just wondering if there are any Empire City Garrison members on here. I will be applying for 501st acceptance soon, and the ECG would be my garrison. Just thought it would be cool to get to know some of you beforehand

the ECG forum is only open to members already in the 501st.

-
lookin good bro!
Im sure your in for 501st, and just a few tweaks and i think your good for elite!
Im going to be applying to the same garrison hopefully in the next few weeks, and then applying for elite status as well. I too need to lose a bit to close that side gap,
lol i will hopefully be closin that off soon! i sent im my application to the 501st last week but havent heard back from anyone yet. I figured by the time i need to send them pics, i should be done. good luck bro, looks great!
-
haha i didnt even think of that! ...i was born in 1971 !!
but that doesnt explain the paint having the same number! lol
-
Has anyone noticed that the number of the grey paint for the frown of the ANH trooper helmets,the testors brand, number 1138, is the same number of the cell block they were "transfering chewy from" in ANH? after the officer says "where are you taking this ....thing"..luke says "prisoner transfer from cell block one one three eight" weird lol
i guess that makes it easy to remember huh?
-
Dunno if you have those resin pieces yet, but i came across this on the bay and thought ya might be interested if ya still need em!
-
payment sent =)
-
you are one awesome uncle. I hope my nieces get into it (and they will if i have anything to do with it haha), i will aspire to be as cool an uncle as you are haha! good job bro!
-
Why make them shorter?
Just trim the offending inner half where it is digging into your arm, up near your elbow joint. I found the same thing with mine and I trimmed the iner section, just making the curve that bit deeper until it felt better. You can also make a small curve at the wrist on the inner half too which helps.
OH! i didnt even think of that! Good idea, i will try that first, if allelse fails, then ill shorten them. i just want to be able to get my bucket on! lol
-
I think this is where we come back to individual preference.

--Jonah
You are definately right about that, i just wanted to see the pros and cons of each to help me decide.
...still havent made up my mind....lol....but i do like the idea of using the velcro to attach the liner so its not completely permanent.
-
has anyone had to shorten their forearm pieces? I have FX armor, and mine fit me for the most part, but seem like they would be a bit more comfortable and pinch my inner elbow less if i cut off a bit of the length from the wrist area. maybe like 1 "dents" worth. Is this a bad idea?, should i just leave it alone? i know once i cut it, i cant put it back, so id just like to know if anyone has done this and how the result was. Im also trying to stay as movie accurate as i can (ANH) thanks in advance everyone!
-
This is a nice modded CA Vader if anyone is interested. Kinda hard to come by, most people who have them dont wanna part with them! Im selling this to pay for my TK bucket! Id also be interested in a trade for an AP, TM or GF bucket. It can be in kit form. If you have one to trade and are interested, let me know and ill end the auction!
thanks guys n gals!
-
Decided to keep my casting and sell my CA instead.
-
TK4205 said:
(psssst: what he said)
here's a tutorial on installing a hard hat liner:
----------
HAHA
ill check that out..lol. i suppose i have to try them both out for myself ...

-
Hm, general consensus seems like foam padding. The only reason i was thinking hard hat liner was to keep air circulating. Im guessing i can still add fans with the foam, so i may give that a try first. Still trying to get my hands on an AP or TM bucket.
-
i lowered the price, i need to sell this to get my AP bucket, boots, gloves, holster, and blaster.
-
The helmet doesnt have the right paint scheme. Its proportions are off big time. Not worth $650.00!!
what? bro, that helmet is cast directly off a DP, which is cast off a movie used. the proportions ARE correct.. the only alterations i did was the mounting system and i made one tear duct more pronounced, on the dome i just redid the center strip. The paint scheme IS correct and done with a paint that matches EXACTLY the valspar brand black pearl paint (i have the valspar, i just didnt like the way it went on)which as ive found from many reliable sources was the exact paint used on the movie helmets. Im not a pro photographer. Its hard to photograph that paint. Altho this is my first casting of a vader,ive been "finishing" vader helmets and armor for years and never had a complaint. Also everyone on the vader boards thinks its great. The grey is very dark i know, it was done that way for a reason, not only is it the correct color according to many various sources, but i liked the way vaders helmet looked in the opening scene of jedi, and thats what it was modeled after. i took these pis with a flash so you can see where the grey is. you can see it better in person, like i said, the pics just dont pic it up. dont snap judge just by pictures. if you dont like it, move along, i didnt post this topic for negative comments, i posted it cuz im trying to sell it to get some cash. sheesh!


So does this helmet look proportioned corect to you?
cuz this is the exact helmet i cast it off of. its exactly the same size and shape. the grey is also a bit lighter on this one as i wasnt going for that particular look like i was on the other one, but i guess you didnt read my entire description.
hasbro e-11 "one step beyond" mod tutorial [picture heavy]
in Build Threads Requireing Maintenance
Posted
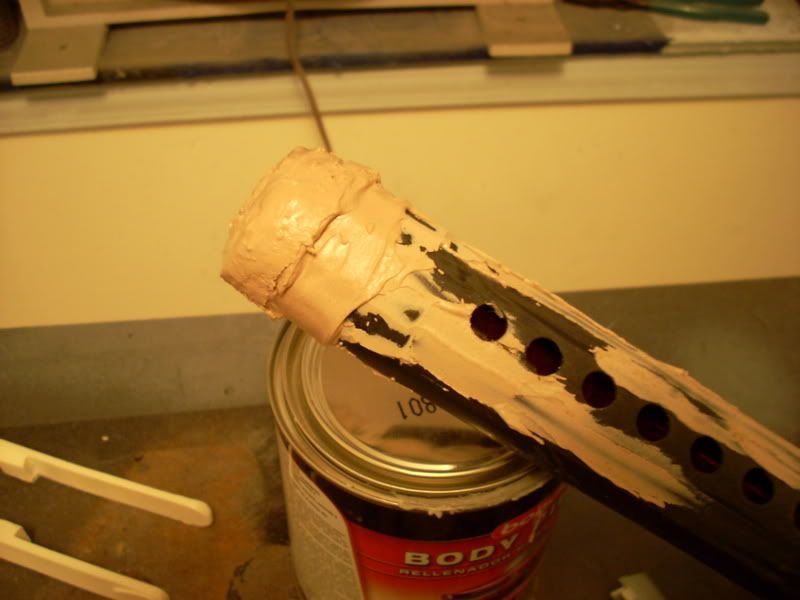
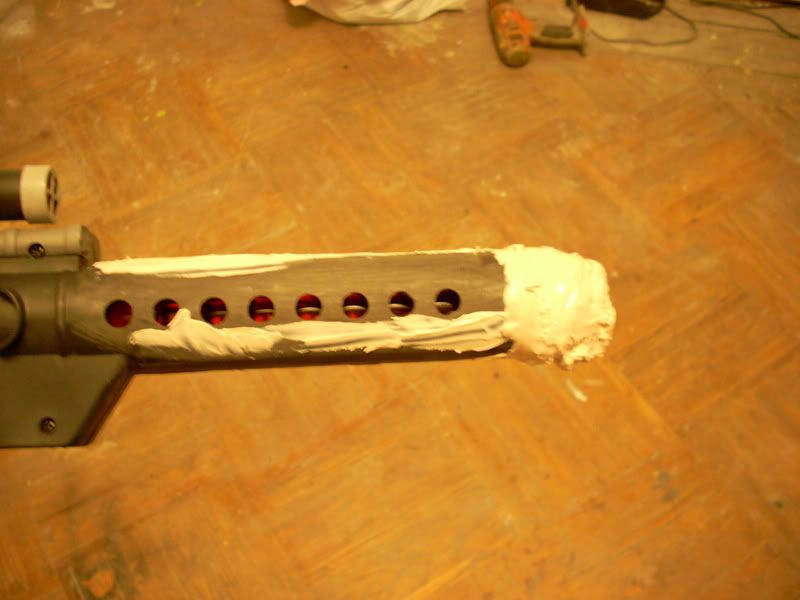
Ok, now its time to add the folding stock piece of the resin kit. This piece will have to be extended to fit the now extended barrel of the blaster. So i first attach it to the barrel, lining up where the front of it should be. [[*NOTE- i cut off the tab at the bottom of the barrel so i can freely move the resin piece where i wanted. You could also cut a groove into the resin piece if you want, but i found it easier to just remove that tab on the bottom of the barrel]]
I then marked off where the other part of the folding stock ends to give me an idea where to bondo up to.
Then we glob on the bondo! i let it harden up just a little first so it wasnt running all over the place. It takes a little working with, i used a jumbo popsicle stick to apply the bondo, and just kept pushing it back up the sides to keep its shape the best i could get it, the bondo hardens quickly, so its not that much of an annoyance haha.
So now we have this:
I then did the same as i did with the barrel and carved it to shape
Then i repeated the process to fix any imperfections, and sanded it with 80 grit paper to get it to this:
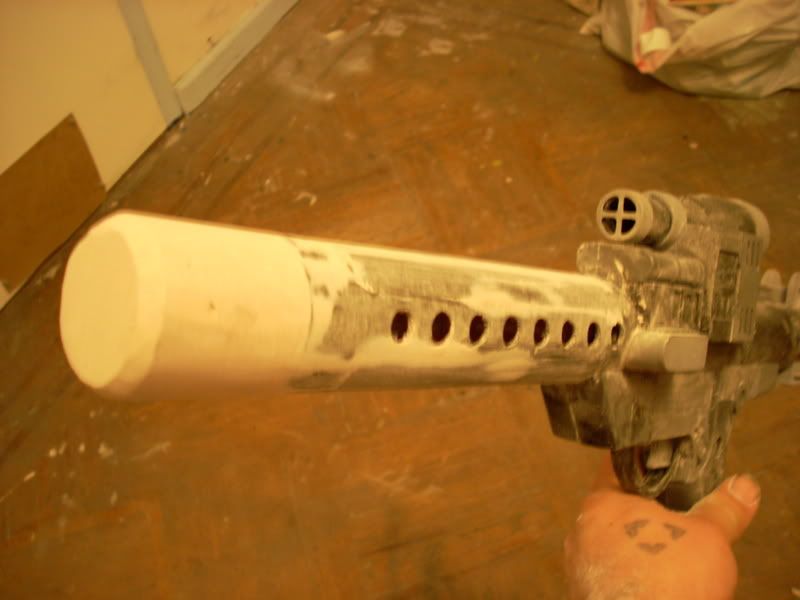
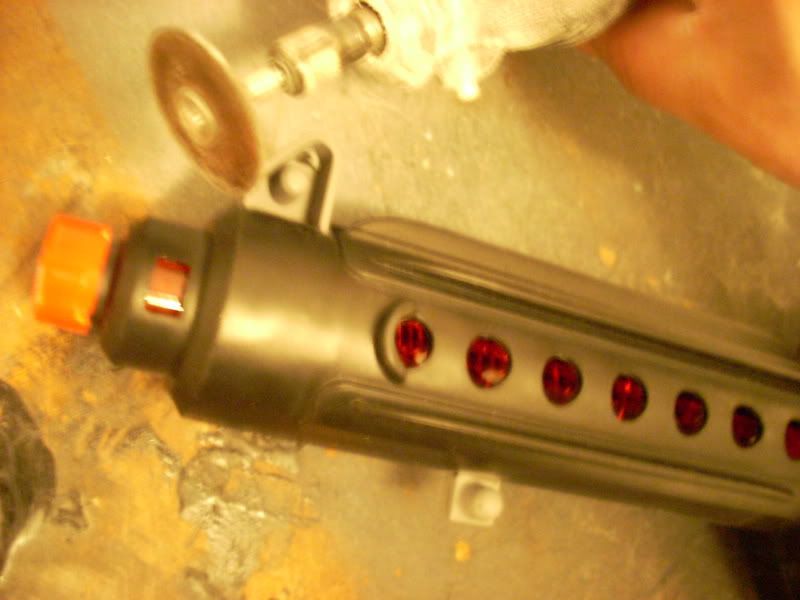
than i proceeded to add on the rest of the resin kit, and re-attached that aiming guide at the end of the barrel:
I then filled in any imperfections with the bondo spot filler, and primed it grey
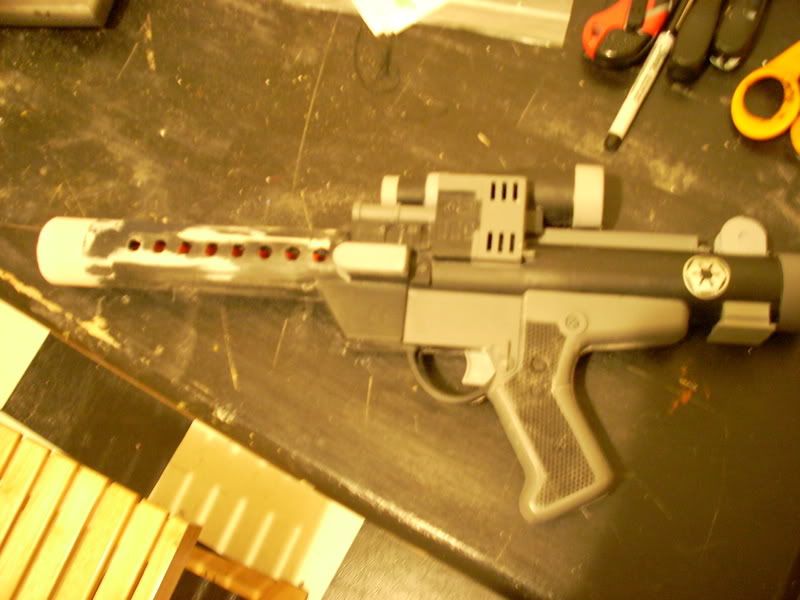
Next post will be the finishing pf the paint and adding Stompers T-track!