TK-3855
-
Posts
19 -
Joined
-
Last visited
About TK-3855

Recent Profile Visitors
2,134 profile views

-
HWTpack videogame version ... suggestions?
TK-3855 replied to TK bondservnt's topic in Build Threads Requireing Maintenance
I am curious, for I too am working on my HWT pack, where have y'all found that LED light ring in the center of your packs? Ive gotta get one of those for my build! -
Scratch made 100% custom leather pauldron
TK-3855 replied to TK-3855's topic in Build Threads Requireing Maintenance
Wow, ok so its been a little bit since I looked at my post on how to make one of these. I'll see what I can do to post the pics to give a tutorial on how to tool the leather like I did for my pauldron. Basically you first need to create a stencil of what you want on the leather once you have the shape of leather cut out how you want it. You then wet the leather, and taking a stylus, you copy the image over to your leather. From there, you take a swivel knife to lightly cut the major lines of the design into you leather. From there you take a beveling tool and a mallet around the outer edges of your design, compressing the leather to make the main image stand up and out off the "background" From there you take what ever other tools to create different effects, such as a pear to give the background (like on my pauldron) the hammered look within the cog. From there, leather stain or paint the parts you want painted. Then I use a spray on Leather Shene by Fiebling's to protect the color and give it that shiny look. From there, the black parts of my pauldron were created by cutting 2 pieces of black died pigskin into the appropriate shapes. Holes were punched through the cowhide leather as well as the pig to give lines of holes to created the necessary pattern. As I stitched I filled each pocket with a poly-fill used for pillows. The piping around the outside was creating by cutting long strips of pigskin with 3 roles of holes punched through it (in addition to a matching row of holes through the cow). I used 2 needles in a simple hand saddle stitch to get through the stitching since i don't have a $1500 leather sewing machine. 3 hole rows go through the pigskin due to how you wrap it around the cowhide. Its flipped into an "e" shape around the cow. So the top is fold in to give you a straight edges so that your needle will go through (from top to bottom) Row 2 Pig-> Row 1 Pig -> Cowhide -> Row 3 of Pig. I'll do what i can to create a picture tutorial. If you have any questions feel free to write back in the meantime -
TK-3855, Requesting status change to 501st Stormtrooper status http://www.501st.com/members/displaymember.php?userID=12431&costumeID=124 Thanks much!
-
Scratch made 100% custom leather pauldron
TK-3855 replied to TK-3855's topic in Build Threads Requireing Maintenance
Thanks so much! I also tooled the Cog and my TKID on my E-11 holster as well If you want any help or advice or How-to about making one yourself let me know -
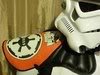
Im posting this here to see what the forum thinks. I wanted to make a trooper who could wear a pauldron that wasn't a sandy so here is the place. I wanted to put my leatherwork skills to the test as its been my hobby for the past 6 years. I got the idea to make a custom pauldron from seeing several standard pauldrons with event patches glued to them. I thought it would be neat to make a pauldron with my TKID and my Garrison crest. Im currently working on a second for my unit CO. This took an extreme amount of time due to all the saddle stitching being done by hand and not machine so I don't know believe I could consider going into mass production of these by any means. However I will keep the forum posted on my progress of different leatherwork possibilities. What do you think?
-
Neckseal from TK409 and TK armor from Rob at Rt-mod have both arrived and Im stoked to get to the construction process!