

Berbs42
-
Posts
497 -
Joined
-
Last visited
Content Type
Profiles
Forums
Gallery
Articles
Media Demo
Posts posted by Berbs42
-
-
This looks Amazing, Derrek!
Supercool Stuff, sir!!
- Berbs
-
Renee and I will be there!! Legacy Jes Gistang (still waiting for approval), and my TK. Hopefully More!

- Berbs
-
 1
1
-
-
Evening, All!!
First EIB is here!! THANK YOU THANK YOU THANK YOU to Darren, Adrian, Sager, & Clint for pushing me to finish even after I received the award. Darren especially, as he inspired me to even go for it in the first place, and gave me tons of advice during my slow progression over the last few years.
So as I finish everything up, and work my way towards Centurion, I think I should post up a few pics:
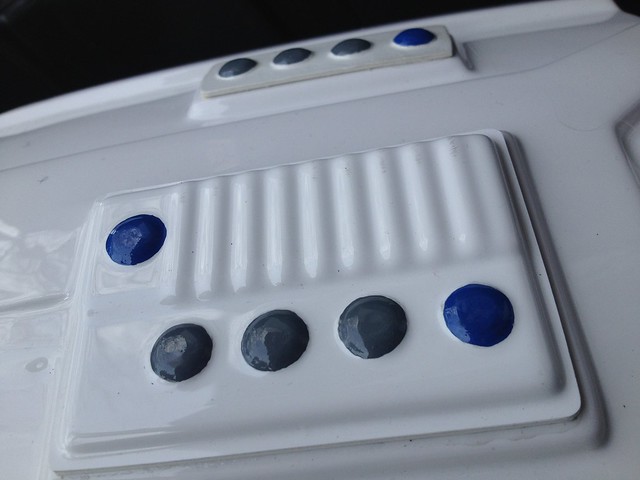
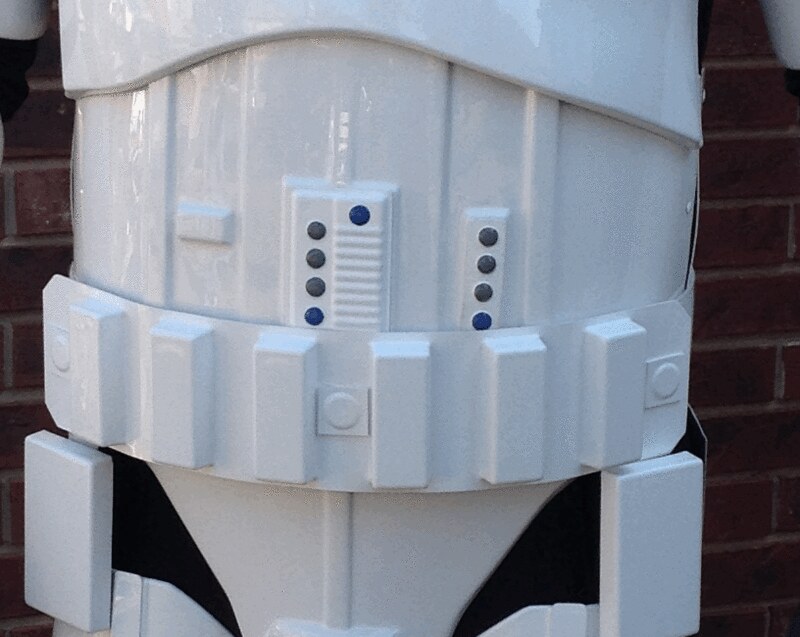
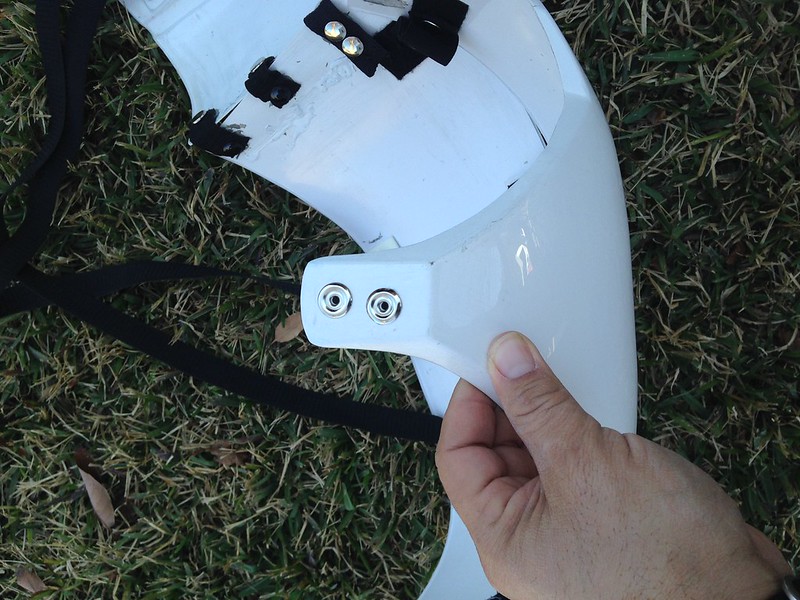
- Another Shot of the Ab Button Plate affixed:
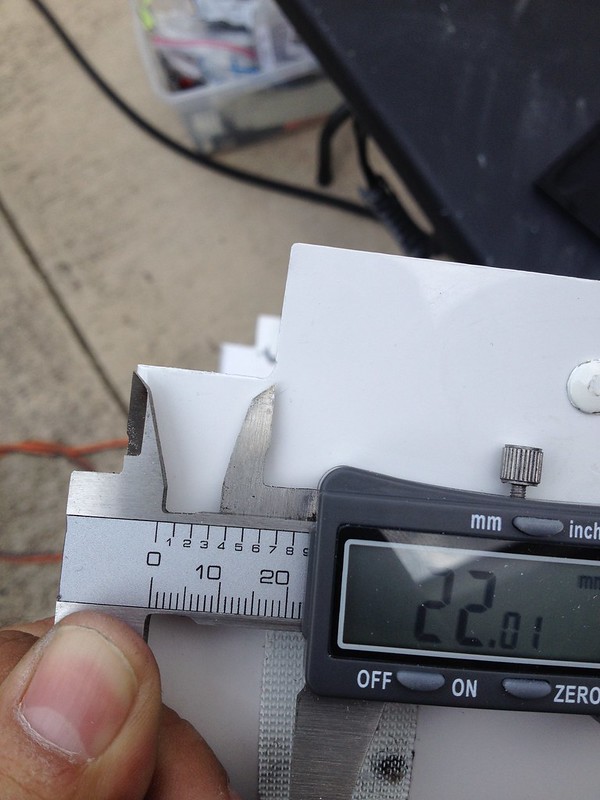
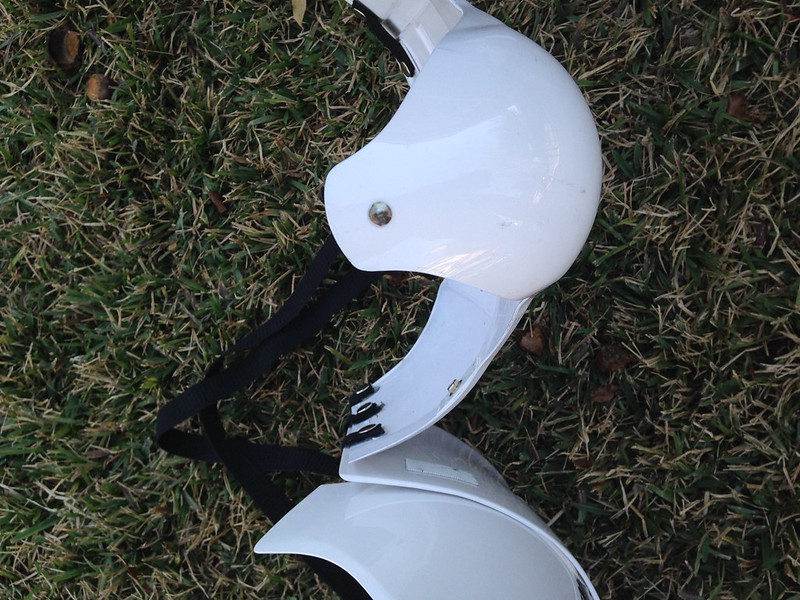
- The new Notch 22mm x 22mm added to the Kidney plate sides:
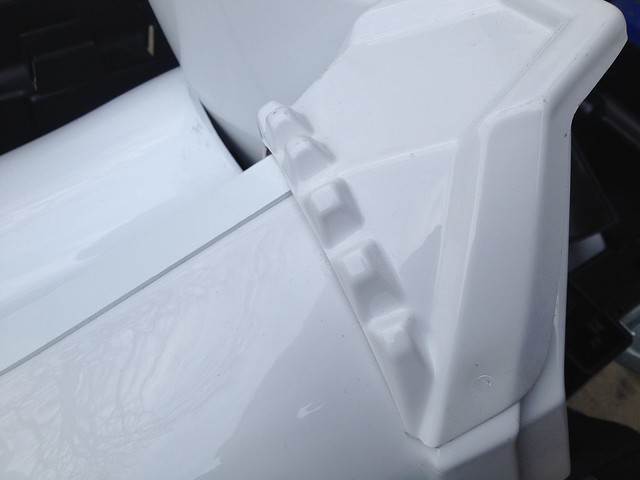
- A Closeup of the Left Shin and Knee Plate (this was originally riveted but is now filled with ABS Paste sanded, and attached with E-6000):
More to come!!
- Berbs
-
2
- Another Shot of the Ab Button Plate affixed:
-
Thank You Brandon!!
I've got SOME of the parts from Skyone's page, but wanted to find a build going into a PhoenixProps kit, and am glad I've found one!! (thanks for the headsup, Derrek!)
Can you post details of how you're setting up the battery and switch plate within the Magazine Clip?I'm definitely looking forward to this!

- Berbs
-
Congrats!
Beep Boop...
-
That's the next goal!! More adjustments to make!!
Beep Boop...
-
Much Appreciated!!
-
Chris Berban 6427 EIB Letter
Thanks!!
- Berbs
-
Welcome, Future Trooper!!
Happy to see another here in San Antonio!!
- Berbs
-
Welll... Time for an EIB Thread...

Wish me luck!
http://www.whitearmor.net/forum/topic/30025-tk-6427-requesting-esb-eib-status-am/
- Berbs
-
2
-
-
-
Name: Chris Berban
TK ID: TK-6427
Forum Name: Berbs42
Garrison: Star Garrison, Imperial Rough Rider Squad (CTX at the time of approval)
Armour Maker: AM/(with AM 2.0 chest, back & thighs)
Helmet Maker: MTK
Blaster Type: Hyperfirm
Height: 5'10"
Weight: 240 lbsBoots: TK Boots
Canvas Belt: Homemade with Insert
Hand plates: AM 2.0 trimmed slimmer w/ elastic
Gloves: Rubber chemical gloves
Electronics: Aker voice amp
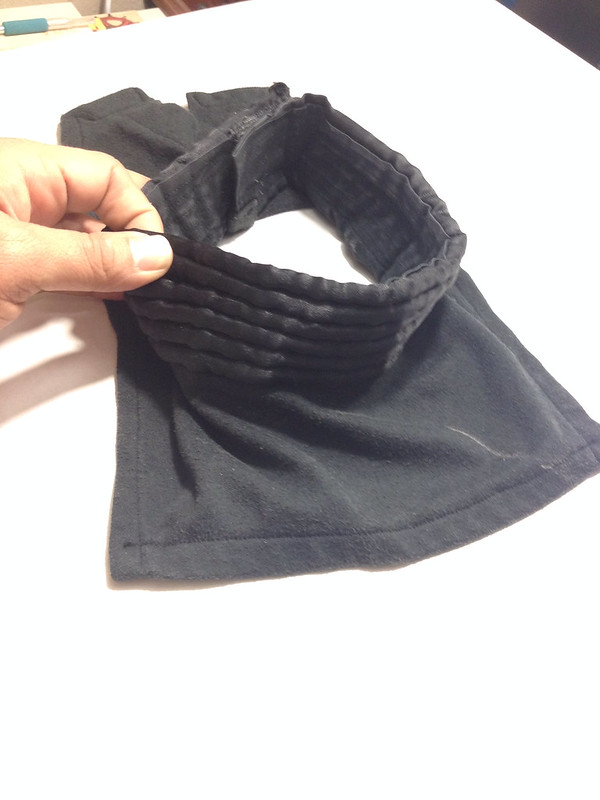
Neck Seal: Trooperbay
Holster: Made by Squadmate
Note:
-
My holster is waaaay too far back and under the belt in these pics
, and I didn't grab a pic of my neck seal. - Also of note, when I first bought this original AM kit from a Trooper who was upgrading, I removed rivets that were misplaced and filled the holes that remained with ABS Paste and sanded that down.
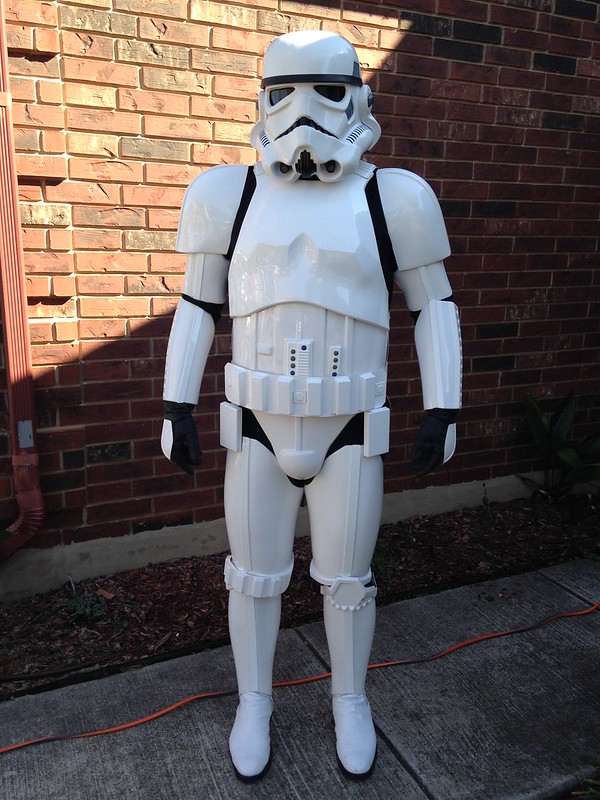
Pictures - Full Body
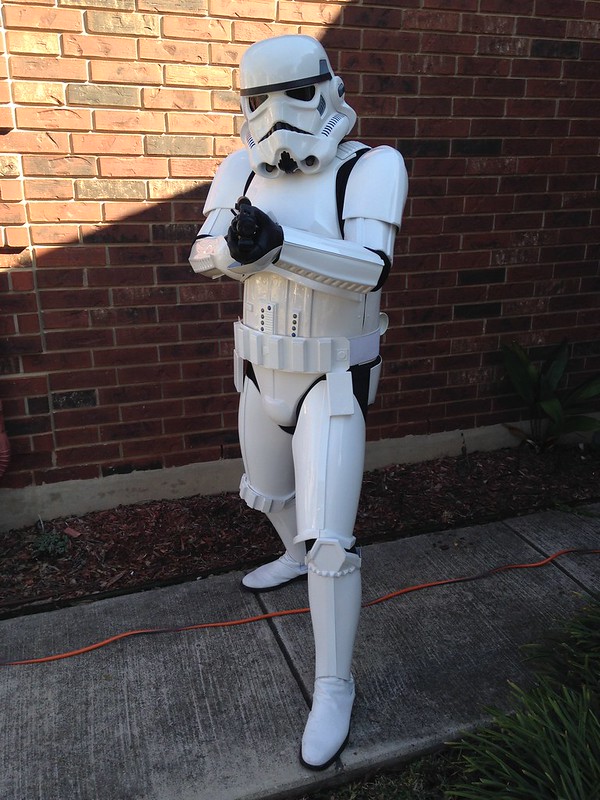
Front – Arms at side:
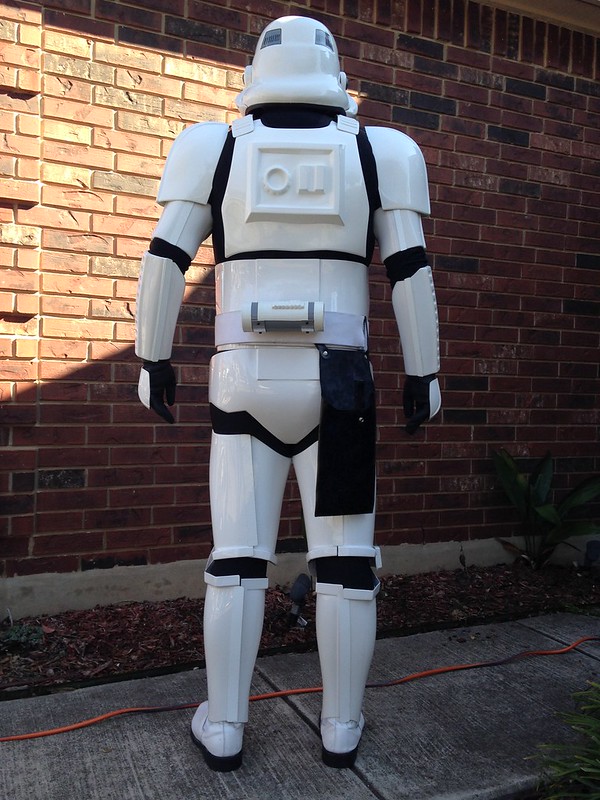
Back – Arms at side:
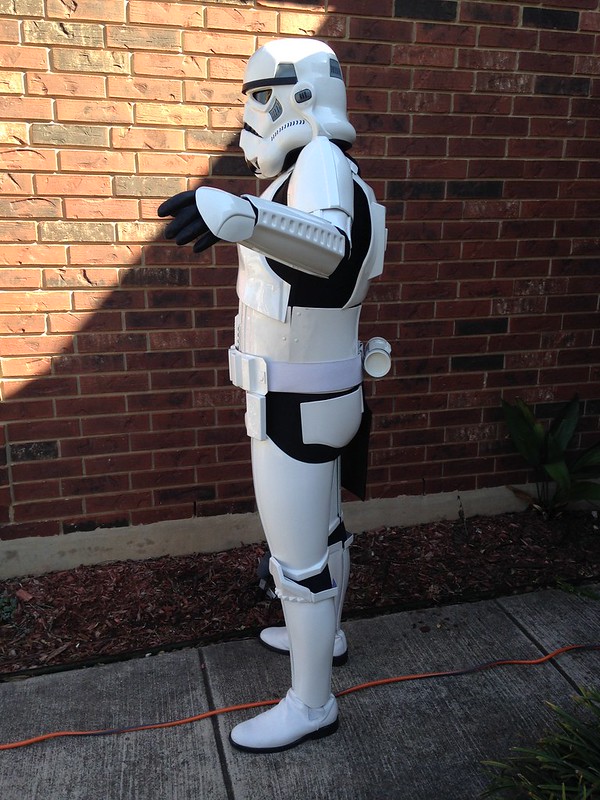
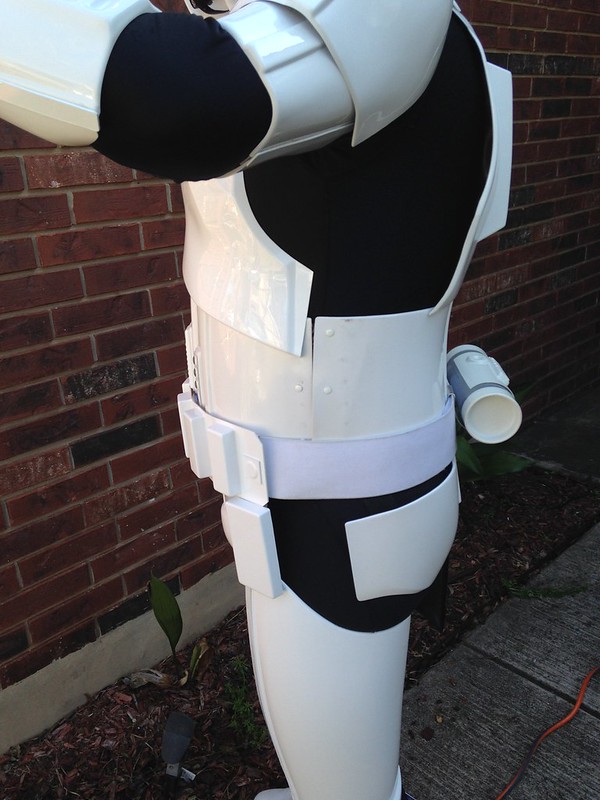
Left – Arm raised:
Right – Arm raised:
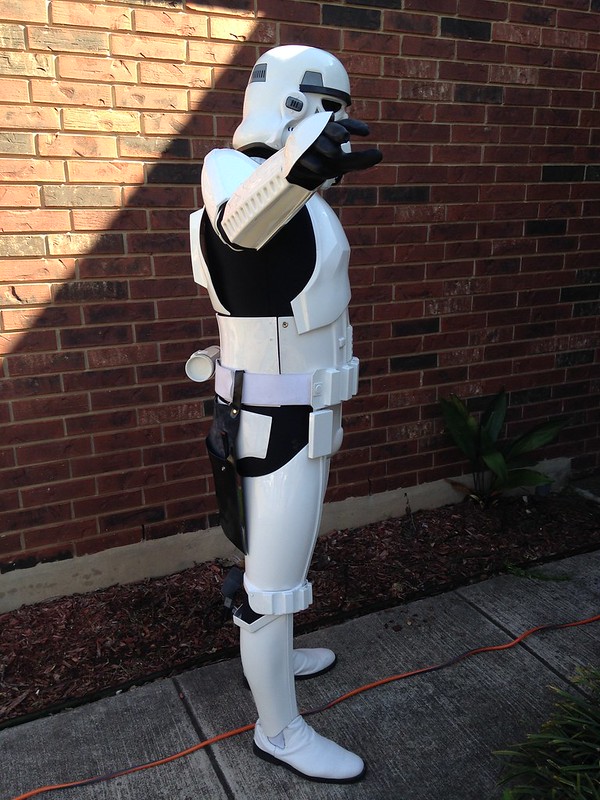
Right Side Detail – Arm raised:
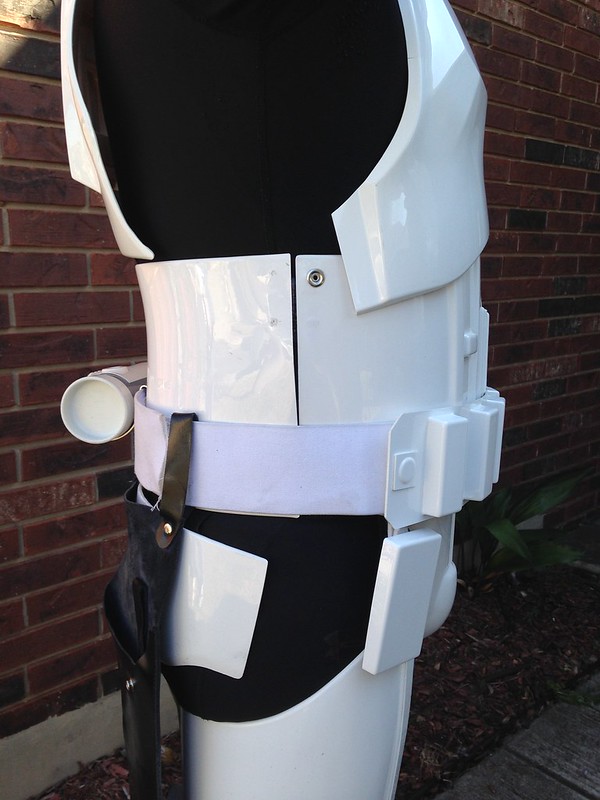
Left Side Detail – Arm raised:
Armor Details
Abdomen Details:
Action Shot:
Cod and Butt Plate Attachment:
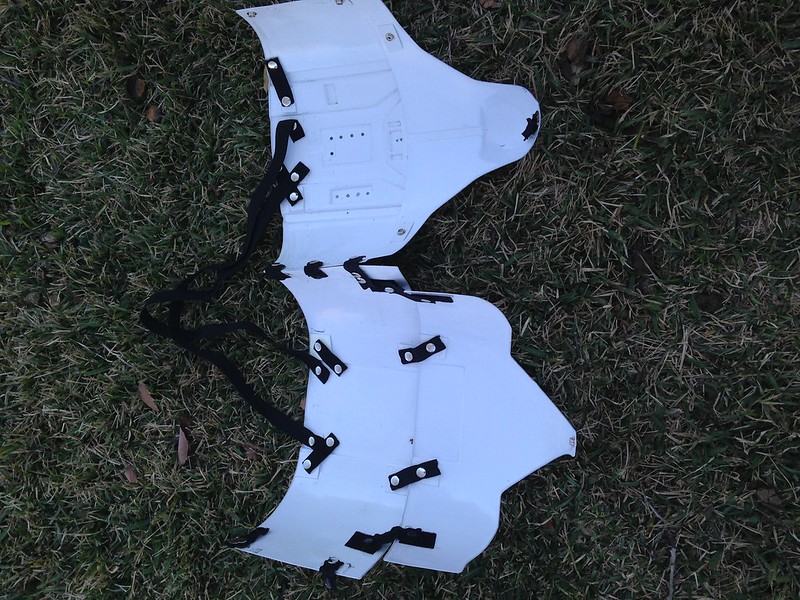
Interior Strapping:
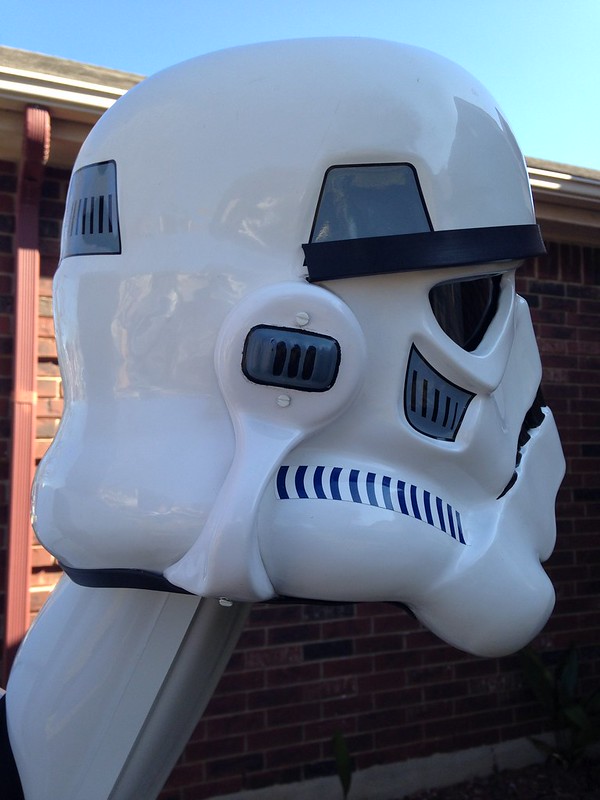
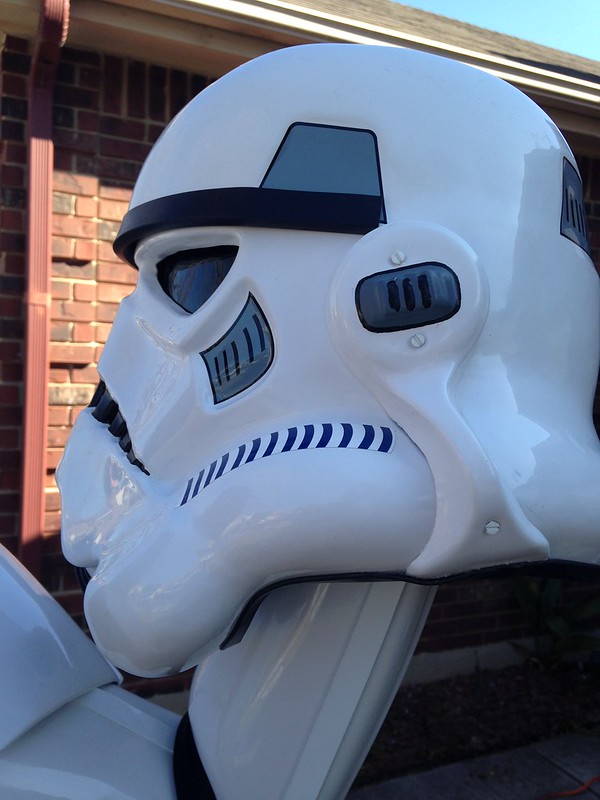
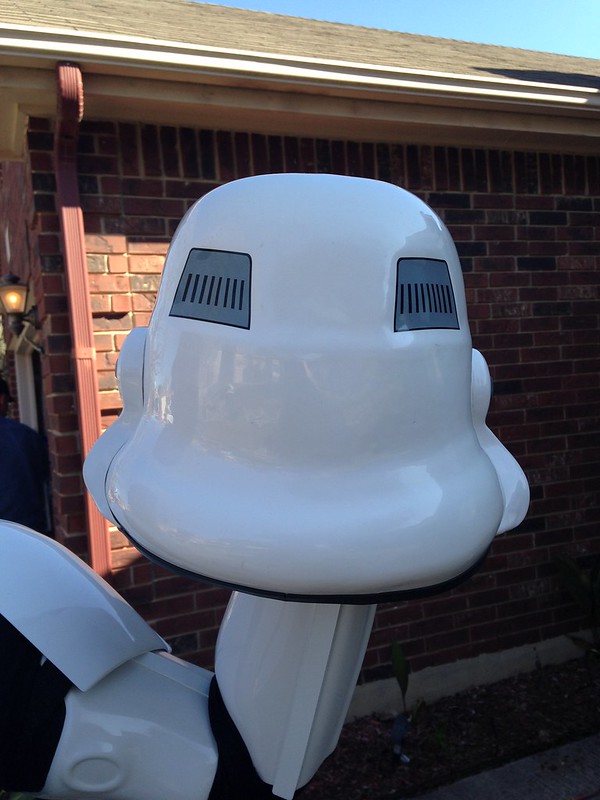
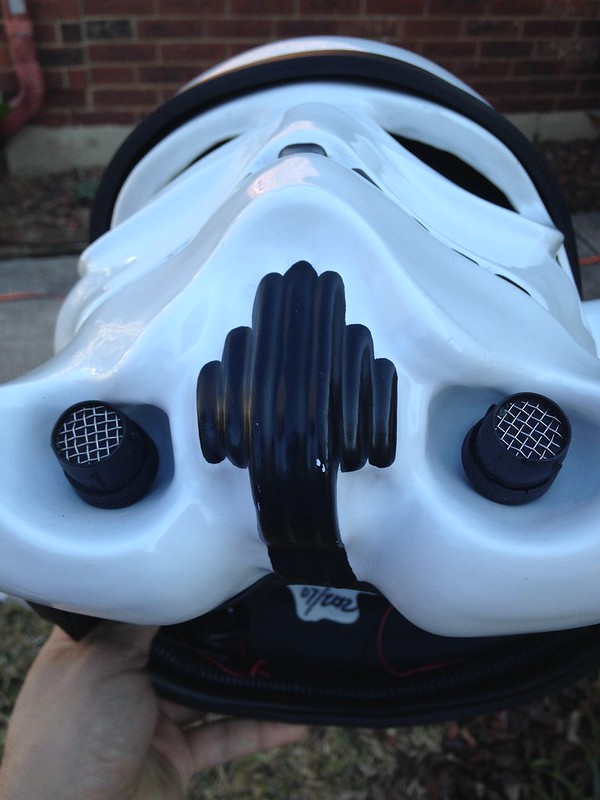
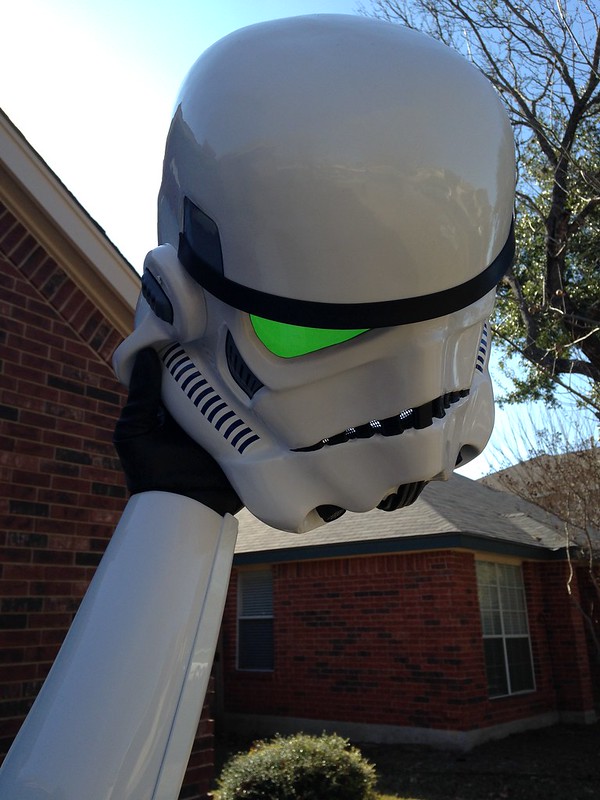
Helmet Details:
Front:
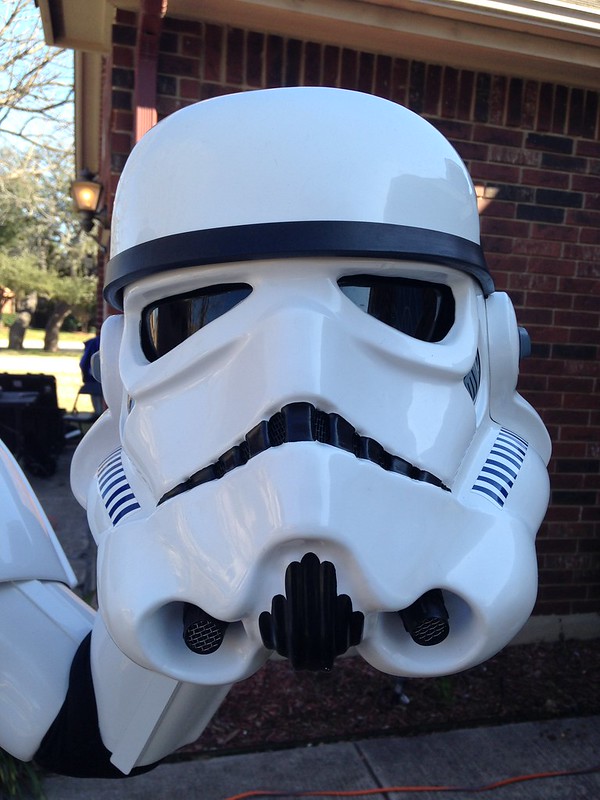
Side:
Back:
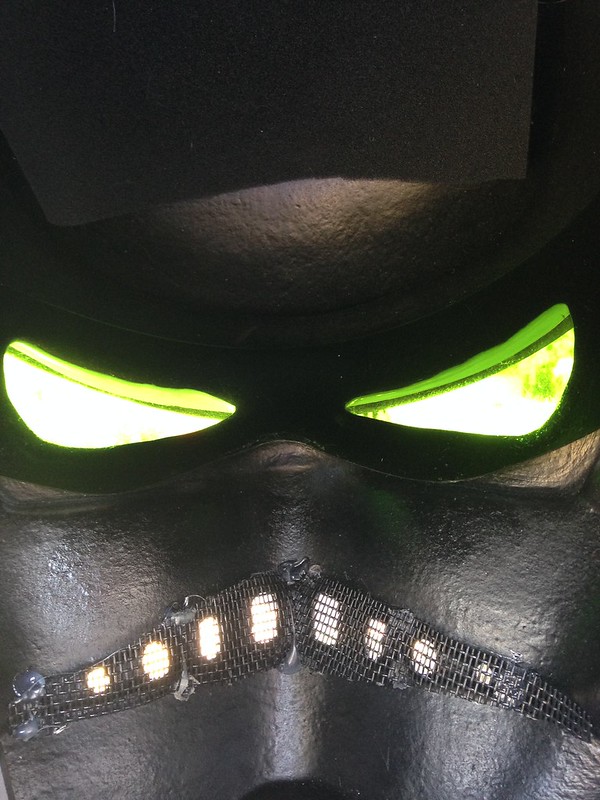
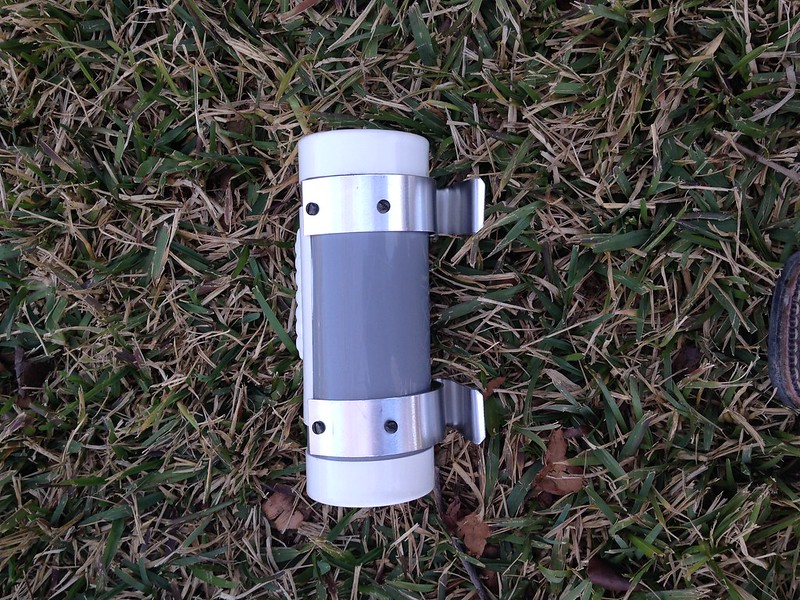
Hovi Tip Detail:
Lens Color (Backlit if required):
Blaster Details:
Blaster – Left:
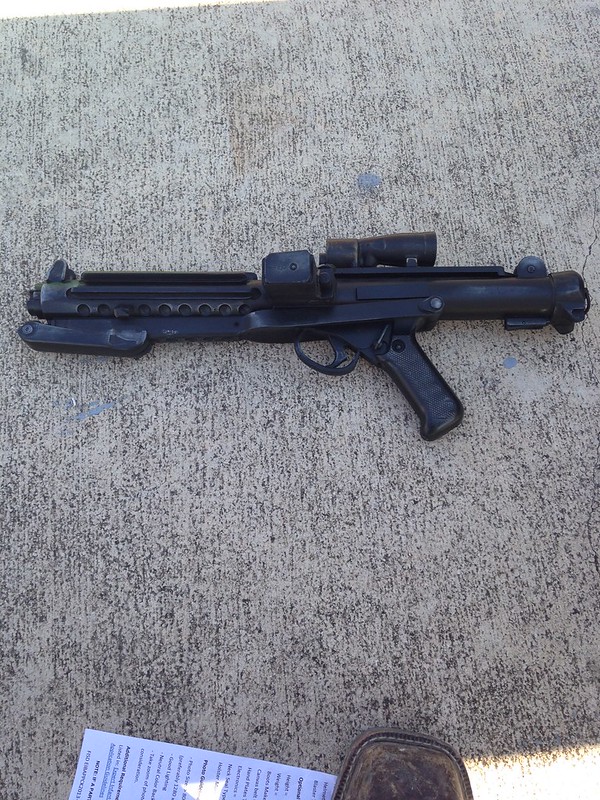
Blaster – Right:

Accessory Details:
Neck Seal:
Thermal Detonator – Back:
Holster Attachment:
I realize you want to see this ON the belt... Not UN-Attached... LOL
Thanks, Guys!!
- Berbs
-
2
-
My holster is waaaay too far back and under the belt in these pics
-
What's up Tommy?!?
Can't wait to see your Build, Brother!- Berbs
-
1
-
-
One of our Troops when we visited the Children's Shelter in San Antonio one year:
-------------
- Berbs
-
1
-
-
Spurs Star Wars Night in less than a week!!!
See you there!
- Berbs
-
1
-
-
So... what if there were two CRL's; like the ANH Hero / Stunt?
Could they be split, with one being NDA and the other FISD?
- Berbs
-
... Come to think of it, isn't it only approvable WITH the Bucket?
How could they NOT make it part of the FISD? (well, you make a good point about EU)
But, you're absolutely right! It IS approved!!
- Berbs
-
"No Detachment Affiliation"?!?
When did that happen?
I thought it was definitely going to be an FISD Costume w/ or w/o the helmet.
Weren't folks saying here that it should be here?

- Berbs
-
Clint!
Another option for Gloves
----------------
Try them on at the store to ensure a good fit.
The palm side is textured, and the back breathes and the handplate will cover the logo.
Also, you could tighten up the elastic on the handplates, and if you only have one elastic strap on them that goes across the palm, add another that goes around the wrist.
The benefits are two-fold: stability, and you can wear them with any set of gloves (or rotate worn-out gloves) since they wouldn't be glued. Even if you decide to go with latex handplates in the future, you'd have these as an option for any given event.
And I have elastic strap suspenders that snap on the inside of the ab and kidney plates.
- Berbs
-
1
-
-
Merry Christmas Troops!

-
Welcome to the Star Garrison, Future Trooper!!
- Berban
-
Thanks, Paul!
But it's not only me.Hopefully, we might even see more tomorrow...
I doubt it, since I figure that we've analyzed it far more than the plan to do on the 'Inside The Force Awakens' feature which is gonna air on Disney.
But one can hope.- Berbs
-
1
-
-
Congrats, Clint!!
- Berbs
-
1
-
-
Pulling a bit from Tim's (Dark CMF's) Thread Labelled : Episode VII Trailer Reported To Post At 10:15 EST as this seems to be the more appropriate location and would help with more consolidating.
Also, here's one of the many links out there to some screen grabs.
I'm guessing they made the Holsters functional, but I don't quite understand if it's just through magnets?
Some of the "Clasps/Clamps/Clips" or whatever do seem to be functional in that they cover (Velcro/3M-Strip/Other) seams (The Spats had a Wardrobe Malfunction) and others do seem to only be there to give the illusion of functionality (if the Inner Seams on the Thighs and Calves are Clamshelled and the Outer Seams are Glued Shut):
And lastly, (forgive the crude drawing) it looks like the white on the gloves isn't limited to the Trigger Finger and runs from Thumb to Index Finger on both hands:

- Berbs
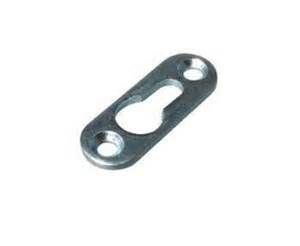
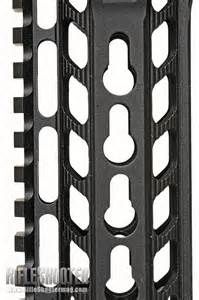
If I were going to make a functional holster for trooping, I would use "keyhole" notches on the thigh piece.
Pins on the weapon would register into the holes on the thigh and slide down into the slots.
The mechanical connection would be way more secure than magnets.
Beyond that, I can't imagine the strapping system to hold the thigh up with the added weight of a blaster...
The images aren't clear enough, but the "clasps" look like resin globs to me.
I understand the intention and like the idea, but they look like they're just there to cover the velcro.
If you could find the correct clasp, they could be blind riveted to vacuum formed armor (with reinforcement from behind) and be totally funtional.
If you look at the spat malfunction on the lower right, you can see the velcro strip behind the clasp...
Aaron, I see what you mean with the Holster... I'm sure I'm not even close, but something like this "Y" Notch seems to fit with what you're saying:
And Velcro is exactly what I figure is what the Spat clasps were attached with, but it is a touch blurry, and it almost feels too thin... (Heck, that may even be the problem! They didn't use the thicker Industrial Velco that most of us use! LOL!)
Bottom Line: I can't wait for more pics!! And I'm sure someone will figure it all out soon enough!!
- Berbs
That's EXACTLY what I'm saying!!! NICE JOB with the graphic!!!
You've got the keyhole slot like I mentioned at the bottom, and the Y-slot at the top makes a lot more sense for being able to holster the weapon quickly.
The Y guides the pin into the slot so they don't have to be fiddling around trying to line it up just right.
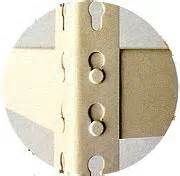
The bottom piece reminds me of "adjustable shelf standards", with a custom Y piece attached to the top.
Maybe the bottom piece has several keyholes, which allows up and down adjustment of the Y-piece to suit your arm length, etc.
Same concept with the the way you can adjust the shoulder harness in modern cars up and down to suit your height.
- Berbs
-
1
-
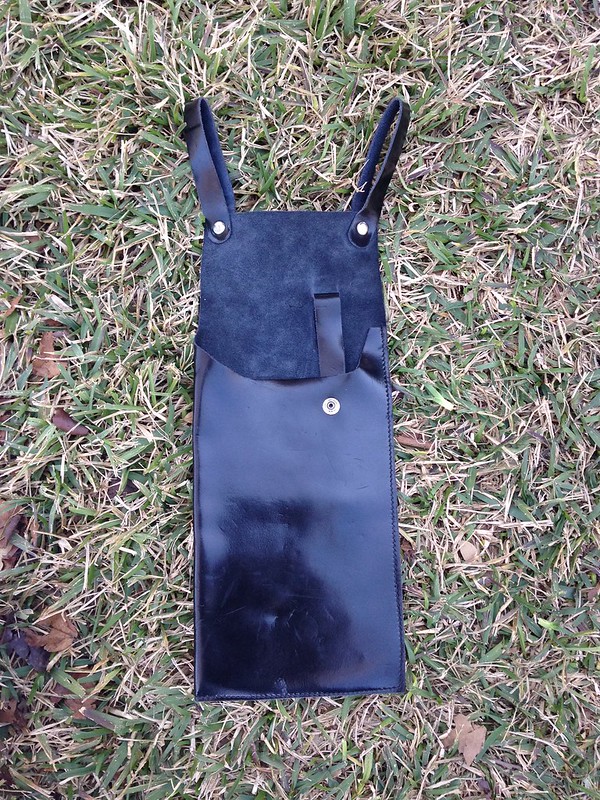
Personlize helmet bag
in Boots, Soft Parts, and other Accessories
Posted · Edited by gmrhodes13
link not working removed
Nope, not the Only one, Sir!
Though I don't have something as amazing as a personalized patch, so I may also need to look into getting these embroidered...
------------
I have one that defines each of the buckets within. Fordo for the Clone Wars. Death Trooper and TK below. I do still need to find a Jolly Roger Patch for my wife's TI.... Something to look for at the Swag Trading night...
the other side of the Bags have our Squad Logos.
-----------
- Berbs