Leaderboard


Popular Content
Showing content with the highest reputation on 10/31/2024 in Posts
-
Greetings from a future member in-process. I purchased a set of WTF ANH armor from its previous owner and will be joining a build party in two weeks. Did a test fit a couple days ago and lost my freakin' mind when I looked in the mirror. 7 year-old me thought it was the coolest thing ever! I've read a lot of good advice in the forums over the past few months and made specific purchases to make my trooping easier. A little about me personally. I'm an AEMT and work in the ER in Sacramento. Been a volunteer in Search and Rescue for 14 years and studied martial arts for 30 years. Looking forward to taking orders from Vader...2 points
-
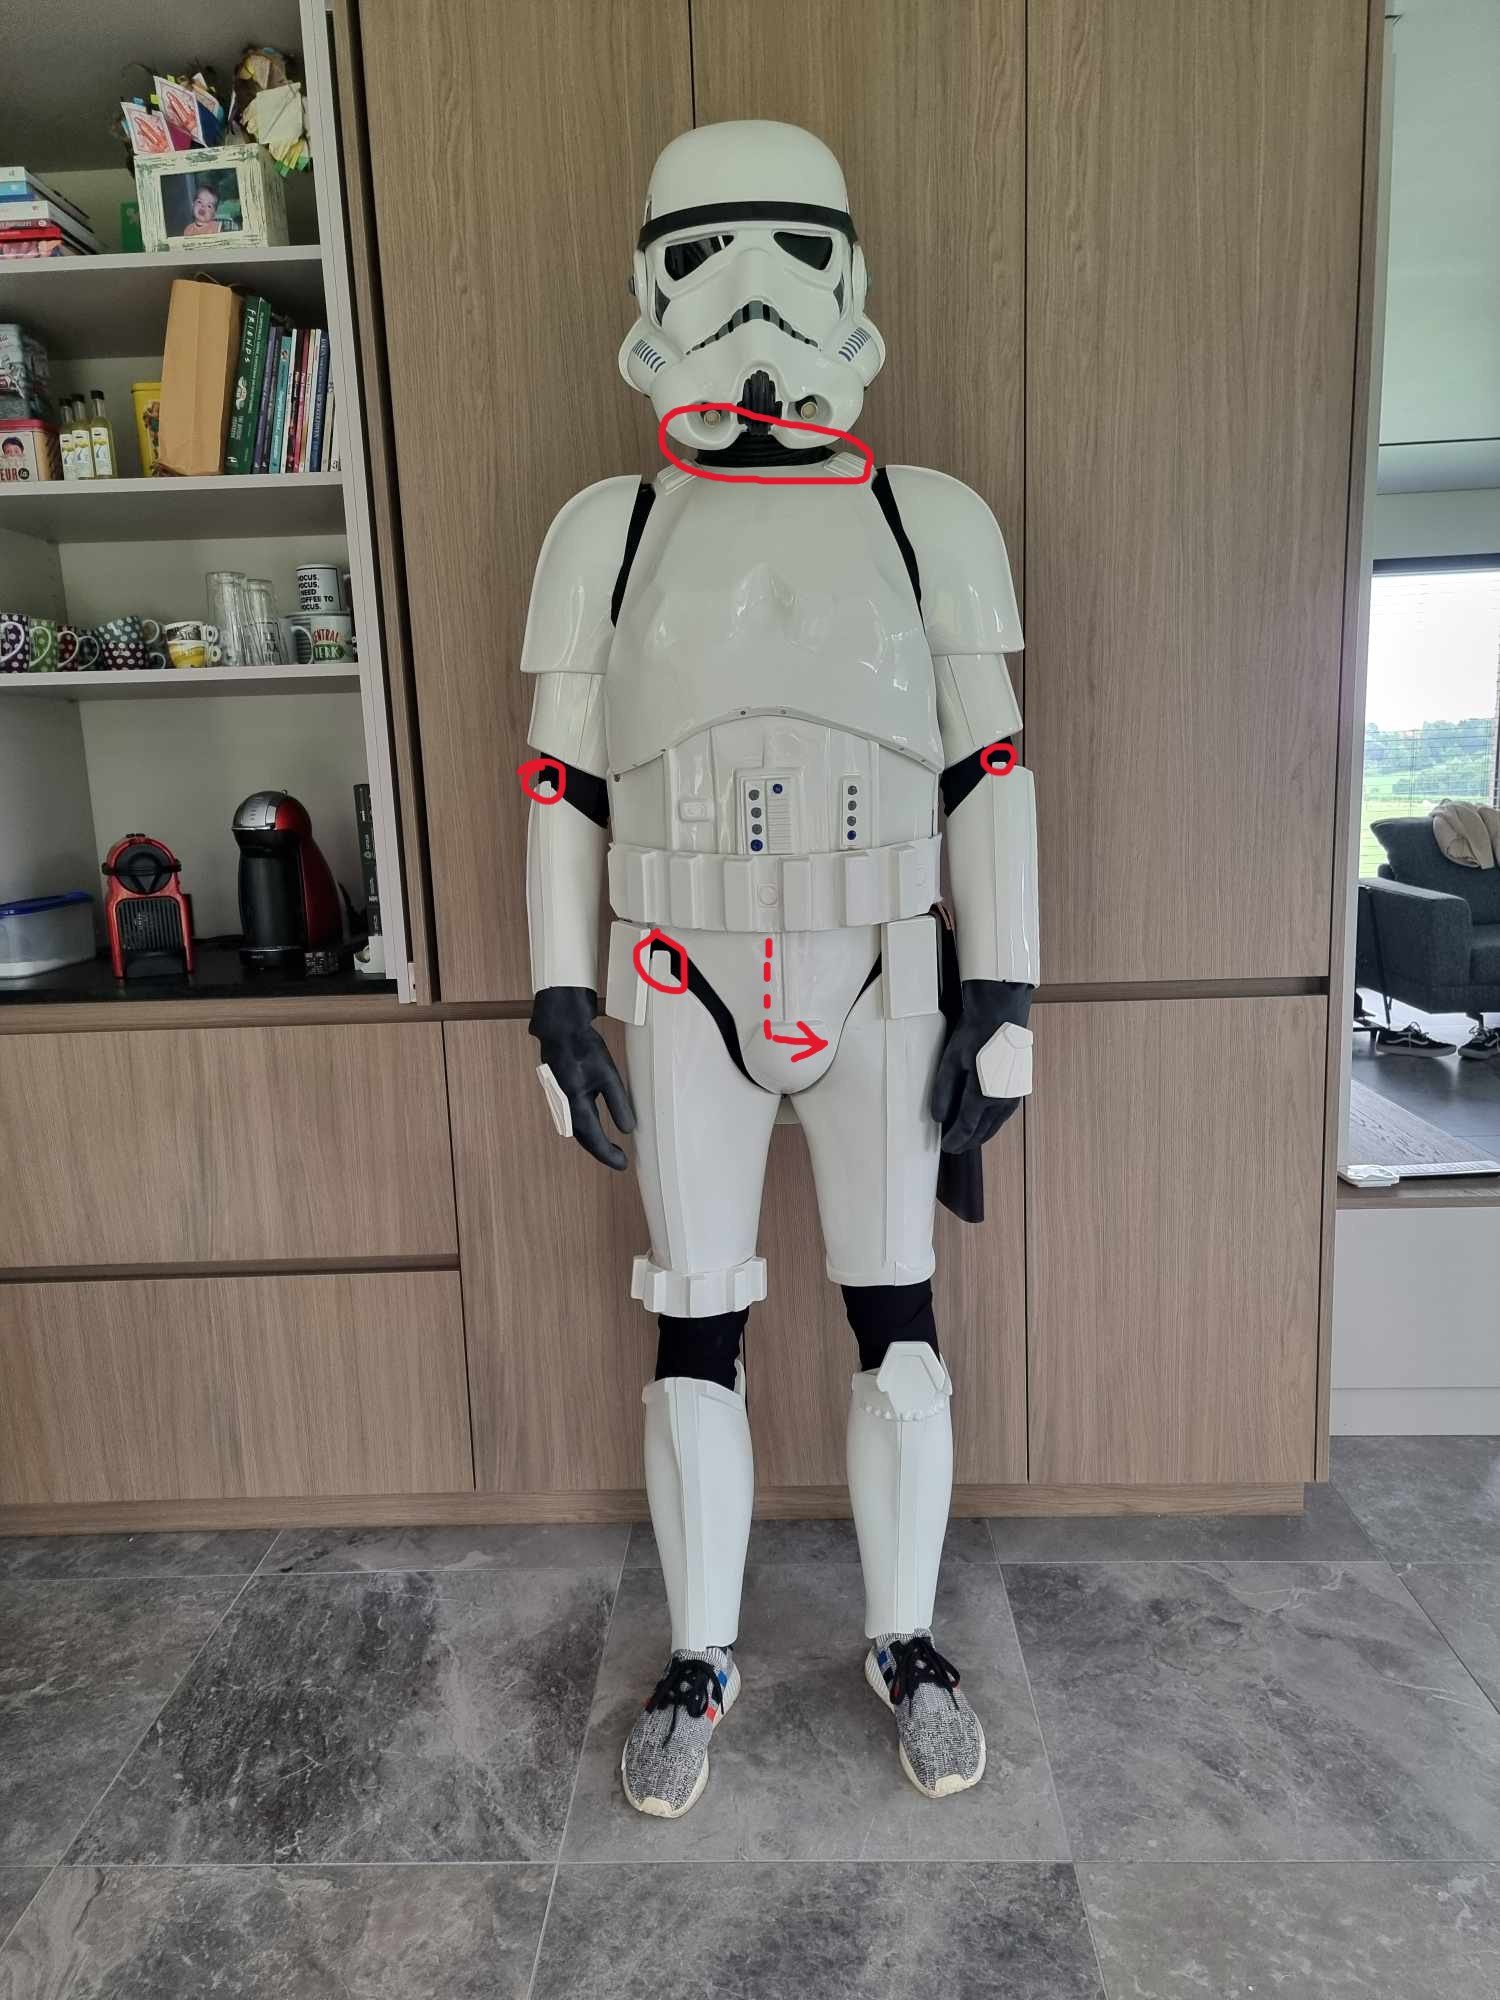
Looking back I mentioned that you may want to move your belt over so that it's centered on the raised edge of your lower ab armor. Looking at some other builds many troopers out there have it centered on your ab plate buttons as you have here. You might be ok not adjustting your belt after all. However it does still appear to be off to your right (picture's left) by looking at the dropbox locations. If anyone has any alignment opinions I'm curious to know your thoughts
 2 points
 -
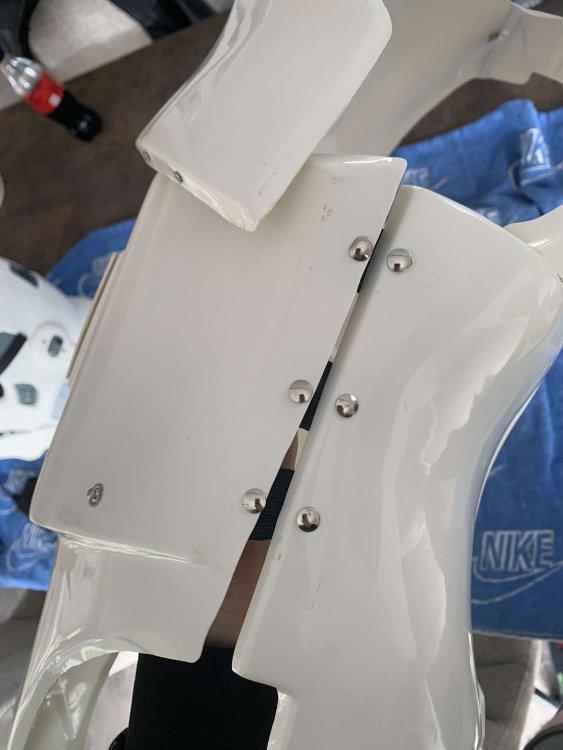
The red line was a suggested cut line of your AB, since the AB is at the moment not completely straight with the kidney plate! The rivets would go just about here Do with that exactly what you want! If you don't want to cut your ab plate, then you can just reposition the rivets on the surface that you have, like that (ofc this is a 2 second mock, but just measure and you'll have it correct)2 points
-
I just punched a hole through the shoulder elastic with regular line 24 snaps. That should be pretty standard1 point
-
Thanks for all the advice and the images, really helpful! I might do the cutting and repositioning if I decide to go for centurion. But then I'm also gonna try and polish the old spots as much as possible so it's as invisible as it can be.1 point
-
It shouldn't be a problem for Expert Infantry if we read the CRL: OPTIONAL Level two certification (if applicable): Any gap between the abdomen and kidney armor is no more than 1/2" (12.5mm) wide. Any shims used to achieve this effect are of a similar material and color as the abdomen and kidney armor. Shims fit flush and seams are allowed. A split (bifurcated) or single cap rivet is present on the lower tab (cod area) of the abdomen armor. Rivet does not need to be functional. Rivet on must be brass or silver in color, approximately 5/16" (8mm) in diameter and is not painted.1 point
-
Yes haha I didn't do enough research when starting the assembly of this suit ? I'd love to put together another one with all of the knowledge I have now! I imagine this might be an issue when trying to ask for EI approval if I keep the rivets the way they are now?1 point
-
Don't worry about the already existing holes too much, as you can create ABS paste from any off cuts that you get, so the color will match! Here's the tutorial that @gmrhodes13 linked earlier:1 point
-
Perfect thank you! They look very close together, indeed! I'm not sure if you've cut too much off from the front for them to be moved! I think that ideally for the fitment of the AB/Kidney that we'd first have to straighten out the AB like this Then we have this diagram showing how they should sit:1 point
-
Does this work ?
 1 point
 -
Hello and welcome to FISD1 point
-
Welcome aboard Craig! We have some very helpful members in Cali, hopefully you meet some of them at the upcoming armor party. Definitely the best way to get help if you need any resizing or strapping adjustments done. Good luck with it all, and hope to see you as an approved TK in the near future.1 point
-
Is your backplate overlapping the ab plate? Because it either looks like that or the rivets are placed very close to the edge of the ab!1 point
-
What do you say Daniel, should we take some EI photos this weekend at Comic Con? LET'S DO THIS!!!1 point
-
I had the same problem. I ended up cutting the tips off and drilling two new holes. It didn't take as long as I expected and now the "donut" faces outward instead of upward Before: After:1 point