Solcar23[TK] Posted July 24, 2012 Author Report Posted July 24, 2012 Thanks Steve! Couldn't have done it without you! Quote
Solcar23[TK] Posted July 25, 2012 Author Report Posted July 25, 2012 Well! I was able to get about 8 hours yesterday on the armor and am closer than ever to finishing! I still need to finish the belt, glue in snap plates and work out the strapping system. It's amazing how much faster everything goes after the hellish limbs are done! Lol! Well here's the progress! Drilled out the holes for the rivets on the ammo belt: Installed: I put them on for a test fitting. Then I moved onto the snaps and rivets on the torso armor. I'm installing the right side male snap here: Then the cod rivet. This one's for show only: inside view: Then I moved on to the drop boxes, first riveted the nylon strap onto the backs. I got these from TK 0812 Kevin. They are meant to fit AP boxes, but by cutting the corners they fit fine: Glueing and clamping them up: Then I moved onto the left side rivets, once again for show, they don't hold anything together. I was going to use the same rivets that Gazmosis gave me but I ran out of the heads so I went to the ones I bought from Trooperbay. They are excellent and I'm glad that I'm actually using them since I had written them off when I saw Gaz's. Lined up with the kidney plate: Then I put in the butt plate snaps, easy peasy!: Then after what seemed like forever fitting them I glued on the shoulder straps: Finally, I started the belt assembly. I began by heat bending it to a curved shape like the thigh ammo belt: Next up! Finishing the belt and installing the snaps and attaching all of the parts to the canvas belt from Trooperbay! Woo Hoo! I can see the finish line in the distance! Quote
Solcar23[TK] Posted August 4, 2012 Author Report Posted August 4, 2012 (edited) Well, nearing completion of the suit and need to get cracking on the lid soon! Progress is moving along and thought I'd share on where I'm at. Finished cutting the corners of the belt and final assembly to the canvas belt: Installed snaps to the canvas belt: Glued on the drop boxes: rivet covers in place: Finished belt sans canvas: Then I was on to finally installing the nylon webbing snap plates: Final product ready for the strapping and fitting process: Front chest and ab: Back kidney and butt: Biceps and bells: Thighs: There is also a snap plate on the inside of the forearm to the bicep and velcro in the hand plates to use Pandatroopers idea for the attaching the plates on: So, I really liked Panda's idea for attaching the hand plates so I roughed together the parts and am giving it to my neighbor who is going to sew it for me. Great idea Panda thanks so much for designing these! Top of the right hand: Bottom: I also loved Panda's idea for the thigh garter so I put that together as well and had another different friend sew it together for me. These work great! PROPS TO PANDATROOPER AND MIGHTY TANK FOR THE ORIGINAL DESIGNS FOR THE GARTER AND HAND PLATE HOLDERS!!!! Then it was on to strapping the whole this together: Elastic straps with the Dritz 5/8 snaps: Evening out the rear bottoms and cutting the tops of the shins and bottoms of the thighs to allow greater range of motion in the legs: Tops of shins: Bottoms of thighs: Then glued the shoulder bell elastic: I also installed the shoulder straps but forgot to take pics of the process. Still more work to do but 9 months of research, gathering and assembling later, I see the finish line!!! Edited August 13, 2012 by Solcar23 Quote
gazmosis[501st] Posted August 4, 2012 Report Posted August 4, 2012 Isn't it great to see thie light at the end of the tunnel!!!!!! Nice build my friend Quote
Mogwai[TK] Posted August 4, 2012 Report Posted August 4, 2012 That is Great Progress. Looks good, keep on going. Quote
bigironvault Posted August 5, 2012 Report Posted August 5, 2012 Easily EIB imho and Centurion not far behind. Quote
Potty Meister Posted August 5, 2012 Report Posted August 5, 2012 looking great man. I'll definitely be using your thread for reference The lid looks really weird in a mirror, huh Quote
Solcar23[TK] Posted August 5, 2012 Author Report Posted August 5, 2012 Yeah! Lol! Especially when it's just teetering there because there's nothing in it! I can't wait to get the interior finished and get it to fit comfortable! Thanks! Quote
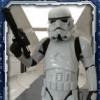
Solcar23[TK] Posted August 13, 2012 Author Report Posted August 13, 2012 (edited) Well, it's time to finish up and get trooping! I'm all finished (generally speaking) and wanted to finish off the build thread with the rest! It's been a crazy 10 months working on this thing that I'm going to miss the obsession! Hmmm......I would really like a sandy, or maybe a scout trooper.......Maybe Boba Fett!!.......Well anyway, here's the finishing stuff! Since I left off last, I was getting a huge flare on my kidney and butt pieces so I had to carefully heat bend the parts which made all the difference. When I looked at some pics of me in the completed armor I see that I still need to go a bit further in with the kidney as well: Then I finished strapping the arms: and did a test fit with the straps in: Then it was on to finalizing the lid. First I applied the Dave M decals and then moved on to the painting. I had heard that the Humbrol gray was a bit lighter than the decal color and that turned out to be true. So I just added a bit of gloss black and was able to match the color of the decals pretty close: I painted the vocoder with a satin black enamel by Model Master: After finishing the outer details I air brushed the inside with a black that was sitting with a bunch of other bottles of several kinds of black and as it turned out I grabbed the gloss instead of matte! Since it goes on wet I was waiting and waiting for it to dull up and it didn't then I finally looked at the bottle and realized I used gloss instead! I also installed a hardhat liner in it and some foam at the top and the thing fits excellent! I'll fix the paint job eventually! After the lid was finished I turned to painting my buttons, rivets and screws: I used the older darker colors for the blue buttons. I am probably going to change it to the more correct color before I apply for EIB/Centurion. Side rivets: Knee ammo belt rivets: And helmet screws: Installed my electronics, Thanks to Sparrow for the idea!: First in the chest and back. I need the smaller Aker and may not stay with the wireless. I need to experiment a bit.: Then I installed the fans, mic and wireless transmitter: Glued my latex hand plates onto my rubber gloves: A final safety snap in the shoulder to keep the bells from pulling the webbing out: And voila the kinda finished product (always a work in progress ya know! ) Flaring kidney and sagging belt a bit on the left. I'm on the fixes though! The belt looks like it slipped down a bit in the front too........another tweak...... It looks like I mis-aligned the belt when I was putting it on: You can really see the flaring kidney and the sagging belt (besides the ugly mug!) in this one: In the Stanley tub, I was able to fit everything, some emergency tools, my E-11 in a towel and my lid in a bag. It's easily the best way to go!: Now on to fixing the flaring kidney, fix the belt, repaint the blue buttons and take some quality photos for my EIB/Centurion submissions! I've already applied and sent in some photos to the Legion and was able to troop once at Comic-Con on Friday with the Midwest Garrison so I'm well on my way to my TK# and full membership! This was an absolutely AWESOME experience!! I'm soooooo glad I found FISD and was able to do it right, so to speak! I can't thank everyone on the boards enough for all of the help and support that was out there! THANK YOU THANK YOU FISD!!!!!! Onward and upward! LET'S GO TROOP!!!!!! Edited August 13, 2012 by Solcar23 Quote
Potty Meister Posted August 13, 2012 Report Posted August 13, 2012 A final safety snap in the shoulder to keep the bells from pulling the webbing out: This is genius Quote

Recommended Posts
Join the conversation
You can post now and register later. If you have an account, sign in now to post with your account.