


Darth_Nickel
-
Posts
382 -
Joined
-
Last visited
Content Type
Profiles
Forums
Gallery
Articles
Media Demo
Posts posted by Darth_Nickel
-
-
Lastest belts are all done and in the post guys

This one here i just finished for Brad has extra velcro all around the inside just as he asked

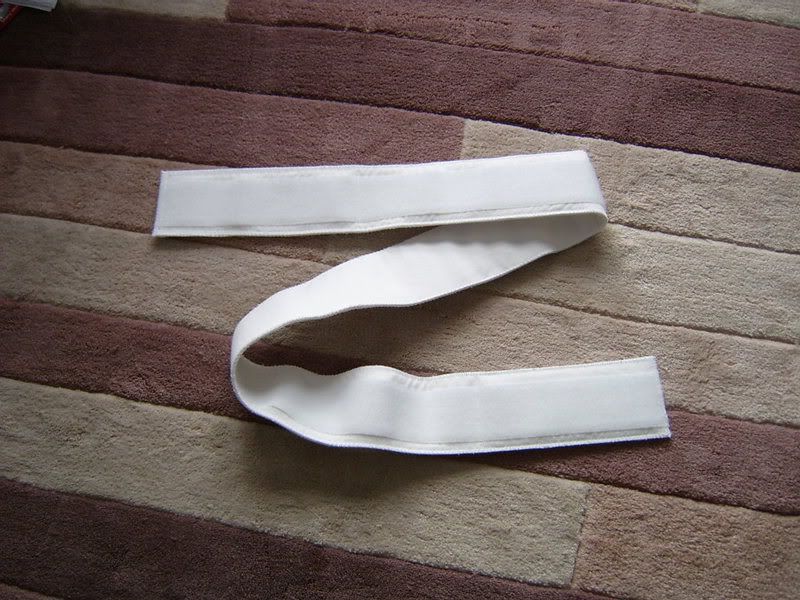
Looks perfect man. That extra velcro will help hold that massive blaster I have!!!!
Don't forget to mention that extra plastic in the back either. Nice little option/add-on to screw the TD on the belt. One less thing to worry about while trooping.
-
If you are using the hardhat liner, you can add spacers behind the front clips. This will allow you to "push" the liner back and your face away from the front face plate.
-
There was a guy who made larger arnor who went by TK BIG. He did great work, a friend of mine has some of his armor. Unfortunately his molds got destroyed (not sure exactly how) and he's not made new ones.
Just an FYI.... for those interested.
I have been working on getting larger leg molds made. The goal is to match the FX armor (since it is what I have after all) It's been slow, but I hope they will be complete soon. I HATE MY SHIMS. I too was referred to TK Big
I'm 6'3" 250, and the new molds should be big enough that I have to trim a bit off for a good fit. They are also will be longer than the current FX molds. Not only do I HATE SHIMS, but I wanted to get rid of some of that extra black space.
Like I said, I hope they are done soon, but it's already been a while so what's the hurry anyway....
ps. I have no skills, I'm having them custom made.... leave it to the professionals.
-
It looks like in the upper right hand corner I have -3 new messages? Does this mean I need to send 3 messages ASAP?
-
man, that's a sweet site... hope the finger heals up well Matt!!!!
-
Dan,
Your best bet is to check with someone in your local garrison. They should be able to point you in the right direction and they may even be able to help you put it all together.
Good luck man
-
I don't know if it's possible, but make the lower back piece larger so that it wraps around the body more and meets up with front piece so there is less black on the sides (especially difficult on troopers who are larger in the gut area).
outside of the above changes, I would like to see the parts generally sized up. This would allow more troopers to use the armor with less shims, and smaller troops can trim away the excess. I would be MOST interested in the legs and arms, but in general, everything could a "little" bigger. I can't stand my shims.
-
I had a pair of these mic tips in hand. Nice. Looks like they need to be dremmeled out . I've been waiting for stomper to do another ****ing run of mic tips so i can finish my bucket. Did you hear that Tony? I dare you to make another run of mic tips. In fact I double dog dare you

yea, another run would be good. Any info on how/where you need to dremmel our Keit's tips would be sweet. I don't want to mess them up since they look so cool as it is....
-
Mine will. Many folks have installed them in Ken's and Tony's hovi-mix aerators.
So how do you install them? I just got a set of Keith's mics (Which I only had a second to glance at in person, but they look awesome) They look like the have a recessed, tip (where the mesh is) but the "body" is solid. How do you get the mic inside the aerator with the wires? Perhaps
Like I said, I didn't spend a ton of time looking at them yet, so perhaps I'm just missing how they do together.
Sorry for the rookie question...
-
They can't, they are way to big.
Your speakers won't fit in there?
-
How do you install these in Keith's tips? Can they be installed in Keith's tips?
-
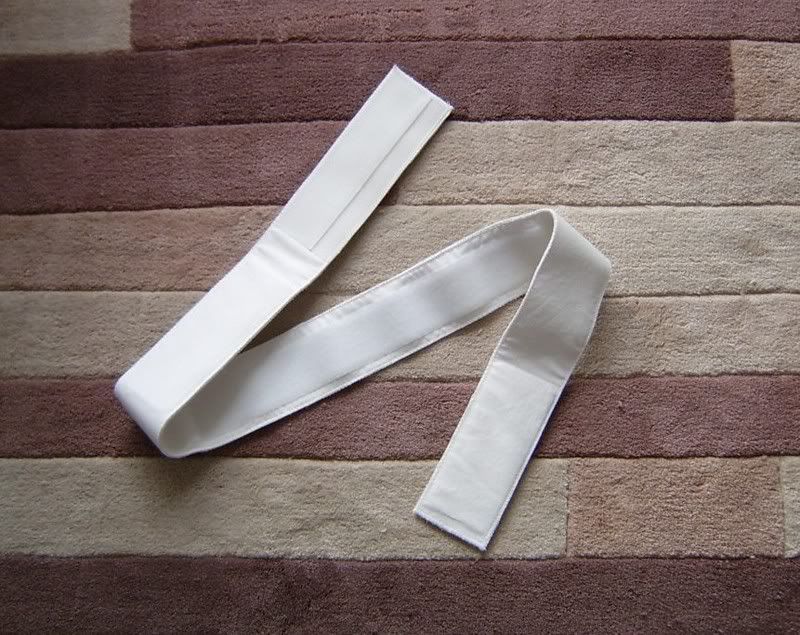
I picked up a belt from Mark. FANTASTIC!!!!!! It looks great. Mine is the bleached white one above. I just need to install the hard parts, which I hope to get done this week/weekend. Thanks Mark!!!!
-
Problem is I'm working with a cemented TD, so I have to work outside in.
I originally had my TD rivets to my ABS belt from the inside just like you are talk about for screws. I guess I could try pulling the thing apart... Or make a new TD...
The remaining two things I'm still looking for solutions is a toy blaster conversion kit and tusks that will work with my skullworx setup.
I too am looking for a solution to the Skullworx tusks. I've not had any luck to date, but keep me updated and I'll do the same.
-
Don't use Hot glue for an FX bucket.... that would be a mess man.
Use the ABS glue in the kit or pick up some CA glue (CA is prefered as the ABS glue is a bit of a pain to work with)
-
Hi Steve glad it got to you ok, thats fast shipping accross the pond hey?
Pm sent on fitting your holster
post up those instructions Mark!!!! I "think" I know how to do it.... but I would LOVE to make sure. Can you also add how to attach the front formed part? Again, I think I know how to do it....
I'm waiting until after a troop tomorrow to finish up the belt (in case anything goes wrong)
-
I too used snaps. SOmetimes it's a blessing, sometimes it's been more of a pain (trying to get them together in a hurry, reaching around your back) I'm now moving to a canvas belt...
-
There was a thread in the legion forum about bigger leg and arm pieces, but it seems to have died out. Maybe you could post there which will give it a bump.
that may have been me.....
 but perhaps there was another.... (I was focused on leg armor mainly)
I've been trying to get a mold maker to make some larger leg armor to match the FX set. Talks were progressing along nicely.... however it's been some time since I've heard back again.....

-
What a great thread. I loved the comments about being a proud TK. I have to say... it's the entire reason I'm here. There was NEVER a though before starting my TK armor about should I start a Clone, a Vader, a Boba, etc.... It was always TK (and clean at that). Now that I'm here, I'm looking at other options to "play with" and I'll build up a sandy, but I'm in no hurry. Love the TK, be the TK, Live the TK

So on the FX armor. It's what I have. I'm 6'3" 250ish give or take 10 lbs (time of year and what I've been doing). I'm a big guy. Actually, I wish there was BIGGER armor out there than the FX. I'm actually trying to get some custom work done to get bigger legs (I hate my shims, and they are not that big - I just want one solid leg, that I can actual trim to fit proper)
It's not the most accurate armor, but it looks good. Without it, I never would have been able to join the 501st (again, it never entered my mind to do another costume)
So where can I get some bigger armor?
-
Great work
I'm tempted I really am. For this to work it needs to be so spot on.
I'd suggest a metal stopping bar stuck inside to help you get the cuts all the same length. Stop when it reaches the bar.
I have few lids in kit form and can easily make a new top dome so I may give this a go too
Summer lid!
Can I post these pics up on the UKG board to gauge an opinion dude?
Perhaps a link to this board (drive some mebership????)
I'm fine with you sharing my photos. It's all about spreading ideas and helping people.
-
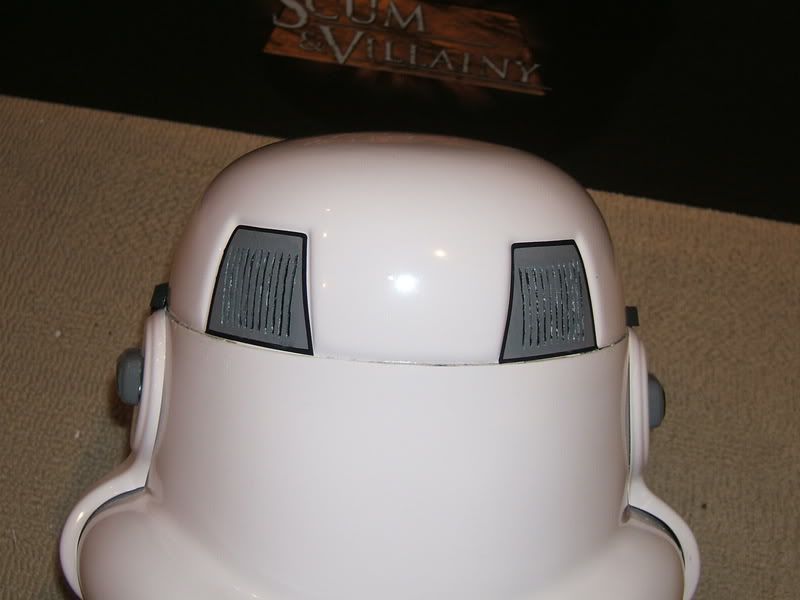
Don, you are 100% right. I thought about spray paint (actually it's what I used, I just didn't spray it). I'm glad to see that you had some of the same issues I had (it was REALLY tough to get all the insides of the vents covered)
The 10 foot rule is great. Actually the 6 inch rule in person is great. The flash on the camera is VERY unforgiving (you can see so much more close-up) In person, honestly if you didn't know it, you would never know those decals were cut. In the flash (if you look close) you can see a slight shade difference in the gray paint vs the decals. You can't see that at all in person.
Your vents are much cleaner than mine, you did a great job
All in all, I'm pretty happy with how it turned out. It's not perfect. It really looks different in person, so please don't judge 100% by the photos. I'm installing some fans now to really get my monies worth. I can't wait.
I would love to hear some more comments from people viewing this. I tried to give a little more "distance" on a couple of shots to help demonstrate.
-
as promised....


-
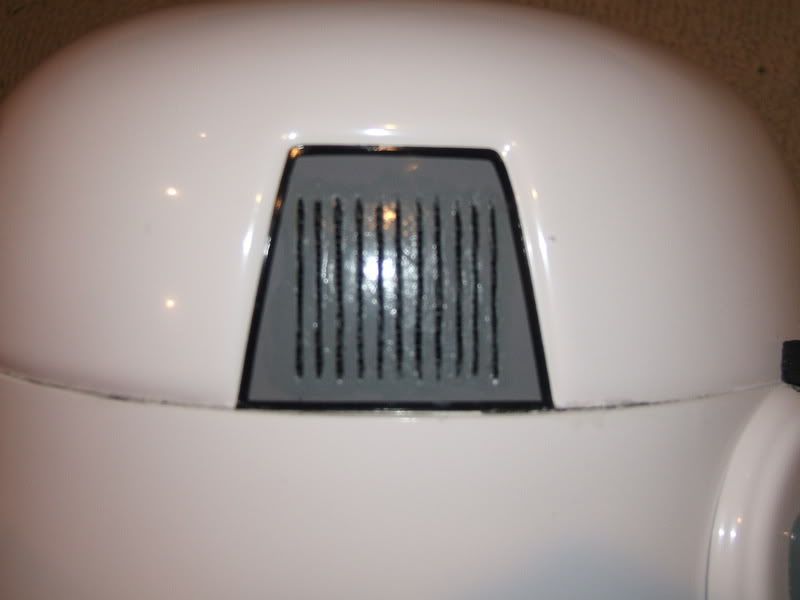
I'll take a picture of mine tonight. I don't think it came out as nice as what Don's was looking, but it's not bad. My vent's don't appear to cause the area to become weak. I was actually out on a troop last Friday and the guys didn't even notice. I asked them about it later, and once I said something about it and showed them they realized what I did.
When painting the insides of the vents.... which was in my opinion the hardest part of the mod.... I had to get pretty creative and start looking at all my options. It was VERY difficult to paint the inside of the vents black and NOT get any paint on the decals. So needless to say, I got paint on the decals. The solution..... and it sounds crazy..... paint the decals....(I didn't remove them, just painted them....)
I hope the pictures come out well. It really does look pretty good in person. (outside of the initial mistakes I made when building up the bucket and applying the decals originally...
 )
) -
Great news all!!!!!
I just got my pauldron and will be sending my photos for Mark status ASAP!!!!!
I kid... I kid...
-
I used a pair of pliers to hold the nut really tight. You should then be able to keep screwing. It takes some effort and feels like it's done, but you can keep on going. Also be sure you have the nut on correctly (facing the correct direction - made that mistake the first time too)
Aerator speakers run3; will fit Hovi-mix aerators
in For Sale - Archive
Posted
I'm down for 2 sets