

bishopdonmiguel
-
Posts
192 -
Joined
-
Last visited
-
Days Won
3
Content Type
Profiles
Forums
Gallery
Articles
Media Demo
Posts posted by bishopdonmiguel
-
-
It helps black out the helmet which in turn can assist in hiding your eyes through the lenses. It also helps black out the interior for your own vision and gives a more substantial appearance if a kid peeks under your bucket lol. I’ve also found it dampens ambient and internal sound somewhat. I also like the extra bit of heft it gives the bucket.
Sounds promising. Count me in and thanks for the explanation.-
 1
1
-
-
Curious. Aside that it looks really cool, what is the practical reason for doing this?
-
Very nice layout! I have been trooping for just about a year now and for some reason I had no idea about this part of the site! So this is all new to me. I wanted to make sure mine is organized just like yours.
Thanks! I’m new to the trooping but I like this log idea. Like a photo album to look back a later.
Enjoying those candid photos in your album. Looks like your group has fun.-
1
-
-
Post troop photoshopping interlude (all work and no fun makes TK-21393 a dull servant of the Empire)...

-
1
-
-
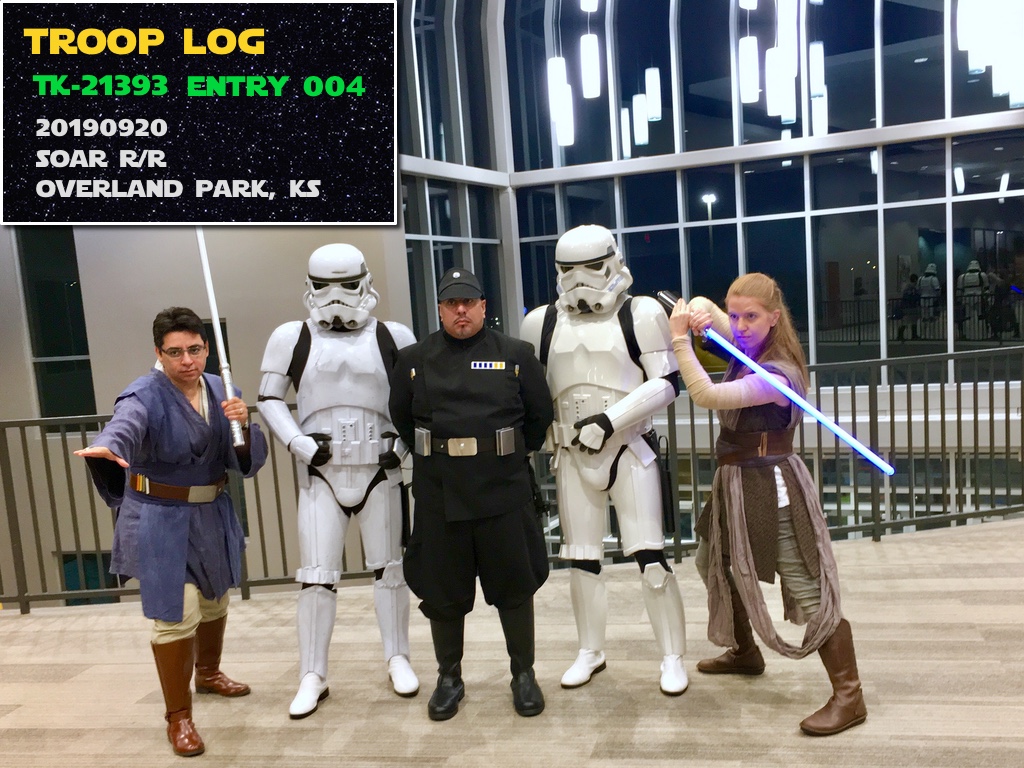
Troop 004 -- 2019/09/20 -- S.O.A.R. R&R in Overland Park, KS
-
2
-
-
What E-11 build would be complete without an operating test. The neighborhood dogs were not impressed.
https://bionicmoonlabs.com/wp-content/uploads/2019/09/BlasTechE11Test.mp4
-
Troop 003 -- 2019/09/07 -- Heart Of The Summit Race in Lee's Summit, MO

-
5
-
-
Troop 002 -- 2019/09/04 -- Kansas City Symphony ESB In Concert in Kansas City, MO

-
2
-
-
Troop 001 -- 2019/07/25 -- Children's Mercy in Overland Park, KS

-
3
-
-
-
-
-
-
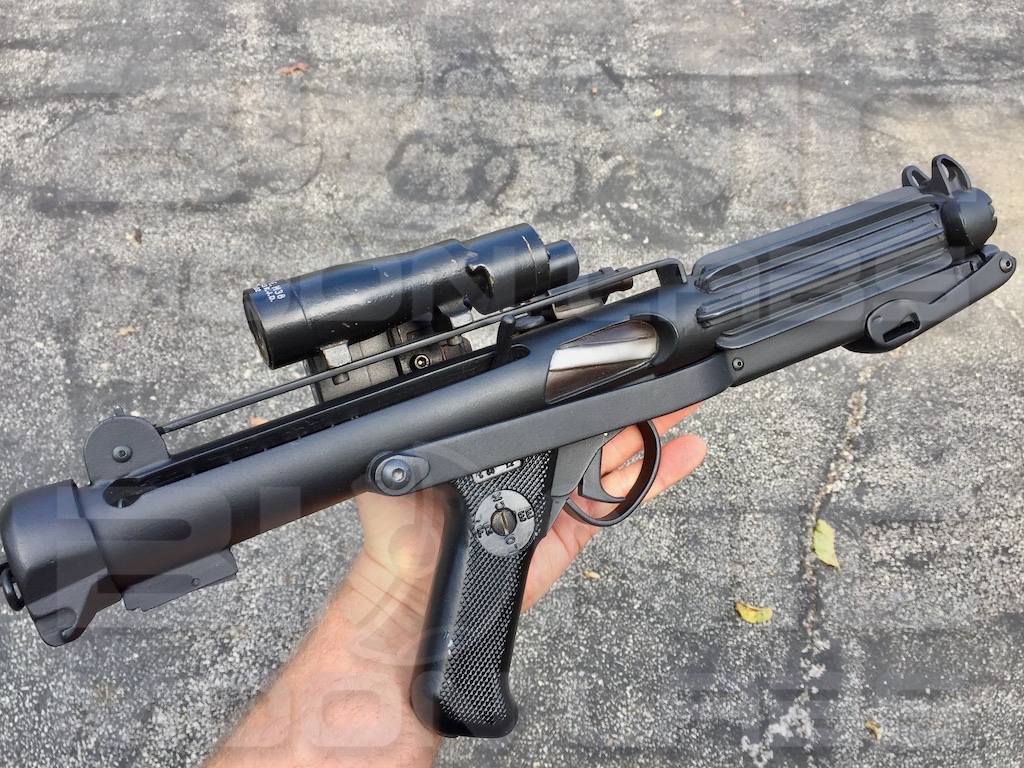
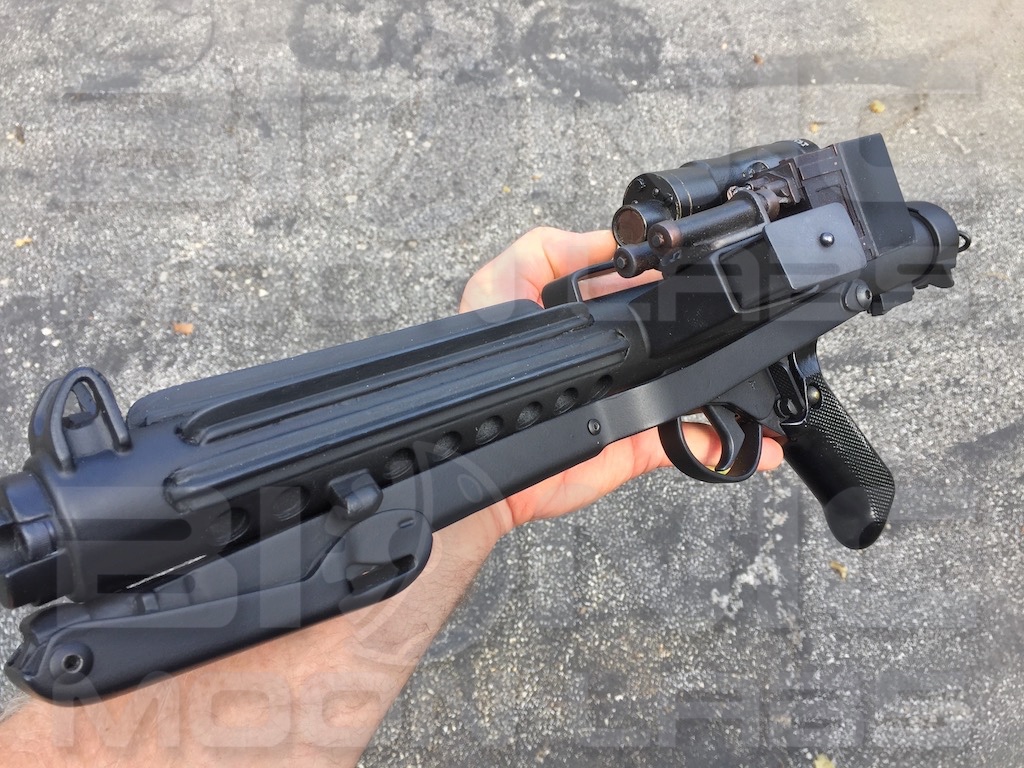
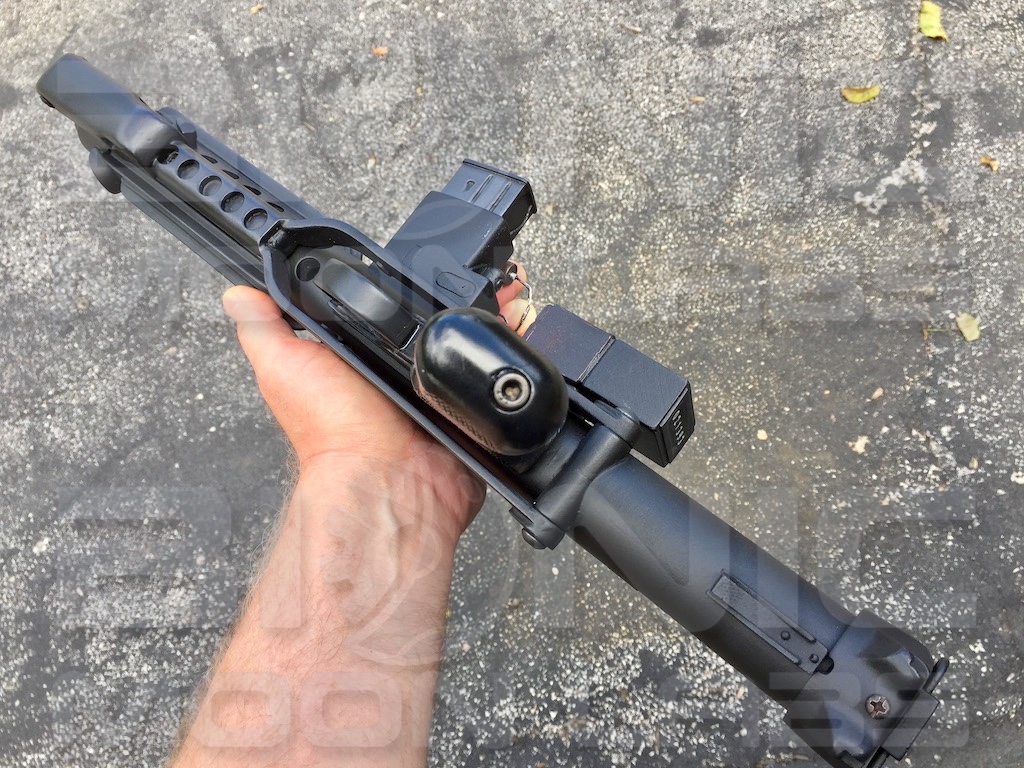
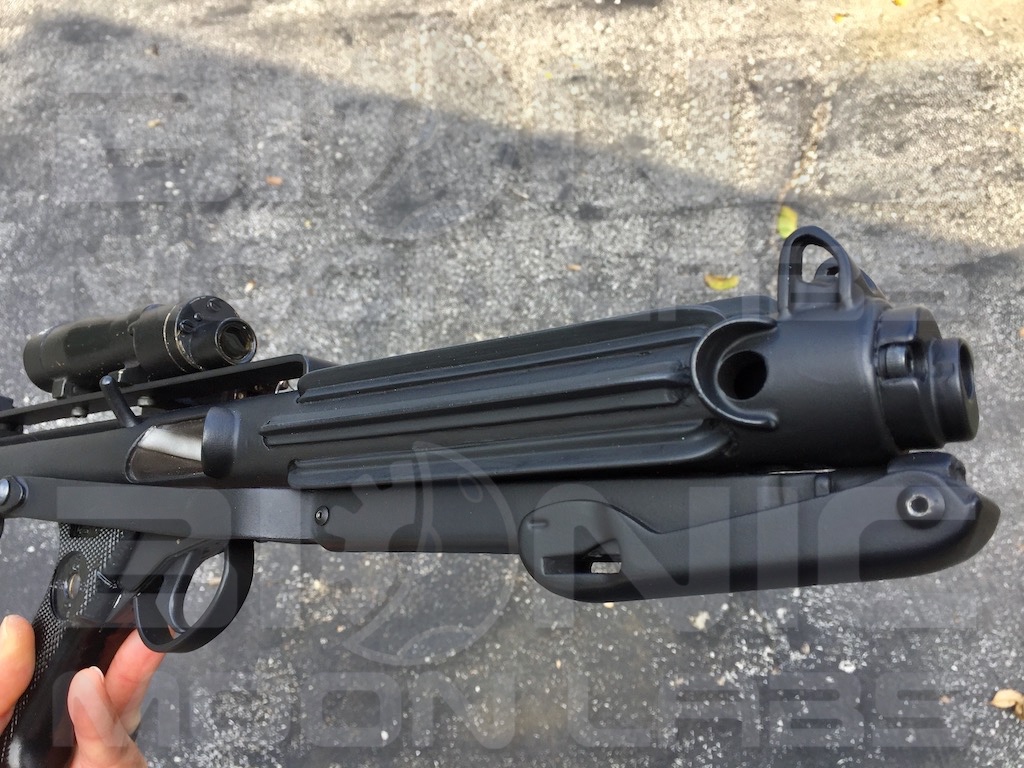
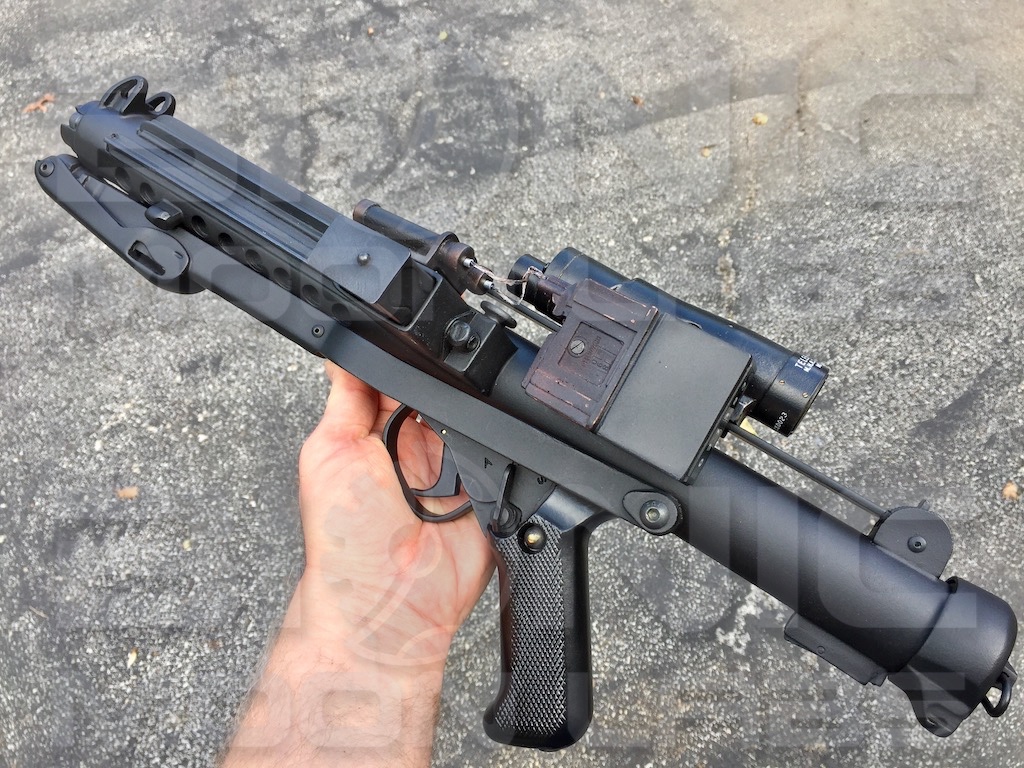
Build is complete. Many steps were skipped in the making of this thread but you get the idea. Coming up are some shots taken outside so hopefully the subtlety of the various blacks, undercoats and sheens show.
-
10 hours ago, boyorastroboy said:
Beautiful work! Love the varying shades under the black.
Thank you. It's a labor of love, especially since this will be my troop blaster and I know it will get beat up. I wish Doopy would use tinted black resin but any scuffs and dings will just add to the character of this.
-
1
-
-
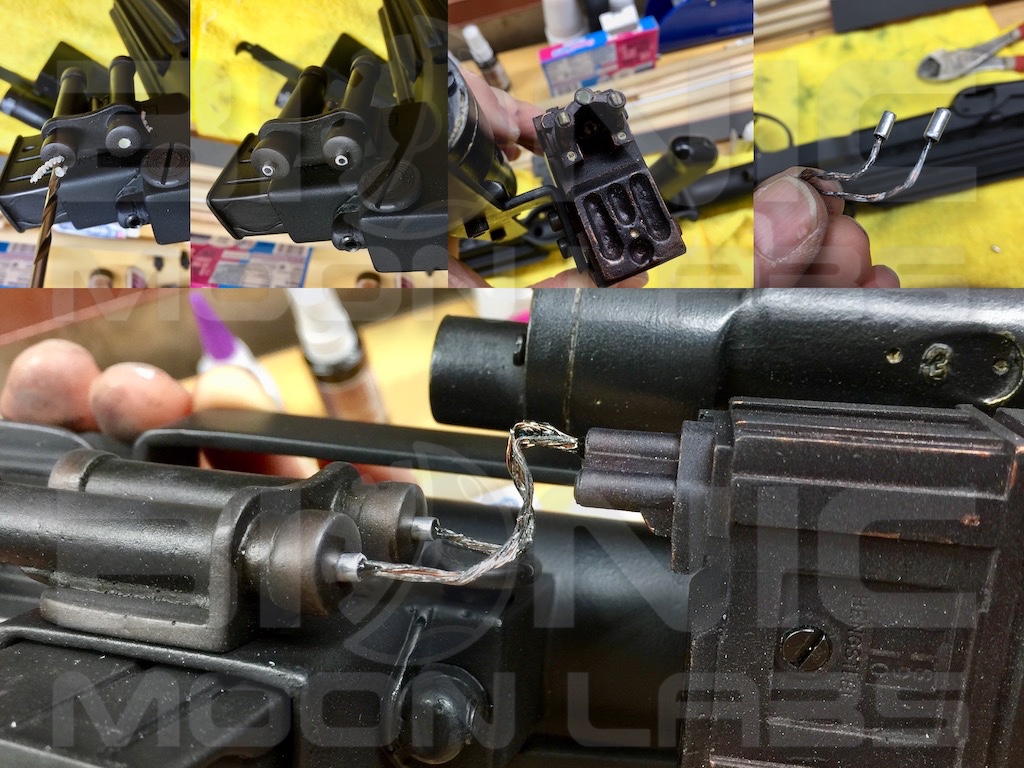
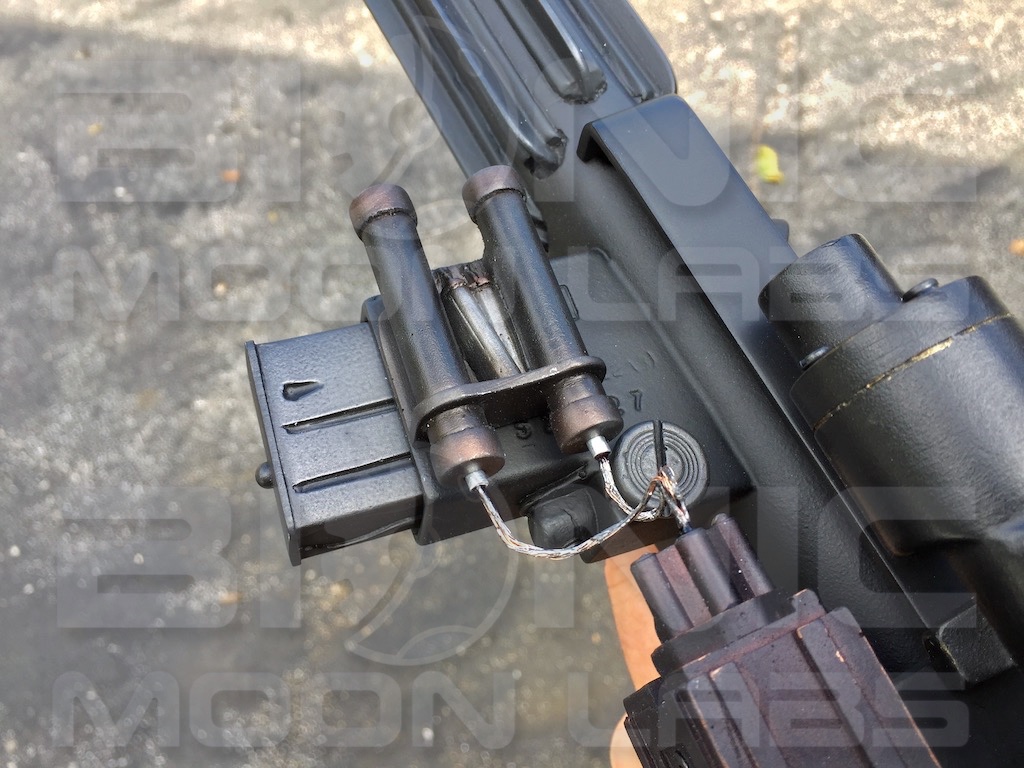
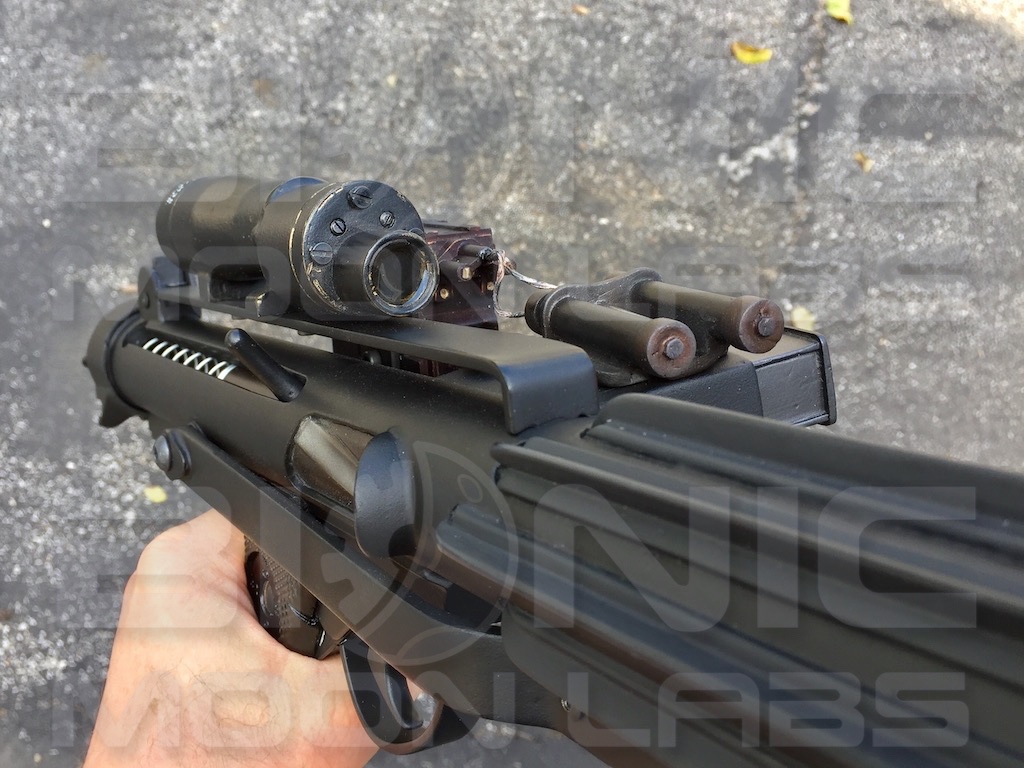
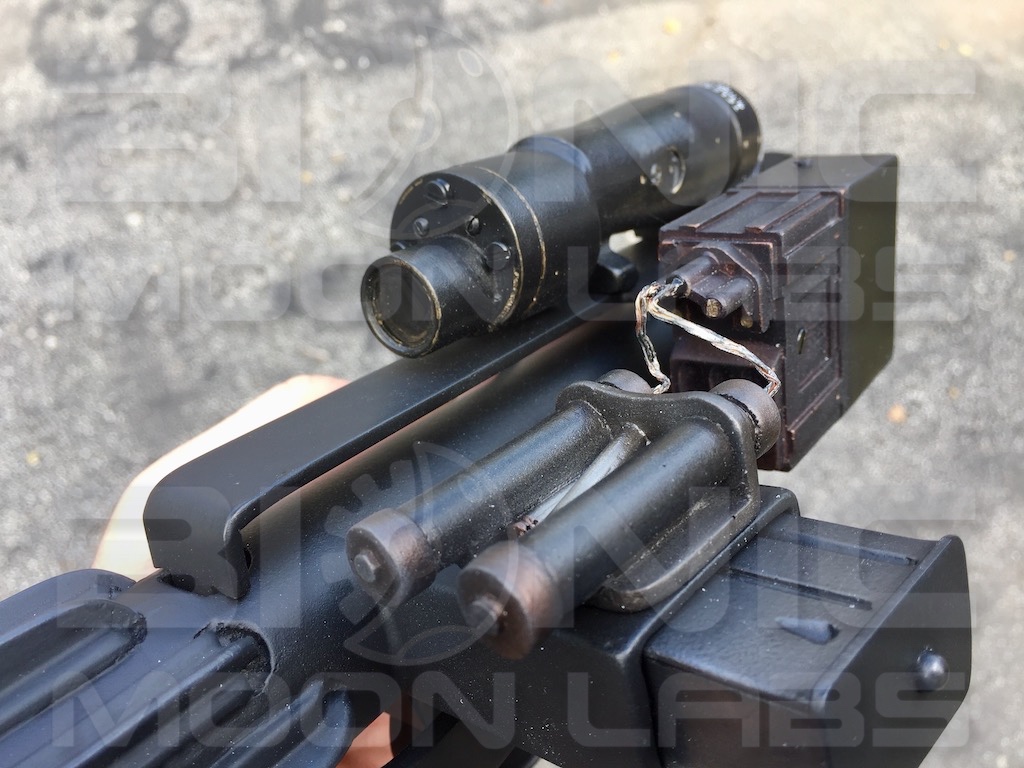
One last detail I want to add is bare wires from the Hengstler to the part on the magazine receiver. I'd seen a few pics with wires and thought they looked cool and add a sense of purpose to that part.
I applied a bit of solder to a short piece of wire split into a "Y." This holds it together and keeps the wire from fraying. Too much and the wire would not be bendable. A smearing of black paint completes the look.
After drilling shallow 1/8" holes in the magazine part, I used a small section from rivet heads to create a place for the wire to epoxy in. This also serves as a "pressure fit" component to allow the wires to be removed from the part should the scope rail need to be disassembled later.
A 1/8" hole in the Hengstler provides a permanent connection for the wire. As with the trigger assembly, I used tinted epoxy.
-
1
-
-
11 hours ago, Lestat616 said:
Just arrived a week or so ago, and am lurking through threads. This looks simply amazing.
Thanks for taking a look and your nice comment. Lots of inspiring builds here. Be sure to check those out.
-
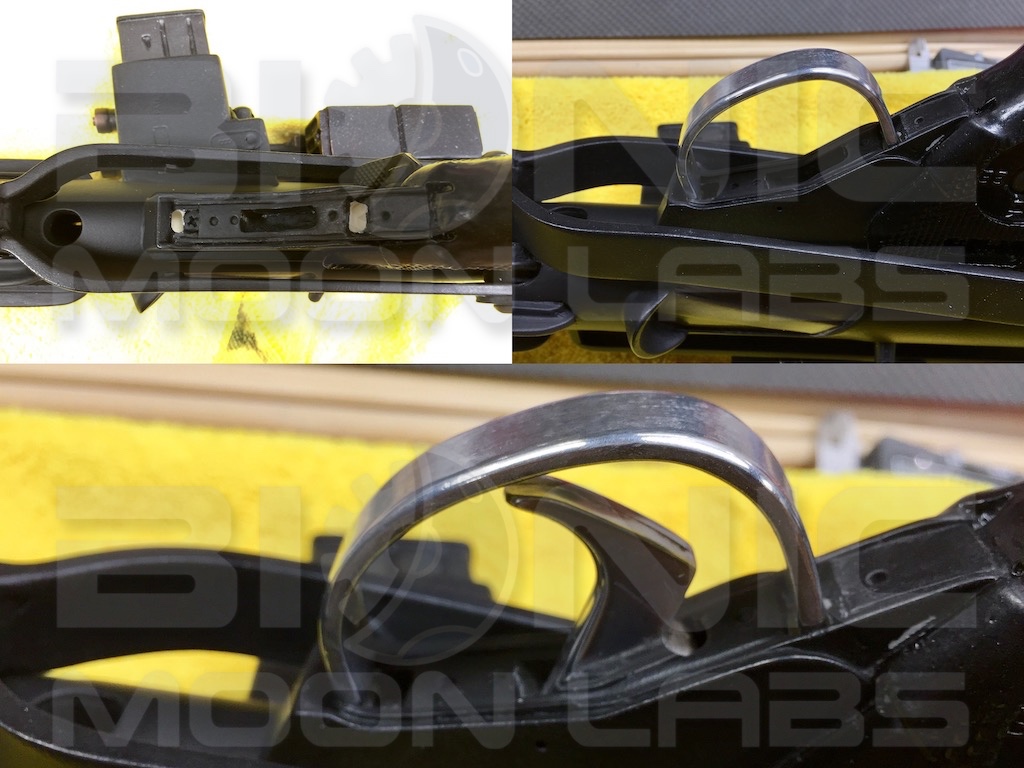
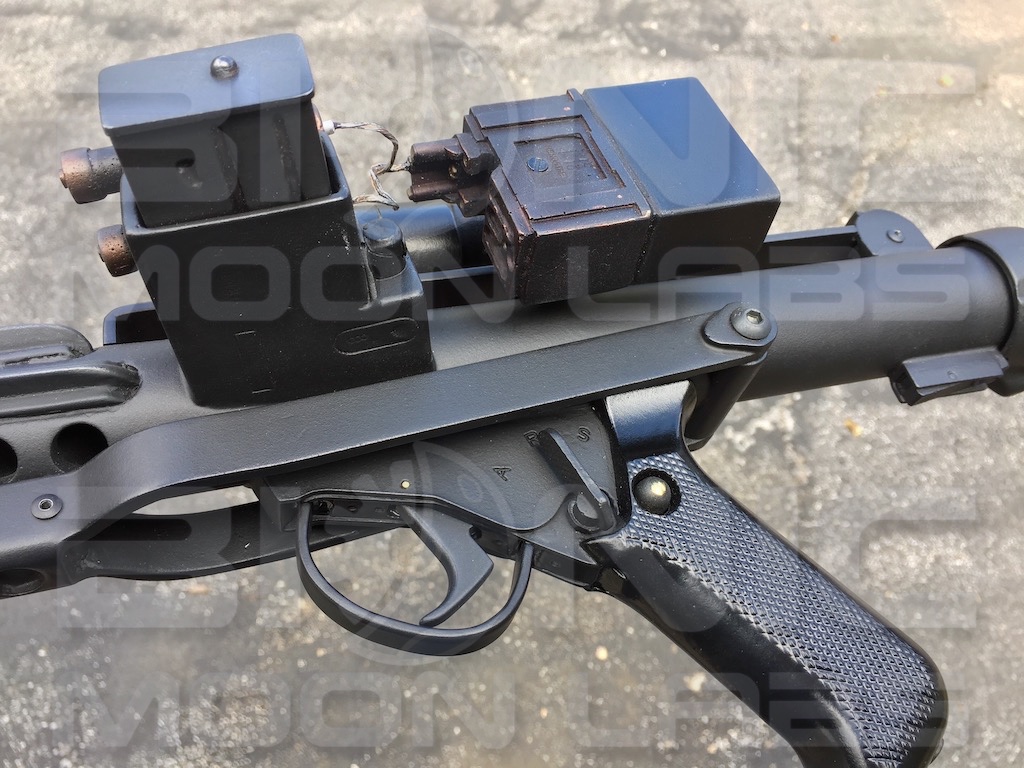
Carve out gun body as necessary to accept the aluminum guard and trigger. Test fit. Prime and paint parts (mask of small areas for epoxy to adhere to).
I tinted the epoxy black to help hide the unpainted metal and fill in the void. I'll probably cover this with a brush on of the body paint to complete the look.
-
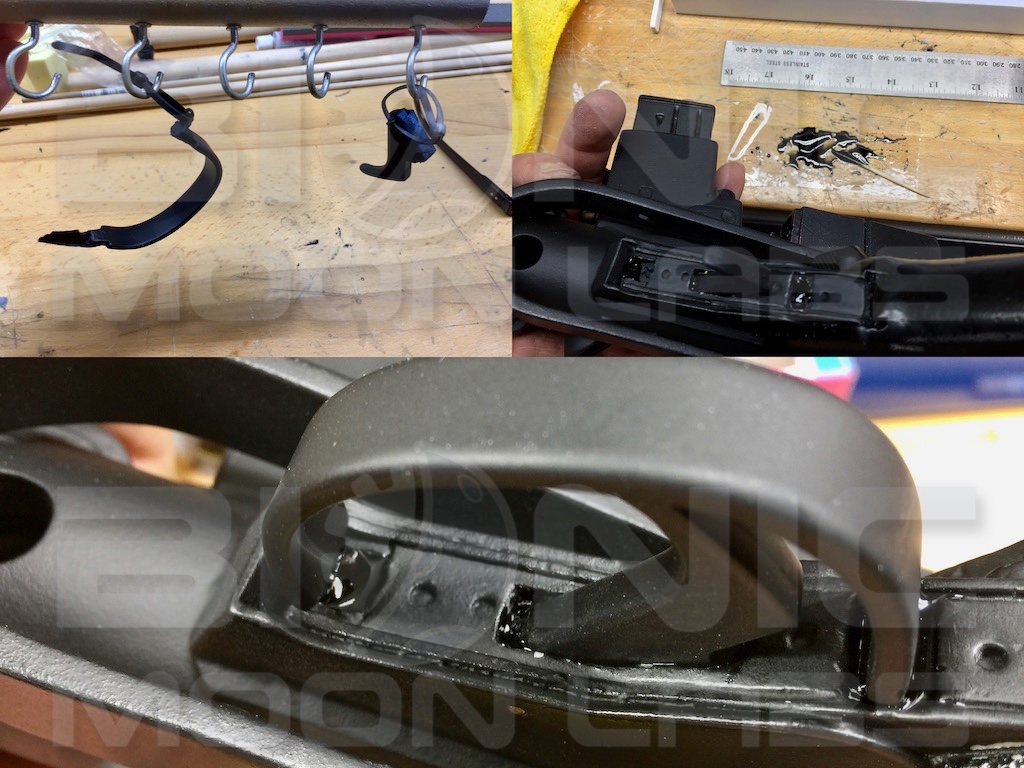
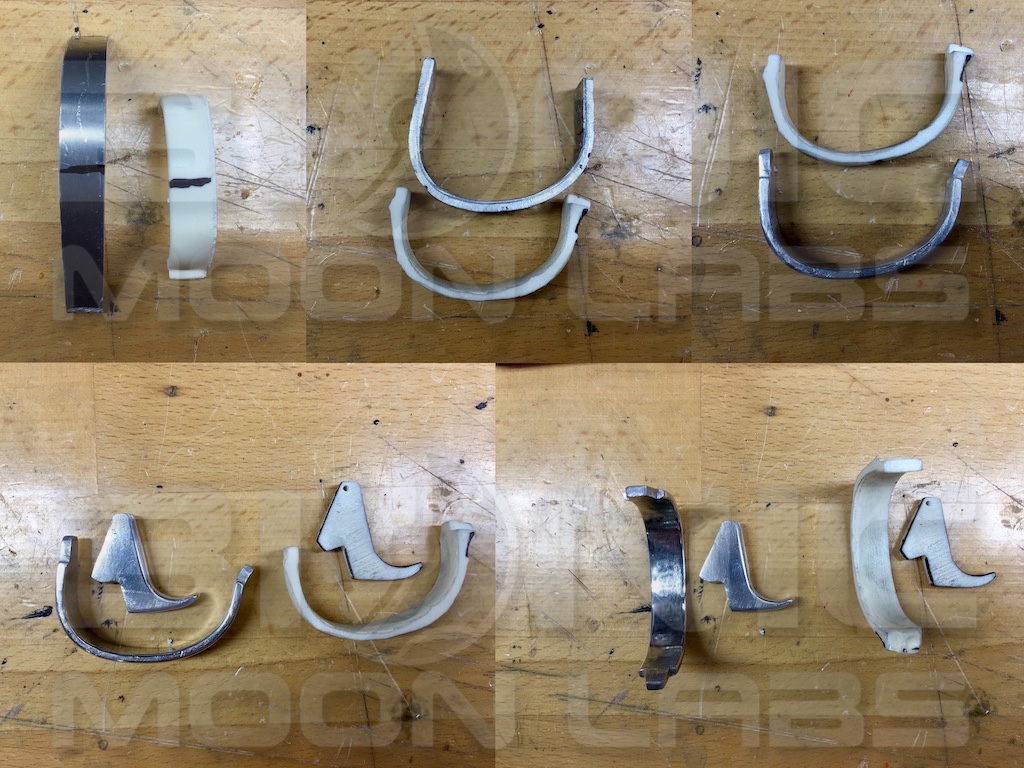
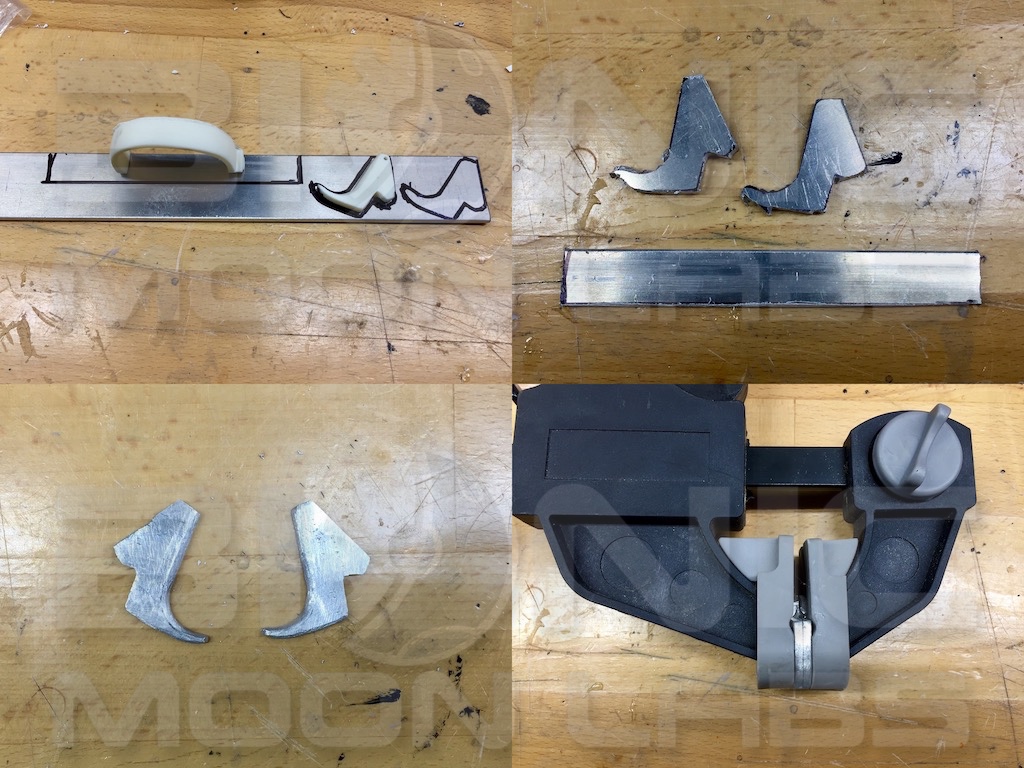
Shape the trigger guard in a vice and compare to resin. Apply a line in black Sharpie to use as an alignment point. Rinse-and-repeat until they match. Carve out ends with a Dremel to fit into gun body recesses. Sand with increasingly higher grit paper gives a smooth finish. Buff with steel wool before priming and painting.
-
I decided the resin trigger and guard would be prone to breaking so I created aluminum replacements. I didn't have thick aluminum on hand for the trigger so I epoxied two halves together to achieve the proper thickness.
-
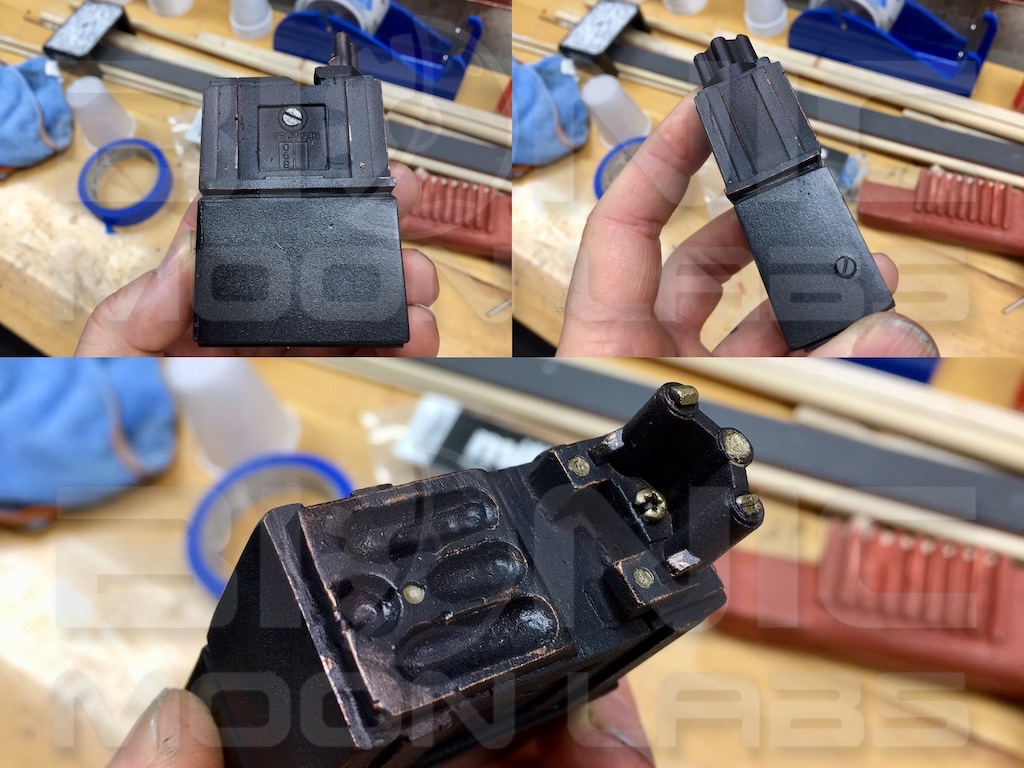
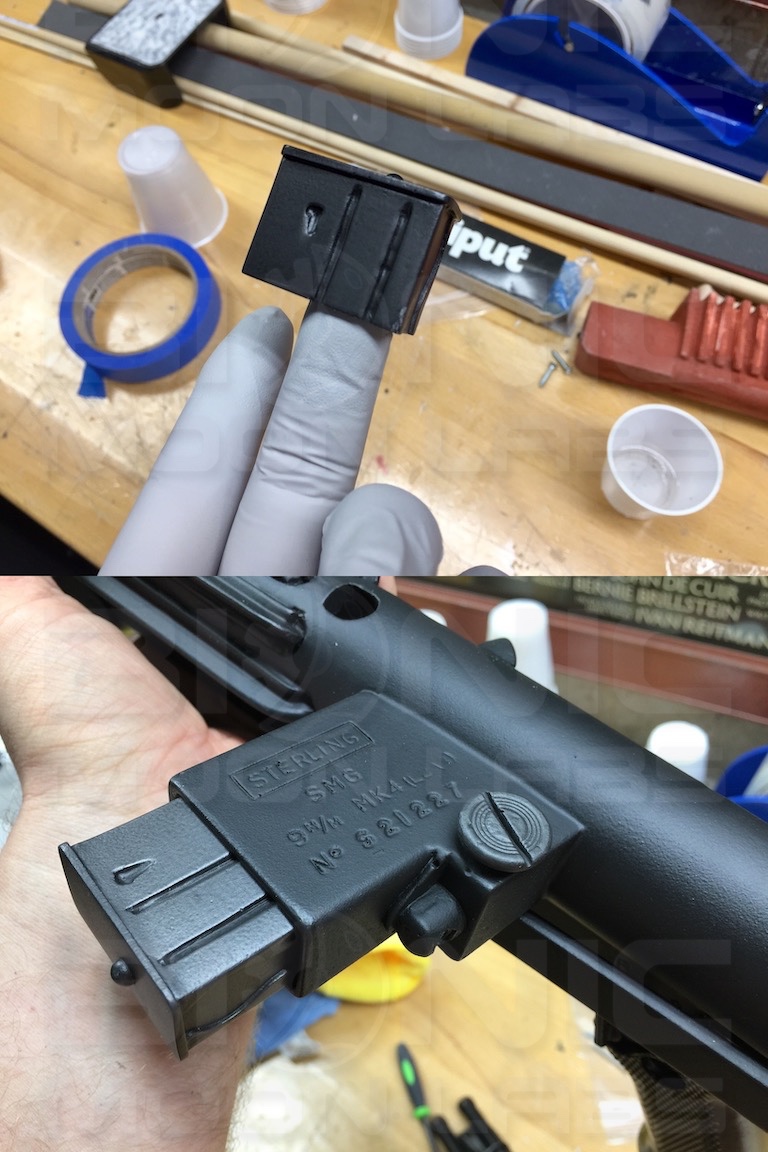
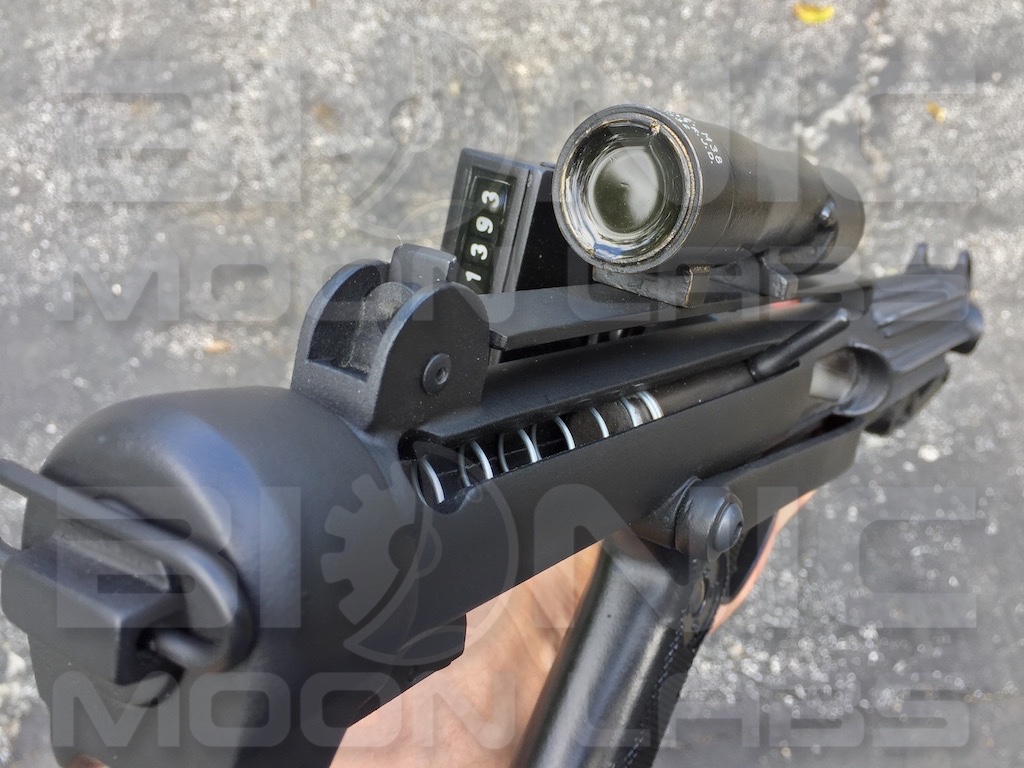
Hengstler Counter with fasteners and painted details.
To finish the window detail, I cut a piece of black styrene and applied vinyl dividers and numbers (my TK number). This plaque is affixed to the bottom of the window void with epoxy and then filled with clear resin to approximate a piece of glass or plastic.

-
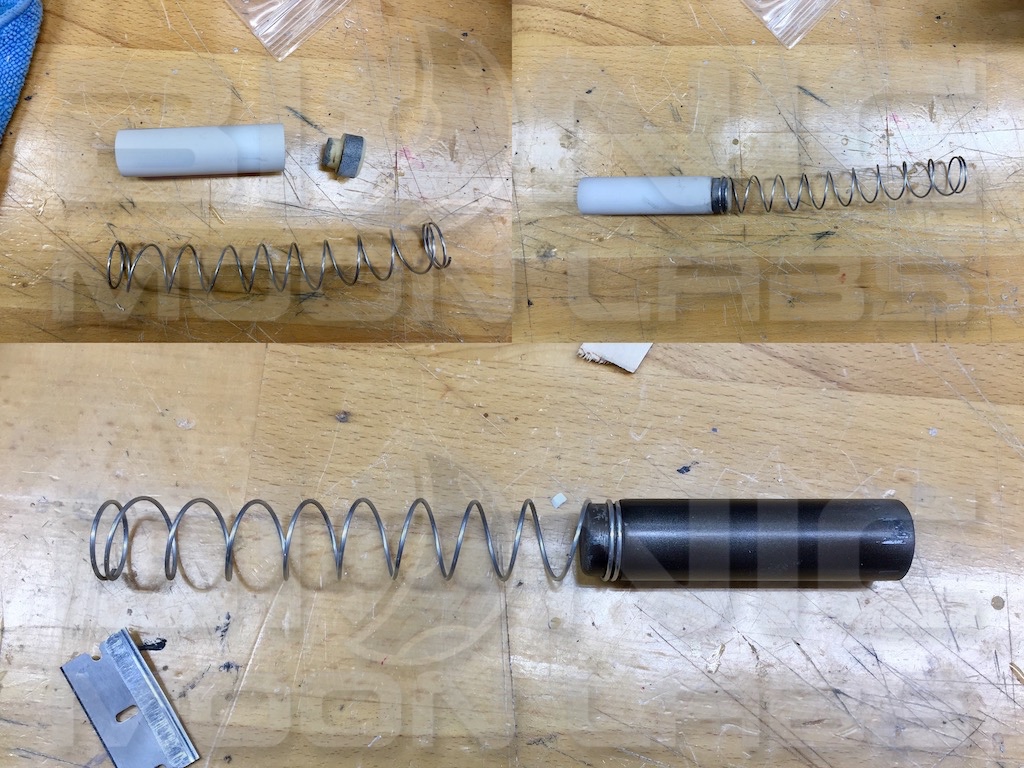
I found a suitably sized spring at Ace Hardware. A piece of PVC pipe and small wood stub to hold the spring serve as the bolt. A bit of painting here to match the detail on the body helps communicate the function of this piece.
-
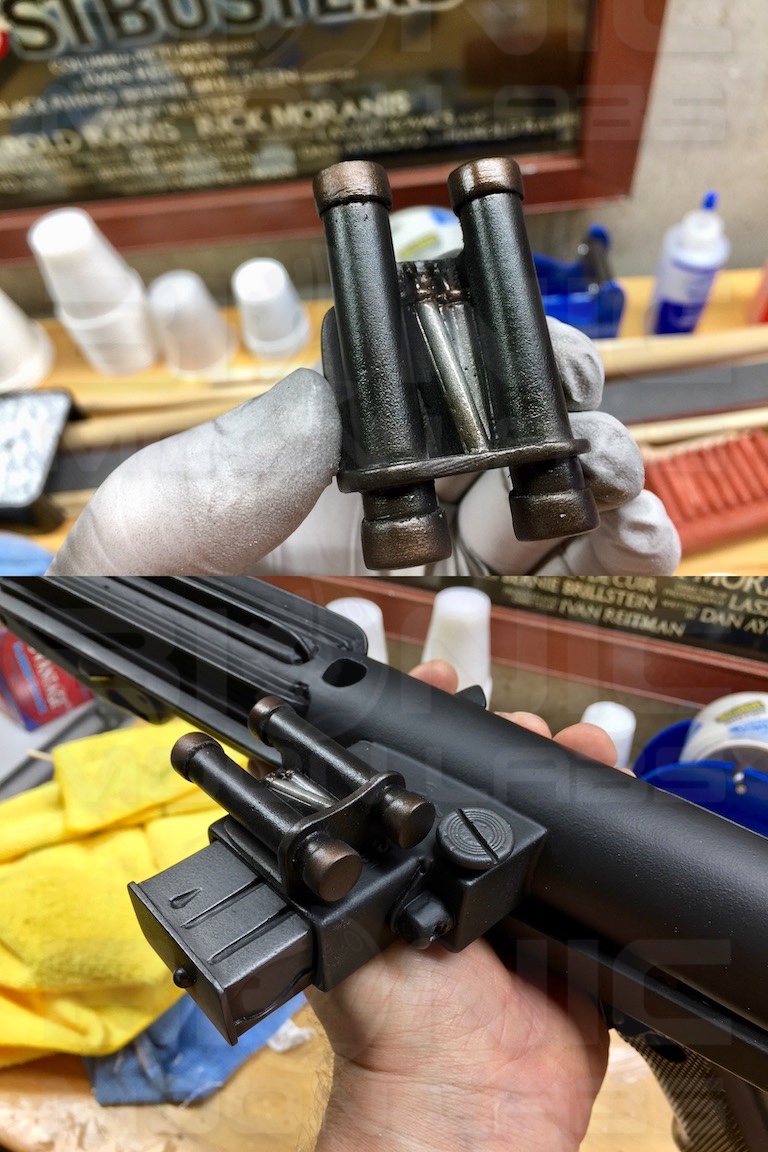
I don't know what this part is called but I know there has been extensive research on their origin. While I have no plans to make this more accurate, it is a cool looking part and I think it deserves an interesting paint job. I think the originals were partially constructed from aluminum but I wanted to add some copper accents. I painted the little thingys in the center silver to help them stand out a bit.
I'll be modifying these a bit during final assembly.
-
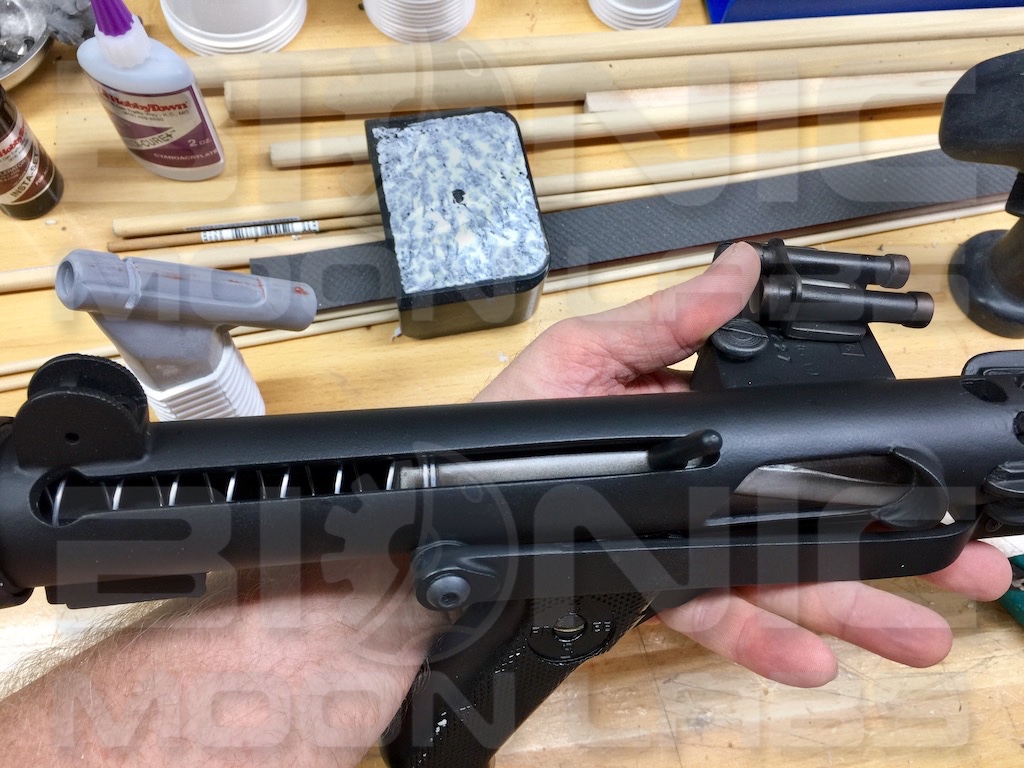
An effective way to make something look more realistic is to use different colors. As this prop is essentially all black, using different shades of black works well. Adding different sheens with clear topcoats is another useful method to help draw the eye to different pieces and details.
For the magazine and release button, using the same base of flat black would result in these parts simply becoming an extension of the gun body. A rub of graphite powder over these parts and then a thin topcoat of clear semi-gloss lacquer to "lock in" the graphite gives these some extra sheen and a metallic flair. This is a great subtle contrast to the gun body and these parts look like they are made of a different material.
-
1
-

[50] TK-21393 Troop Log
in Field Training Exercises
Posted
Troop 005 -- 2019/09/26 -- Make-A-Wish in Kansas City, MO