

Shikkakku
-
Posts
8 -
Joined
-
Last visited
About Shikkakku

-
 Hello! Pleased to request detachment affiliation: memberDB link: https://www.501st.com/member/63613/ Thank you!
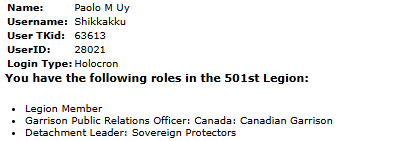
-
TK Talkie Troubleshooting- BLE Module
Shikkakku replied to Shikkakku's topic in Electronics for Helmets / Blasters
Thanks, I'll check them out- though I've been trying to minimize my Facebook use as of late. Looks like the latest post has the same problem as I do, and the fix was to get a whole new BLE board. I'd rather save that as the last ditch plan since the one I got took almost a month to get shipped here to Canada. Wanted to try troubleshooting it first. -
TK Talkie Troubleshooting- BLE Module
Shikkakku posted a topic in Electronics for Helmets / Blasters
Hi folks, wondering if I can get an assist on why my TK-Talkie isn't communicating with the app. Teensy 4.0, with 4.x audio shield (RevD) HM-10 BLE module, don't think its a CC2541. TK-Talkie App v.2.31 I've wired it together, and can confirm all boards have power. The voice changer itself works, but when I try to connect I get the "Failed to Connect, errorMessage: Peripheral Disconnected" When looking at the serial monitor in Arduino IDE, we get the following: Thanks in advance, any tips appreciated! -
Red to White- Shikkakku's ANH-Stunt Build (AP)
Shikkakku replied to Shikkakku's topic in ANH Build Threads
More Bicep Work, Forearm prep and belt raw trim. After some testing, I decided to up the shim width to 15mm, and the cover strips to 25mm, just for more wiggle room. To act as a foundation for the shim, I used a 30mm wide strip of ABS in the inside of the bicep, used superglue to glue the shim in the middle and e6000 to get it all together. Magnet and clamps per usual. Cover strips were then cut to 25mm width from provided ABS sheets (to ensure colour matching, though there was still a little mismatch annoyingly enough). Contact sides were sanded roughly and glued using e6000. Both biceps are now drying and should be ready for strapping later on. Forearms are next, and before that I used some hot water to straighten out some curled-in surfaces on the inner forearm. Protip: since I needed to do many straight cuts for shims and strips, I 3d printed out setup blocks with specific thicknesses (15mm, 20mm, 25mm, etc) so I have consistent measurements. Beats having to use a ruler to mark out widths or waste ABS for templates. One more task that was done was rough-cutting out the ABS belt. Since I wanted to get as close to the boxes as possible I used a combination of a Dremel cutoff wheel and lexan scissors to do rough cuts, and finished the edges using a deburring tool, a hobby knife and sandpaper. Corner angles to be cut once I get to canvas belt attachment. Next up, forearms and legs. I think I need to look more into how the foream parts line up since the outer forearm is much longer than the inner forearm. -
Red to White- Shikkakku's ANH-Stunt Build (AP)
Shikkakku replied to Shikkakku's topic in ANH Build Threads
Bicep and Forearm Shims and Cover Strips Agreed with @Doggydoc that shims were the way to go, so I took some time to determine how much of a shim I needed to make things fit on the arms. I first tried 8mm and eventually went up to 10mm. I used liberal amounts of painter’s tape to bodge it together and did a test fit on one arm with my shoulder bell just taped on and with rubber gloves. Looks and feels better, but its still tight enough that I can’t fully flex my arms. But at this point I don’t want to shim any wider since Im worried it’ll start affecting the final look. (Bonus beagle lol) With that decided I started cutting the shims and planning out cover strips. I wanted to see what an 18mm strip would look like, but also tried out a 20mm wide strip. What would look better? Im partial to 20mm myself but wanted to check with the forum. (First pic is 18mm, 2nd is 20mm) Another question is how the forearm cover strips need to be cut, given the sharp difference between the forearm halves . Should it be cut at a sharp angle, or a shallower angle, or even just square it off? Oh, to answer @Doggydoc's question, biceps do not have return edges, nor do the forearms. -
Red to White- Shikkakku's ANH-Stunt Build (AP)
Shikkakku replied to Shikkakku's topic in ANH Build Threads
Rough Trimming Most of the trimming was done using the score and snap method following the lines that were molded in. Per my GML @Doggydoc's advice, I left most of the material on the seams of the legs and arms as I will need all the space I can get. I’m a big boy, sadly. Hope I can fit in this thing. For the larger trims, I found it very helpful to score each big waste piece into smaller sections so I can remove them a bit at a time and minimize the strain on the overall piece. That being said, I’ve run into my first mistake- I’ve had my knife slip and score the armour in some places, notably right on the collar of the breasplate . How would I go about repairing this? ABS paste, sanding and polish, or would just incremental sanding work? As of this post, I’ve rough trimmed most of the armour with the exception of the bucket, thermal det panel, ABS belt and hand plates and some of the smaller details, so I’ll be looking at dry fits next for at least the torso, arms and legs. But this brings me to my next issue: my biceps are too small and can’t make it up all the way towards my shoulder. To fix, I was thinking of adding a shim between the butt joints to give me some more space, and it’ll be covered up by the cover strip anyways. Question is how much flexibility do I have in terms of how wide the cover strips are and how wide the ridges will be? I have a feeling I’ll have to do something similar to the forearms especially when you consider the added thickness the gloves will add. -
Shikkakku changed their profile photo
-
Intro and Preamble Hello TKs of whitearmor.net! I’m Paolo, TR-63613 of the Canadian Garrison and this is my ANH-TK Stunt build thread. Normally, I rock the red of Royal and Praetorian Guards, but recently I’ve wanted to branch out a little bit and try some white armour on. After helping a buddy with the early stages of his TK and realizing how easy ABS was to handle as compared to my usual fiberglass and 2-part epoxy, I made the decision and started gathering my kit late last year. Oh, and I’m doing this as a little bit of a low-key build since I want to surprise my garrison with the new kit, so if you’re from the Canadian Garrison and reading this…no you didn’t 😉 Anyways, enough preamble: Kit details: Armour: AP Boots and Neck Gasket: KeepTrooping Blasters: E11 Resin/FDM print from TK14082, DLT-19 Resin/FDM print from Galactic Armory Big Brown Box day was sometime in December, and after unpacking everything and seeing what I was working with, it was time for some rough trims.
-
Hello! TR/ID-63613 here requesting 501st access please. https://www.501st.com/members/displaymemberdetails.php?userID=28021 Thanks!
