Bristol trooper
-
Posts
30 -
Joined
-
Last visited
Content Type
Profiles
Forums
Gallery
Articles
Everything posted by Bristol trooper
-
Researching Helmet mods
Bristol trooper replied to JZYL's topic in Electronics for Helmets / Blasters
Im not sure if the maker is on a vendor list in the FISD i know hes a member of the 501st and attended alot of events ill ask him and send you a pm Sent from my SM-G975F using Tapatalk -
Researching Helmet mods
Bristol trooper replied to JZYL's topic in Electronics for Helmets / Blasters
To add to your list! Mic speaker set up from- 1-IMPERIAL LIGHT AND MAGIG 2-ISLE OF WHITE 3-ALL IN ONE UNIT (NO STATIC BURST) 4-MEMORY CARD WITH BACK GROUND CHATTER 6-REMOVABLE MIC 7-LIGHT WEIGHT WITH NECK STRAP. -
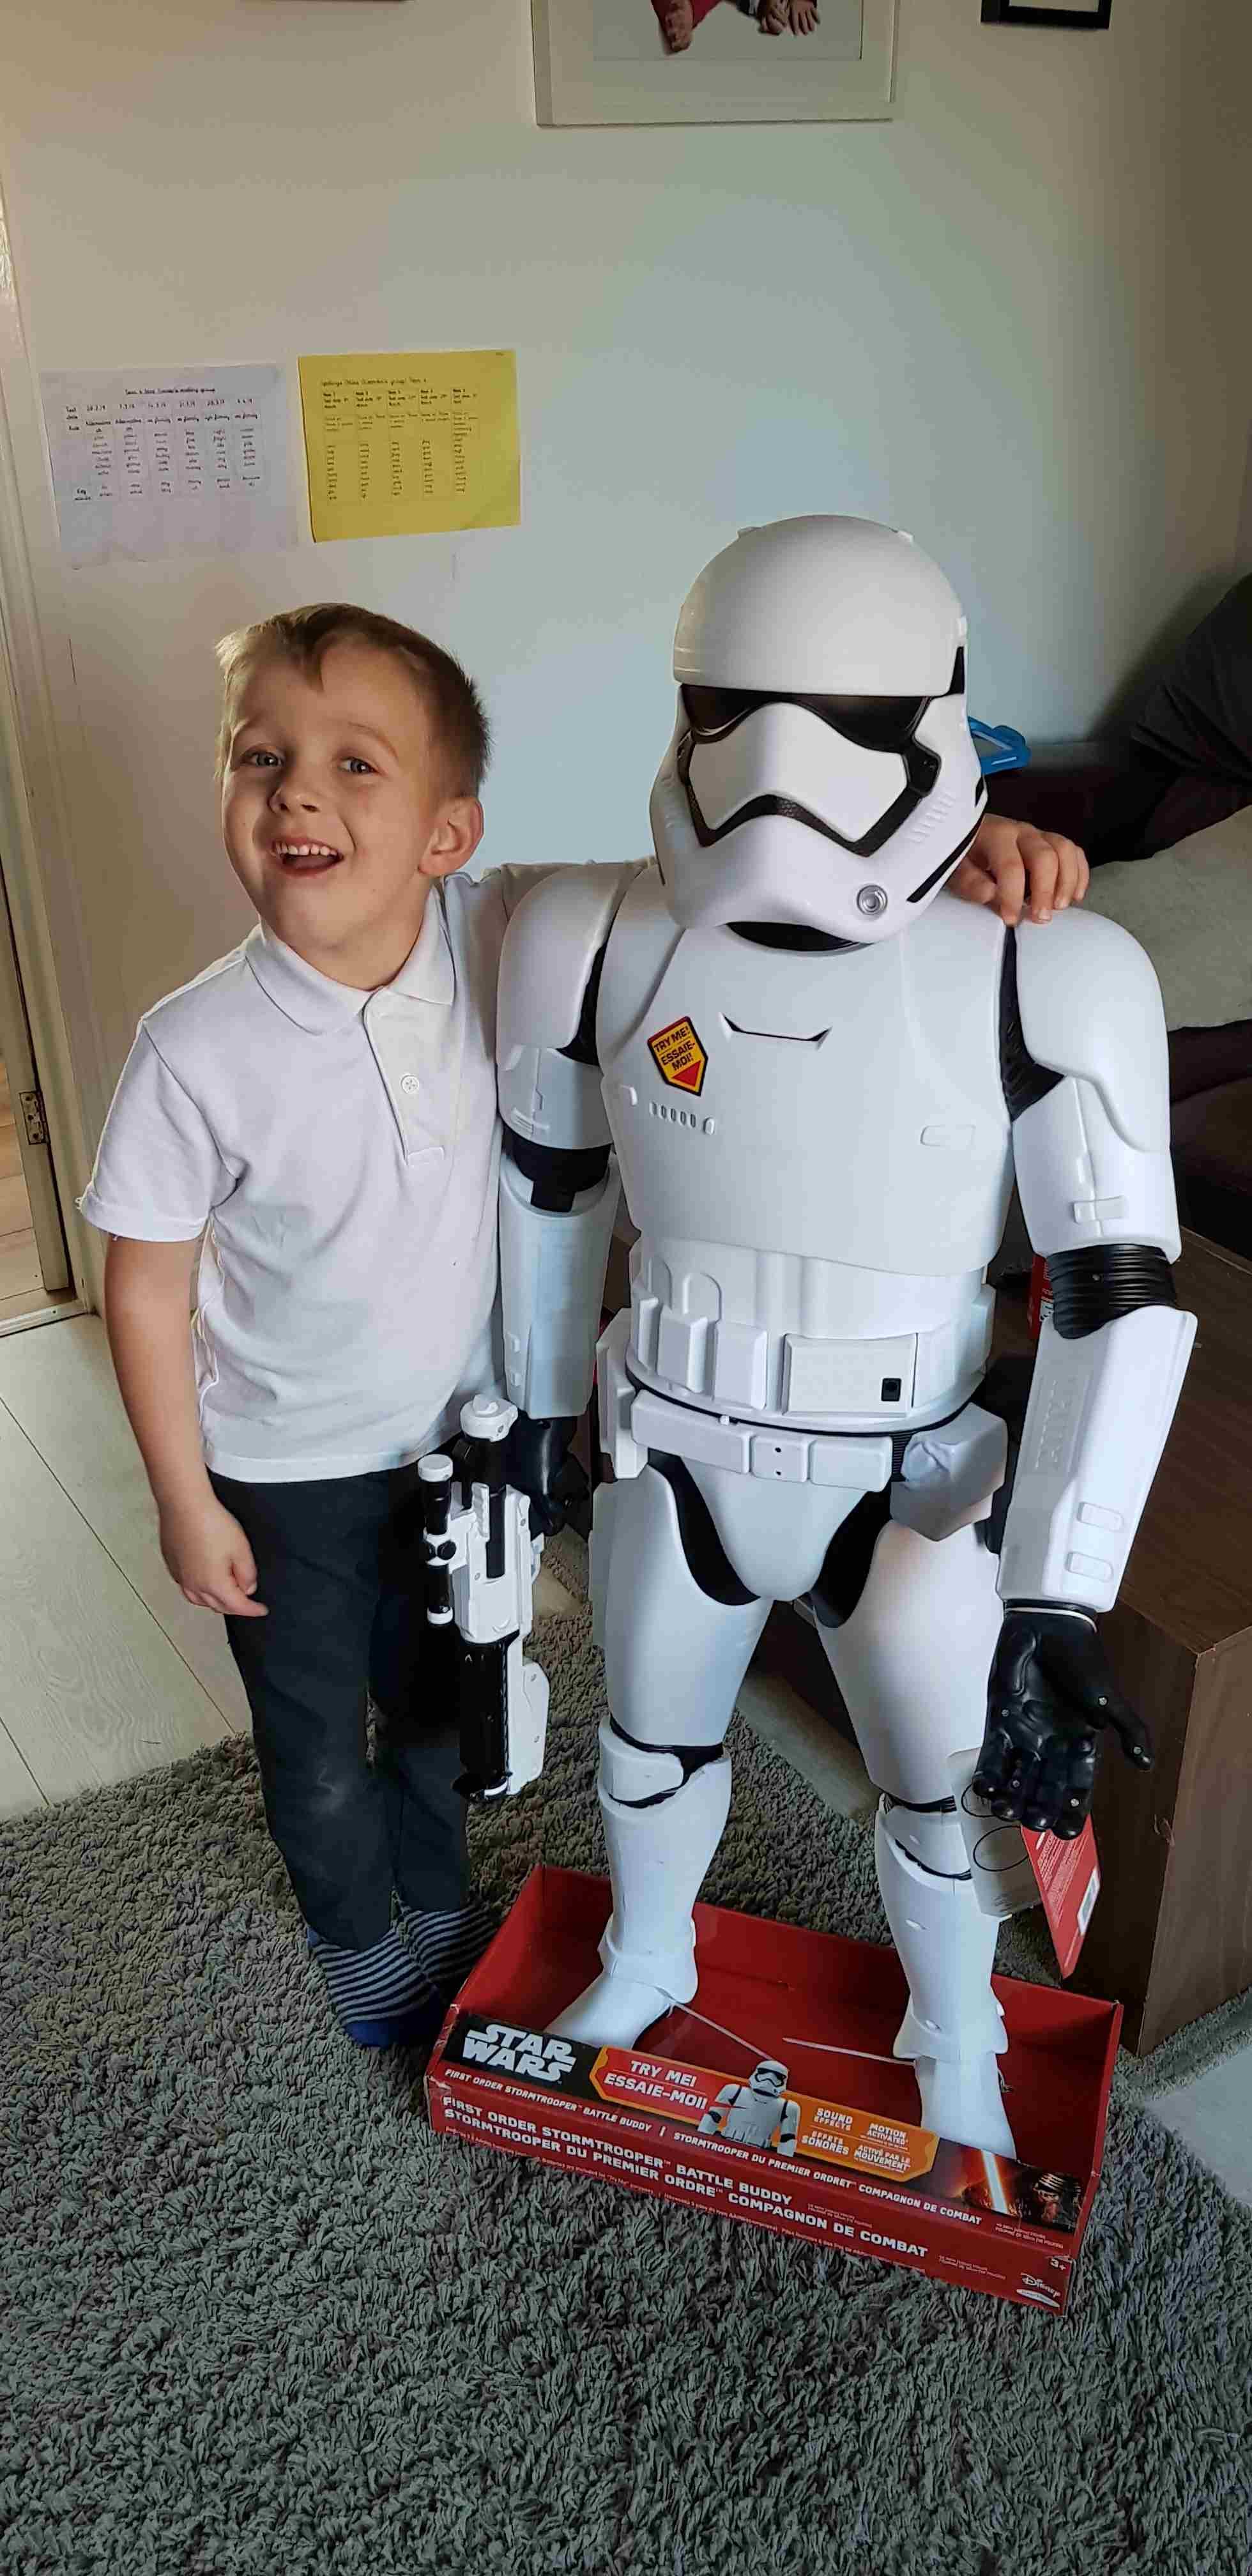
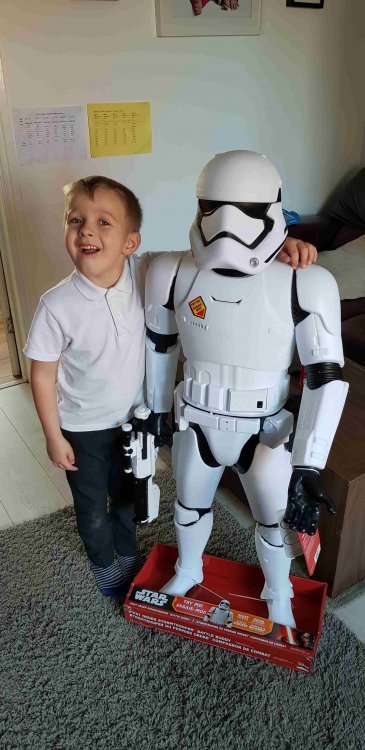
First comicon done,didnt realise his shoulders were on backwards other than that he had a great time. Sent from my SM-G955F using Tapatalk
-
Thank you Sent from my SM-G955F using Tapatalk
-
We did a little troop down the street to see how it all flows and he loves it! Sent from my SM-G955F using Tapatalk
-
And finally its finished,took a lot longer than expected but i didnt touch it for weeks at a time. I was also given a tool box on wheels which is the exact size,so i had some spare paint and stickers and i painted it and my son put the stickers on. Sent from my SM-G955F using Tapatalk
-
All parts together except the undersuit and gloves which i did buy the kids black and white disney gloves there ok ish. Sent from my SM-G955F using Tapatalk
-
So finally all painted and i added a few vinyl stickers to make it look a bit more screen like. Sent from my SM-G955F using Tapatalk
-
I painted the armour in plastic primer for the last time before a final test fit,fits really good. So down to painting,i used optima paint which i got from eurocarparts its around £2.60 a can but with there alway being a constant offer on it was near the £1 mark ive used about 10 gloss white cans 2 plastic primers 1 high build primer(to fill in holes) 1 normal primer. 1 can of gloss black 1 can of matt black 1 small revel chome/silver 25ml can I havnt used lacquer as to be honest i couldnt get any cheap cans. I spent a lot of time painting all the parts and rubbing down etc,it came out really nice but because of the no lacquer it will mark easily but im not bothered by that. Sent from my SM-G955F using Tapatalk
-
Knee caps if thats what there called ,same with all the other parts that were in 2 pieces i used milliput to attach them together and they are rock solid,ive painted these but because my son is still quite short they wont fit inbetween the shin and thigh so at the moment weve left them off. Sent from my SM-G955F using Tapatalk
-
Helmet. So last year i brought a FOTK helmet at a comicon in chippenham i think it was only £30. Somone had painted the clips black and it just looked terrible. So after a lot of sanding and primer i painted it the correct colour but i want happy with the strip around the bottom,i havnt got a steady enough hand for this kind of detail and it bugged me so i repainted it all again but still the same thing,so if i do it again ill use black gloss vinyl to do that part,other than that it looks quite good. Ive put a bit of padding inside but not too much. Ive also cut the vents out for air circulation and ive made a small fan but i dont think itll get used but its there just in case! Also where there is suppose to be a mesh material ive drilled a 3mm hole in each recess and i tell you it took hours to clear all the excess plastic from each hole,looks good and its hardly noticeable and lets more air inside too. Sent from my SM-G955F using Tapatalk
-
So on the thighs,shoulder bells,forearm covers and both of the shins they were in 2 parts which i had to glue together. I used e6000 and lots of strips of webbing straps to join the pieces together. On the shins i used elastic strapping so we can remove them from my sons legs with ease,to close these ive made a mould of one of the armour clips and moulder 4 clips,on the reverse of these ive glued some very strong magnets to keep them together,they work ok,but i didnt have enough so were waiting for more to turn up in the post. On all parts after sanding it was still quite rough on the inside and kept catching on the undersuit so i got some very cheap material and used a glue stick to attach it,it worked really well to my surprise! Sent from my SM-G955F using Tapatalk
-
In connecting the chest and back plate i adopted the clam shell style from my tk,it works really well so i just copied it onto this armour. The torso and butt plate and cod piece are also connected with the popper system and it is held up with 2 big straps over the shoulders which are adjustable Sent from my SM-G955F using Tapatalk
-
So the boots look like this at there final stage,shame i had to cut them but they just wouldnt fit in the shins Sent from my SM-G955F using Tapatalk
-
Boots Boots are a real paint to buy in a size 12 we tried everywhere,in the end we managed to buy a cheap pair second hand for 4 pounds i think. I sanded these down and primered and painted them gloss white,they came out quite nice. The paint has split on them but its kinda looks pretty good. I ended up cutting a good inch from the top as the shin wont sit over the boot and still keeps riding up now. Sent from my SM-G955F using Tapatalk
-
F11-d blaster. The armour came with a blaster which is attached to the troopers hand as one piece so there was no handle. So i thought maybe i could just make one from filler and it would be ok but after a long time shaping and sanding and test fitting it just looked crap. I spoke to a good friend who helped me out last year with a speaker system at mcn comicon to see if he could 3d print me one that i found on a build thred,atleast i think i found it or maybe somone else showed it to me,anyway after a few days steve from Imperial Light and Magic came through and made this handle for me,it looks a million times better,thank you steve. So the orginal blaster had a sound board with it and i was going to add this to the blaster so when he pushed a button it would say its sentences and when the button was presssed it would make the blaster sound. But some how i managed to blow the micro chip up and it wouldnt work,i was pretty gutted tbh it sounded really good. I remembered i brought last year a nerf gun that makes the same blaster noise and also lights up blue when you pump the gun,so i placed all of this into the f11-d blaster on a push button for the blue lights and made a movable trigger for the blaster sounds. When all this was temporary fitted i removed it all and painted it using stock photos,itll never be like a film spec one but its close enough for a toy blaster from a bedroom buddy stormtrooper. Sent from my SM-G955F using Tapatalk
-
So my son kept asking if he could speak like a stormtrooper,but i didnt want to actually buy him an expensive set up for him to only use it a few time befor he outgrows the whole armour set. So i had a spare aker mic amp from when i first started trooping and i had the ammo pouch on the armour itself and was looking at it thinking it was almost the same size. So after a lot of glueing and filling and sanding i managed to get the aker mic system to fit in to ammo pouch,i used the aker hole surround and fit that into the pouch front to let the sound out. And the slide button and jack ports are easily accessible as wel as the charge port. This came out really well and it is screwed to the suit so he doesnt have to carry it. I ended up using the speaker from this old childrens toy as the aker one was too big to use in the pouch. Sent from my SM-G955F using Tapatalk
-
Next was a quick primer spray to see what areas needed more filler after i did this i sanded it all back and used a plastic primer as the normal primer didnt stick very well. Sent from my SM-G955F using Tapatalk
-
Another thing i noticed was all the other armour suits that have been made had all the screw holes still visible on them,so i decided to fill them and make the armour look better than all the rest. So first off i tried pvc paste and putty but the plastic woulnd stick to the armour plastic,its a diffent plastic to a normal tk,i even emaild jaxx to ask them what it was made from but they never replied. I then tried car filler but that also wouldnt stick and kept splitting away from the pastic. A friend who builds models told me about milliput putty,this stuff is really good to use,never heard of it before and will always recommend it to any one. Very easy to work with aswel So after a while all the holes were filled and sanded flat,for a bit of security i put stelmax glue on the side you cant see just for extra strength. I also then went over the very fine imperfections with revels plasto filler quite cheap about 3 quid a tube i think Sent from my SM-G955F using Tapatalk
-
All the other builds seem to just leave a gap inbetween the torso and the chest plate and the back plate and butt plate but it looks stupid so i used a spare piece of pvc i had with my tk armour to extend them and then i used a lot of filler to extend the same design up the length of the plastic insert to make it look like it was already apart if the armour. Sent from my SM-G955F using Tapatalk
-
So we decided to do a preliminary fit just to see where we were at and it fits really well even held with together with electricle tape. Sent from my SM-G955F using Tapatalk
-
Next was to take it apart and see what i was dealing with,there are a lot of screws and inner plastic support parts,i cust away the limbs and started to gut the inner plastic out,this was really messy and took a long time todo,i used a rotary tool like a dremel and stanley knife,i think in total it took over 15 hours todo after work most evenings,think i burnt my fingers a few time with the melting plastic,and glasses are a must if your goin to attempt this yourself Sent from my SM-G955F using Tapatalk
-
Second thing todo was to take loads of pictures of the trooper for reference just so i didnt lose any bits or have any spare and for painting it the right colour after although I spoke to someone and at a recent comicon and took a lot of photos of his armour for reference. Sent from my SM-G955F using Tapatalk
-
-
I was slightly worried about the size but theres plenty if room!