
hazamel
-
Posts
96 -
Joined
-
Last visited
Content Type
Profiles
Forums
Gallery
Articles
Everything posted by hazamel
-
I'm in a little rush today... Next up: Hinges! The additional material on the ab get's me in a little trouble here. What has to be in line? Like this: or like this where the edge of the ab an the kindey is in line (blue line) and I'll have to trim down the return edge of the ab (red line... in a more elegant way of course). Like I said before the extra material is needed to keep the gap at a minimum. I'm still trying to stay as close to Centurion level as possible.
-
It is. These are just the ones for connecting the torso pieces
-
Strappingtime! I drilled all the holes, added the bracket like @ukswrath described in his Anovos build and... voila.. I haven't glued the shoulderstraps yet and just used magnets to fix them on the amor to get a reference. Looks good for me so far. One thing that looks weird to me is the posterior sticking out on the sides. Any ideas how to fix that? Use less elastics on the side to make it sit tighter to the body or do I have to go down the rabbithole of heat treatment? I will also keep every extra inch I can get from the sides of the abplate Hope I'll loose some weight over the summer and gain some space in my armor but I won't cut down the side. Right now I'm pretty happy that everything comes in place nicely (especially the kidney-abplate-line). For the size of the elastics (if anyone cares): I cut them at about 6,5 cm, sewed them and turned them inside out. For the chest and abplate I used about 8cm and sewed them along the 6.5cm line. So I got a loop of a little over 3.2 cm
-
One week of from from work and goal is to put together the torso. I already drilled the holes for the back parts. And I'm ready to take on sewing the loops for the brackets. Looked around the forum and youtube but couldn't find any recommendations about the length of the loops. Mine came not pre-sewn as one long piece of elastic and I don't want to make it look crappy. So any guidelines for the length of the short and long ones?
-
Good to know. I was aiming for the small gap you're talking about. The second try was much better. I was using the plastic shoulder strap for reference instead of the elastic one. Did I understand you right, that bigger persons have to cut out the neck of the chestpiece to lower the back? No concern so far. I did a rough cut with about 10mm all around to remove the excess material. Didn't want to cut away too much where I attach the brackets. Do you round of the edges somehow or just sanding? Especially at the kidney piece.
-
1,84m So not that tall Chatted to a fellow trooper just around the corner yesterday and he's close to 2 m. He mentioned that my kidney and butt-plate seem to be very low and after I moved everthing a little bit upwards and used the real shoulderstraps for reference it looks like this: And now I know where to remove or reduce the return edges
-
First time all parts of the torso meet. I used the kidney edges and the chest as reference where to put the parts. Shoulderstraps are just eyeballing. Compared to elastics that came with the RS strapping kit, I'm not that far away. Hope I'm not to big for a stromtrooper and it's just a matter of spacing and reducing return edges that aren't important for the brackets later. At least it seems like I'm in no danger to violate from the CRL L3
-
Yesterday my missing snaps arrived from RS including the right tools. Great customer service... Because I was a pretty tired from trooping on friday I decided to tackle something less complicated on the weekend and started building the detonator. Lucky me, I've already a template from my snowtrooper... I marked my endcaps at 18mm and started rough trimming them... Next up was the control panel, which was very easy because I just cut it along the curve. Dry fitting before final dremel-action... and the final result before glueing compared to my Snowie-DT
-
Ah now I know what you mean. No, I didn't trim the top edge of the abplate. Double checked the strapping guides before. It's a little confusing, because the screen used armor has the brackets not on the edge (guess becaus of wear and tear) but to the front. And with the edge facing upwards it was hard to see. But thanks for the heads up
-
@Digz Graavz Strapping. The RS kit has 8mm washers and 6mm loops at the brackets so I left between 10 and 12 mm return edge to have some space in both directions. Screws themselve have a 6,5mm head and the thread is 3mm in diameter.
-
Thank you for the side view and the information about the thickness.. Speaking of "thickness"... If I don't reach EIB, I blame it on choclate and chips... I left about 10mm of return edge on the top and the bottom for the strapping. Return edge at the seam will be removed, also on the top of the abplate because the strapping is mounted to the plate not to the return edge. Kindey also needs some round corners at the side of the return egde or narrow it down. I hope to gain some extra mm for a better fitting. My wife was also very gentle with the belt. But somehow I also like breathing. Even more than EIB And finally I got some lexan siccors. My neighbours will be so reliefed! And trimming was so easy with these! Why didn't I get those earlier?
-
 Watch out for the loading bolt on the side I almost lost mine on the first troop by kicking it
 -
Sun is back out and I already had my abplate at hand so I started to draw the line where to trim it. a) because I have to do it anyway b) to have a good reference before I finally fit my thighs Codpiece: No question. I'll start at the moldline and work my way up until it feels comfortable. Abplate: More questions... I looked at different builds but didn't really get a good clue where to cut. The Anovos builds were a good reference for the right side... ...but left side leaves me confused. I'm afraid that's the famous seventies, asymetrical style that curve and corner are different. So: Blue line where the ab and codpiece seam flares out or Red line "slightly" below this point? Is there a rule of thumb how much space from the edge (grey line) of the abpiece? The typical 10mm? Another one: Reading through different builds to look for the strapping: I saw a few anovos builds using the bracket-strapping reinforcing their return edges. Is that an Anovos "issue" because of thinner plastic or is it recommended in general? The RS ABS looks pretty sturdy for me (at the moment)
-
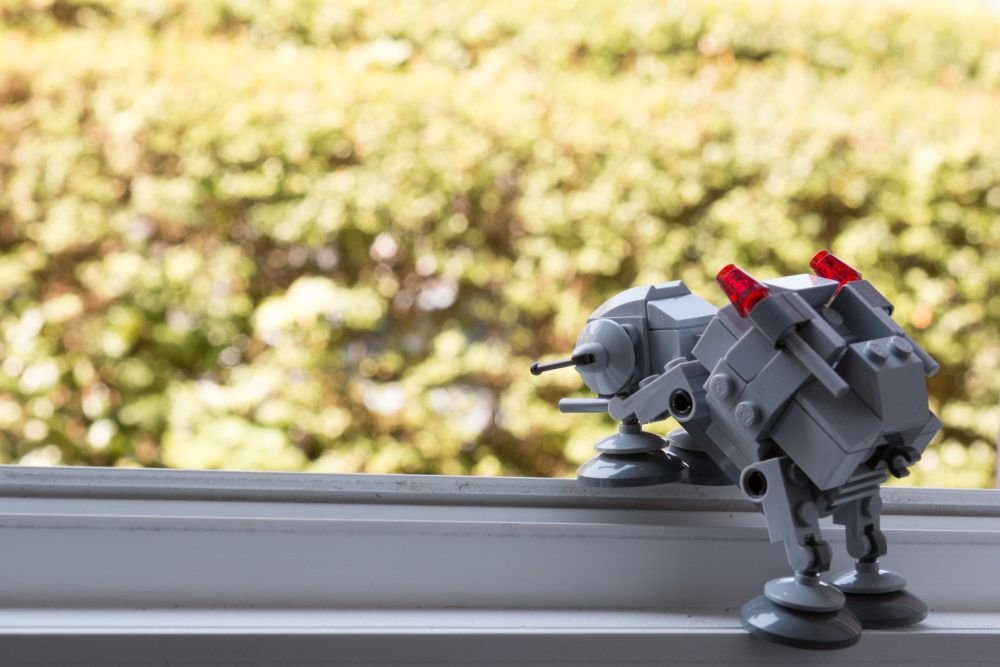
For comfy I've my AT-ST because it was horrible to have the first troop ever as a Snowtrooper at 30°C under a glassroof The ab plate is not trimmed yet. That's how I got it from RS. This was just for checking the gap between codpiece and thigh. I'm afraid our neighbours are already annoyed by the sound of the Dremel.
-
Thank you! This helped a lot. I'm more horizontally challenged than vertically, but it seems like the thigh is in the right place at the moment. Can't get any higher than that, becaus me "real" thigh blocks it with the middle section. Tried to adjust the armor in the back but no chance. Plenty of space at the top and bottom then but doesn't change in the middle No more sports for me. Trying to find the right height before I trim down the back which is currently poking me when I walk. Untrimmed abplate looks good for me so far: Just for the record: Boy, do I already miss the comfort and freedom to move of my Snowtrooper!
-
Okay, expert advice needed: I looked at other threads to see where the thighs are placed compared to the knee cap. Is it over the knee cap or is it sitting on top? While looking for these things I came across @Cricket's comment in one of the build threads where she recommends building torso first and then fitting of the leg parts. So... put aside the thighs and start over with the torso before I go for the legs? Personal impression because this thread is titled "vlog build-a-long": For someone who's doing this the first time those tutorials are not that helpful. Feels more like they're filming their daily building routine instead of doing a tutorial (espescially the thigh-part). There hasn't been an update since december so it's a little frustrating. Guess they are very busy but thigh part also feels like they lost interest in doing these tutorials. So sorry for asking so many questions others seem not to care about. I guess it's a little frustration and feeling left alone (not by you...)
-
Hi, best way to start is the „Getting started“ Part at the top of the Board. There are threads about the different types and makers. And who to avoid
-
It's warm, it's sunny! Time to convert our balcony into a winter wonderland! After very rough cutting my left thigh parts I started adjusting them for final fitting. Once done, I was surprised that the inner part might not be THAT far off. It's just straight and not bend like the outer part. I assembled the two parts and the cover strip to see how much space I've left and right... and magic happen: Almost not off and very close to the reference pictures @TheSwede posted. With coverstrip removed I had this: So cutting a curve seems the way to do it, isn't it? The left pencil line is the cutting line in my case This matches the line on the inside I'm pretty sure that's right, but it looks reaaaaaally weird. I hope the back will fit after these adujstments.
-
Of to uncharted terrain... Rough cutting of the left thigh. This is driving me crazy. Looked through other threads and it always looks like there's a straight edge for the coverstrip. But it isn't. Finally found an EI-Application with an RS armor with some details of the left thigh, and thank you, it's also of. If I give up this project it won't be because it's so complex but because these strange edges drive me insane
-
You don't have to. I was overthinking the whole thing. Will return to to the ususal way: make it fit in the front and adjust the back. Sorry for taking so long to reply. Life and trooping with my snowtrooper kept me from updating.
-
Thank you very much for the pictures. Are the meassurments left and right the same? Noticed that the right parts came pre-trimmed pretty rough and I had to cut off a large trinangle at the back side? About 5cm on the bottom messured from the last corner. 28 on the top outside and 33 on the inside from the raised middel part.
-
Weird corners and edges seem to be a RS trademark. I tried to align the upper end and ended up like this. In the tutorial video they said "Doesn't matter because no one sees it under the ammo pack". Fits to the pictures @TheSwede posted later
-
Didn't except this to happen in the beginning, but I'm reaching the end of the video tutorials. I've to admit that I got a little annoyed by the last one, so I hope they're returning to a more professional style in the future and keep the fun part to the vlog. Aaaaanyway... I started with the right thigh. Rough trimmed and duct taped it... ...and it's so unbelivable off If they hadn't said that this is normal I would have asked myself if I was reaaaaally drunk. (I don't mention here that I had to go to the basement twice because I brought both inside parts up to our apartment at first try... ) Hiding behind the coverstrip they say in the video. But, dear helpful experts, is cuting off the tip a common way? Fading of the returnedge towards the buttjoint so it doesn't look that bad? Guess I would do that anyway because of comfort reasons. I'm not a big fan of being poked constantly (I know... Wrong hobby ) I also added a few cm in the back to have room for fitting and because my thighs, like my size, is not movie accurate.
-
Thank you. Did that with the biceps. I can still slide my finger between and move it up and down. But no more spinach for me
-
Thank you good to know. So I‘ve to flatten it? I’ve seen all kinds of straight, shortened and wavy ones.
