

Eric Ostendorf
-
Posts
63 -
Joined
-
Last visited
Content Type
Profiles
Forums
Gallery
Articles
Everything posted by Eric Ostendorf
-
Thanks! The 3d printer is pretty great but it is a fair amount of work. It has a super steep learning curve and the machines like to break (lots of moving parts so go figure) so keeping them running is a challenge in itself. I started with just printing ready-made files off the internet but I've been trying to learn some 3d modeling software lately and the HWT pack parts are a good practice item since they are fairly simple shapes.
-
Angled vent box is off the printer. The cooling fan failed about halfway into printing the base so it is blobby on top, but I can clean it up with sandpaper and filler primer before final paint.
-
Small progress. I painted my PVC side tubes (making two - one for me and one for another pack for a friend) and 3d printed end caps assembled onto the tubes. The printed caps are a very snug fit so no glue was used. Hopefully I don't lose one, but if I do I'll just print another and put glue on it *before* giving them a test fit. My plan for this week is to get going on the rest of the pack parts to 3d print. I have the large angled vent box almost done and will be working on the tube stripes next.
-
Thanks for the input guys! I don't have a super accurate scale but I think the hinged box is about 2lbs heavier than the oil can. Its not a *ton* of weight but its enough to certainly make a difference so I will take that into account. The wood "magazines" make my belt a lot heavier too so those will probably be going away soon. I'm definitely going to build up the oil can pack first though. I have some padded shoulder straps coming in from Amazon that I hope will make carrying it more comfortable too. The 3d printed boxes will probably be a little big heavier than the Pop-It boxes, but I doubt it would be by much and the biggest bonus is that it would be much cheaper for me to print them off in black plastic. Dunno. There are lot of details up in the air till I get everything printed and start mounting stuff.
-
More progress! Slowly but surely. I went to my local garrison's armor party this past weekend and got some small projects done. First I filled in the last teeth holes that I accidentally trimmed before my first convention. I used a tiny flake of ABS scrap and acetone welded it from behind and then used a small dab of white E6000 on a toothpick to fill in the gaps from the front. I don't think anyone would notice unless I told them about it so I'm happy with my repairs. I need to do a dab of paint touch-up but that's fast and easy. Next I made a bracket to hold my Aker and Icomm in my chest plate. I was hanging them around my neck on the factory Aker strap but it was annoying to have it sway under my armor and having one more thing around my neck was a nuisance. I have left holes in the bracket so that I can still charge it and hook everything up without having to take it out but if I need to it is just velcro-ed in place. Progress on my pack is slowly chugging along. I am slowly working on making 3d print files but in the mean time I have collected all the parts that I'm not going to print. It sorta kinda looks like a HWT pack already But I still really want some kind of storage capability. I stumbled on this plastic sample carrying case at my work today and saved it from the dumpster. It is a little thicker than the oil can, but otherwise its almost the right size. Honestly, I think it is a better match to the screenshots from Battlefront. I think I'm going to go ahead and build up the oil can pack as CRL accurate as possible, but I think I may go ahead and build this second box up as a video-game accurate pack..
-
 I like the idea of having space to haul stuff vs. it just being a wasted hollow but I can also appreciate how light and cheap the photo boxes are. I suppose it would make more sense to just use the cheap box and I can always change it out later if I really want the metal box. I've done a couple troops with my armor as a "recruit" and I just left my phone, wallet, etc. in my tote. It wasn't that big of a deal but I would like it better if I can figure out how to use some space in the pack to carry stuff like water, con merch, phone for pictures, etc. so I'll keep mulling it over. The biggest hurdle is getting at the pack once its on so its probably not practical anyway.
 -
I am working on assembling parts for my HWT pack. I am planning on 3d printing most of the smaller boxes but I don't have a large enough printer for the radio. I was thinking that instead of using a photo storage box as I have seen in other builds that I could use a container with a hinge that I could use to store stuff in while trooping. Can I use something like this box, painted black with the radio parts on the face, as the radio body and still be approvable? I can remove the handle the wall hanger so all that would be showing as additional details would be the hinge and latch. https://www.amazon.com/dp/B006RNSPYM/ref=sxbs_sxwds-stvpv2_1?pf_rd_m=ATVPDKIKX0DER&pf_rd_p=4228958869635247268&pd_rd_wg=VLMGd&pf_rd_r=43GKFF6TE1VSCGPFTNP9&pf_rd_s=desktop-sx-bottom-slot&pf_rd_t=301&pd_rd_i=B006RNSPYM&pd_rd_w=sg6xW&pf_rd_i=first+aid+case&pd_rd_r=165a93df-992f-4fb8-afd5-50ff0db5f787&ie=UTF8&qid=1532577764&sr=1
-
And now that the body is pretty much done its time to get going on the pack again. I will probably repost this part of my thread in the HWT section after I'm done so visibility so folks can find my files when I get done. Files. Yes. I have a 3d printer that I have been playing with for about 2 years. I have a good handle of printing stuff and I have modeled some very simple parts in Tinkercad and printed them (i.e. the snap plates). But now I'm wanting to learn some better software so I'm using the pack parts as incentive to learn Fusion360. I am using these threads as reference for the parts: I am using a combination of the dimensions provided by justjoseph83 with the screengrabs from dashrazor to make my parts. For example, the vent box will not be a flat rectangle, it will have an angle to it as show in the screen grabs. So far I only have the vent box modeled but I will be working on other parts over the next couple weeks after I get back from vacation and I get my printer fixed (I damaged the print surface and have some new parts in the mail to upgrade the bed). I'm hoping to have a super nice looking pack when I'm done and I will be making a second for a friend of mine immediately afterwards. After I get the bugs worked out of all the files I will be uploading them to Thingiverse and creating a build thread/tutorial in the HWT section. Should be fun
-
I went ahead and finished up the shoulder MP40 pack wood magazine inserts to match the hip inserts. These pictures do a better job of the "weathering" with the metallic paint rubbed over the black. This will get attached to the pack shoulder strap after I get the pack built (details in the next post).
-
Magazines built for side HWT MP40 packs. They don't really seem to do a lot but they do help a bit to make the pouches less floppy and I suppose from certain angles will look slightly more real. If the weight ends up being noticeable though I will remove them and go without. Empty pouch on the left, mags in pouches on the right:
-
More work! I installed the right thigh ammo packs yesterday and went on a mini-troop today with no issues so it passes. I did angle it up and tacked it down with a dab of E6000 to keep it from biting my shin like my sniper knee does and so far I can still walk just fine like before I installed it. (I'm on the left with the orange pauldron) My next project is making some faux "magazines" for my MP40 packs. I'm not really sure if the weight is worth the tiny bit of "realism" that being able to see the top couple inches in my mag packs is worth it but we will see. These are cut from pine furring strip but if the weight isn't worth it then I may see about swapping to foam so I'm only making 6 for the side pouches for now. I'm only painting the upper 1/3 of each stick since thats all that is visible from the side. I will be weathering these just a hair by dry brushing on some metallic silver.
-
Tiny bit of progress! My Hyperfirm DLT-19 B Pull and 12.5 qt oil can for my HWT pack came in! The DLT is definitely a rougher B pull but I think I may try cleaning it up a bit with my Dremel and touching up the paint. Its fine at a couple feet so its perfect as-is for trooping but I'm weird and can't leave well enough alone. Hyperfirm: https://www.facebook.com/HFx-Productions-1669859386576227/ And the oil can is just an oil can but it is the right size and shape to look right for the HWT. It is the style recommended on UKsWrath build thread ( https://www.whitearmor.net/forum/topic/30034-hwt-backpack-build-part-1/ ) but that particular can that he links to does not exist on Amazon for cheap anymore but this link takes you to the same can (just rebranded) for $9. I got two for $26 shipped. The second can is going to a friend that is also working on a HWT. Oil Can: https://www.fleetfarm.com/detail/garage-boss-drain-pan-with-funnel-12-5-quart/0000000271264?gclid=Cj0KCQjwodrXBRCzARIsAIU59TKEJFjCaMd5iysqYp5ugaAPtIPuTDXahUrf4bqC4kzhy1fF9M1QjgIaAouFEALw_wcB
-
I saw that idea on another builde thread here on FISD. I don't remember who now though. Two straps really does a good job to keep the plates from moving back and forth on my hand.
-
And this is where construction of my armor ended due to it being Thursday night before the convention. I did manage to shoe-horn in some helmet fans Saturday morning but otherwise I just ran with what I had. I was lacking a thermal detonator, HWT pack, BFG, and a bit more trimming to avoid armor bites but all in all the armor worked out great. Here are some shots of me having a grand old time... the orange pauldron really helps to identify me in pictures with other TK's too! Now that I am back from the convention I am taking a break for a week or two while I unpack and clean up my apartment before I get back to finishing the armor. I need to trim a few spots, add the thigh ammo packs, build the HWT pack, and wait for my Hyperfirm DLT-19 to show up in the mail before I will be ready to submit pictures to become an official TK
-
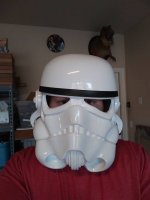
And at this point it is time to make the helmet work! On a Tuesday. Before leaving for the convention on Friday morning. Uh oh. First I took the helmet apart and re-drilled the holes for the face to pull it forward a little. In my test run it fit really tight so I tried to get all the space out of it I could. Even now its still a little hard to get on and off so I may try a bit more trimming. After I had the helmet back together I trimmed up the ears the best I could but no matter what the ears just wouldn't lay flat. I may need to work on this some more or worst case buy another set and try again. Then came the cutting of the teeth. I used a dremel from the inside with a sanding drum to grind through the plastic and then used a series of files and sanding sticks to get the teeth shaped the way I wanted. I was really happy till I realized my first mistake that the last two divots aren't supposed to be cut out.... dangit! Oh well, patching the holes with a bit of ABS scrap and acetone won't be hard but I'm in crunch mode so I just ran with it. Next came decals, paint, lenses, and hovi tips. And more mistakes I got one of the tube strips on a bit wonky so I may have to buy new stickers and redo them but for now they are OK. I also really butchered the paint (because painting small details at 4am is a bad idea) but I later touched that up with a toothpick.
-
The work continues! At this point I'm really starting to feel the convention crush as I'm swiftly running out of time. Sleep was minimal for a couple weeks at this point Here is the ab complete! The buttons could use a little paint touch up but otherwise I'm very happy with it. The belt has just a tiny bit of overlap on the bottom of the button panel and the rivet covers came out really nice. Drilling into the ab to add the snaps was unnerving but totally worth the results. At this point I could wear the lower half of the armor, slide the chest over my head, and star work on the top half. I first attached the shoulder bridges via velcro (which will get glued down eventually after I decide on their exact location, made an elastic loop to hold the back of the bridges down (this helps keep the chest/back in place way better than I expected) and then made a strap that goes from the side of the chest to the side of the back plate to hold the halves onto my body like a T-shirt. After the chest was done, I started fitting the shoulder/bicep/forearm. I knew from browsing Centurion submissions that the bell has to be super close to the shoulder bridge and the rest of the arm will be adjusted from there. The arm fitting was a real pain but after several strap remakes and re-adjustments, I got it! And here is a picture from my first almost complete kit-up! This was super satisfying to see come together. My shoulder bells look a little big so I may trim them down a little but for now I'm leaving them alone. Apologies for the less than perfect pictures, taking selfies in the mirror is hard
-
Yup! I have done a *ton* of digging and searching on every section of this build. I actually have a google doc where I have saved links to really good threads pertaining to certain parts of my build. I'll probably edit it and post it up on the first post as a "master resource list" or some such.
-
At this point some mail came in and I was working on some accessories for my HWT. MP40 Ammo Packs - Leather - Etsy.com I did not like the TrooperBay pouch design and most of what I could find on eBay looked very plasticky instead of leather. These cost a little more (about $100 shipped) but I really like them and am happy. https://www.etsy.com/listing/598772504/star-wars-stormtroopersandtrooper-armour?ga_order=most_relevant&ga_search_type=all&ga_view_type=gallery&ga_search_query=mp40&ref=sr_gallery-1-5 Orange Pauldron: Katarra8 on Ebay (she also has an Etsy) https://www.ebay.com/itm/Star-Wars-Stormtrooper-Shoulder-Pauldron-your-choice-colors-FREE-US-s-h-/361514294420?var=&hash=item92e4b7b22f I also have a 3d Printer so I made this guy to carry around with me: https://www.thingiverse.com/thing:1985666
-
This is my first test fit of (almost) all of the armor! I had a friend take pictures and some measurements so I knew how long to make the straps to hold the chest shut. Looking good so far! I think this was actually the night before I made the shoulder strap fillers and added the ab buttons in the previous post but the purpose of this test fit was to check how the back plate laid. I was in a serious rush to get to this point to get ready for another build party where other TK's could help me adjust parts before I got too deep into making straps.
-
At this point I found that it was time to re-shape some parts. I did not trust myself to use a heat gun so I went the hot water bath route. I used leather gloves encased in rubber gloves (left over from my Anovos kit that I ended up selling because it just didn't fit) to keep from getting burned as I heated up parts in a pan of boiling water. A disposable aluminum turkey pan worked great for me And the parts I reshaped: -Both biceps -- as assembled the AM biceps were very rectangular and scraped my arms pretty bad. I trimmed a bunch of return edge before boiling and reshaping into more of an oval but I ended up removing more of the return edge later -Top strap attachment points of the back O | | plate to get it to lay flatter on my back -belt - it sat very flat and I needed more roundness to it to go over my belly -sniper knee and knee ammo packs -both forearms to round them out a bit more ....and snap plate installation after cooling off While the glue was setting I made some tiny scraps to fit into the bridge straps. I had to heat these up a little too to fit my body better but I just used a lighter for that since they were small enough to control the heat on. These were super easy to trim down on a belt sander at the armor party BTW. Waiting intensifies. While those parts were sitting I worked on the belt. I used cap rivets to attach it to my Kittle belt and snaps to attach the belt to the ab plate. You can see it here in my pile of parts in progress shot from the night that I got it together. The straps holding the chest and back plate together are just velcro E6000'd onto the armor and onto elastic so that I can adjust the fit. This is meant to be temporary until I perfect the fit, at which point I will glue the straps directly to the armor. On the other hand, this is holding up just fine so I may just leave it till it fails. Also while I was waiting on the snap plates to glue I trimmed and glued on the ab buttons.
-
After a while I got the legs mostly done. And at an armor party (where I didn't get any pictures) I got the arms assembled. This picture shows the state that my armor was in at this point. Not too shabby! I tried it on but those pesky thighs had to be held up so it was time to make some sort of garter system. So after a trip to Wal-Mart for a flexible belt, suspenders, and 1" elastic I came up with this. The belt goes around my waist, the suspenders keeps it from drooping down (have no hips to keep it up on its own), and the 1" elastic positions the thighs at the right height on my legs. Nifty! Success!
-
I did some work on the arms at this point but I will show photos starting from the feet and up. I have Totally Killer TK boots so I wore those to fit the shins. I first glued the front inner cover strip and then glued on the back flap that will eventually close with velcro. Lots of clamps and magnets are my friend. I used this thread to help me identify which parts went where: https://www.whitearmor.net/forum/topic/28321-sure-fire-am-20-shin-identification/ After the inside and back was done I did the front cover strip. At the same time I started working on the thighs. These were tricky since I didn't have help to measure but I got them eventually. I did inner and outer strips on the thighs as well for strength. I used this video to help me size the thighs: https://www.youtube.com/watch?v=gPj5DIWHJbI After the thighs were assembled I had to trim some off the tops so that I could move my legs without the tops hitting my hips. I trimmed them in small increments until they fit juuuuuuust right.
-
(So... I actually have the armor done-ish and wearable at the time of this post but I was trying to get it finished in a mad dash for a big convention so I didn't post here. The posts here will be in the order that I completed each section and I'll pick up where I'm at currently when I get all these uploaded.) The next section I worked on were the hand plates. After marking them Left and Right, I glued on some of my snap plates, assembled some straps with the help of a soldering iron to punch holes in the elastic, and then tried them on. Using two straps for each hand really holds them in place well!
-
Please do, I have more pictures I need to upload anyway The snap plates certainly makes building straps simple!
-
So I have finally gotten back to working on my armor after getting some other shenanigans and small projects out of the way. However, I have slightly changed plans. I was originally going to build this a standard TK and then change it to a heavy weapons trooper but it looks like I will be better off to just build it as a HWT instead of having to figure out how to remove the holster holes from the belt. Can I get this thread moved or do I just start over in the HWT section? (Edit: I have started to edit the older posts so if this seems weird to see after I already mentioned this above then that is why. I also have removed my uploaded images and went to sharing IMG links from Imgur as I seem to have trouble resizing images and uploading to this site from my phone.)
