

Deadeye
-
Posts
70 -
Joined
-
Last visited
-
Days Won
1
Content Type
Profiles
Forums
Gallery
Articles
Everything posted by Deadeye
-
 I don't know if it's an AP thing or just the way mine worked out but the right side of the ab has a pretty noticeable curve to it. Much more than the left side. This appears to have made it narrower than the kidney. I tried to hot water bath it a bit less curved but it was difficult to fit in the pot and the return edges kind of kept the shape. This seemed like an easy way to ensure that I wouldn't get too much misalignment and would have a nice clean look when I was wearing it. It's pretty easy to get into at this point so it's not too big a deal. Also, I had the CA laying on the bench from some previous projects so I just figured it would give it that little extra hold. I'm already having a couple issues with E6000 on some joints.
 -
Next, I wanted to steal a page from SpiceCredits' build and add a tab to the right side of the ab/kidney connection. I added a pocket to the ab and a "tongue" to the kidney. You can also see in this pic where I'm adding a second snap for a strap at the bottom of the pocket. These were glued on with CA, as I was concerned that they would pull off with E6000. It seems to me the ab is narrower (maybe because of how I cut it) than the kidney so there may be some stress on these parts. Hopefully the CA holds. Since I was concerned about pulling, I also thought the three nylon straps riveted to the left side may not be enough to hold that together. I added two tabs between the straps that will keep the kidney aligned to the ab and I plan to put two elastic straps over these tabs. I think that should be robust enough. I've done some other odds and ends but that's the major stuff. At this point (assuming all the glue holds), the arms and legs are done except for the hooks on the biceps and I need to start strapping. Once the strapping is done, I'll need to break out the paint and do the ab plates and the helmet. Yesterday, I bought a cheap hard hat at Home Depot and plan to use MoSc0ut's technique of cutting out the mounting points and gluing them into the helmet. I'm also THIS close (holds fingers really close together) to finishing the TD but for some reason I can't find screws with the required non-Philips head. Seriously, everything at Home Depot yesterday was either Philips or a combo head. I'll head over to Ace Hardware today to see if they have something. Fingers crossed. Then I can wrap that thing up.
-
I've kind of reached a point where I seem to be doing several different parts in one sitting. It seems that I do one thing and let the glue dry while I jump over to something else. Kind of feels like nothing is getting done but I think it's just that I'm working on details so there isn't a lot to do anywhere. Now that I've got the thighs and calf cover strips finalized, I want to finish up the legs so I've been working on the knee parts. I got the ammo belt attached to the right thigh and the sniper knee should be done (assuming the glue holds). I tried to use the advice I've read on the sniper knee. I secured the center making sure it was "level" and centered on the cover strip (pretty sure that's the goal). I then secured the inside and made sure the upper edge follows the top return edge. When I went to do the outside, it seemed like I really had to force it into place. I'm not 100% confident E6000 is going to be robust enough to keep it in place long term. When I last looked it appeared that the upper edge followed the return edge well and I'm hoping that once the clamps come off today everything stays in place and looks right. I'll post more pics if everything works out. Again, trying to finish up the legs I wanted to install the snap plates for my Pencap510 garter system. I fitted the thighs in place and figured out where I wanted them and then glued them in with plenty of E6000. I think I'm maybe a little overly generous with that stuff as I've almost used up my second tube and still have all my snap plates to install. Oh well, as long as it holds I'm happy.
-
That's a good tip. I will definitely do that on some of them. I think there may still be a couple that I need to sew like the smaller white pieces for the calf closure. No snaps, just the bra hooks. Plus, I just bought two different kinds of thread in two different colors--four spools total--so I hope I get to sew something. LOL. Of course I say that now but I haven't tried the sewing machine yet. That might change my opinion a bit. Thanks for the tip, though. I really appreciate it.
-
Hi, Rick and thanks for checking out my build. I'm feeling a lot better than I was a month ago today. I learned a lot about AP construction steps and some little tricks from your build. Appreciate your work. Well, it's been a chaotic couple of days of bouncing around to several different things. I didn't post anything because I wasn't sure what to post. So here's some progress updates. First off, I got my Hyperfirm B-grade E-11 yesterday. I love it and I'm not sure what's B-grade about it. I also went ahead and cut up my nylon webbing and spent a bunch of time heat-sealing the edges and then got the soldering iron out and melted my holes. Then I set 46 male line 24 snaps in preparation for my elastic straps. I'll be doing double snaps in most locations but a couple of singles in the arms. Not sure if it's a common issue but a lot of my snaps seemed to "wander" a bit when being set. You can kind of see what I'm talking about in the last picture where the back seems offset from center. Hoping this won't present a problem when I create the straps. I then decided to work on my belt. Using a combination of ukswrath's Anovos build thread and some tricks from SpiceCredits, I laid out the canvas belt and measured for and installed ukswrath's suggested 'S' popper snaps on the belt and ab piece. Then I laid out the holes for the ammo belt and installed line 24 snaps as SpiceCredit did. Then I used his water bath technique to put some curve into the ammo belt and when I went to put it all together nothing lined up. Individually all of the pieces worked but assembled the outer two snaps on the ammo belt were too far out to line up. it's due to the fact that the arc of the loose belt around the waist is shorter than the arc of the ammo belt when curved compared to the flat pieces. No problem, I just ended up drilling them out and installing new ones a little closer in but I am down to my last snap so hopefully nothing else comes up. Here it is all assembled and fitted and working perfectly (although I'm a bit worried about the holding power of the 'S' popper snaps). Still need to install the covers of the backs of the snaps. While I was bending the belt I also bent up some other parts that needed it. I tried to shape the bottoms of the calves a bit narrower side to side to fit over my boots better but that proved kind of difficult. I think they're better but not great. No pics of that. I'm also working on the thermal detonator. I tried to find the gunship grey that ukswrath recommends but couldn't so I got something similar in a matte finish. Here's the in process painting. Also bought material for TD clips. All other parts are ready to be assembled once the paint's dry. Next up was fitting the thighs. I was kind of apprehensive about it and didn't want to make any cuts but kind of got to a point where I said how bad can I screw them up? I'm sure they can be replaced if I get them wrong. So I cut them for size and measure that they were the same. Everything looked good and lined up well. I was a little concerned about the bottoms that were unsupported by cover strips so I added some pieces on the insides to bridge the gaps. You can see the clamps for one of those here. Lastly, I added the last cover strips on the backs of the calves. So that pretty much brings me up to date. Once the glue's dry on all of these parts I think that I'm ready to install snap plates and start strapping. Then I get to figure out how to use the vintage sewing machine that my wife inherited from her grandma so I can start folding over the ends of my elastic straps
-
Jaime, it is going along pretty quickly. My wife is fortunately pretty tolerant of me working on projects for long periods of time and with the fact that I'm off work for a few weeks I've had a lot of time to focus on it. My wife's a teacher and today is the first day back so I hope to make some good progress this week as well. The kids start back next week so I have one more week with lots of free time before my leave from work runs out and I go back to work full time. I'm hoping to have it done or really close to done by then, as I'm sure I won't have much time after that. With that said, this weekend proved pretty slow. My parents decided to come visit to check on me before they leave on a long Alaskan trip. And then we were scheduled to go visit my in-laws who are camping for the weekend and spent most of yesterday there. I got almost nothing done. Here are couple of pictures of what I could accomplish. I wanted to get some pictures of the side notches for posterity and to ensure everyone still thinks I'm on the right track. As I said before, I tried to get to where the line appears to be on the pictures that Mark posted when he introduced the extended AP sides but I think I'm still a bit short. I noticed the bottom of the ab piece hangs a little lower on SpiceCredit's sides. Still, I think it fits pretty well (I wouldn't want to go tighter) and they look pretty muck like the notch diagrams that are floating around for Centurion approval. Next, I was able to get the biceps and calves unclamped and cleaned up. I think they turned out pretty well but I noticed the cover strips on the calves didn't seal down tight and there were some gaps underneath. That made me a little nervous they weren't adhered perfectly so I added some internal cover strips to ensure they don't come apart with all of the movement required to put them on and off. Also last night, I squeezed some more E6000 into the gaps and I'm hoping they clean up and look filled today. Here's pics before the added glue. No pic of the internal strips. I also glued up the backs of the forearms. I was even able to let the glue set up and got the clamps off last night. I noticed similar gaps under the cover strips but since these parts don't move I figured the added glue squeezed in the gaps would be enough there. I may still do internal cover strips at some point but the forearms are pretty snug already so I'd prefer to try to go without. Last thing last night, I was able to get the fronts of the thighs so those should be ready to unclamp today. Today's plan is to size up the calves and thighs in hopes to get those glued up and finalized. Then I'm going to start on webbing pieces for snap plates and may be setting snaps by the end of the day. I want to get the body put together soon.
-
Sylverbard, thanks for the feedback. I tried to do like you said today. Some times worked well and others...not so much. Oh well, at least it cleans up reasonably well. So here's the latest progress. Last night I got the arm parts glued up with cover strips. Here's what they looked like when I put them together: Once I removed the clamps and tape and cleaned up the glue mess, I got to this: Then I decided I'd glue up the fronts of the calves and I had enough magnets to finish the biceps, so I did this: At that point, I only had a few magnets left and I wanted to let the forearms cure a little more before I have to torque on them to line up the back edges so I moved on to other things. I cut the pieces for the thermal detonator. I used the dimensions from ukswrath's Anovos thread for all of the parts. The length came out exactly to the 7 1/4" that he cites. Then I decided to move on to the body shell pieces. I hope that everything looks correct. I cut the AP-extended kidney down to get the 22x22mm notches and squared up from the lower edge. I then tried to cut the extended ab piece back to where the line shows in the AP thread about the extension. I don't think I was able to get it all the way to where the line is but it's close. It fits pretty nice at this point. Then I started laying out the snaps and rivets for all of the parts. I have the snaps for the belt, the left side rivets, the visible snap on the right side and cod and posterior snaps and rivets. I haven't drilled anything yet. Need to build up my confidence that everything's in the right place, first. I tried to align the belt as ukswrath describes in his thread. Tomorrow, I hope to finish the forearms and get the front of the thighs done. Then I might drill some things and get some snaps going. Getting really excited by the progress but there are some daunting steps ahead.
-
One side of each forearm and bicep glued. That E6000 is some messy stuff. The tube never seemed to shut off. I'd squirt a bead on each side and go to close up the tube and it was still oozing. No pictures yet but I'll get some before and after the clamps come off. Can't wait to see how they turn out.<br><br> Done for today.
-
Great feedback. I think that I have enough confidence to open the glue. I need to cut my cover strips to length and then I'll glue the forearms, biceps, shins and thigh on the front and follow that up with the backs on the arm parts. Also getting started on the torso parts. I need to trim off the extra girth to get it back to my size but luckily my waist is trooper-sized--33 inches. Glad I don't have to do all that surgery you had to do on the kidney/ab/posterior parts, Sarah.
-
Luc, your tutelage is very appreciated. Sounds like there is a consensus that trimming the helmet opening (within reason) is allowed and encouraged for comfort and ease of putting it on so I'll need to determine how much I need to remove to achieve those ends. Sarah, appreciate your feedback on the arms. Below are some pics of the arms roughly fitted in place. I'm pretty sure that my forearms are rotated about 90 degrees wrong. Not completely sure I know how those fit. The top edge has the angled side and the straight side. In these pics, I assumed the angled side fit into the bend of the elbow but then the cover strips for the forearms and the biceps don't line up, which appears to be the general alignment. Oddly, that seems to mean the angled top of the forearm pokes into the elbow bend. Anyhow, in these pics I have cut the return edges for 15mm cover strips. If I cut them anymore for size, the cover strips/return edges (I'd assume at the back of the bicep) would not fit correctly. Also, if I happen to take up lifting and bulk up they'd no longer fit. Let me know your thoughts on the fit of the three arm pieces and if I need to trim anything.
-
Thanks for the feedback, Luc. Yes, the build is helping to get me active--mentally at least if not too much physically--during my recuperation. I figured I had some more work to do on the teeth after looking at the picture. It seemed better in real life but the picture exposes that some work is needed. I'll attack them some more with the needle file when I get back to the helmet. As for the cover strips, all of the pieces pictured are just taped together so I was planning to do as you suggested and cut the strips to length and clip the corners before I glue up. I thought (and am still thinking) about the internal cover strips. I still need to decide if I want to do that. I figured I might glue up just the external to start and may go back and add the internal after. Thanks for commenting on the 'S' trim, too. By the way, I've learned a lot from your commentary on other build threads so please help if you see anything else I can tweak. Ron and Sarah, thanks for the comment on the helmet opening. I am putting it on as you explained so maybe everything is right as is. You see Luke pull off his bucket when he's rescuing Leia and he makes it look so easy. I figured it should be easier than it currently seems to be. Maybe I just need to practice for speed. I may trim a little as Ron suggested just so I don't pull my ears off as I'm removing it. Sarah, as for the arm parts currently I've done as you did--cut for the 15mm cover strips front and back and plan to assemble them like that. With that said, it would appear I have large forearms and puny biceps because currently the forearms are a fairly snug fit and the biceps are very roomy. That's why I thought I might remove more return edge on the tops of the forearms and why I've left as much as I did on the biceps. My hands fit into the forearms, they're just kind of tight. I'm assuming when you suit up for a troop you slide the arms on and then put on gloves and tuck them into the forearms. Is that right? I'm able to do it this way with some work to make it all fit. With that said I'll need to see how the shoulder bells and biceps look in a mirror to see if they stick out too much. I may need to trim more return edge just so they lay right. And I just ordered my snaps so I'll test on a few and then maybe decide to pursue your suggested gadget. Thanks. Jaime, thanks for following along and good luck keeping calm until your BBB. It's a pretty exciting day but a little overwhelming when you see all these parts and realize there's still a lot to do. It's a fun process, though.
-
Next up, I decided to fine tune the arms to try to get the to a place I could actually start gluing. In these pics, the return edges at the tops and bottoms of each section have been fitted and sanded smooth. I think these are all finished except for gluing but I would love to hear some comments or critiques if there are things that need to be changed before I bust out the E6000. So that brings everything up to date. I may still tweak the return edges at the elbow end of the forearm. I've test fitted both arms and they fit pretty good and I like the look of a little bit of return edge in that spot but I may still find it easier to bend my arm with a bit less. Other than that, I think they're ready to get glued. Let me know what you think of what I've done so far.
-
With the helmet to a good place to park it for a few days, I decided today would be a good one to focus on arms and legs. In particular, I started by getting the return edges cut to fit the cover strips. I started with the forearms: I kept the bottom edge flush to start and let the top edge fit however it did. The strips still need to be cut to length but i think they look pretty good. Next up was the biceps and they were easy by comparison. Then I did the same with the legs.
-
Thanks, Bill. There are certainly better people for you to learn from than me. I'm stumbling through this process for the first time, but I do truly appreciate that you want to follow along. I hope some of my learning experiences help others like you avoid a mistake or two that I make along the way.
-
That brings me to a question--maybe it's specific to AP buckets. Am I supposed to do any trimming or sizing of the hole at the bottom? As it is, it fits over my head but it takes a little bit of contorting to get it over my ears. It also appears to be kind of an odd shape and the ears don't come all the way down to the edge, although that is covered by the rubber trim. I can use it like it is but if it supposed to be trimmed to line up things or whatever it would certainly make it easier to put on and take off, especially if I put in earbuds for the hearing assist system. Speaking of the black rubber trim, I bought some 'S' trim but it occurred to me that I'm not totally clear how it goes on. Probably a stupid question but can I assume that it goes on like the first picture, not the second:
-
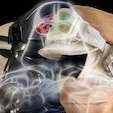
So that brings me up until yesterday, where I violated the number one rule of armor making. I know everyone's said not to, but I did it anyway. I started with the helmet. First up, the ears. Needed to bevel the holes for the flat head screws so I did this: And came up with this: Once that was done, I decided to cut in the eyes and came up with this: Next, I wanted to fit the hovi mic tips: Then I decided to fit the ears. After lots of sanding and marking and sanding and filing, I had this: Last, I cut out the teeth, like this: So what do you think of yesterday's progress? I'm sure I still can put some work into the teeth area and I think I need some finish sanding to remove the file marks on the ears and obviously painting, but am I at least making good progress or did I screw up something? Are the eyes close to right? I was really apprehensive about doing those.
-
OK, so catch up time. I did all of the trimming on August 12th based on the AP trim lines. Where there weren't trim lines on the return edges at joints, I just rough cut enough to trim the to fit later. Here's just a firehose shot of all of the trimming pics.
-
Thanks, all, for the positive comments. Louis and Jorge, thanks for the comments on the pictures. When I looked at this thread last night, the pictures were all still full size from my phone. Now when I look, they are half size as I intended. Apparently it takes a little bit for Photobucket to display the resized images. I think they're OK in the current sizes and I can start posting the others. Randy, thanks for the comments on the glue and magnets. I bought a 20-pack of clamps and I think 30 magnets. I hope that'll be enough to get going and I'll be sure to watch for that glue creep that you mention. Sarah, I've heard other complaints about the Dritz snaps. I only used them for the sewn-on snaps at the shoulder bells (as ukswrath recommended in his Anovos build thread). I just bought some Tandy line 24s for the rest of the strapping. I also got some 'S' popper snaps that ukswrath suggested for a couple of spots. Keep up the recommendations if you see any other areas for improvements and thanks again for the 'well wishes' (is that a thing? Thanks for wishing me well, maybe?).
-
By the way, does anyone have any advice how to resize images? I have pics of all of my trimmed pieces but they all seem to come in really big--larger than anyone probably wants to see. Even the ones I've already posted are bigger than they probably need to be. I changed the sizes on Photobucket but it doesn't seem to have any effect on how they show up here. If anyone can let me know how to change the sizes I would appreciate it.
-
Once I felt up to it, I started trimming. For some reason I still don't quite understand, I decided to start with the ears--probably the hardest part I could start with.
-
I had decided several weeks ago that I was finally going to make good on my interest in building a TK kit and becoming a 501st trooper, and then things got really interesting. After some discussions with a couple of armor makers, I finally decided to place an order for an AP kit on July 28th. Three days later, I literally died on my way to the hospital in my wife's car of a heart attack. I woke up in CICU about 9 hours later and after four days I was back home. So now I have some time available and decided my build and my journey to 501st approval (hopefully Centurion at some point) can be part of my therapy. My BBB arrived while I was in the hospital. I hadn't mentioned the build to my boys (14 & 11) yet so they were pretty intrigued by the mysterious arrival (it was a good diversion from their other concerns). When I finally got home, I got to show them what I was up to and they are pretty stoked by the whole process. I debated whether I was going to start a build thread for several reasons but took a few pictures anyway. Now that I'm a little bit into the process, I have a feeling I may need some help and advice along the way so hopefully some of you will follow my progress and offer some constructive feedback if I start going astray. I apologize in advance if I get overwhelming with the pictures or details. I've read a bunch of builds and tend to like the ones that have lots of detail. In particular, thanks to ukswrath, SpiceCredits and MoSc0ut for the wealth of information you've provided me. Please bear in mind as you're checking it out, I've never done anything like this so any advice is welcomed. Unfortunately, I didn't get a BBB picture but here's all of the kit pieces and some of the things I had started collecting for the build. I've amassed a much larger collection of stuff since. Here's a summary: Kit: Untrimmed AP including gloves, latex hand plates and belt Boots: TK Boots Neck Seal: Darman Holster: Darman Helmet 'S' trim: troopermaster Garter: Pencap510 Rivets: justjoseph63 Blaster: Hyperfirm B-grade Undersuit: Tesla https://www.amazon.com/gp/product/B01DSRS7FQ/ref=oh_aui_detailpage_o01_s01?ie=UTF8&psc=1 and https://www.amazon.com/gp/product/B017TVMGEK/ref=oh_aui_detailpage_o00_s00?ie=UTF8&psc=1 Planning to build with snap plates instead of the bracket system.
-
Love the build thread, Jim. At your suggestion, I also contacted Walt. His stuff looks fantastic. Still working out the details of which kit makes the most sense but I appreciate your suggestion and I'll definitely be referring back to your build thread when my kit arrives. Thanks.
-
Woo! I made it through all 48 pages. Glad I did, as a lot of the questions I had were answered. On the shorter side at 5'7", 160-ish pounds, I think that I've determined AP would be a good option for my first build--I'm hoping for a sandtrooper that I want to get to level 3/SWAT approval and start trooping. I emailed Mark a few days ago through a link on TK409's webpage. I keep getting returned-undeliverable emails from Chris (TK409, copied on the email link) but haven't heard anything yet from Mark. Hopefully my email went through to him and I hear something soon, as I'd like to get in line for my order. I might also contact some of the other builders that have been mentioned just for my due diligence on pricing and availability. I've been a fan of the 501st for years and really want to get involved ASAP. Thanks for this site and the wealth of info. I have a friend that built a TK years ago before resources like this were available and he had to do a LOT of work to find stuff. This is way easier.
