

Addertime
-
Posts
488 -
Joined
-
Last visited
-
Days Won
1
Content Type
Profiles
Forums
Gallery
Articles
Media Demo
Posts posted by Addertime
-
-
TRIGGER - Completed
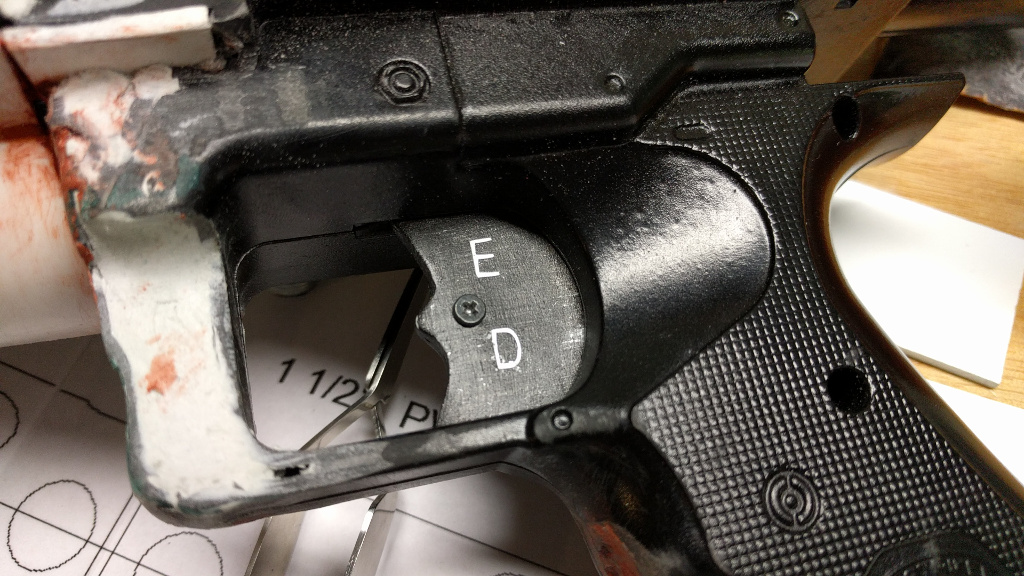
To finish up the Trigger, I've been thinking about how to get a decent "E" and "D" onto it. No way I was going to try and hand engrave it. That would just look to sloppy. My wife does scrap booking and makes things out of paper and has a device called a Cricut Explore Cutting Machine:
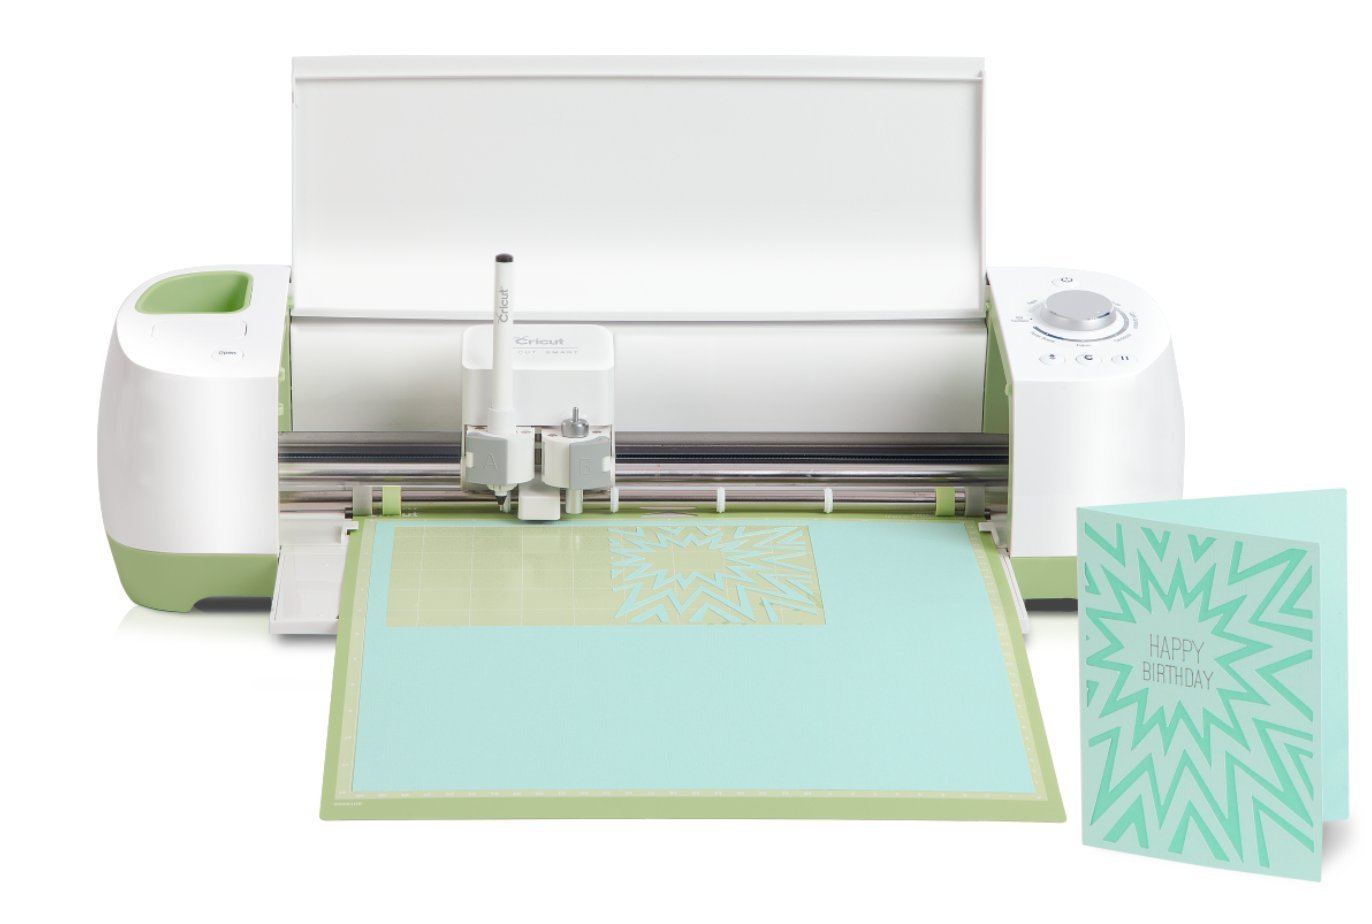
It's like a plotting printer that uses a razor instead of an ink pen. So instead of drawing patterns on paper it cuts patterns into paper, plastic, vinyl, etc. Using adhesive vinyl paper we made some tiny letters. The green background is the cutting mat with 1 inch square grid pattern.
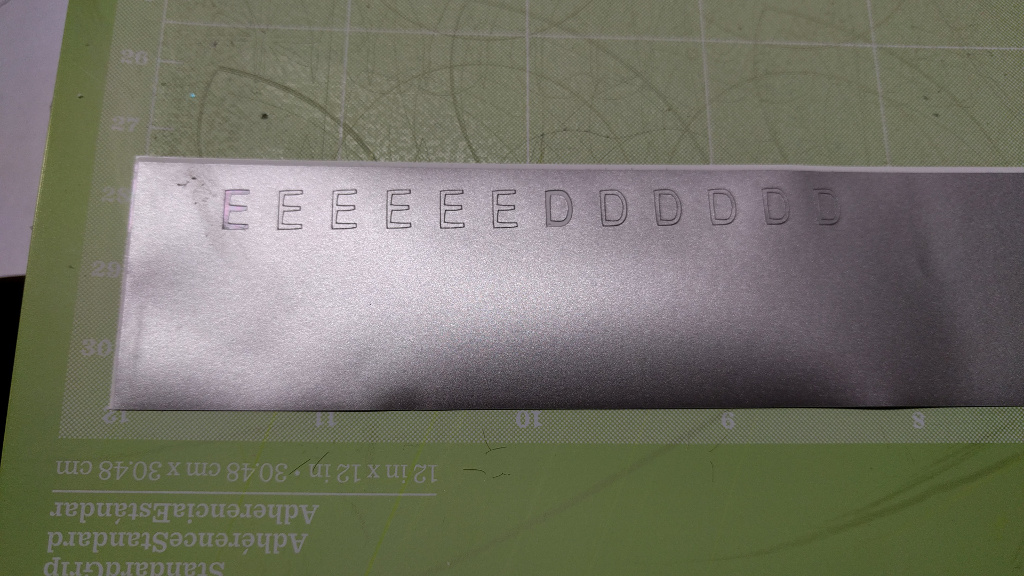
These letters are tiny about 3/16 of an inch (4mm?) and hard to handle. Also it is not that shinny in person, I angled the light to make them really show up in the camera. I might darken the letters a bit later on if needed.
I bought one of these to make stencils for my builds also.

-
 1
1
-
-
But... but... I have a life-sized Stormtrooper in my house... ME!
-
3
-
-
Welcome Stefan!
-
1
-
-
I understand. I do a large Halloween set up as well. Here's my FB page for it...
WOW!
-
Thanks to the contributors and editors alike for another fine monthly edition!
-
Hi Paul... you're well on the way. Now, I'm not an official reviewer for the EIB. I'm only here to offer some friendly advice... so... here comes some tough love...
- Kidney plate looks to be too wide for your body. The ab and kidney pieces should create a form-fitting circle around your middle. The rear standing shot shows a lot of air on the sides.
- Biceps hang too low and at an odd angle. Add a hook to hold the bicep to the elastic on the shoulders and reduce the circumference of the cylinders.
- Vambraces are quite voluminous. I think they also need to be reduced in circumference.
- The greaves sit a bit high. An elastic stirrup can pull them down into the proper location.
- The sniper knee shouldn't ever be under the thigh armor. If your thigh pieces are too big around, cut them down and/or add some foam across the rear to keep the front closer to you leg. This makes for less overlap with the shin pieces.
- The seams on the greaves (shins) should line up better. Check the strapping to make sure it is doing what it is supposed to do.
And if you want to take it to the next level
- The crotch rivet and snaps should not be painted
- Drop boxes should have a rivet each on the back
The overall fit needs work. It looks as if the armor was made for someone larger than yourself. Slip three fingers into each piece of armor. That is all the extra space you should have for a good fit. Make those adjustments and it will look really good.
You've got a good stepping off point by having an RS kit. A little more finishing work will help make it awesome.
Happy Trooping!-
1
-
Great list Joseph!

A handy tip suggested by my frau is to bring along a couple of pre-threaded needles, one black and one white. This makes shoulder snap repairs a lot faster.-
1
-
-
Hi Jordan! Welcome! It's a big decision so do your homework and know that it's a lot of work... but also know that it is a great experience that begins the moment the box arrives.
-
Welcome Bradley!
There's a wealth of knowledge here. Take your time, do your research and enjoy the build! We're here for you.
-
Forgive my ignorance, but what is the elastic used for? I guess my real question is, why can't you use nylon strapping for those areas just as everywhere else? Could someone maybe post a pic of the inside of their shoulder bells or something so I can get an idea of what this is for? Also, I'll be the first to admit I didn't read all 9 pages. Forgive me if this has been answered.

Thanks guys
The elastic is authentic and a lot of the reason we do this is to attempt to create something very similar to the screen-used suits. I have seen nylon strapping used on the ab/back plate shoulder connections but the others are pretty much essential, either for movement or accuracy at EIB or Centurion levels.
I think it's common to come into this hobby thinking, "Why do all these people do it this way?!? I can so improve upon this! " I was right there myself on a few points... only to learn when I started trooping, that there really are reasons to listen to the way it's generally done. I had a few "a ha" moments on my first troop and 'fessed up to some of the guys after having an armor blowout and their knowing grins and nods told me that this is a common affliction.

-
2
-
-
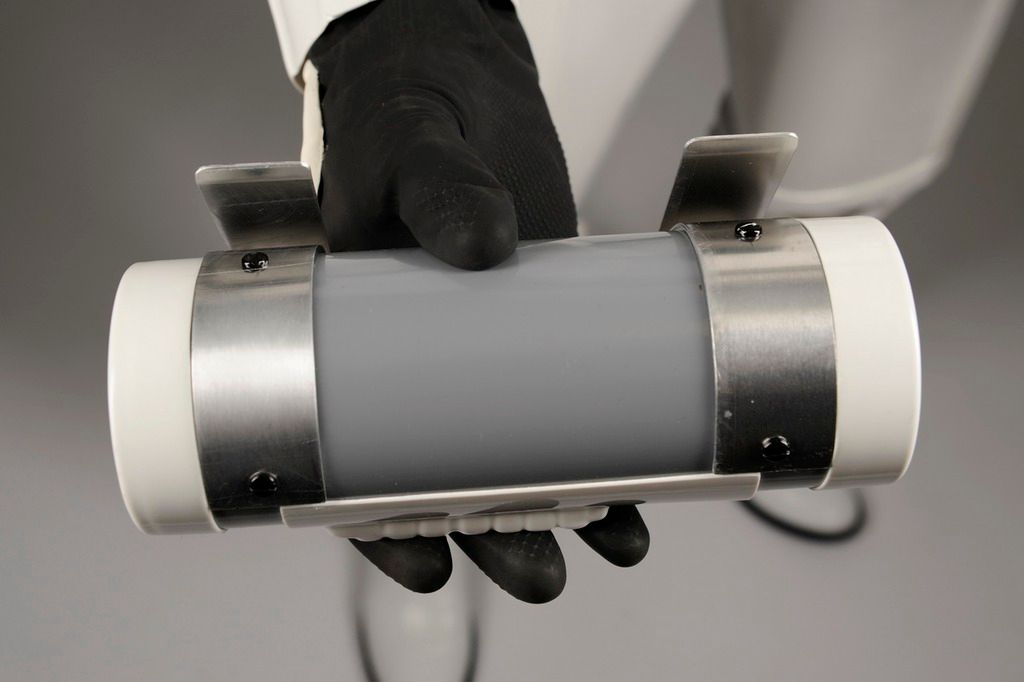
3D printing is awesome... if used judiciously. My suggestion... Use the detail parts but build the rest from scratch.
The barrel would look much better, be quicker to make and sturdier if made from a piece of PVC pipe. The pistol grip, rear cap, Hengstler and scope are the parts to print but in my opinion and experience, you'll get a much better product from scratch building the rest. The pistol grip in this model is overly simplistic. You can buy a real Sterling grip for 30 or 40 bucks, why spend 3 or 4 hours printing, filling, sanding, priming and painting?
Bottom line, tech is cool but don't forget that low tech works too... and often better, quicker and cheaper.
Jus' sayin'.-
2
-
-
Congratulations fellow Centurion!
Kiitos paljon!
-
1
-
-
Hey Michael, thank you for your Centurion application, and thanks for the re alignment of parts and the Thermal det screws, excellent work. Well done
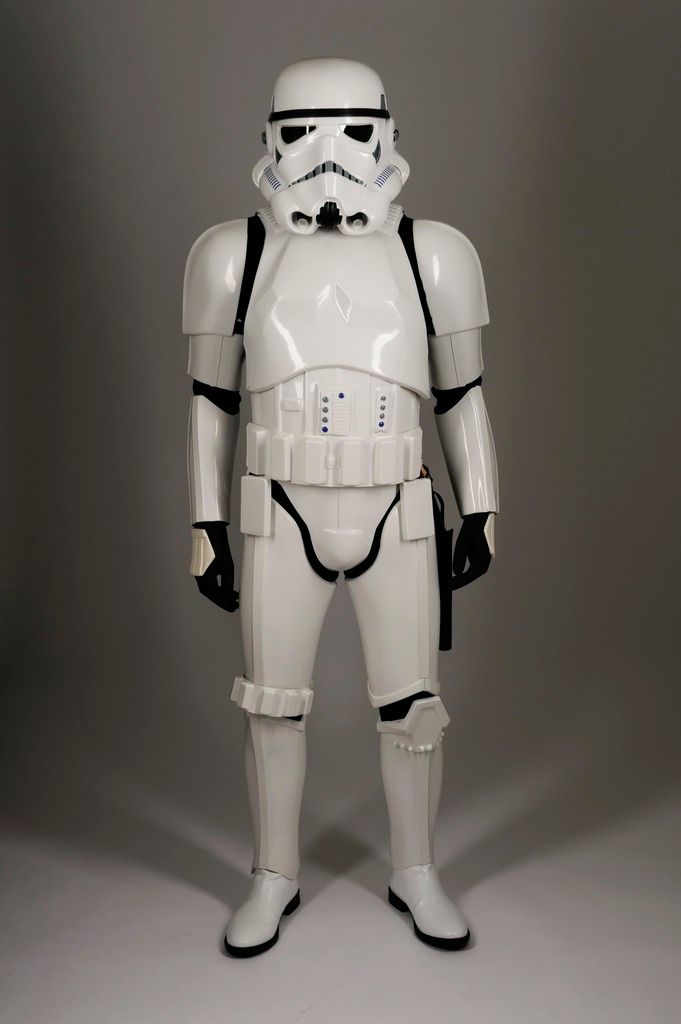
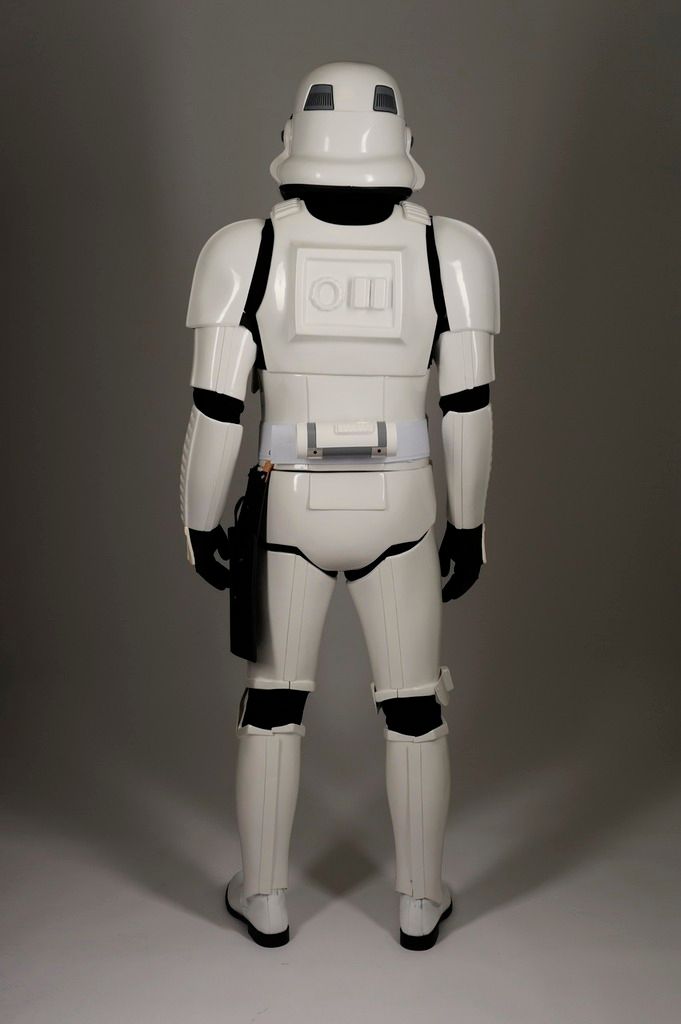
CRL and EIB Application Requirements:
All submission photos are present. Your armor displays all the elements required for Level 3. On behalf of Ukswrath and myself congratulations and welcome to Centurion!!

Other-Armor Fit/Assembly:
Maybe just shorten those top straps of the shoulder bells so they toch the bridges and you will look perfect.
Continue to make the Legion proud Centurion.
Thanks so much! You made my day!
-
Here, I have the new design.
Now everyone will want one!
-
4
-
-
Kind of takes the sport out of it doesn't it?
-
Makes me want to do it again. Great work.
Thanks! More to come.
-
Decal received!
Thanks Joseph! Awesome stuff!-
1
-
-
May I ask where you took your photos? They came out fantastic and the lighting is spot on
In my home studio... a.k.a. my other hobby.
-
PERSONAL INFORMATION
Name - Michael Avina
FISD Name - Addertime
Height - 5'10"
Weight - 165 lbs
Legion ID - 11427
Garrison - German Garrison
501st Member Link - http://www.501st.com...hp?userID=22410
EIB Submission Link - http://www.whitearmor.net/forum/topic/38979-tk-11427-requesting-anh-stunt-eib-status-tm-642/
ARMOR INFORMATION
Armor Maker - TM
Helmet Maker - TM
Blaster Type - E-11, Scratchbuilt (Link to my blaster build thread. The thread is still a work in progress)
Boots Maker - Busse - Self PaintedCanvas Belt - TKittell
Hand Plates - TM
Neck Seal - Darman
Holster Maker - Darman
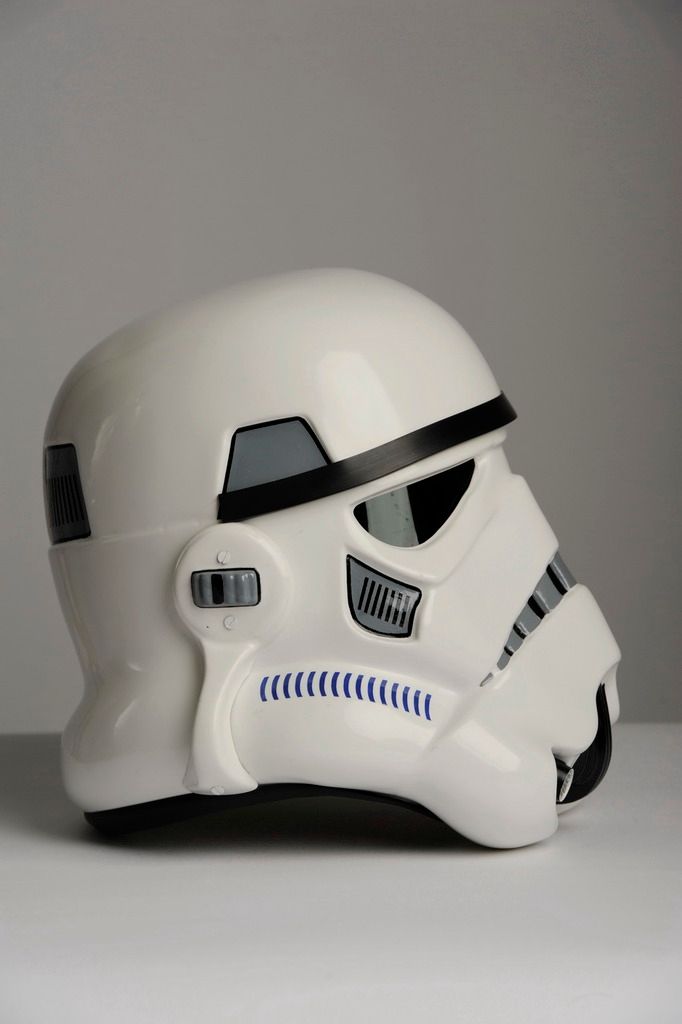
IMAGESFull Body Front
Full Body Rear
Full Body Left
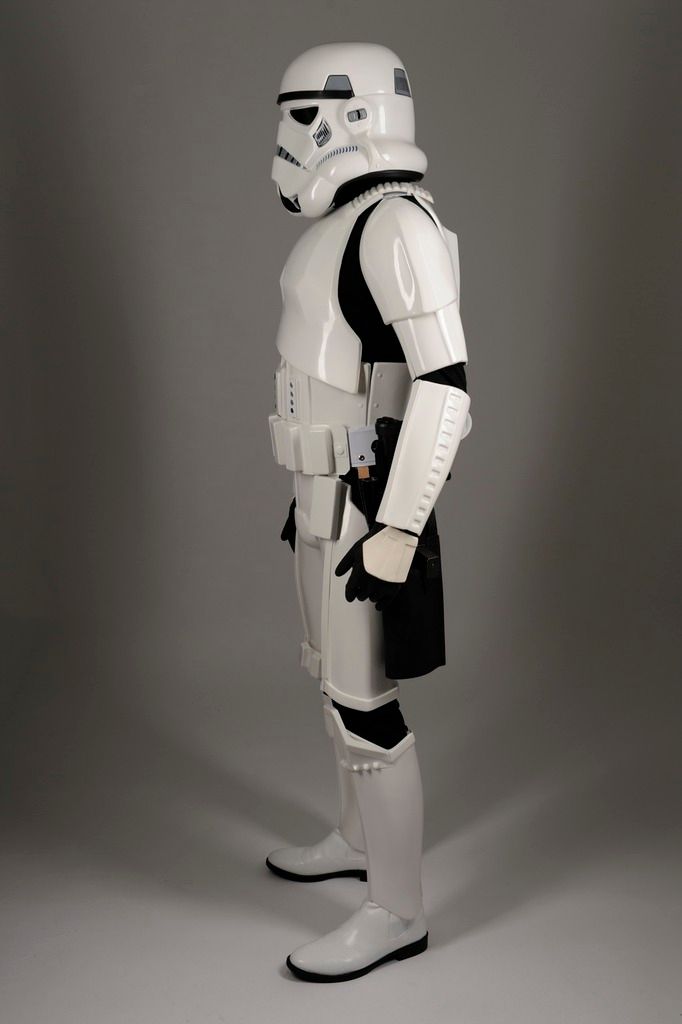
Full Body Right

Belt
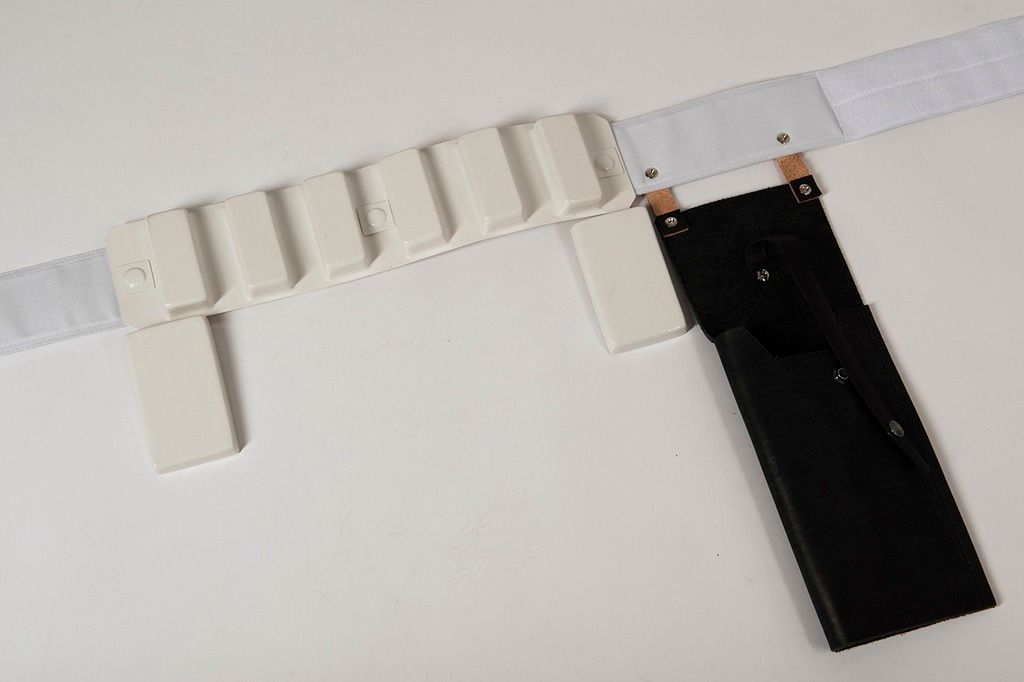
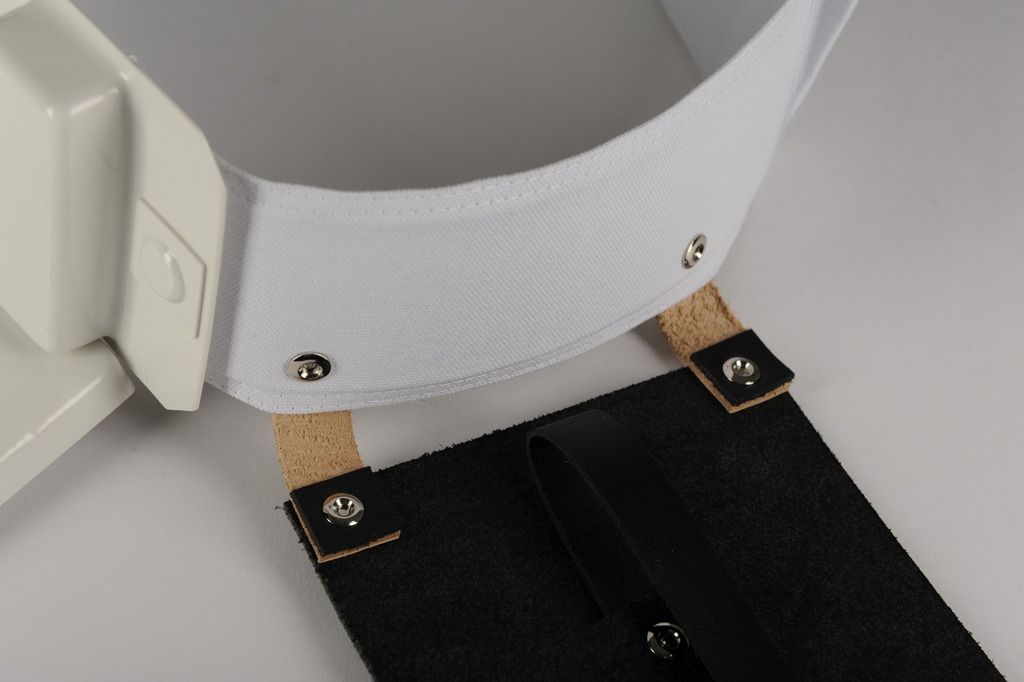
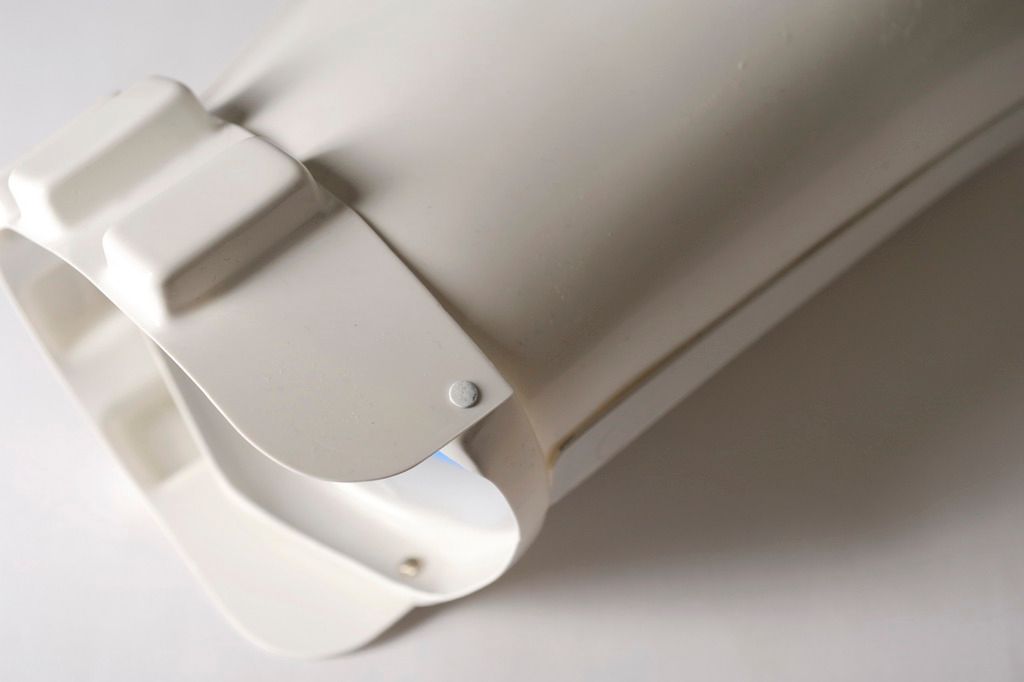
Holster Attachment Detail
Drop Box Back

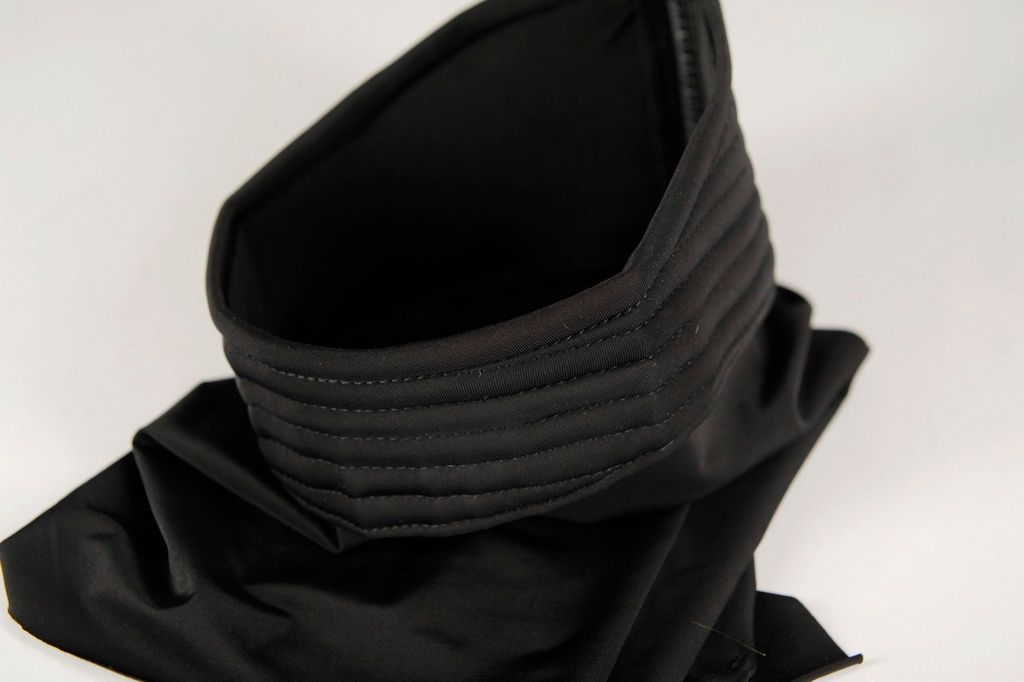
Neck Seal
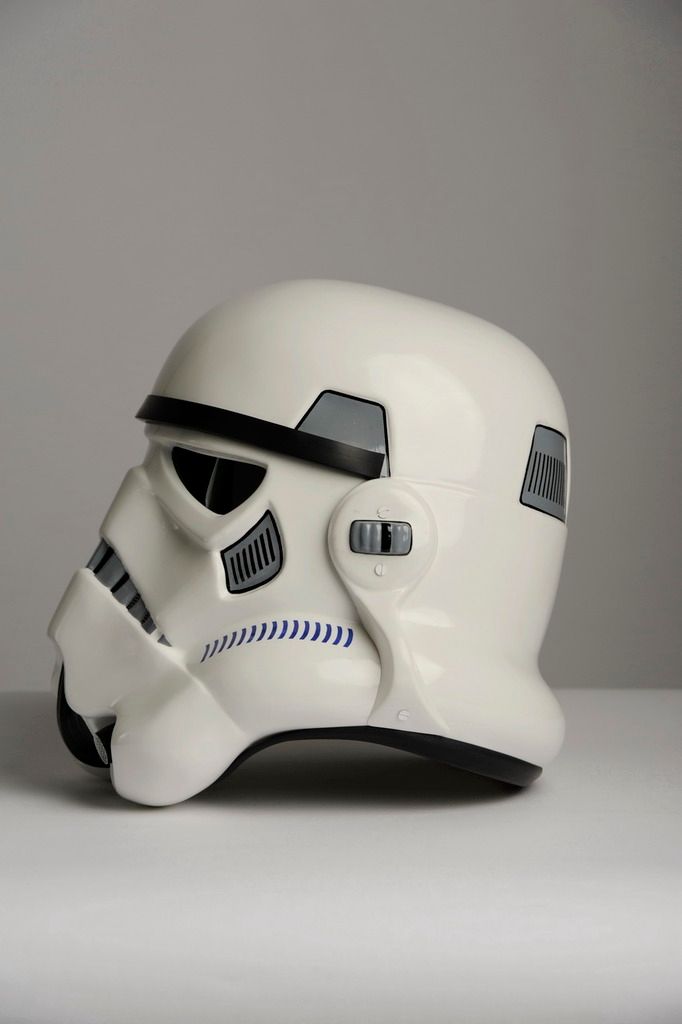
Helmet Front

Helmet Left
Helmet Rear
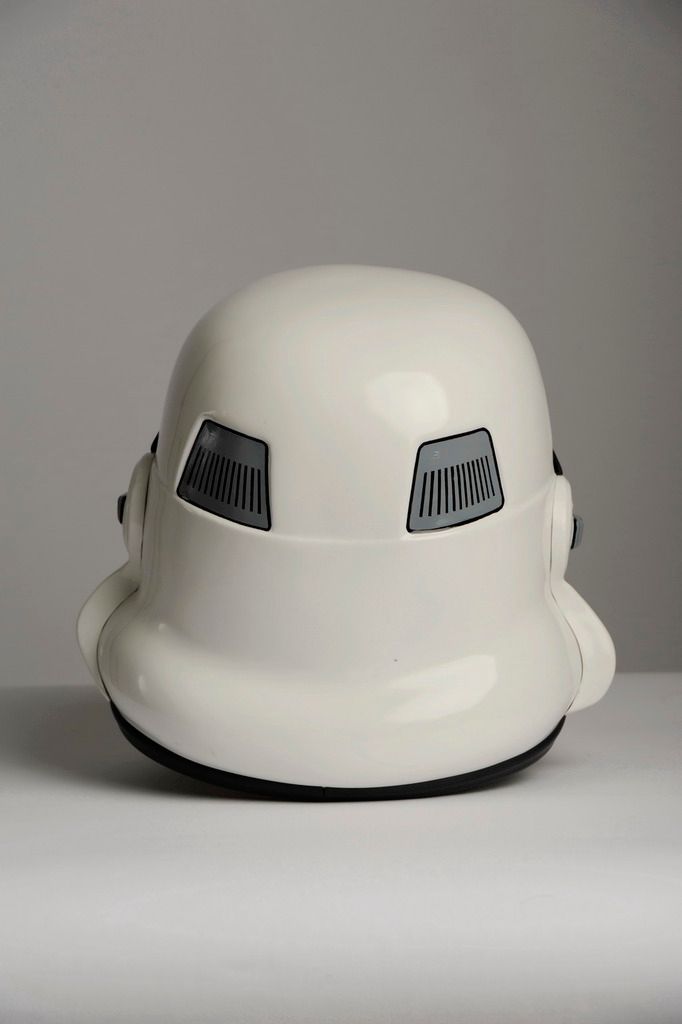
Helmet Right
Lens Color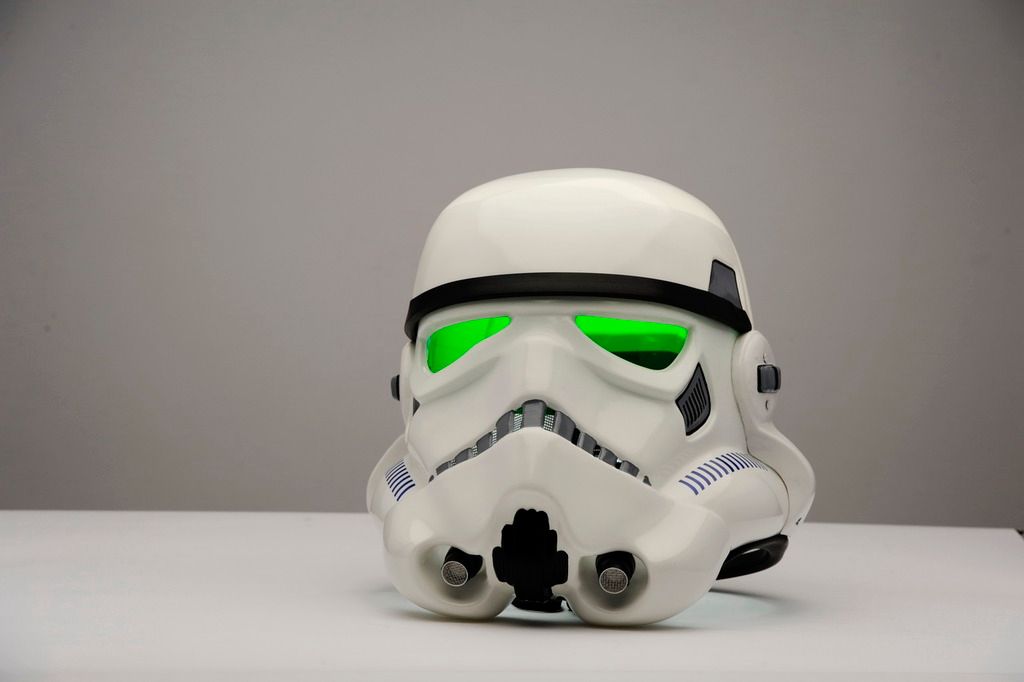
Helmet S Trim
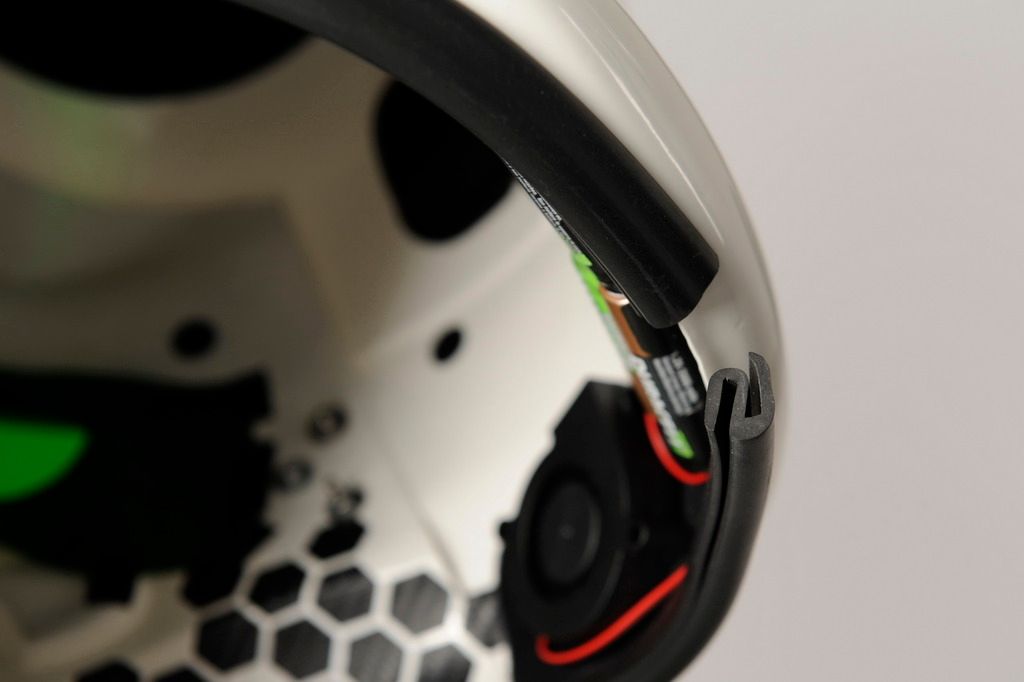
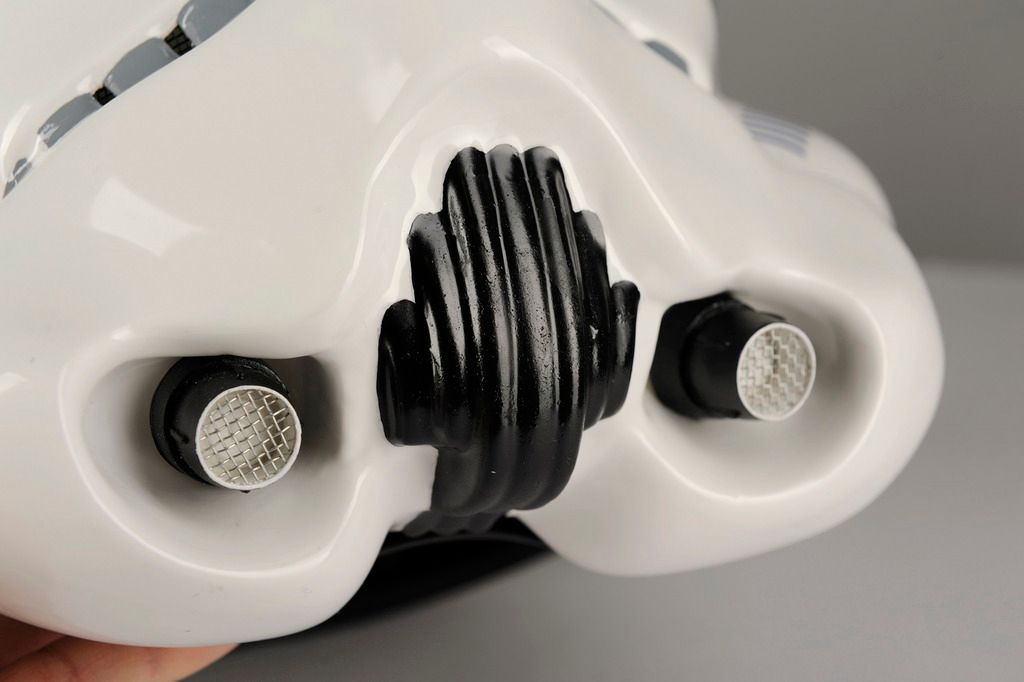
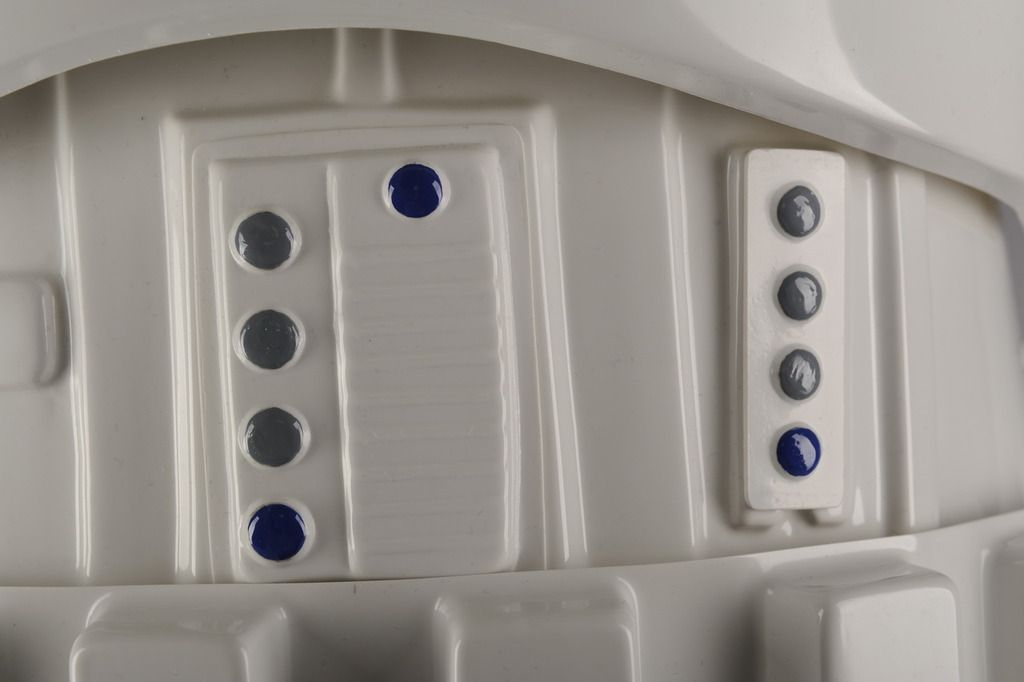
Hovi Tips and Vocoder Detail
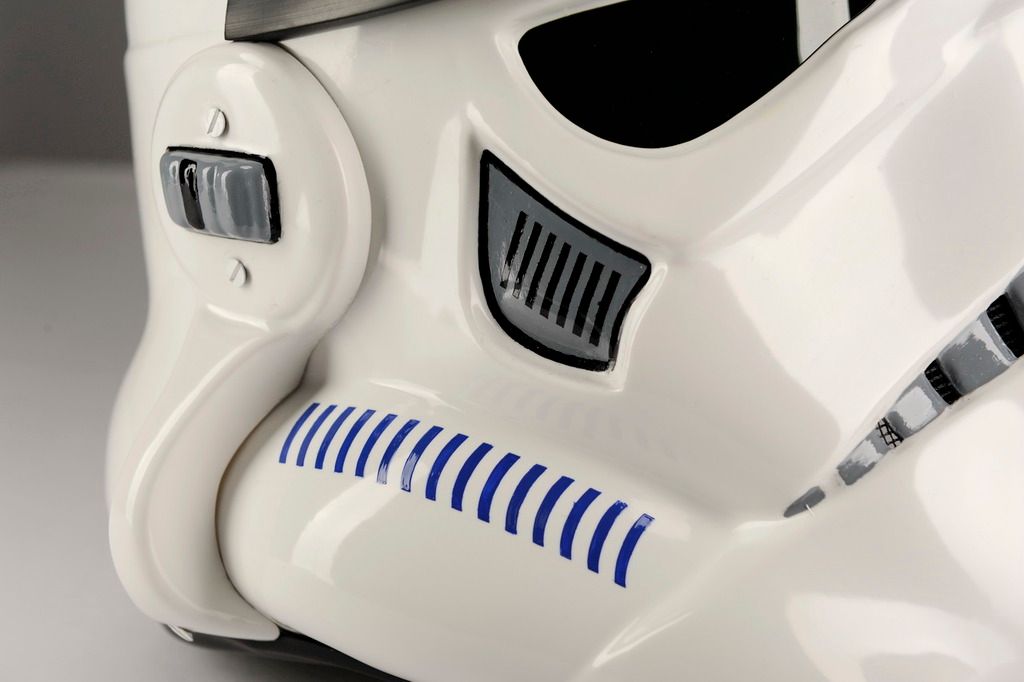
Helmet Detail - All Hand Painted
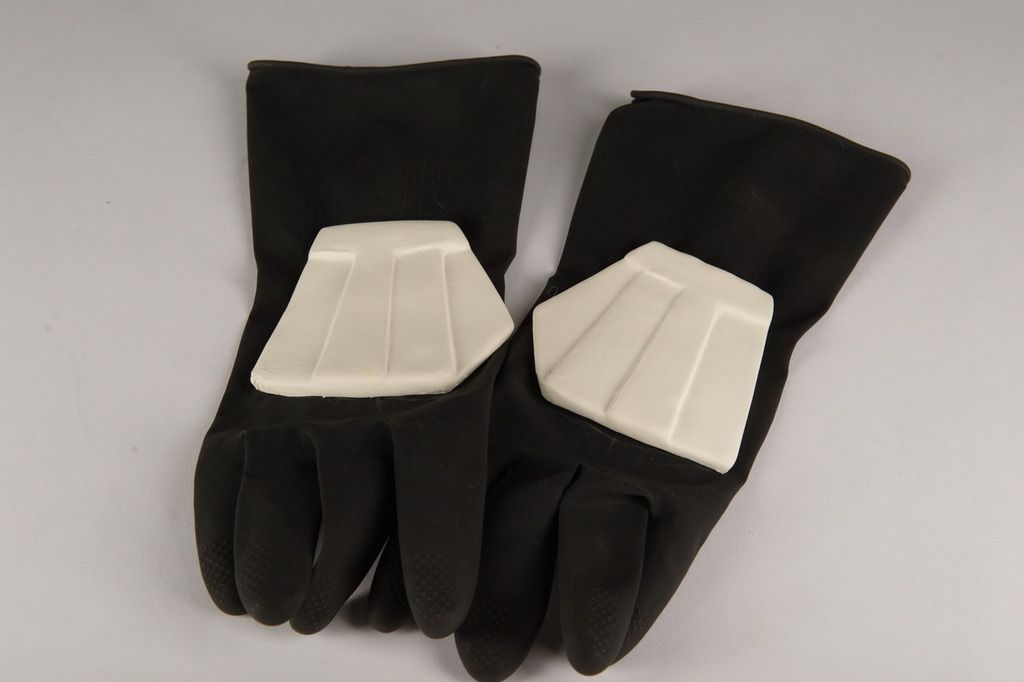
Rubber Gloves with Latex Hand Guards
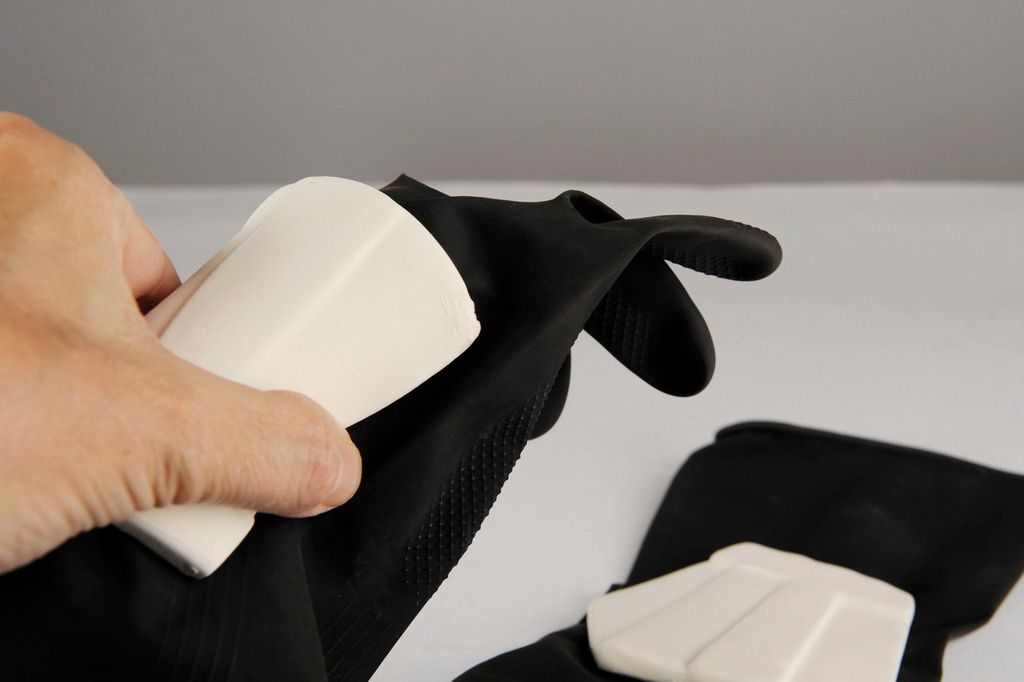
Hand Guard Detail
Forearm Return Removed
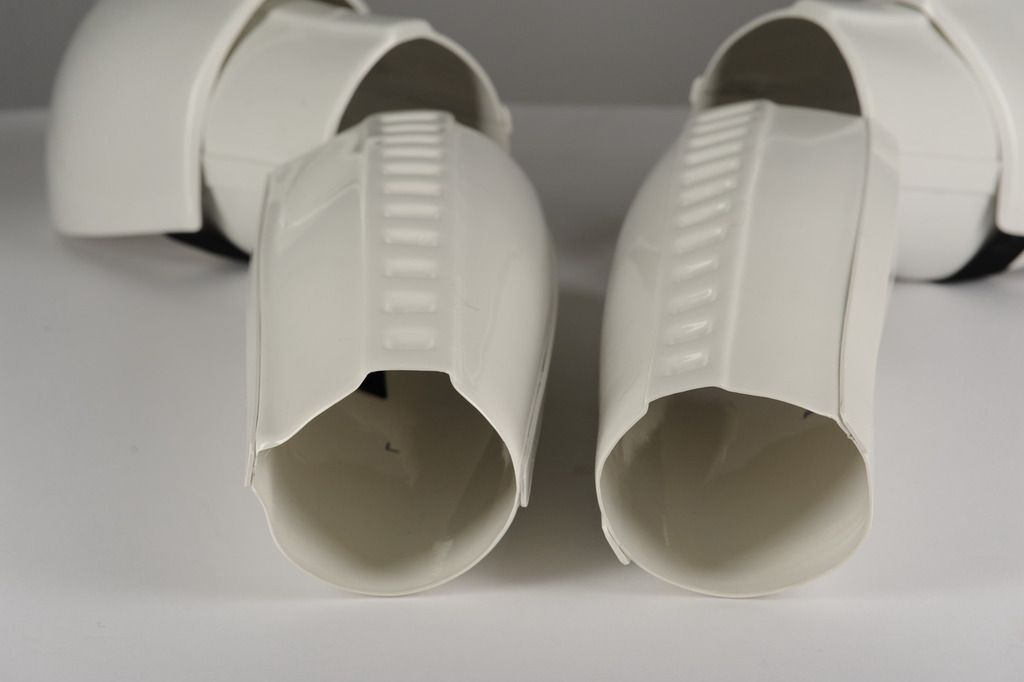
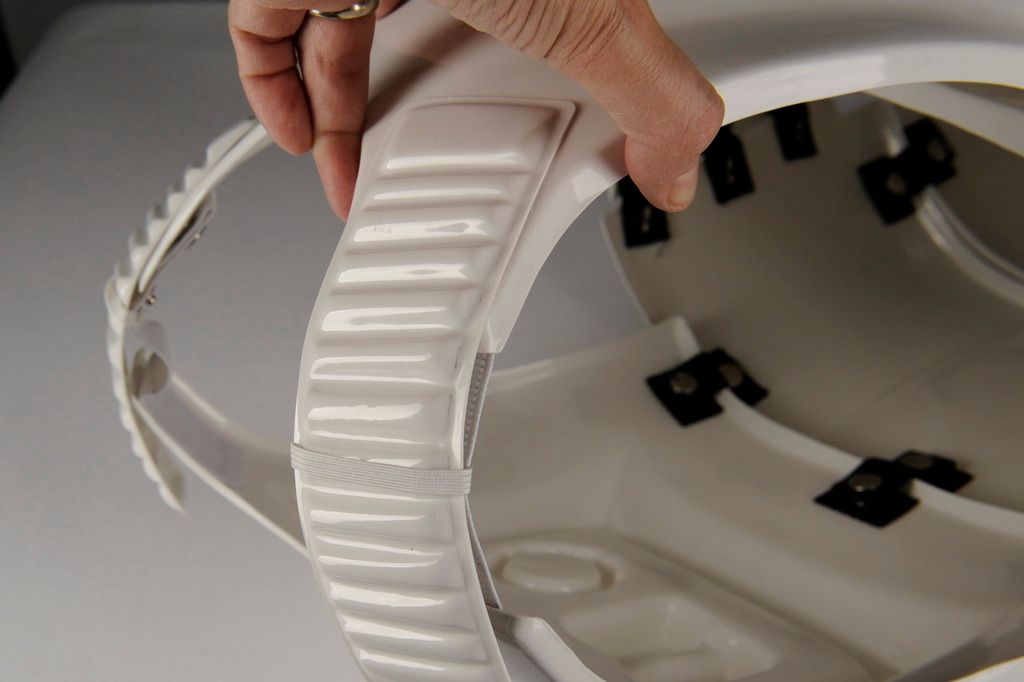
Bra Hook Strapping on Shin Armor
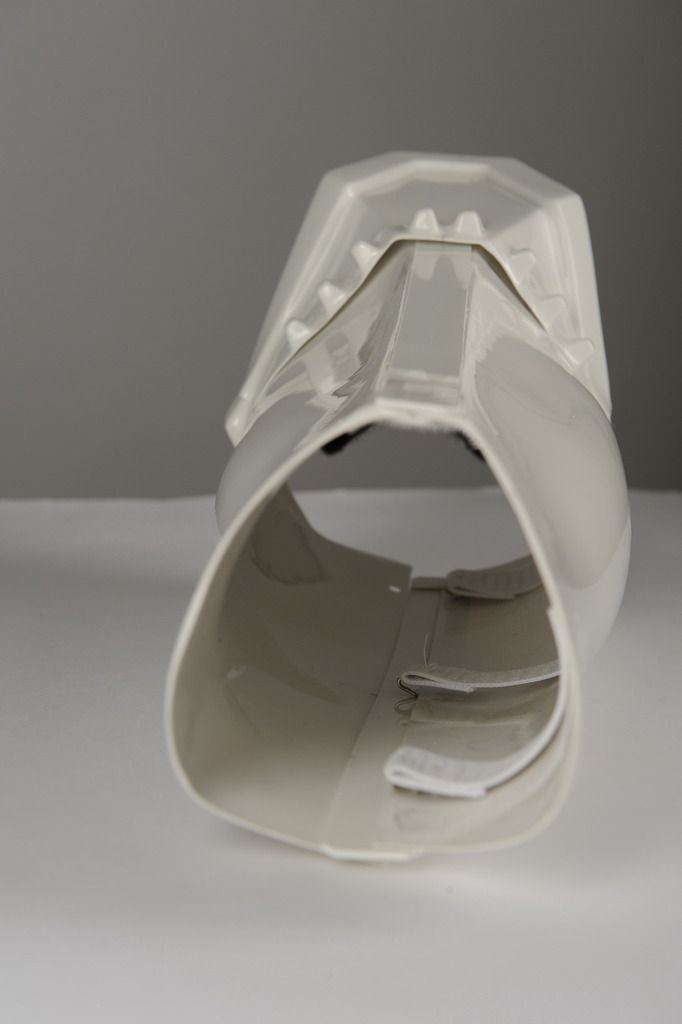
Sniper Knee Side
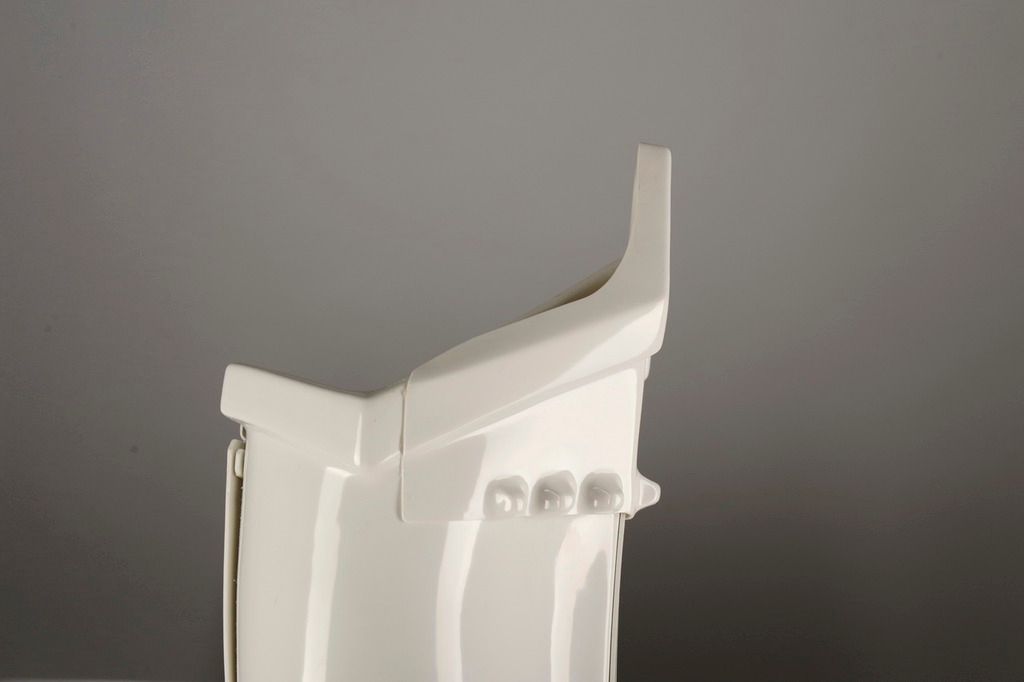
Sniper Knee Front
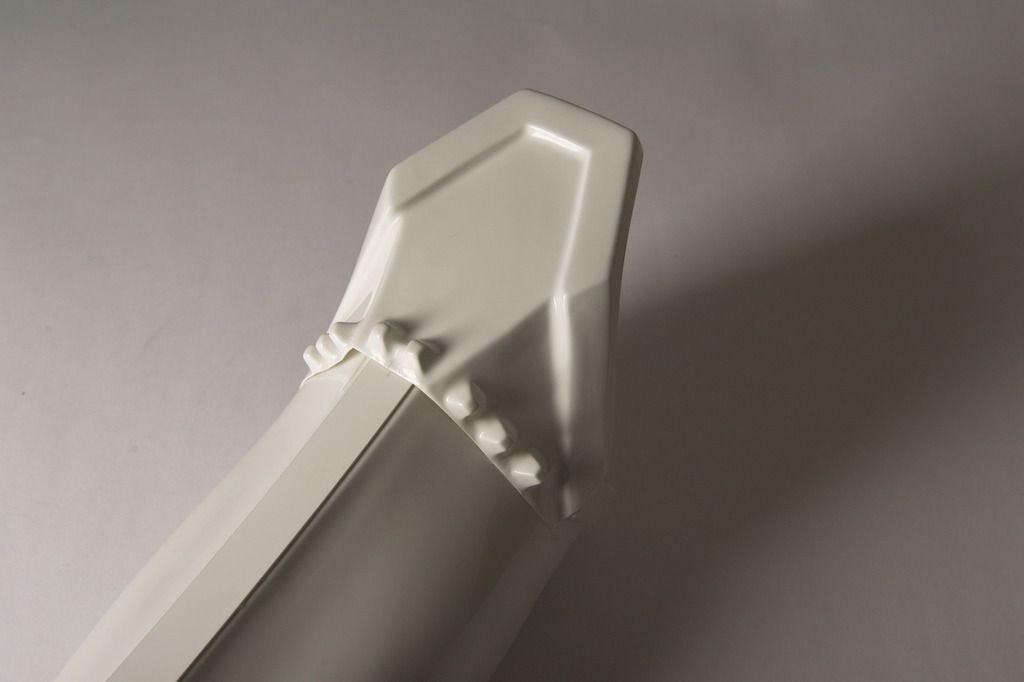
Thermal Detonator Screws

Ab Plate Detail
Left Side Body Detail
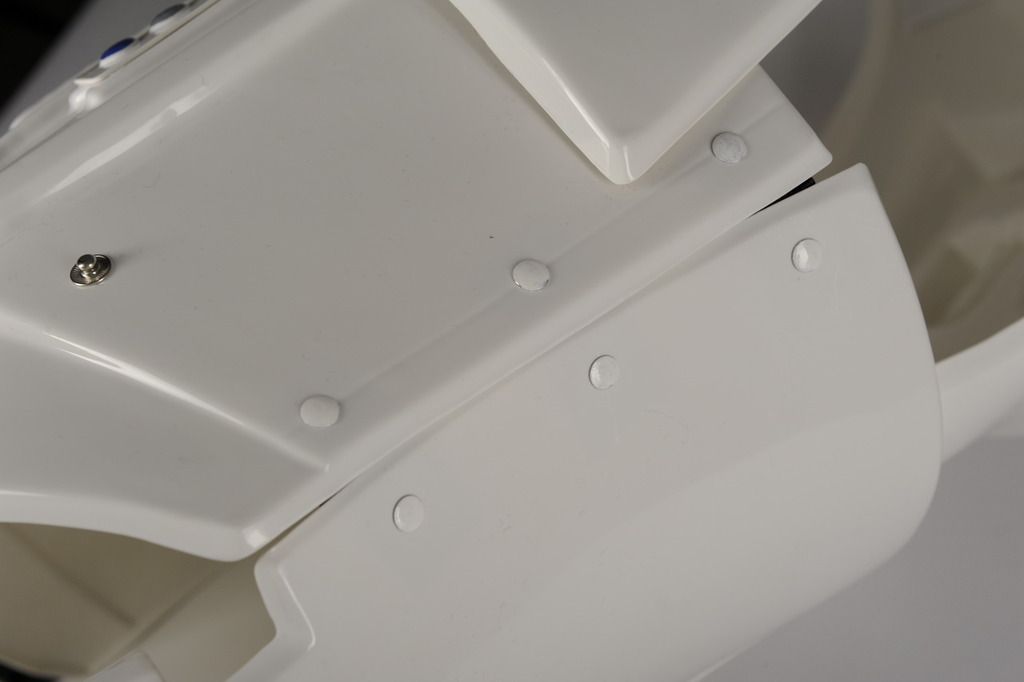
Right Side Body Detail
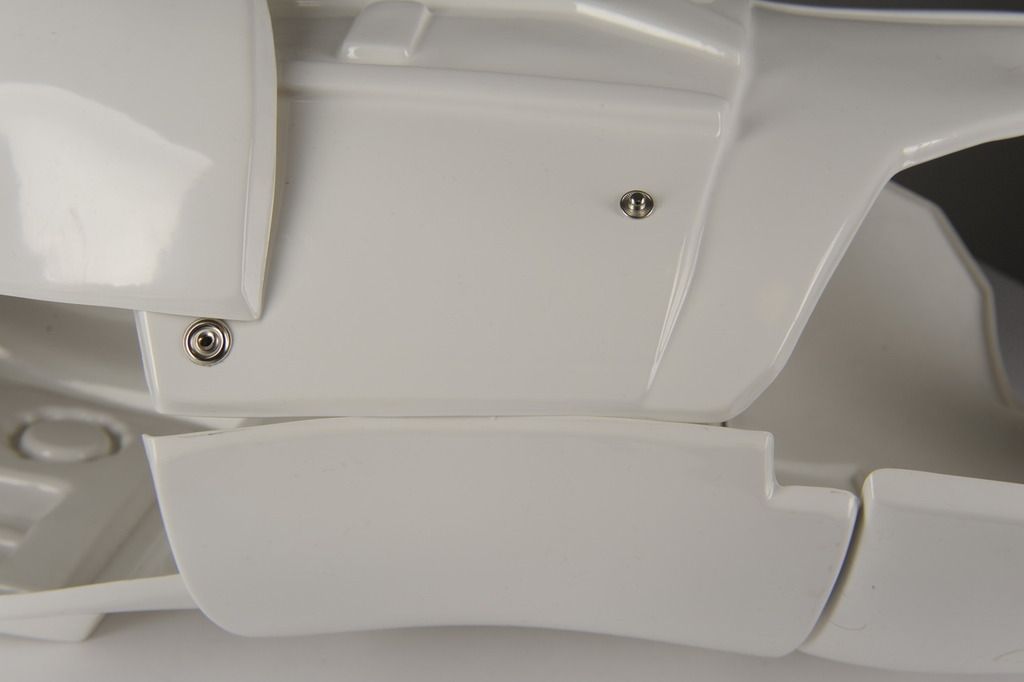
Thigh Pack Rivet
Crotch Snaps and Rivet
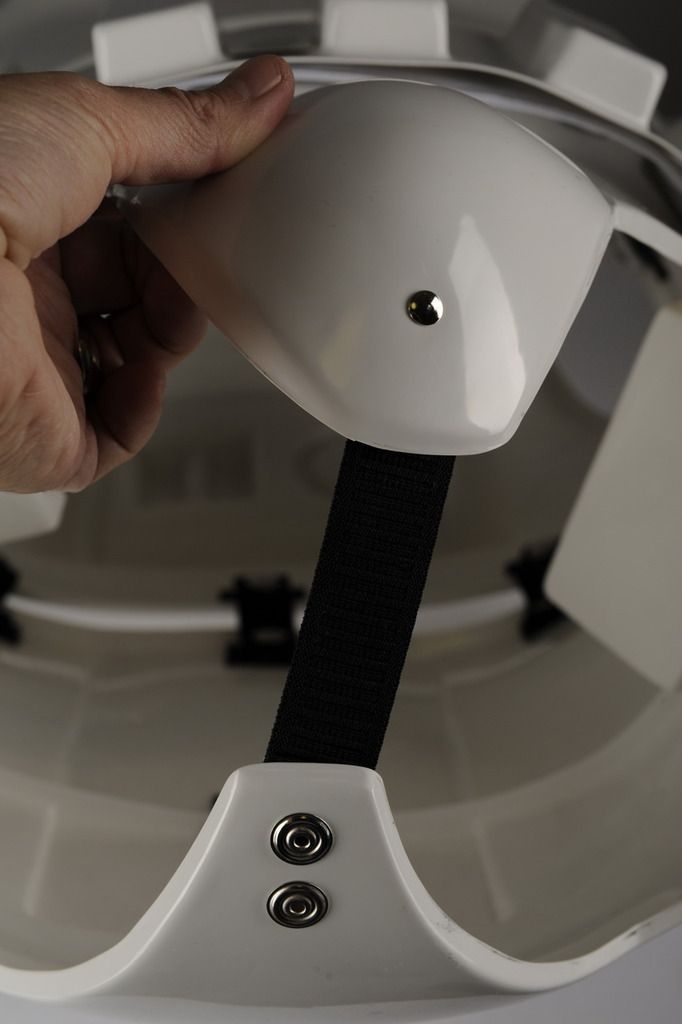
Shoulder Attachment and Elastic
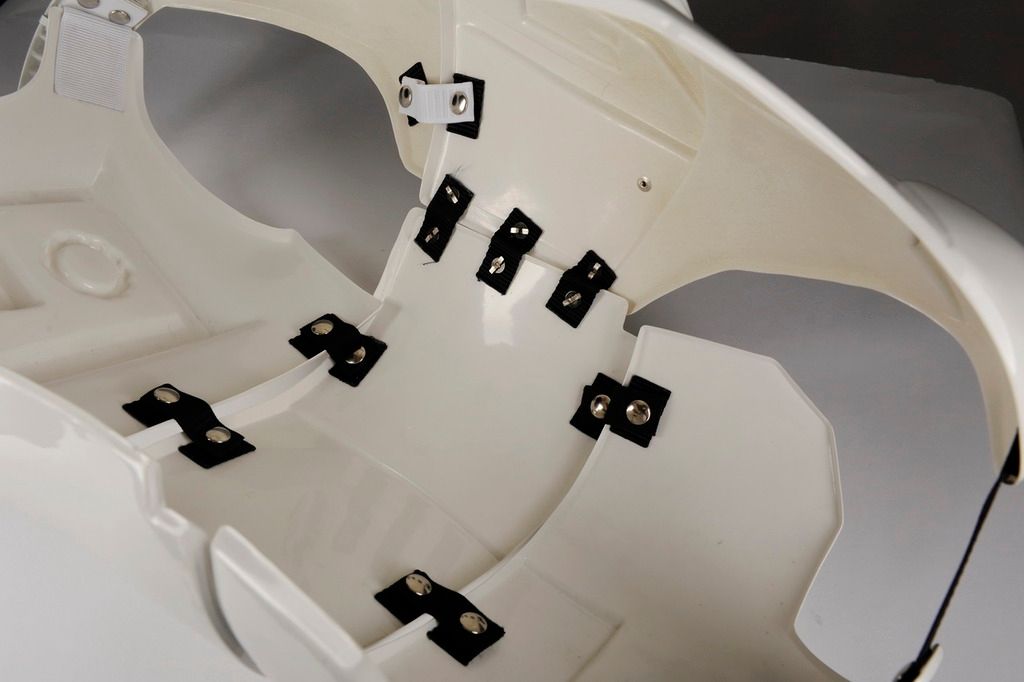
Interior Strapping
Blaster Rear
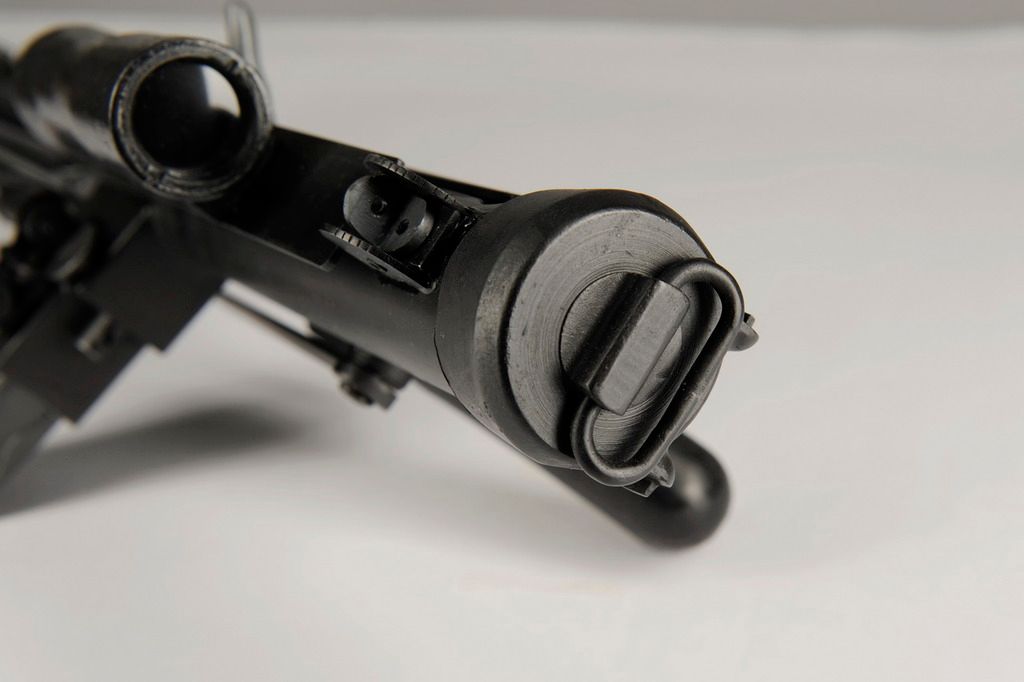
Blaster Muzzle and Folding Stock Detail
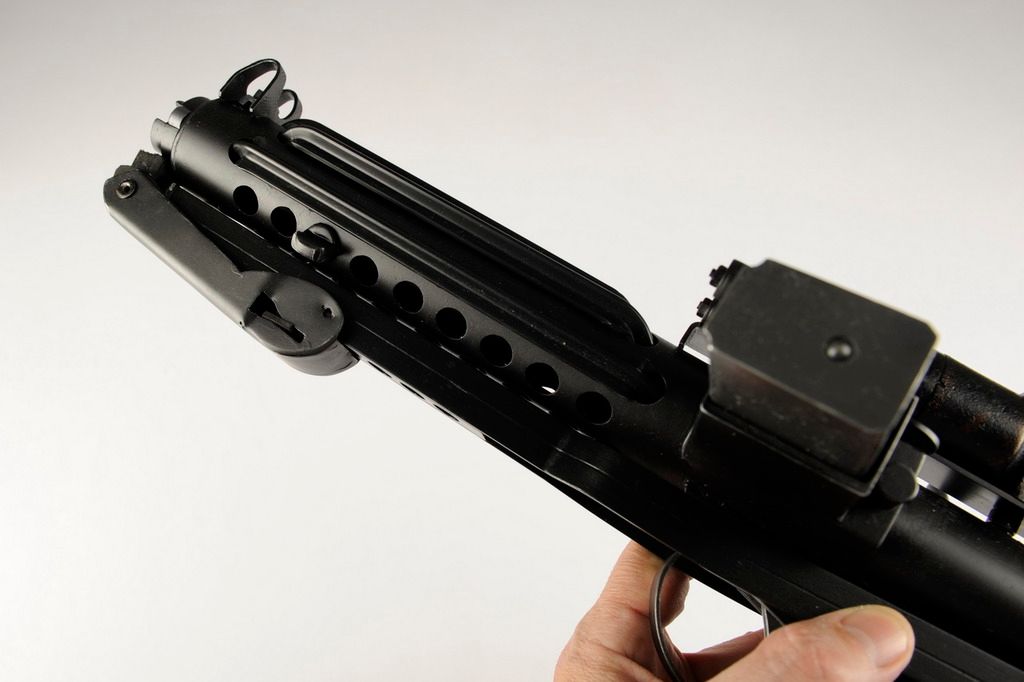
Blaster Right
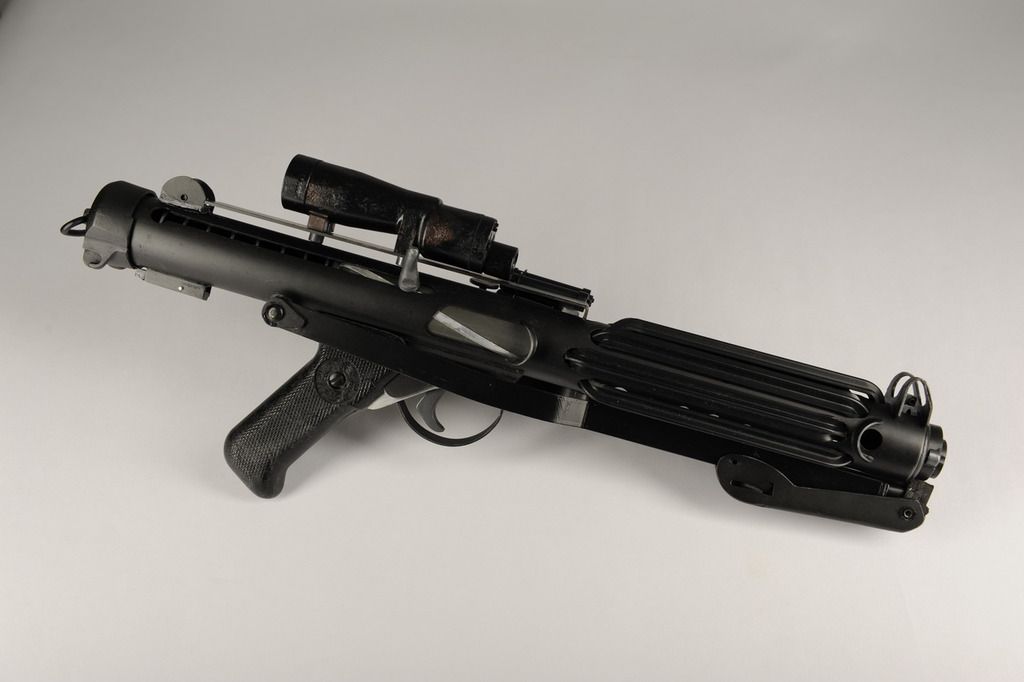
Blaster Left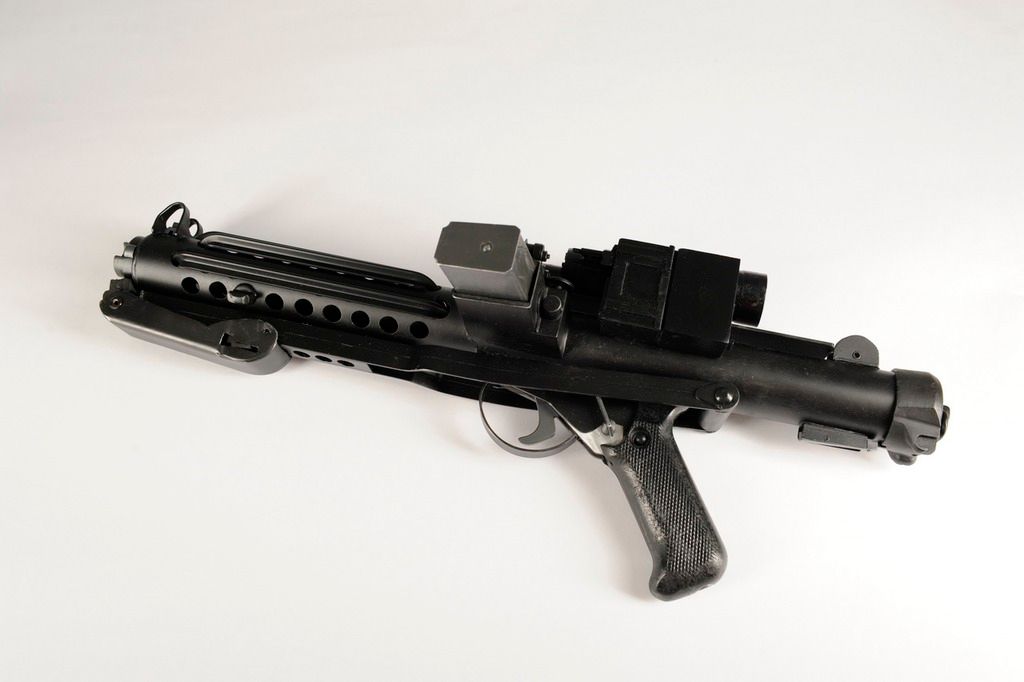
Blaster Detail Top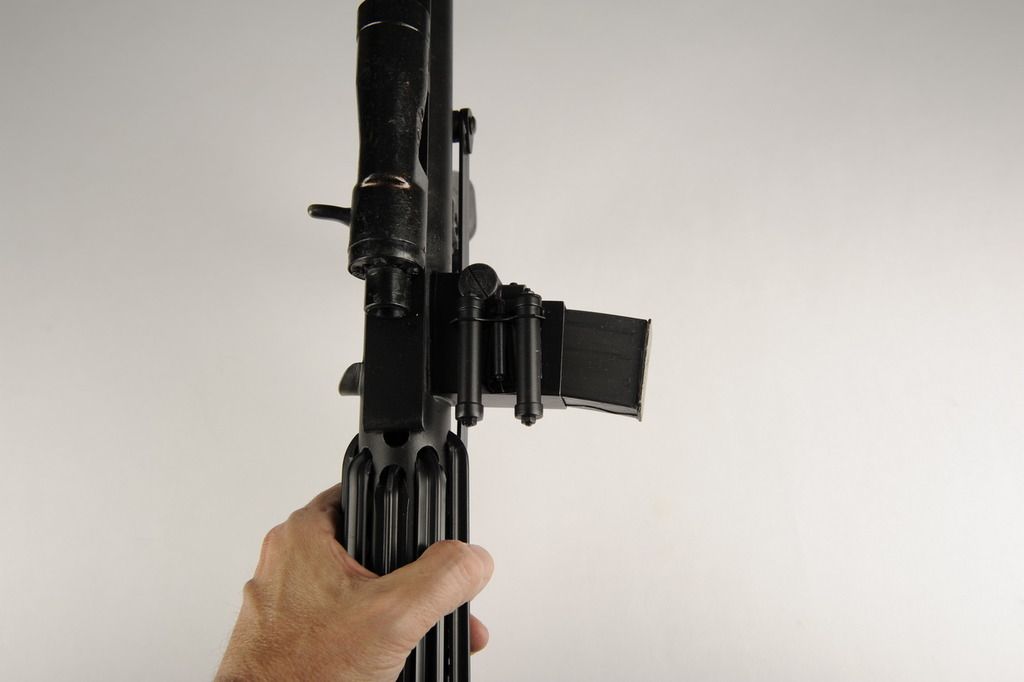
-
2
-
-
Welcome to FISD! As you know, there's a ton of info here. Keeping lurking and learning, it'll come in handy for the build but feel free to ask questions and be sure to share your progress for other lurkers too.
-
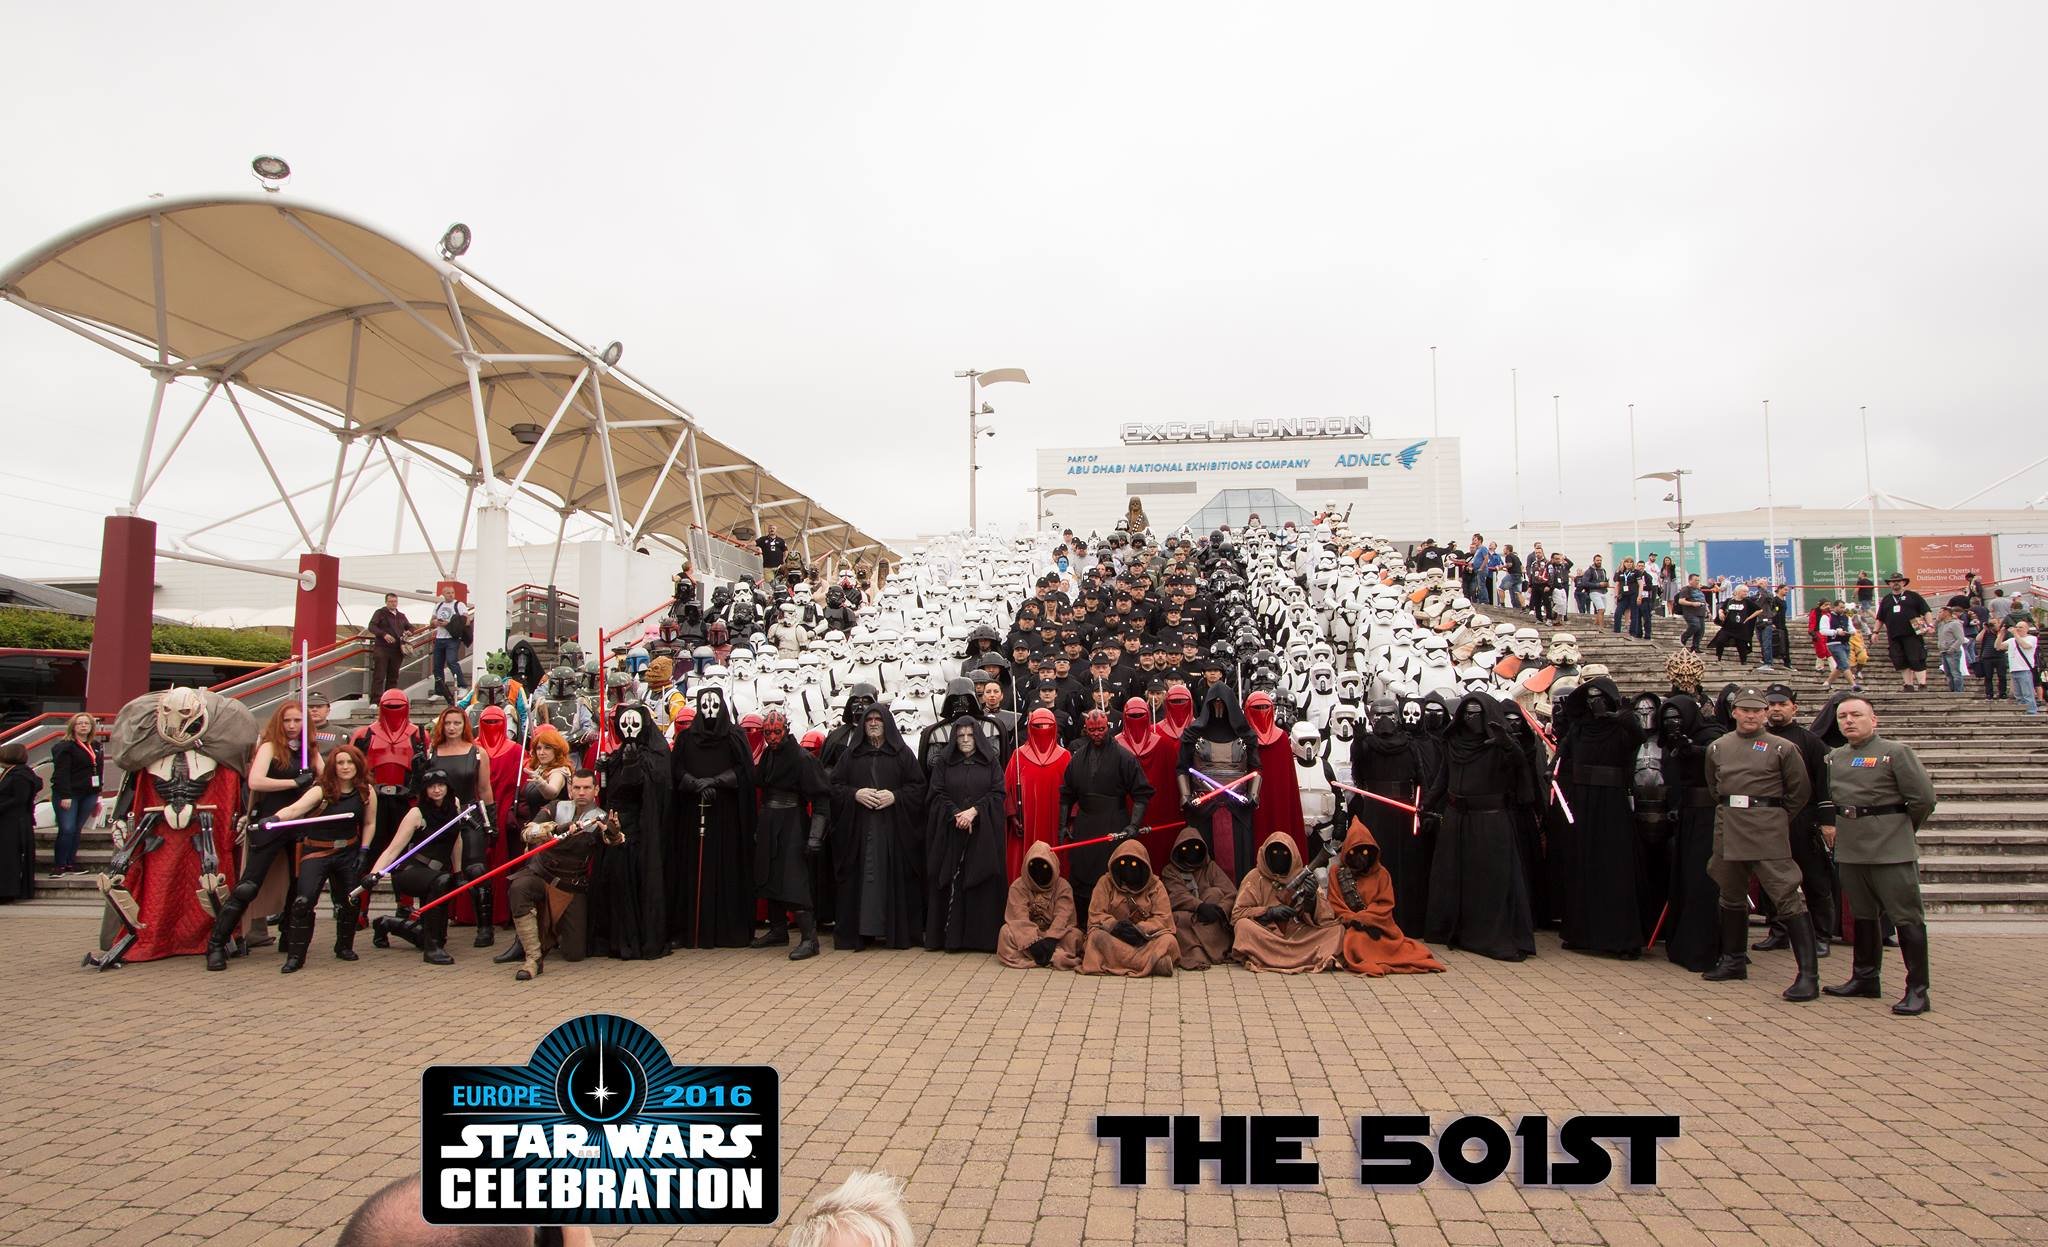
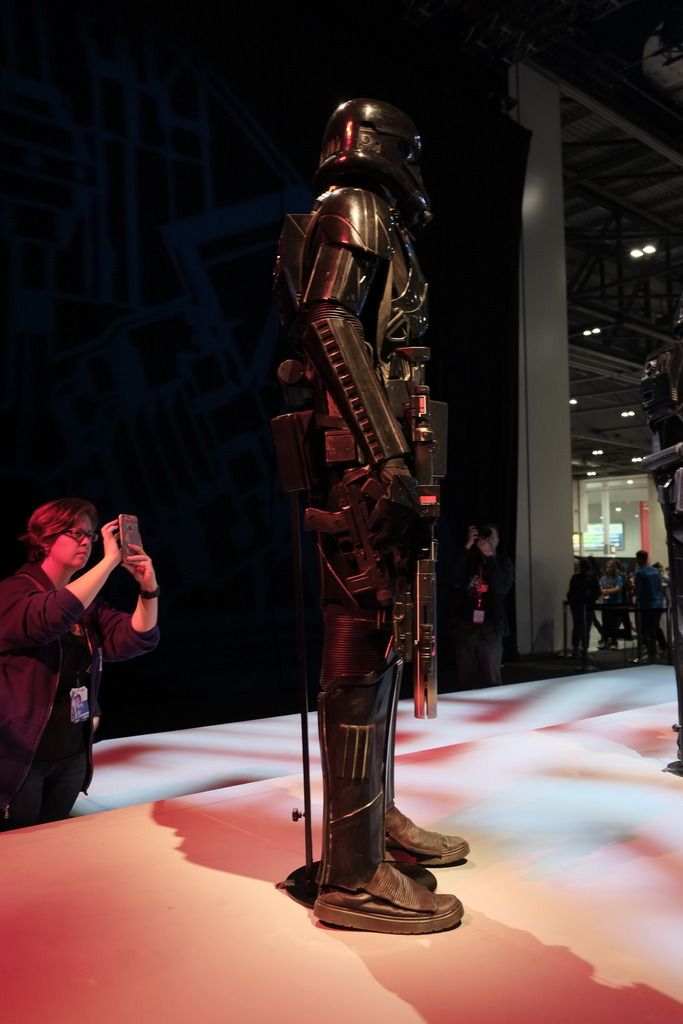
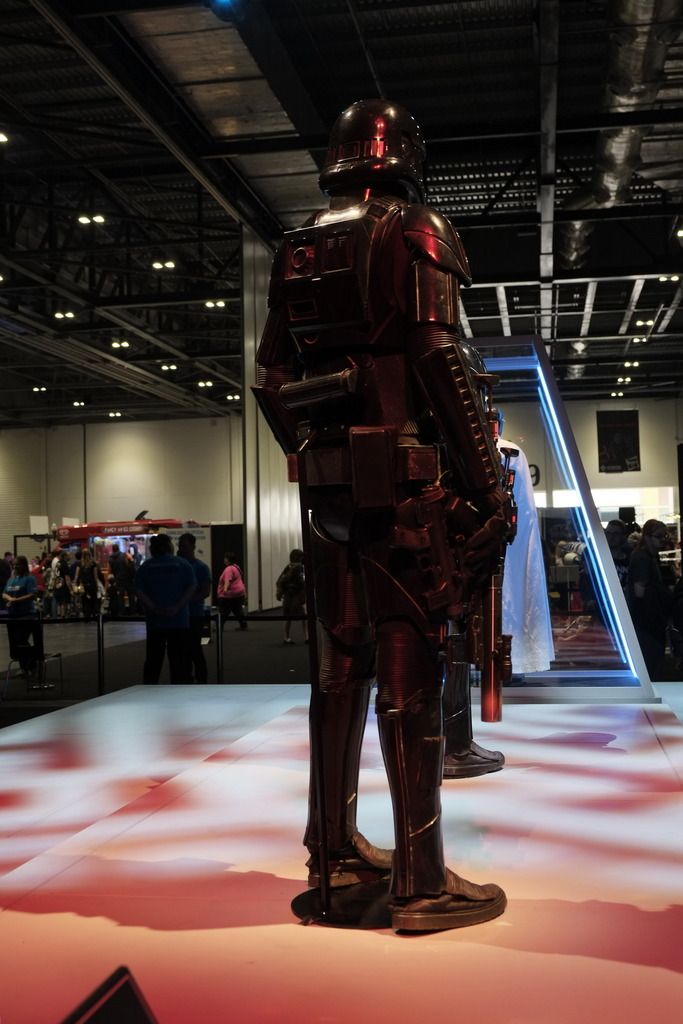
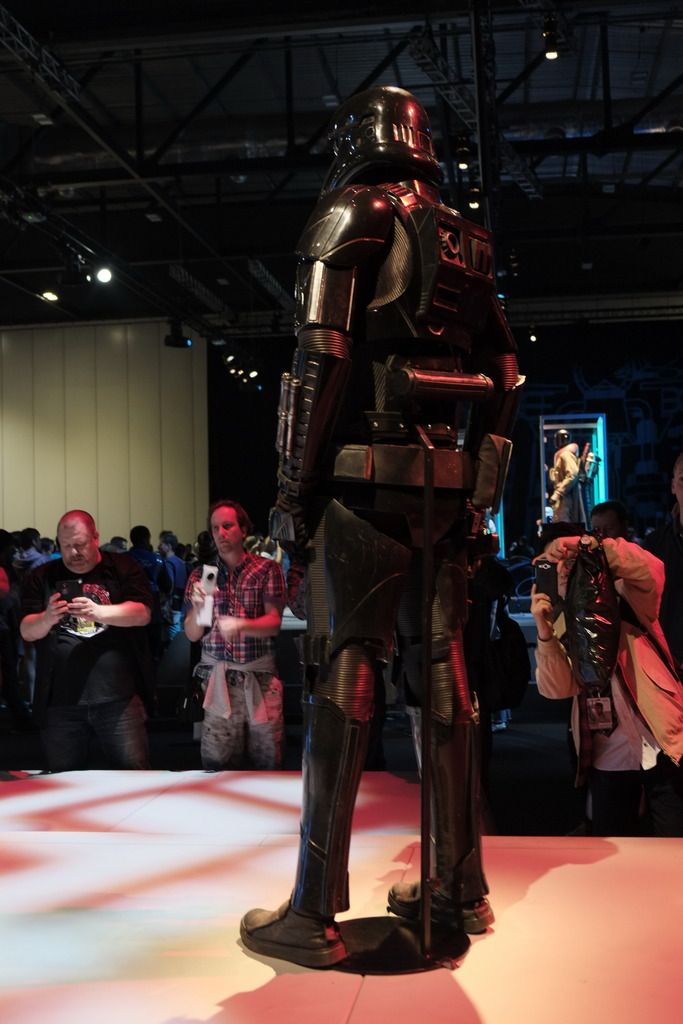
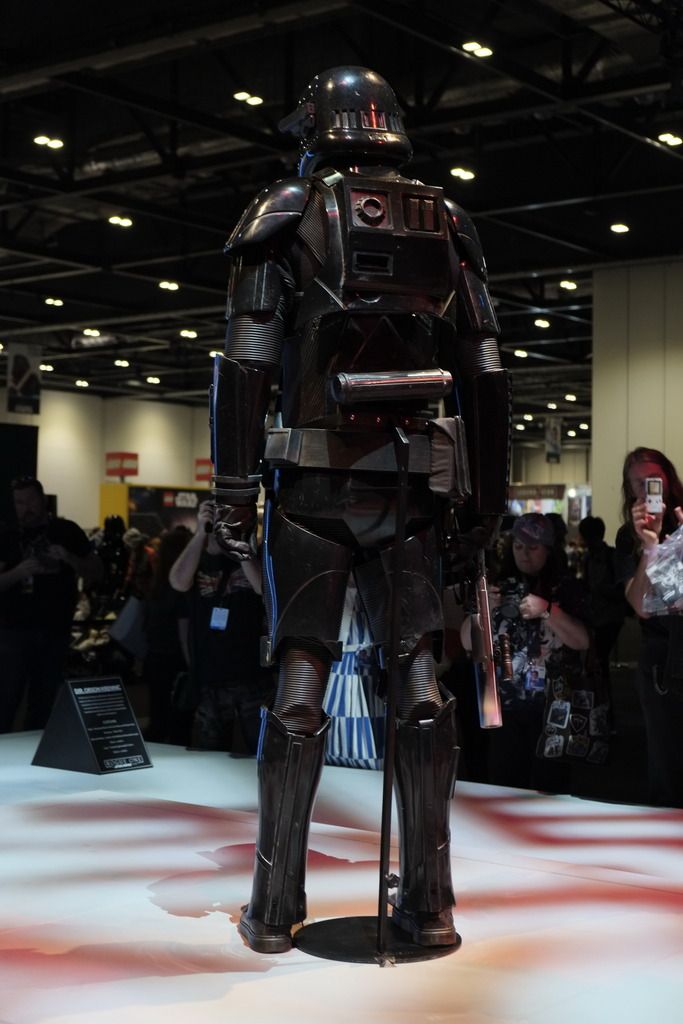
Adding my photos from London in hopes that they help with builds and research. I'd like to do this as my next build but we'll see.
The low light made for slightly blurry images but they still show a lot of detail.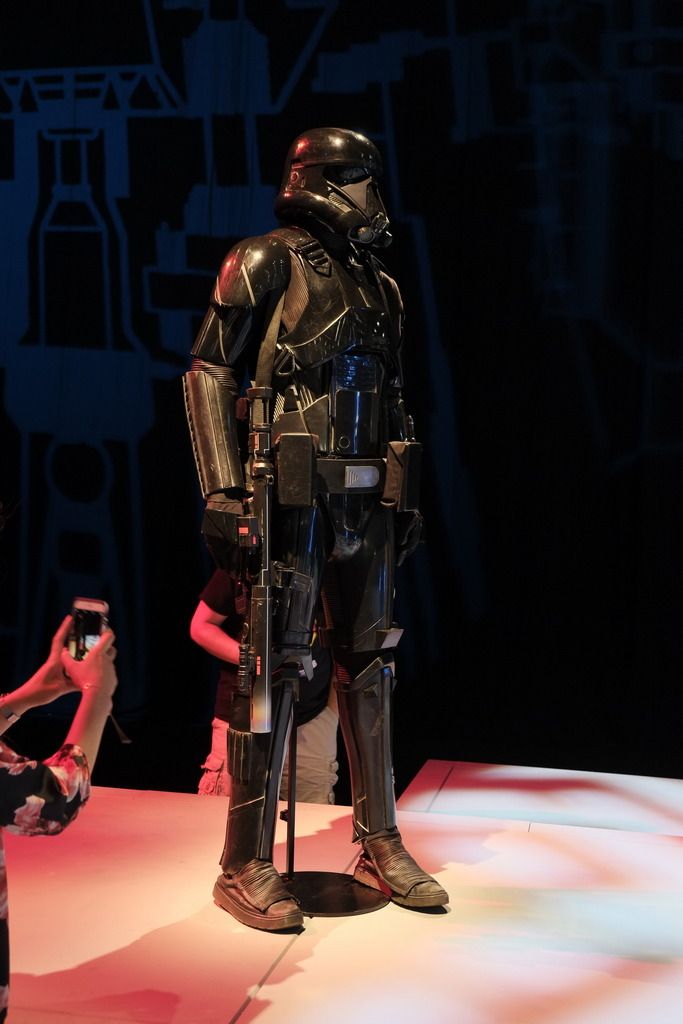
-
2
-
-
Done. Am I still in the running?
-
Thanks Andrew!
I appreciate the feedback.Herzlichen Glückwunsch Michael!
Vielen Dank!
-
Lookin' Good Daniel. Nice to see another TM here.


Cricket's RS Stunt Build (for the Vertically Challenged)
in ANH Build Threads
Posted
Welcome back!