
Engineering trooper
-
Posts
140 -
Joined
-
Last visited
Content Type
Profiles
Forums
Gallery
Articles
Everything posted by Engineering trooper
-
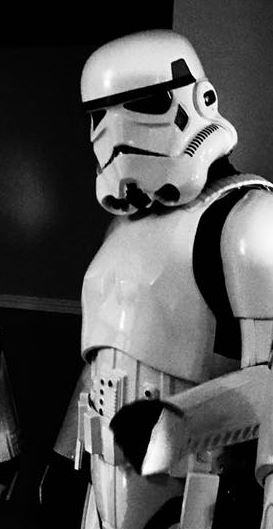
 Have been approved! TK12638 reporting for duty! Thanks to everyone for all of your help on this journey!!
 -
Please enable me for 501st access TK12638 Canadian Garrison https://www.501st.com/forum/memberlist.php?mode=viewprofile&u=15258 Thanks! Jim
-
Took Randy's advice and let the sniper plate sit for 2 days, made a big difference! Submitted my pictures today for approval, awaiting the decision... Here's some updated ones.
-
Pack is now complete, did a fitting today. (Antenna will be added back on when trooping, off for storage ) Fixed my ammo pack a bit differently: Used snaps on the main strap and a sewed strap to the ammo pack. See pictures. Now ready to use for submission to HWT!
-
So got the straps installed, with help from my wife and son (former stitching the ends, latter holding the pack to my armour for fitting) Did a fitting using Velcro to mount the approximate locations of the straps to confirm fitting before mounting them permanently. Changed a little for mounting, based on some advice from Joseph: Used 1/4-20 machine screws, 3/4 inch length with caps and a washer on each side for strength/durability and hex nut on end. My wife tripled the layers on the ends where the screws mounted, stitching that part together for a stronger strap mount. I used a 5/32 inch punch to do the holes in straps, 13/64 bit for the screw holes to the pack. Did a preassembly of the screw/cap cover and washer to the strap before mounting on the pack. Will be mounting the ammo pack strap tomorrow. One tip; I got my ammo packs empty, so used some tile foam (closed cell type for kids playroom) to put in each individual pack to fill it out. See pictures below, almost done! First fitting using Velcro: Final mounting: (Will need to reglue the foam...)
-
Unfortunately having a real hard time with the sniper plate move out, even using the foam. E6000'd the snot out of it, hoping it will hold... More to come.
-
Ok, so here are the pictures. Thought these were ready for submission, but noticed after getting out of armour that the sniper plate was under the thigh, so that is one issue that will need to be corrected and take new photos. So, take a look, and let me know what you think. Pretty close for submission I hope. Thanks for any input!
-
Ok, so round 2 (first posting crashed when internet went off, so here we go again!) More progress, ready to fit tomorrow, here's what I got done: 1. Built the metal strapping per Angie's recommendation. Some duct strapping, 1/8 inch rivets, Velcro, and Voila! 2. Finished strapping on the forearms, triceps and bells, got the alignment to cover strips, will see how it fits tomorrow 3. Reglued my one shoulder strap. Got a great tip from Brad: Fill the indents in the strap with spare ABS, will give more area to glue to the chest plate. 4. Got the cod piece remounted, will see what leg room I get tomorrow 5. Reglued sniper plate, seems to be better 6. Started cutting closed cell foam (play mat type) to help adjust my thighs and calves. Will see how it works tomorrow night. 7. Per Brad's recommendation, got white cotton gloves to use under the rubber ones. Saves the rubber ones from sweat and smell! Will do the fitting tomorrow night, and probably get an idea of how much to cut out of the back of the thighs for better mobility. Thanks to Tony for clarifying the rules regarding that part! And lastly, putting in my application tonight for my Stunt build...
-
Latest update: So I attended an Armour build party hosted by one of the Canadian Garrison's esteemed members (thanks Pickles!), and got a lot of feedback from our group on my build, ended up having a few things to change/update: 1. We cut my cod piece down by about 1 cm, seemed to help with spacing to my thighs which was an issue 2. Worked on issue with my forearms being a bit low/close to hands. Turns out I will need to add snaps/straps between the bells and triceps. That will move the forearms up. Also will need to move the snaps between the forearms and triceps in order to line up the cover strips 3. Turns out my sniper plate was on wrong, up to high, so I took it off, we tried it on with a new lower position, and the clearance to the thigh was a lot better. Regluing it tonight, see pix. 4. Glued down my hand plates with a different type of glue to get better retention as they were coming up 5. My shoulder elastic was being pulled out by the bells, so have a solution provided by Brattie (listed on her build thread, page 58), adding metal strips to the shoulder straps to secure them and help keep the shoulder bells in line. I will also need to shorten the bell to shoulder straps quite a bit, doing that next couple of days 6. Got a trick from the group to keep my calf armour straight: Put Velcro on the inside of the calf piece and on the boot outside. Keeps them straight, covered by the shin armour, so nothing to see! 7. Did a fitting with my belt in the right position, seems to work so going to put on the snaps to get that lined up 8. Glued down my S trim as it seemed to come off without securing it down 9. Got some acorn nuts to cover some of the bolts sticking out in my bucket (Thanks Brad, great idea!) 10. Added a center strap to pull my chest plate in a bit. Will take some adjustment to the other straps, but overall gives a better fit 11. Solved the kidney/posterior plate issue by taking out one snap on each side and putting in a Velcroed web strap in its place to secure that portion. We'll see how it works to keep the overlap from happening. 12. As to the issues with the legs, after putting in some foam, seems to fit the thighs and calves a lot better 13. Cut out the return edges on my forearms and softened up the cover strips to be more inline with the edges of the armour. 14. Fixed my thermal detonator to move the clips out as required for EIB status. On issue that was discussed was mobility, as I still seemed to have issues with moving my legs. The consensus was that I should cut out the backs of my thighs, as Brad did per the attached picture. I'd appreciate feedback on this with regards to EIB/Centurion as I know the rules are changing, but this is probably going to help with a my overall mobility and doing stairs. Anyway, rivets seem to be good, button plate is on and painted. A few more tweaks and I think I am ready to submit. Next picture is of Brad's thigh armour. Want to make sure this is ok as asked above:
-
Thanks for the input Tony, always appreciated! So lined up the markings for my rivet holes, would appreciate input to confirm got it right this time! Also, another lesson learned: An emery board with different grit types works great for sanding down the ABS plastic. Took a page out of my days working on my 76 Nova, used a heavy grit to take of the first layers, then moved more to finer grit. Will polish after all holes are fixed. Another thought for the rivets: Think I may use one 2 inch strip of elastic for the rivets, that way the ab and kidney pieces will be fixed horizontally. Here's a picture of the proposed rivet holes and the sanded off originals..
-
Ok for anyone still following, been on hiatus with the backpack, as I had gotten to a point in September that couldn't do much else without my armour. Since November been working on my ANH Stunt build, and am almost finished, so was able to start up on my HWT pack again. First made sure that the hole fits with the back of the armour, and now am putting in the foam cushion, see picture. Next steps will be to put on another layer across for the foam, creating a cross cushion, then to the strapping. Moving along again!
-
Latest work: 1. Applied the ABS paste, but seemed to pucker a bit on the outfacing side of the armour, so had to add paste on that side to get a good surface. Luckily the first pasting made for a good base. Pictures attached. 2. Based on Joseph's and Tony's feedback, trimmed the cover strips on my forearms at top, bottom. See attached. Note: pictures seem like the strip is going past end of the armour, but that is just a trick of the light in my shop. 3. Reversed the Chicago screws on my belt 4. Remeasured my proposed holes for redoing the rivets, based on Tony's latest post. See attached, think I got it pretty close this time! 5. Need some feedback on what return edges to remove on the forearms. Sorry, didn't post the other picture showing the facing that is by my hands, see attached. So want to sand the glued holes next. Any suggestions as to weight of sandpaper to use to minimize scratches? Next steps will be to redrill (once confirmed that hole positions are good), and put new rivets in (when they arrive with the inlaws next week. Thanks again Joseph!). Also need to glue on the snap plates for my belt, get that positioned and cut my shins to a shorter length. Getting closer, but will take a bit more time... More lessons learned: 1. Always use a new blade to cut plastic (might have mentioned this one already..) 2. Taping around parts helps to prevent cut marks if you have to cut pieces that are already glued 3. To fill holes, you may have to apply the ABS glue on both sides, as even though the tape on the front was pretty tight, got some puckering, (and residue from tape ), so had to fill from front also. 4. Found you can reconstitute your dried ABS glue by adding a little Acetone to it Pictures:
-
Thanks Tony will remeasure. Did the ABS plastic paste. One lesson learned: Double check you taped the right hole!! Had to remove some paste, as can be seen in the pictures. See pix with paste and hole filling. Any idea of how long it is until the paste sets?
-
Update: So I removed all of the rivets last night. It was very kind of Joseph to send another set via Post Express so I can get new replacement parts quickly, as 5 of 6 were destroyed in the removal process. I measured and marked new potential hole positions, shown in the attached photo. May seem a bit off on the one side but that is because the plastic wanted to pucker up, hard to keep flat. I also added some marked photos of where I thought I needed to remove return edges on my forearms based on Joseph's feedback, and a question on the same as to how to cut the closing strips to fit the mismatched end of the forearms. See attached. Will probably work on pasting up the holes tonight, but want to get confirmation on the other parts before cutting/drilling new holes. Thanks!
-
Thanks to everyone for the feedback! Going to work on the updates over the next few days. May ask for some confirmation before cutting return edges and such.<br><br> Will work with one of my future compadres from the Canadian garrison on the calf trimming. <br><br> More updates to come (and probably more questions!)
-
So Tony (Ukswrath) mentioned that I need to shorten my calf armour. Any ideas on how to do that, and if so, can I still make Centurion , as I would assume that the edges have to be trimmed off?
-
Thanks, appreciate the advice to fix it, kinda like Bondoing my old 76 Nova!<br><br> Just so I get it right this time, if I understood Christine's post for the rivets, I need to move the bottom one to about 20 mm from bottom edge, and estimate the middle distance for the middle one? Want to get it right this time, don't want my armour to be Swiss cheese!
-
Thanks Christine, appreciate the clarification. <br><br><br> Now my dilemma: Assuming I have to relocate 4 rivets, will have 4 holes left behind. How do I fix that?
-
Thanks for the feedback Joseph, will start on the return edge cleanup and the other suggestions ! One question back: if the edges of the armour don't line up evenly (as in the case of the forearm, which is at a bit of a slant), how do you trim it to be even?
-
Thanks to Christine and Tony for initial feedback! I think I understand what is going on with the rivets: They are a bit off because the rivets are a bit loose, so in the pictures, the sides shifted and the tops of the armour didn't align. I think that is easily fixed by getting the sides aligned and further securing the rivets. Hope that will take care of that issue. Here's a picture of the armor showing the lineup, hope that it shows the alignment a bit better:
-
Ok, so here is first full fitting. Couple of points to note: 1. Belt is not yet secured to the front by snaps. Wanted to see the right position, so would appreciate any input, think it needs to go up some? 2. Noticed my right tricep is sticking out. Easily fixed. 3. Button plates not on yet: Still cleaning up the paint.. 4. Some gap on right side, can tighten up the snaps/elastic on that, and on bottom of left side. 5. Drop boxes need to be moved, just not sure how far out? Would appreciate any input/corrections/advice as I think I am pretty close to ready for submission. Also, as I am going for Expert Infantry/Centurion, please add any comments that would help for that submission. Will take all advice, and send updated photos. Thanks!!!
-
Ok, so going to post a couple times today, one with what I worked on, and the other with initial photos of my build. So, here is what I did up to now: 1. Finished shoulder straps adjusted the elastic snaps for better fit 2. With help, sewed on the snaps for the bell to shoulder straps (used Unique brand that is in Canada, 15 mm size) 3. Tied on the white elastic straps to hold the floating shoulder straps in back ( used Tony's (Ukswrath's) Anovos build for reference, simple knot around the shoulder part) 4. Rivets on the left side. This one was a lot of measure twice, cut once type. To make sure I got the best measurement, flattened out the plastic using clamps. See below. 4.1 Used guidance from Tony's Anovos build and a photo reference from a movie prop (attached) to finish it. 4.2 Made web plates with holes 20 mm across to fit. As I was using Joseph's split rivets, my punch hole was a bit smaller than Tony's (3/32"), used 9/64's drill bit for armour per Joseph's recommendation 4.3 With help from son #2, used a chisel to bend the rivet edges down, then a tack hammer to bend them in place 4.4 Testor's white to paint the heads 5. Glued the rubber hand guards (Justjoseph's) onto the rubber gloves (Trooperbay). Used Tony's method to fill the gloves with foam, rubbing alcohol to clean both surfaces, E6000 to glue them, and rubber bands to secure 6. Was looking at a for sale mention of a kit, and I believe it was Joseph that mentioned using scrap pieces for reinforcing strips inside of the calves. As I noticed my front strips starting to come off, took his advice, put strips inside both sides 7. Still working on cleanup on the button plates. Mineral spirits work well, but just not quite there yet... 8. Mounted fan system (nice setup from Tony!), Velcroed it in. Put my bucket on for 15 minutes just to see how it worked, and was a lot more comfortable! Couple more lessons learned: 1. Snap removal: Made a few adjustments, so had to remove snaps. I used a pair of pliers and channel locks on each side, after smashing the center post so it would more easily slip off. I have heard of other methods using a drill, but that didn't seem to work for me. I singed the edges of the hold with a candle to keep the fraying down. 2. Tab mounting system on right side: Got this recommendation from Trevor from Canadian Garrison. Helps to align the armour on right side. 3. Pay attention to the orientation of snaps when mounting them (especially the cod rivet !) 4. Extra length on your elastic straps is a good thing, helps for adjustments So here are the pix, then next post in a few will be with full armour (excepting button plates ...)
-
Ok so haven't posted in a few days again, but got a lot more done! 1. Got the belt done, snap system mounted, drop boxes on, and the holster mounted. Used Ukswrath's dimensions for the elastic on the drop boxes, and mounting hole locations for the holster. Contacted Steve (Gazmosis),who crafted the holster to get approximate hole locations (put so that about 1 inch of strap is visible below the belt). I used Chicago Screws for the mounting, recommend to use a 3/32" punch for the holes Pictures below. I may have to move my drop boxes as I got feedback they should be out a bit farther. 2. Got the elastic strapping done for the shoulder mounts and glued the plastic shoulder bridges down 3. Put in some snaps on the left side, as I am concerned with my girth that the elastic I am going to use for the rivets may not hold, so it is extra. 4. Strap mounted for the cod plate using rivet. Lesson learned: I used a chisel and tack hammer to install the rivets, seems to work for me. Going to fold over the extra elastic and sew it down to protect me from rivet sharp edges. 5. Worked on painting my buttons on the ab plates. First time using the templates from Trooper Bay didn't work so well, so did a lot of cleaning off mistakes using mineral spirits. Tried using a 10 mm washer as a template with some success. 6. Sized a piece of foam to go behind the sniper plate. Recommendation from a Canadian Garrison member (Thanks Trevor!). Keeps the plate from rubbing on the thigh. If cut down enough, and dyed with white shoe polish, is nearly invisible. 7..Mounted the clips on the thermal detonator, painted screws. I used a screws from a hobby store that are for a remote control airplane (Thanks Mike Brace for the recommendation!), size 6-32 1 1/4 ", see picture. With that type of screw, use a 7/64" bit. Black Humbrol paint (black gloss #21) to cover the screw head. Recommend to paint the head before screwing it in fully, so you don't unintentionally miss on your detonator! Next steps: Bell straps to shoulders, recheck dimensions for holes on rivets (now with secure strapping) then mount rivets, securing gloves to hand covers, mounting fans in helmet, final repaint of buttons and gluing plate on front ab, snap mounting for belt to ab. Then a full fitting for review on the forum, adjustments as needed, polishing (Novus #1 and #2 per Randy's recommendation), then submission!
-
Further updates: Had a flurry of activity over the weekend and last night, got a lot more done, can almost see the finish line! 1. Tested out my fan system, seems to work great! (Thanks Tony!) 2. Did a fitting for the S gasket on my helmet. Let me tell you, that stuff is like working with an anaconda, does not want to go where you want.. 3. Assembled my thermal detonator 4. Got more snaps set, almost done excepting the left ab side, need to find out best fit for ab to kidney: See picture, a bit of a mismatch between top and bottom 5. Mounted cod piece split rivet/measured for the strap between front and back (Thanks Joseph for the advice on drill bit size!) 6. Got thigh ammo belt mounted using split rivets. I had to cut about 1/4 inch off of each side to get it to fit, so anyone who has the RT Mod kit check the length. 7. Measured and mounted the strapping between forearms and biceps. Hooks for bells work great! 8. Worked on strapping between chest and back plate, glued in the shoulder straps to the front 9. Mounted snaps on my belt. As I am planning on switching the plastic ammo part between my ANH Stunt and HWT setup, used a snap system. Seems to work better than the Chicago screws. Will have more in next fitting. 10. Put the sling on my T-21. Can't wait to troop with it! A few tips I learned along the way: 1. Use mineral spirits to take off paint. Got this tip from one of our Canadian Garrison members (Thanks Steve!) 2. Use Popsicle sticks to clean off excess glue from cover strip areas 3. Use a candle or lighter to sear the edges of your elastic straps. Helps to keep them from fraying More to come soon!
-
Ok, so after a flurry of activity the last few days, have a few updates: 1. Snaps are finished for front abs to cod piece, back to posterior plate 2. Did the snaps on the right ab plate and for the posterior plate (thanks to Ukswrath for his video on Youtube on how to do the snaps for ABS plastic, and to get the position of the right side snap ( 20 mm in each dim from edge, Anovos build)!) 3. Snaps set for biceps and forearms 4. Painted the buttons for the Ab plate and the pipe for my thermal detonator (Side note: The cover template I bought from Trooper Bay is awesome for doing the painting, see pix) 5. Glued in the elastic for the bells as well as the snap plates 6. Did a fitting and got the snap plates done for the garter system 7. Did some testing on using Chicago screws for securing my belt. Want to be able to swap it out for my HWT belt. Remember: Spare ABS is your friend. See the prototype I did in the pix, showing how the cover button fits for the screw. Lots of pictures attached. Getting near the finish line, but a little concerned about the stomach area, going to need to get to the gym a lot more, or a lot of sucking in during trooping! Prototype fitting for Chicago screw with ammo belt cover 20 mm in for each edge for the snap center
