
CrookKnight
-
Posts
1,327 -
Joined
-
Last visited
-
Days Won
5
Content Type
Profiles
Forums
Gallery
Articles
Media Demo
Posts posted by CrookKnight
-
-
Welcome aboard.
Sent from my SM-G930P using Tapatalk -
Exciting times when you waiting for your first BBB. Welcome. Let us know if you have any questions.Hello all my name is Nate. looking to get my first set from TM was hoping someone nearby (Grand rapids , Rockford, Belding , Greenville) may have a TM set of armor I could look at and get a basic look of what I was getting into and anyone with tips and tricks to getting everything fitted and trimmed when Big Brown Box day arrives! Excited to meet others in the garrison and start trooping and making friends .
Cheers , Nate
Sent from my SM-G930P using Tapatalk
-
I make these to order. Each pack takes me about 4 weeks to print and then a couple weeks to finish. If you are interested in one, let me know. This is quickly becoming my favorite back.
Sent from my SM-G930P using Tapatalk -
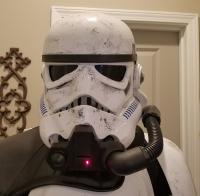
I just finished this pack and wanted to share it with everyone. This is a Full-Size Wearable Replica of the Rogue One Jedha Patrol Backpack. All parts are 3D printed and painted. This is very light weight. I posted a build thread on MEPD if you want to see it.
Here are some pictures of the final product. These are now for sale.


-
 2
2
-
-
11 minutes ago, gmrhodes13 said:
Looking forward to seeing the armor, I've heard of them but not seen anything from them as yet.
The wait for the BBB is unbearable
")
Tell me about it. I cannot wait. It is not the cheapest armor, but it is high quality and painted in high gloss.
-
I have armor coming from MIMIC in the UK. The armor itself is made from a high quality fibreglass cloth with a perfect gel coat surface. All parts will be painted. I will still need to fit it, add the strapping, belt, boots, under armor, etc.... The new Episode VIII helmet will follow about 1 month behind. I should be receiving the armor in a couple of weeks. So I will probably start acquiring the soft parts. NOTE: After a year of waiting, I still have not received the second half of the armor.
THANK YOU KB PROPS for working with me and others that got taken advantage of by MIMIC and getting us armor at a great price.
So this armor will be a mix of MIMIC's Fiberglass and KB Props ABS.
Below I am going to list what vendor I am purchasing all of the items from:
Hard Armor: MIMIC (First Half) KB PROPS for second half of armor. https://www.facebook.com/KBProps
Helmet (TLJ): TKD Props - https://www.facebook.com/TDK-Props-537706609725029/
Helmet (TFA): Anovos
Gaskets: Geeky Pink's Phantastic Gaskets - https://www.facebook.com/GeekyPinksPhantasticGaskets/
Boots: Crow Props - https://www.facebook.com/groups/108653819216581/?ref=br_rs
Gloves: Crow Props - https://www.facebook.com/groups/108653819216581/?ref=br_rs
Belt: Premium First Order Belt Kit (Darren aka JAFO) visit http://www.whitearmor.net/forum/topic/36882-premium-tfa-fotk-belt-kit/
Cape:
-
YesThink you could email that to me?
Sent from my SM-G930P using Tapatalk
-
I have about four of the pages on PDF. When you print it out a couple hundred pages long. It is not everything but it is a lot of what he did.
Sent from my SM-G930P using Tapatalk -
Hello and welcome aboard.
Sent from my SM-G930P using Tapatalk -
Hello and welcome aboard. Glad to see you are a huge fan. You will enjoy this process.
Sent from my SM-G930P using Tapatalk -
Hello and Welcome aboard. If you have any questions, feel free to ask.
-
Thanks for the update.
It's still in progress. If the applicant was building their pack while the CRL was in transition then technically they could be grandfathered in. Ultimately we leave it up to the GMLs but without a solid CRL to refer to telling an applicant no antenna is a hard push.
Sent from my SM-G930P using Tapatalk
-
Hello and Welcome Aboard.
-
Has the CRL been revised yet? On the 501st page is still looks the same.
I am asking since we have someone in the Carolina Garrison submitting with an antenna and from what I can tell, they are still allowed.
-
Do you still sell the ROTJ Decals?
-
Hello and welcome to FISD. Please feel free to ask us any questions you may have.
-
Anyone know where I can find the Helmet Decals for the ROTJ Bucket? I am going to build a ROTJ Bucket from WTF.
-
Welcome to FISD. Just take it slow and 1 step at a time. You will get there.
-
1
-
-
Welcome to FISD. If you ever need anything, please feel free to ask.
-
1
-
-
Welcome aboard. If you have any questions, feel free to ask. It looks like everyone else gave you great advice to follow.
-
3 hours ago, Daetrin said:
I like it a lot, and will have to do that for my pack. I like that it looks very easy to take on/off. Another option is for the top to not be adjustable, so just the bottom needs to be.
Good idea on the top not being adjustable. I think I will make that happen.
-
Here is what I have come up with for strapping the pack to the backplate. I like this option, since it will allow for easy removal and placement. I would probably still use with magnets just to hold it in place as best as possible.
I cut (4) slots into the base plate. Inserted the white 3/4" nylon webbing. I used the black plastic slip buckles just because it was all that I had. For a real pack, I would do with out them and either glue the fabric together or sew it. The black hooks holding the plate onto the armor are actually from a bike rack system that goes on the back of a car. I ordered these online and they can be painted white so they do not stick out in great detail.
This will work great and keep the pack on, even if someone bumps into it. I will have the base plate redesigned to allow for these 4 slots to already be present. In this picture, I used a sodering iron to create the slots.
This is the first picuture. My next one will be without the black pieces and no extra nylon webbing. Should blend pretty well and not stick out.
----------
As you can see, I did not have it pulled completely tight. The black sliders prevented me from doing that.
-----------
---------
----------
Thoughts?
-
On 7/22/2017 at 3:43 AM, justjoseph63 said:
After sanding everything smooth, I primed it and then used 6 (yes, 6) coats of Automotive paint and then a clear coat. I chose the Chrysler "Light Almond Pearl" for the canisters, as it really isn't a pure silver or bronze, but sort of a mix. I used regular silver for the main body/hose connector and helmet/hose connection as well as on the back plate, and Nissan "Super White" for the main unit. Don't ask why, (I don't know, LOL) but I added a leftover Hovi-tip screen into the end of the hose/helmet attachment.
BTW, I used large rubber O-rings on the outside of the main cannister. For the other recessed areas (like the 2 bottom attachments) I used silver pinstriping.
----------
Amazing....When I finally get to make myself one, I am going to talk to you about how to paint it.
Great job. I would ask to use those pictures for my marketing, but there is no way I can make it look like that right now. lol.
-
On 7/20/2017 at 0:49 PM, justjoseph63 said:
Since I ordered the "unfinished" kit, I have about 40 + hours into this bad-boy. This includes sanding, filling, dremeling gluing painting, etc.
As you can see I took an"artistic license" with a few of the pieces to say the least, lol. Since the insides (cannister/vertical tube inserts) cannot be seen unless removed, I figured what the heck.
All that's left to do at this point is to do some touch-up painting, attach a hose to the "mouthpiece" and secure the back on.


That looks amazing. How did you do that paint job?
Another newb saying Hi
in New Member Introductions Archive
Posted
Welcome aboard. If you have any questions let us know.
Sent from my SM-G930P using Tapatalk