

CrookKnight
-
Posts
1,327 -
Joined
-
Last visited
-
Days Won
5
Content Type
Profiles
Forums
Gallery
Articles
Media Demo
Posts posted by CrookKnight
-
-
I am going to start posting progress this weekend on my build thread.
Sent from my iPhone using Tapatalk-
 2
2
-
-
Follow the existing TLJ CRL and make notes as you go for any changes required t suit Cardinal. Then we need to sell it to the LMO's for a green light. occasionally they are hesitent to allow CRL's off action figures but it has happened in the past.
Time to get the Action Figure.
Sent from my iPhone using Tapatalk -
seriously considering building this one. Kind of started 2 years ago, but stopped since there was no CRL. Guess I will need to buy the figure first.
-
1
-
-
Hello. I am also from SC (Charleston Area), so if you need any assistance let me know.
Also, please join the Carolina Garrison if you have not already done so...They are also a great resource.
-
I hope the KB armor gets here soon.. I cannot wait to get this thing finished.
-
Well, I think I can finally finish this armor. I tried to work with the MIMIC armor for the upper body but it is too rigid. I have already cracked the abs just by putting it on a couple of times. As a result, I have ordered the remainder from KB Props, so my entire set (minus the helmet) will be KB. Once this comes in, I can finish.
I did just notice that all of my URL links have expired so my new pictures will need to come from Imgur.
-
2
-
-
Hello and welcome aboard.
-
I also have extra Garage Boss oil pans is you need one or can point you in the right direction for one.
-
This is going to be an awesome thread. If you need any pointers on the pack, let me know. Also, I do have 3D files you can use for the cone if you want.
-
I built my pack straight from Tony’s build thread.
Here is the link. I built everything from scratch. It was the first pack I ever built.
https://www.whitearmor.net/forum/topic/37930-hwt-pack-build-thread/
Sent from my iPhone using Tapatalk -
-
Welcome.
-
Well 25 months later....Approved today as TK72828. So excited and relieved.
Awesome. I see you did not wait on mimics armor. Ha ha. I am doing the same thing and should have my armor done in the next couple of weeks
Looks great
.

Sent from my iPhone using Tapatalk
-
Well 25 months later....Approved today as TK72828. So excited and relieved.
Awesome. I see you did not wait on mimics armor. Ha ha. I am doing the same thing and should have my armor done in the next couple of weeks.
Your armor looks great.
Sent from my iPhone using Tapatalk
-
2 minutes ago, gmrhodes13 said:
Unfortunately CRL's are not built on assumptions, all we can hope is they bring out a figure or official images (front back sides) of Cardinal.
Thanks. I might still build it and just make an assumption. Maybe one day we will see the entire set of armor all the way to the feet.

-
1
-
-
Hello,
My name is Crookknight. I have built over a dozen sets of TK armor and I am offering any free assistance or advice to newcomers who want to build there armor so they can get Centurion status. I am a Centurion Level HWT and am looking for ways to give back. Post on here if you want any assistance with your build. There are not strings attached.
Admins, if this is not the appropriate place to post this, let me know. I did not know the best place to post this.
Thank you.
-
7
-
-
So is there anyway to get a CRL for this? I know we do not have pictures of the boots, but there has to be some way to get this done. Can't we just make an assumption based on historical data of how other costumes look? I want to do this one, but not if I cannot get it approved.
-
Boy am I glad that I did not do business with them. I have issues with another maker and been trying to get armor for over 2 years.
I do get behind on some of my packs, but at least I honor all orders, communicate with the buyer and get them out, even when it costs me. Customer Service is the most important thing in this business....and yes so is delivering on what you promised.
-
-
A resin cast side holster clip (or whatever you call it) came with the KB Props Kit. Is there somewhere I can get a metal one or one that will hold the pistol?
-
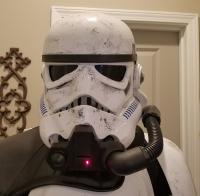
Anyone know where I can find a build thread or where to purchase the big gun shown in this picture?

-
THIGHS:
The thighs came pretty well trimmed with most of the excess material already removed.

In order to make the front of the thighs look consistent in width (i.e. the right side joint is in the proper position, as well as the overlap joint on the inside), I trimmed a minimum amount of material from each side of each front piece.

Once trimmed, I did a quick test fit with the untrimmed back of the thigh. I marked specific locations (forgot to take a picture) and trimmed only the outside seam piece that will butt joint against the front part. I used the sanding table to get the 2 edges as close to even with each other as possible. At this point, I used painters tape on the inside seam to temporarily act as the joint strip. I do this so I an mark where I need to trim the top and bottom of the back thigh piece.

I then superglue the abs strip on the inside of the outer portion of the thigh. I place magnets on it for about 5 minutes to allow for good adhesion.

I trim the top and bottom pieces for a smooth line between them. Then another test fit to determine where I need to cut the overlap for the inside of the thigh. Once cut and trimmed, I added the velcro.


Next will be to add the greeblies (clips). Then once all the other armor is done, I will perform a test fit and trim more off before painting and strapping.
-
1
-
-
Current Progress:

-
BICEPS: I AM GOING TO POST NEW PICTURES
I laid out the untrimmed biceps components.

Using a sanding table I quickly sanded off the extra. If you do not have a sanding table, I highly recommend you get one. It saves a lot of time and makes it much easier to shape. Also, I used some of the excess material to make the inside cover strip that will hold 2 of the pieces together.

Using Superglue, I glued the first piece of the bicep (long side) to the strip. Used magnets to hold in place for a couple of minutes.

Next, I glued it to the other long side of the bicep. I used the sanding table to ensure the 2 ends were straight and flat so it makes for a clean line between the 2 pieces.
Next, I sanded down the greeblie.

Then using a heating gun, i shaped it to the insert on the bicep where it will be placed.

I then superglued it on.

Next, i used white industrial strength velcro for the connection of the other 2 pieces. I cut it too length and installed the rougher side on the outside piece and the softer loop side of the velcro on the piece that faces out from the bicep.

It closes easily.
All finished....minus cleanup and final painting.
-
1
-
Captain Cardinal Black Series
in Captain Cardinal
Posted
Awesome. I am glad they are going with the TFA helmet.
Going to get the action figure now.
Sent from my iPhone using Tapatalk