

CrookKnight
-
Posts
1,335 -
Joined
-
Last visited
-
Days Won
5
Content Type
Profiles
Forums
Gallery
Articles
Everything posted by CrookKnight
-

HWT Pack Build Thread
CrookKnight replied to CrookKnight's topic in Build Threads Requireing Maintenance
Just finished adding some battle damage. Using metallic washable paint. Let me know what you think. -
I have software that could make this happen easy and efficiently.
-
Christian, I just updated the original post with the revised photos. Thank you.
-
Ok. I have replaced the rivet with a split rivet. See picture below. Also, I have added the black elastic that goes around the biceps.
-
HWT Pack Build Thread
CrookKnight replied to CrookKnight's topic in Build Threads Requireing Maintenance
Thanks. I just ordered a new ammo belt and fabric so I can make one just for the HWT. Sent from my SM-G930P using Tapatalk -
HWT Pack Build Thread
CrookKnight replied to CrookKnight's topic in Build Threads Requireing Maintenance
Below is a photo of me trying everything out. It is not very clear, however everything went well. My DLT-19 will be ready next week. After that I will be submitting for approval. -
Chris and Sarah, Thank you for all of the advice and instructions. I will give it a try tonight and see what happens. Thanks again.
-
If anyone has instructions on how to install the split rivet please let me know. Sent from my SM-G930P using Tapatalk
-
I still have not learned how to do a split rivet. I have them. Sent from my SM-G930P using Tapatalk
-
I have installed the rivet on the front cod and installed the proper male snap on the rear. They now are compliant with the CRL. Thanks. Photo is below:
-
No.
-
I am going to still cleanup the velcro at the posterior cod piece and replace the front snap with a rivet. This should not be too hard. All of this velcro is from the previous owner of the armor. Apparently, the previous owner needed the shims on the side for the armor. I looked at removing, but since the kidney plates were cut as they were, if I removed them, I would not meet the 1/2" gap. It would be much larger.
-
Thanks. I will make those changes. Sent from my SM-G930P using Tapatalk
-
Christian, I took a picture of the double male snaps on the posterior armor. They are both male. It is a bit messy, since it used to have velcro in this area. Before I installed the snaps, I tried to get all of the velcro off, however, I was not successful. At least it is on the inside of the armor and not the outside. Below is the picture:
-
Where do we request HWT approval?
CrookKnight replied to CrookKnight's topic in Heavy Weapons Trooper
Thank you. -
I have looked in the forums and I cannot find where we request HWT approval. I have everything ready, minus the DLT-19 (which I will have in 1 week). Thank you.
-
How long until you think it will be officially reviewed? Sent from my SM-G930P using Tapatalk
-
Thanks. They are both male. One is just a different style. Sent from my SM-G930P using Tapatalk
-
Christian, Per your recommendations, I removed the TK sticker off of my left shoulder bell and re-took the front and back picture with my internal belt on to allow for the ab plate and back plate to sit normally. You will notice the front gap is gone and the back gap is within tolerance. Thank you for the pointers. Below are the pictures:
-
HWT Pack Build Thread
CrookKnight replied to CrookKnight's topic in Build Threads Requireing Maintenance
Performed a couple of trooping events with the backpack and ammo pouches. All I have to do now is weather my armor and I will be ready to submit for HWT. Can't wait. -
In regards to the 3 piece helmet, about half of my Garrison has this. Please let me know if this needs to be changed. The only thing I could do would be to use bondo and paint. I would rather not do this.
-
Thank you for your comments. I am aware of the issue with the overlapping of the kidney and chest plate and back plates. When I took the pictures I was not wearing my interior suspenders that usually boost up the lower portion of the armor. When I do wear them, the lower portion of the armor sits higher therefore allowing for more overlap. I bought this armor from a former 501st member that had purchased from AP. It came with the side pieces connecting the front abs to the back plate. I tried to remove it, but it is glued very well. I might be able to remove it with more work. Thank you for your comments.
-
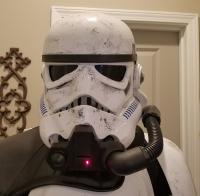
APPROVED [emoji41] Name: Shawn Cantey 501st ID: TK 10204 FISD Forum Name: CrookKnight Garrison: Carolina Garrison Armor Maker: AP Helmet Maker: AP Blaster Type: Elite E-11 Hyperfirm Height: 5'9" Weight: 175 lbs Boots Maker: TK Boots Canvas Belt: 501st Member Hand Plates Type: Rubber / Vinyl Electronics: Fans / I-Comm / Microphone / Hovi Tips / Speakers by Ukswrath Neck Seal Type: Darman's with zipper in the back Holster Maker: Darman 8oz leather holster Photos are below: Front - Arms at Side Front picture retaken with lettering removed from left shoulder bell and chest plate and ab plate properly positioned: Back - Arms at Sides Rear retaken with gap closed between kidney and back plate: Left - Arms Raised Right - Arms Raised Right Side Detail - Arms Raised Left Side Detail - Arms Raised Abdomen Details Action Shot Cod and Butt Plate Attachment Interior Strapping Black elastic at shoulder bell: Helmet Front Helmet Side Helmet Back Hovi Tip Detail Lens Color Helmet Interior Electronics Blaster Left Blaster Right Blaster Back Neck Seal Thermal Detonator Holster Attachment Thank you
-
Tk23812 reporting for duty,
CrookKnight replied to Dale3van5's topic in Newly Approved Members - Sound Off!
Welcome aboard. You are now part of something great. -
TK-30773 Reporting in and sounding off!
CrookKnight replied to Racermouse's topic in Newly Approved Members - Sound Off!
Welcome aboard. You are now part of something great.
