


Somatophylax
-
Posts
255 -
Joined
-
Last visited
-
Days Won
2
Content Type
Profiles
Forums
Gallery
Articles
Media Demo
Posts posted by Somatophylax
-
-
WOW man! AWESOME work! I'm not in Toronto, but I'm not that far away (Montreal area). So TK party someday with Dark Side cookies for sure

-
 1
1
-
-
So basically something like this. (sorry, the pic is kind of blurry)
-
1
-
-
Just to make sure we are on the same page, excuse the rough drawing.
 ImageUploadedByTapatalk1432482971.830018.jpg
Sent from my iPad using Tapatalk
Ahh. Got it! I understood it wrong obviously. I'll check it out. Thanks

And I guess that even if I use E6000 to put the final piece unto the armor, I could use something more permanent and fast (like Plastic Melt) to make this thing.
-
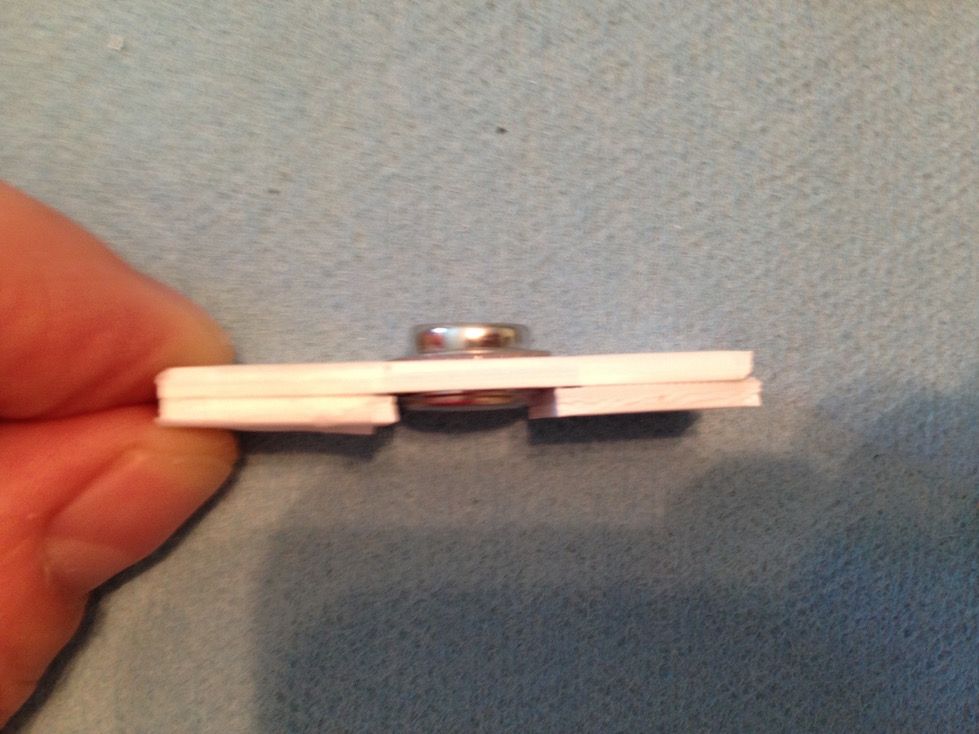
Exactly. The back part snap will just hang out in between and have space between it and the armor. (Thanks to Spacebrew who taught me that one.)
Sent from my iPad using Tapatalk
But the 2 pieces of plastic still won't touch each other (so can't be glued properly) because of the space taken by the back of the snap... unless I encase it in one of the plates.
-
You can also cut small pieces of shim or cover and glue it to the underside (on both sides of the snap but not over it) so the metal part doesn't touch the armor...
Sent from my iPad using Tapatalk
So basically to "sandwich" the back part of the male snap (the part with the shaft)... right?
-
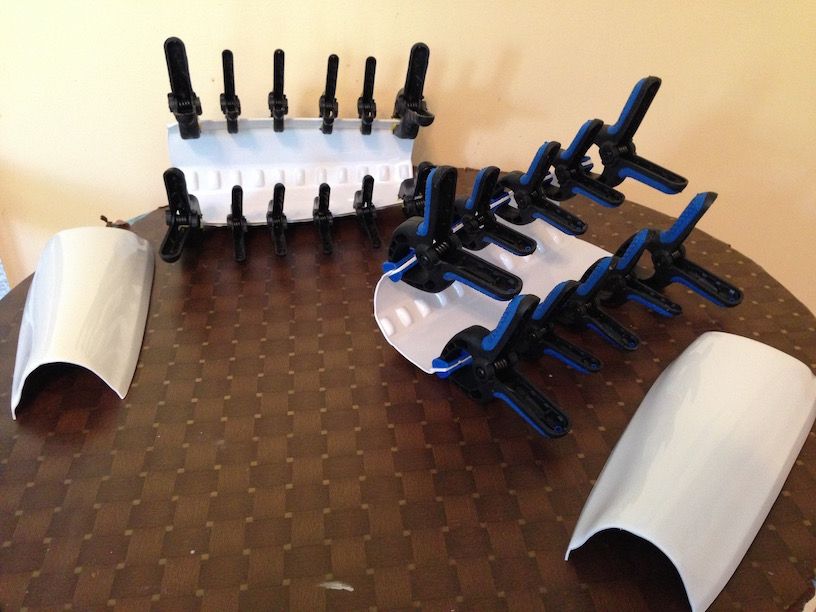
So I found some more clamps today. 1$ for 4 at the dollar store. So I got MANY packs
I glued the inner strips for the 2nd bicep and I started with one inner strip for the left thigh. It sucks though to have to wait 24hrs. Oh well... I guess I'll work on something else.
-
Thanks Eric. I'll wait then.
-
Hi all,
Sorry if it's been discussed before but I can't seem to find the info I need.
The CRL states (for Centurion) that "Squared cut-out sections at the lower left and right corners of the Kidney Armor.". However, I've seen people talking that the AP armor doesn' have the proper sizing/proportions (compared to the ab plate) to have a screen accurate cut-out. I've looked at various Centurion application requests for APs, and it seems that most leave the kidney piece as it is.
So my question... is the 22x22mm cut-out really mandatory when assembling an AP armor?
Thanks.
-
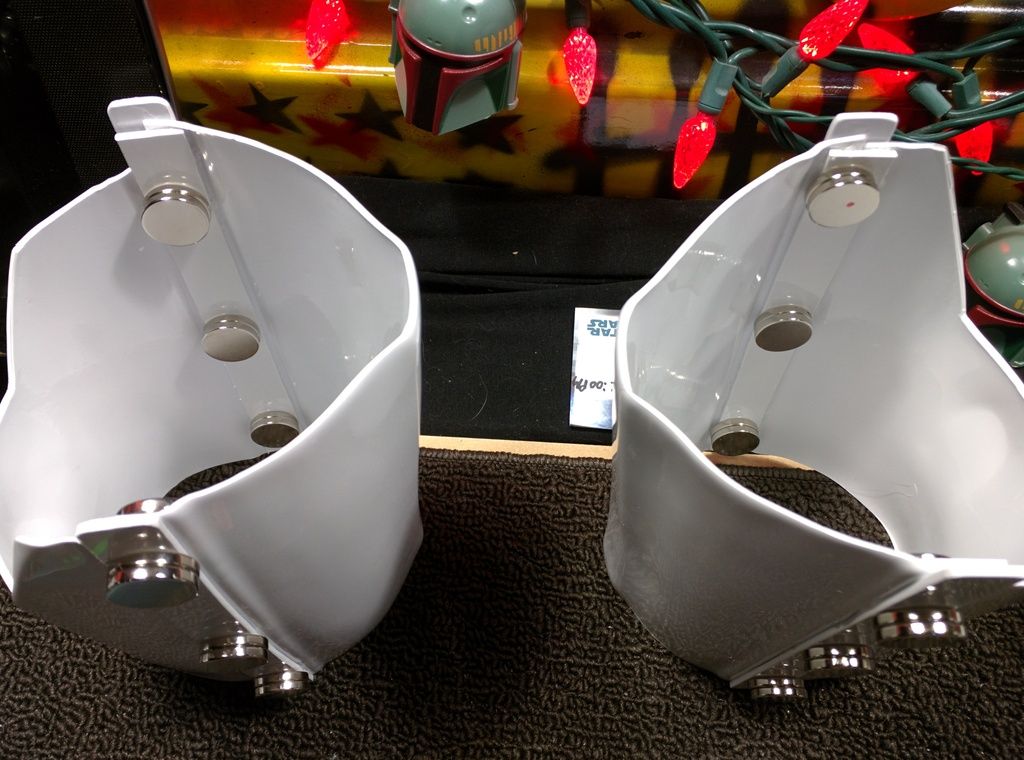
Ok, I have a doubt on the snaps for the upper shoulder bells. Most people just glue in elastic bases with a male snap in it. The tutorial section mentions the possibility of using a plastic plate instead of an elastic. I thought it would be preferable because glueing a piece of ABS with a male snap inside the shoulder bell would stick better. Here's the image from the tutorial section:

So, I prepared a couple of ABS plates, drilled a hole of the right size to let the snap shaft go in, and installed it.
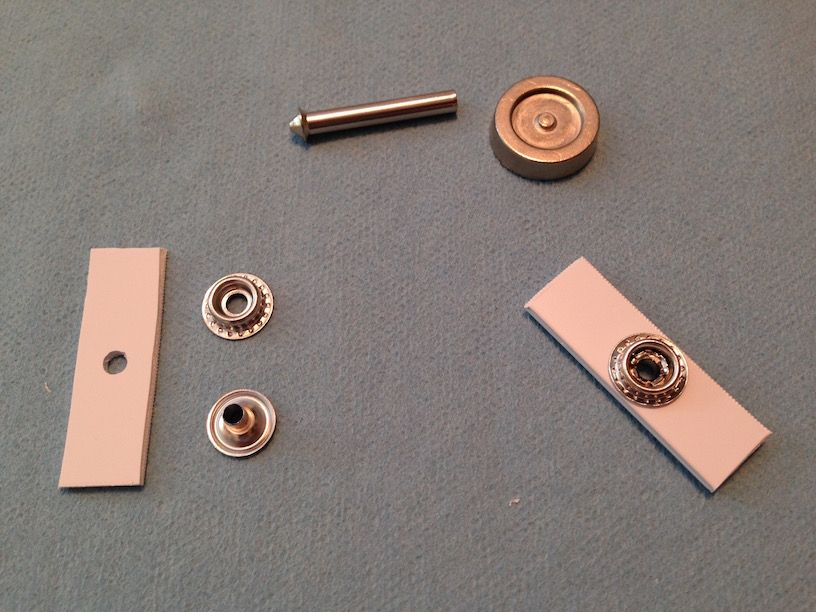
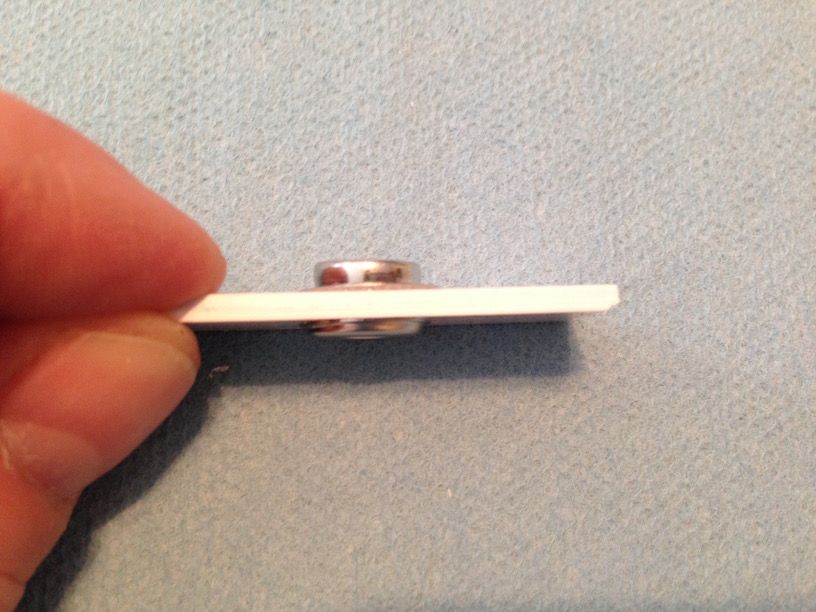
But here's my problem. The 'under' part of that plate now has a bump with the back of the snap. Maybe it's just the brand I use, or maybe it's normal. But I wonder how well it will stick now when I glue it.
Since the shoulder bells hold the arm pieces, I want to make sure it has a secure, solid fit. So maybe I'll have to use elastics instead. What are your thoughts on that?
Thanks!
-
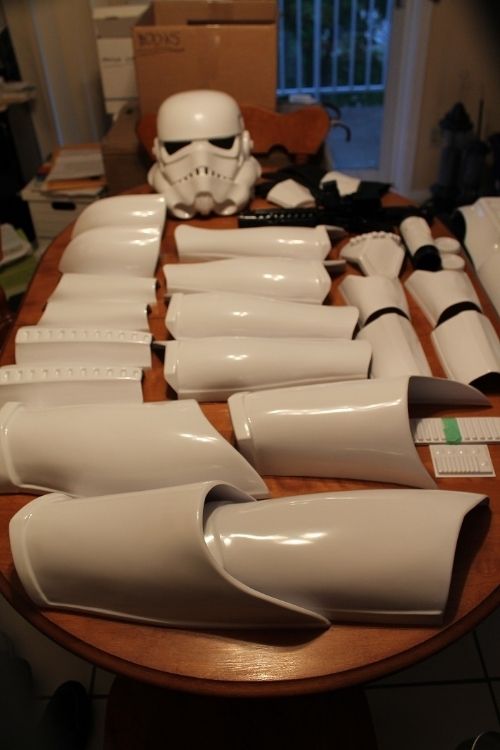
Hi again,
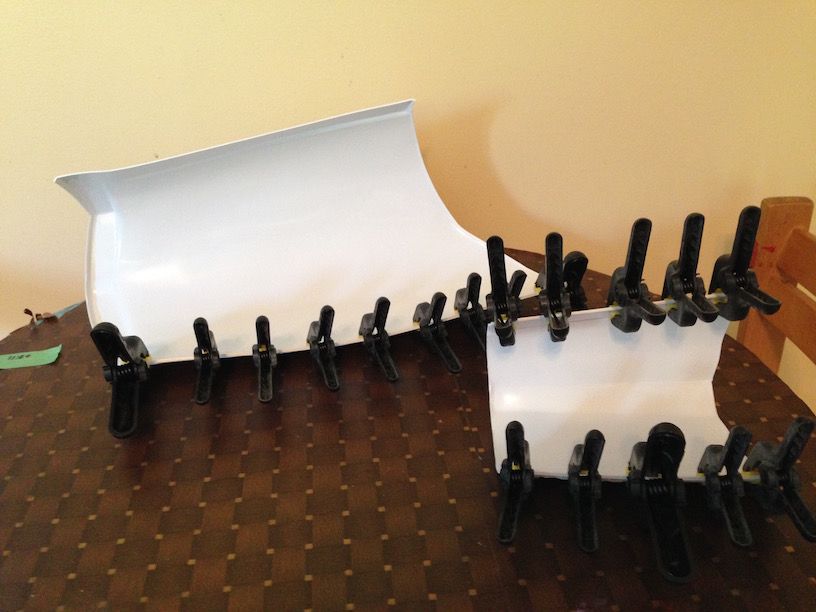
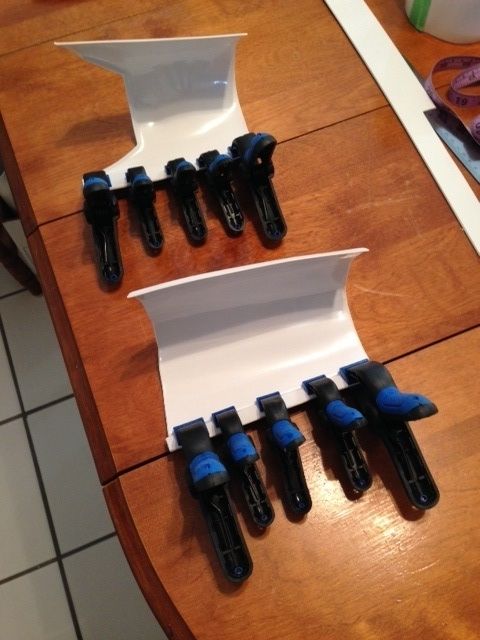
I made a whole bunch of strips to complete the biceps and forearms. So here are the forearms with the inner strips glued. I ran out of clamps (damn!). I guess I'll work on more strips or snaps until tomorrow. I hope they'll glue ok. One of them kept slipping out of place (even with clamps on) and I had to find a way to hold it there.
-
I wish I had been there. The medieval group is called VINLAND PRODUCTION. I am a member of that group and we do a lot of medieval events, mostly as vikings. The pic with Vader and someone else holding a red lightsaber... that 'someone else' is my younger brother. He had such a blast he now intents to join the 501st (probably as Count Dooku).
Cheers!
-
By the way... I'm aiming for centurion right away with my first build. So if someone notices something odd, don't hesitate to point it out. Thanks
Stéphane
-
1
-
-
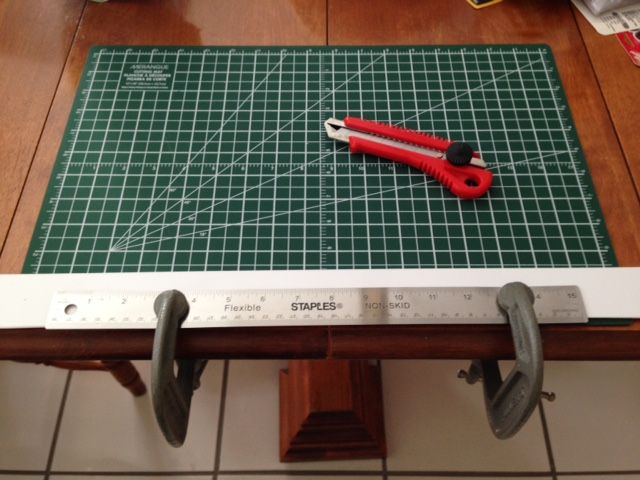
remember just score using a ruler pressing hard enough, no need to go deep and bend plastic it will break clean with no rough edges, I did tons this way.
Gotcha. The ruler was held down quite well with the tools. But when I got to the middle of it, the cutter blade kind of dug beneath the ruler and so made a curve in the cut. I'll be more careful next time.
Update: I just did a 2nd pair of bicep strips and they're perfect (I think). So I was much more careful while cutting. Thanks Mark
Note to self: Do not wear black pants when sanding white ABS

-
And there... It's official... Armor building has started! One bicep set with the inner strips waiting to dry. I used E6000. Results in 24 hours

I'll need 6 more strips to finish the pair of biceps. So I'll make them and use the best 4 as the outer strips for a better look.
-
So here is my first set of ABS strips ever! They didn't end right as I probably did not press hard enough while cutting (or pressed too hard... I don't know). But they'll do fine for the inner joints of the bicep pieces. I smoothed the edges and rounded up the corners with a dremmel.

-
Good point Mark
Sly11... the trick with the Phillps works quite nicely. Thanks!
Also, thanks to MechaPumpkin's build tread (and advice), I made myself a cutting station.
-
Well your build is an inspiration for sure. I am still trying to find the courage to glue the first piece, and obviously to cut the first ABS strip for the joints. I have no clue how to cut it though. So good job and continue to keep us informed. This tread is a gold mine!
-
Oooo.... Nice idea. Thanks

-
So... not much progress still on the armor. Honestly, I'm so scared of fitting and glueing the first piece and I'm not sure how to proceed to make the joint strips

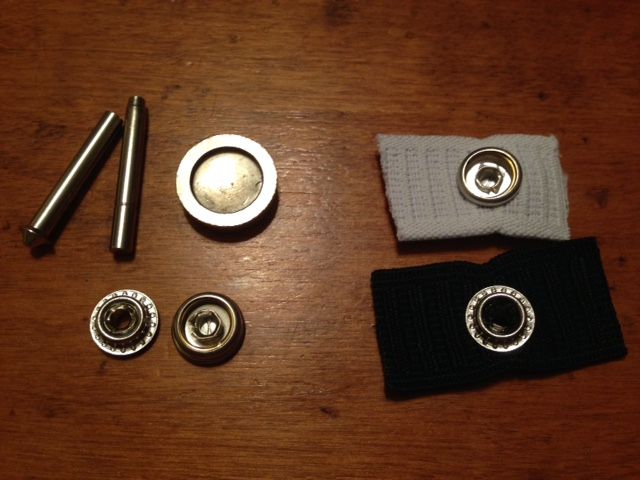
So in the meantime I decided to try and test the snaps. I never worked with that before. The first ones aren't really a success. The damn shafts are too long and thus hard to hammer down. The first pair I couldn't make them snap. The second (with the fabric) work, after I also used the hammer to snap them together (which I won't be able to do while wearing the armor). I hope it won't cost me a ton of money before I get it right!
-
I think I get it. And yes, a pic of the finished piece would be great. Thank you
-
Awesome job! On your post #59 from May 5th, you posted this pic
I see that the pieces (easily seen with the one on the left...at the top) don't end up even. One (the outside bicep half) is quite longer than the other and your joint piece is longer too. How did you deal with that? Did you just cut off the outer bicep part to make it even with the inner bicep? Thanks
-
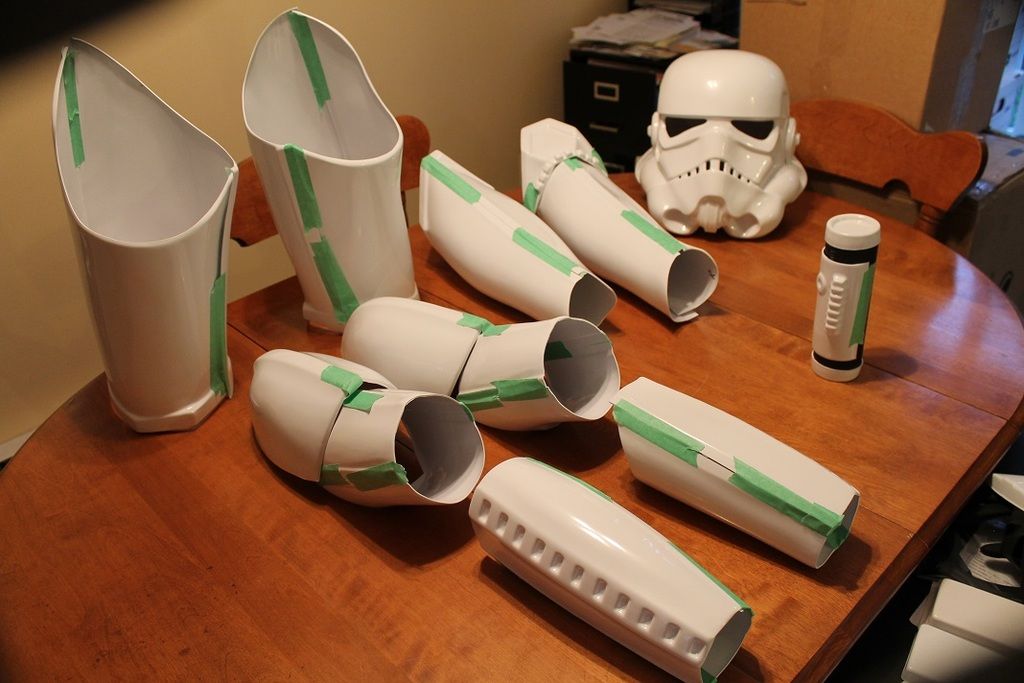
So... after a couple of days (painfully thinking about starting to work on it), I finally opened the box and verified the content.
So many parts!
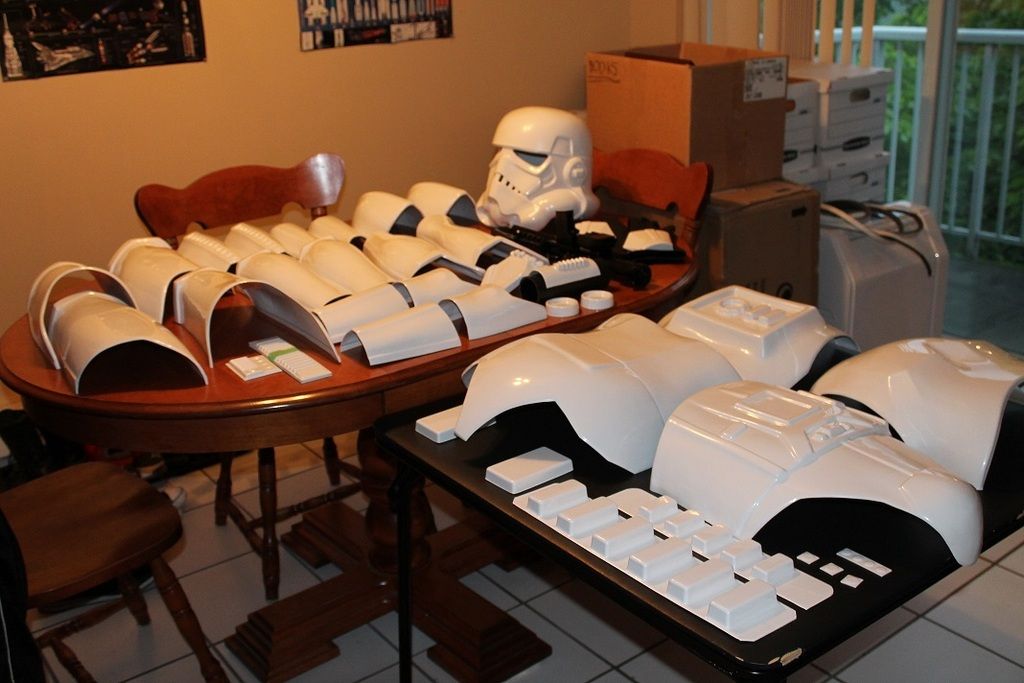
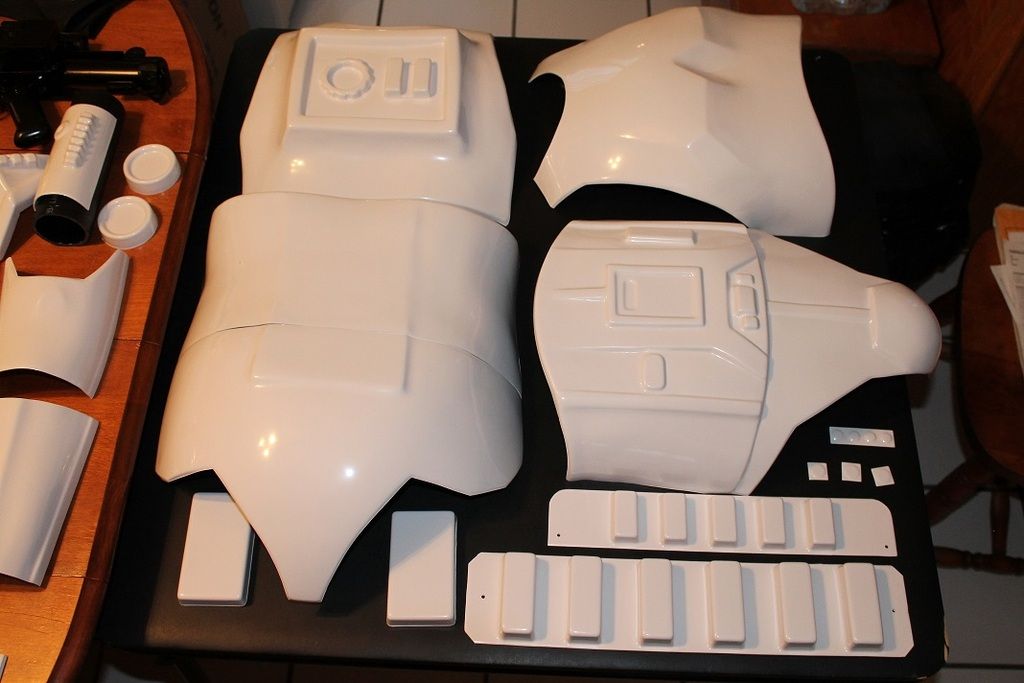
I decided to tape the articulations and analyze the basic assembly. I was surprised at how the pieces don't necessarily fit perfectly. I will need to either force them into place when I glue them. Or, I'll need to do some trimming. Or both! What are your thoughts on that?
-
Hi everyone,
Since I don't have experience working with metal, I was wondering if anyone is still making belt clips for sale? I looked in the Ongoing Sales section, but the treads I find are all archived and closed.
Thanks
-
Got the E-11 from AP with my armor. He orders them from a maker in Ontario.
Stéphane
E6000 and metal reaction question
in Boots, Soft Parts, and other Accessories
Posted
Hi everyone,
I've ready in many posts about how you have to be careful with E6000 because when in contact with metal (i.e. snaps in our case), it can generate heat and deform armor. However, it looks like the majority of you are using E6000, and practically everybody glue the elastic-backed snaps everywhere on your armor.
So my question: What's your secret? Painting the back of the snap? Applying a coat of wax on it? Cover it with plastic? Using glue on the elastic "around" the snap without touching it? Or nothing maybe! Is the danger to the armor really there?
Thanks