GeorgePBurdell
-
Posts
43 -
Joined
-
Last visited
Content Type
Profiles
Forums
Gallery
Articles
Everything posted by GeorgePBurdell
-
 Common enough to have a step for it as an option in the tutorials. I'm not sure how many people actually do it, but when I was fitting the pieces, it was pretty uncomfortable as a solid piece, so I went with it cut.
 -
As I mentioned before, here are some better back views of the shins I also invested in a sewing machine. After hours of struggling and reading the ambiguous, pictogram filled instruction manual for hours, I cranked out a canvas belt, made the same way as in the tutorials. It turned out to be a bit shorter than I though so there's only about 2 inches of overlap instead of several. I'm hoping my thermal detonator can will cover that up. I'd also like to point out that I tried to heat bend the plastic part, BUT the plastic is so flexible that it kinda just sags back flat. So I decided to just leave it as is and allow it to flex as is when attached to the belt. I'll probably reinforce it with velcro at some point, too. A friend came over and helped me fit my ab, kidney and posterior plates so I trimmed them and am now strapping it all together. I removed the cod piece from the ab plate because it's really awkward feeling to keep them together and I noticed that it is common to do so. I was messing with the snaps method but they kept breaking off so I just went with the permanent method. The elastic straps are glued down and then held in place with magnets while the glue dries. Also, here's the cutout of the lower corner on the kidney plate (22mm by 22mm as specified in the CRL)
-
There is a cover strip. It's hard to see in that picture but there's a 30mm cover strip that the velcro is attached to. I'll get a better picture in my next update.
-
More progress from last night! Applying velcro to the backing of the calves. Gluing on the knee plate. According to the tutorial, you can do this with rivets, but according to the CRLs, you cannot use rivets for the knee plate for centurion level. So I just glued it on. Note: I'm not applying for centurion, I'm just following those guidelines since I'd like the most accurate looking armor. Putting the knee pack on. I heated it in the oven and bent it to my will first. The edges needed to be cut to the correct shape as well before I could rivet it one to the thigh armor. I also finished the left arm armor the same way I did the right arm. It goes much faster the second time when you know what you're doing and can use your right hand to help fit the pieces... Making straps and snap plates.
-
I think in the new AM kit the forearm with the relief cut out is actually the left arm, based on how the curves match up. At least that's what I did after reading the tutorial on arm assembly.
-
Ate lunch at home today and took this picture to make a coworker jealous. Little do they understand how much work still needs to be done...
-
Arms today Began by trimming the right arm down to size Gluing on backing strips (15mm wide) Connecting the bicep halves I noticed while gluing the bicep halves that the biceps are designed kinda wide, meaning it takes a lot of bracing to keep them in place while the E6000 sets. I made several trips to Home Depot and bought many clamps during this stage. Doing the same thing for the forearms. While the arms were setting up, I ate dinner, then switched to finish the backs of the legs. Trimming them to fit. Applying the backs (20mm for thigh and 30 mm for shins) And now we play the waiting game.... Knee plate, thigh pack, left arm, and velcro for shins to come!
-
MORE UPDATES! Made some awesome progress on the leg pieces. Got the front cover strips glued on all of the legs and did some finishing touches on the helmet. Finishing up the helmet stuff! Gluing in the mesh Painting the ear bumps Also worked on the thigh pieces. Where I accidentally spilled a whole bottle of ABS glue. Shortly after taking that last picture, I was trying to trim the right shin grieve bottom where it doesn't line up. The knife slipped and went into my other hand, even though I had been cutting away from myself and everything. I immediately applied first aid and proceeded to the emergency room. The doctor said I didn't need stitches and will be fine. Just a reminder to always be safe. It's when we get most complacent that accidents happen.
-
Sorry for the lack of updates, wasn't feeling well. I took a break from the helmet and started working on the shins. After studying the tutorials I think I got it figured out. Lining up the halves of the shins and figuring which ones are which. Trimming the fronts of the shins. According to the how-to I found, it's supposed to 14 mm from the ridge, so that's what I went with. Cut the return edge Started making strips for butt-joint method joining And began gluing them on. Now I'm just waiting for the glue to dry. While I wait, does anyone have advice on the backs? I haven't seen much on how to properly do them...
-
Good catch! It shouldn't be too hard to change out the eyes to stunt then.
-
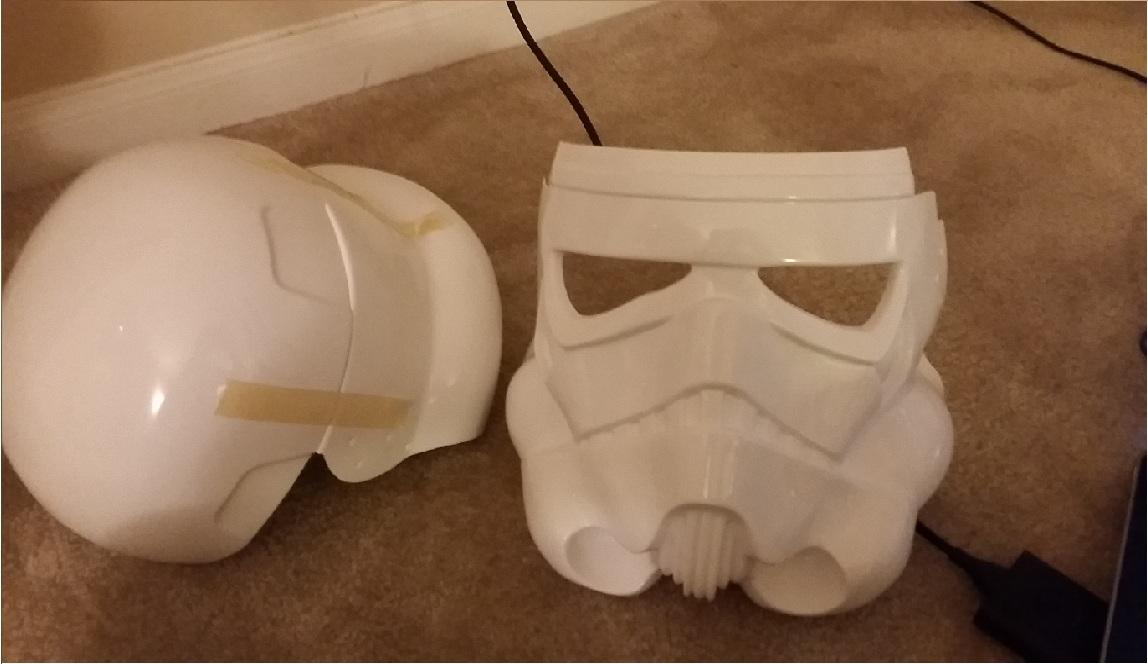
Here are some more pictures after a long night last night. I spilled my whole can of ABS glue so I'll be switching to E6000 from here on out. Here's the left ear issue I had touched on before. As you can see, the left ear isn't bent the right way, and kinda sticks out a bit on either end. Here's the right ear for comparison So I took off the left ear and heated it in the oven for a bit to soften it, and while that was going on I addressed other issues, such as this gap in the right side of the helmet. ' Looking at the inside of the helmet, you can see that the right side is not as nicely aligned as the left. This is due to the screw holes being slightly mis-aligned. I used the built in bumps as references while I cut them out (because I'm too cheap to invest in a drill) so be careful when you line yours up and don't go off the bumps. (right vs left inside you can see the holes should have been located elsewhere to bring the front plate to the right position) Tried my best to close it up with more glue (prior to spilling it all over the inside of a thigh piece) While that was setting up, I worked on fixing my paint (I'll keep cleaning it as I go along) While it was taken apart I also took the opportunity to paint the insides black After fidgeting with the left ear for what felt like hours (and actually was hours it turns out) I finally got it to fit and not stick out like a sore earpiece. And tonight I will begin the adventure of painting both ears, using the centurion level paint scheme with 1 black bump on each ear. Let me know if anything looks wrong or any suggestions! Can't wait to finish!
-
Mine is a mythical anonymous character out of my alma maters history. I'm honestly surprised no one else has used it yet... http://en.wikipedia.org/wiki/George_P._Burdell
-
I chose to go with Hero. The bottom of the ear was previously too rounded and couldn't reach all of the holes, so I heated it up and flattened it out slightly. I'll probably have to reheat it today and reshape the bottom to get it lined up nicely. I'll share photos of it later. Also, anyone have nay good suggestions for cleaning up bad paint jobs? I used Model Masters paint and it doesn't seem to come off easily with physical means and I know acetone will destroy the plastic and the paint so I'd rather not go that route.
-
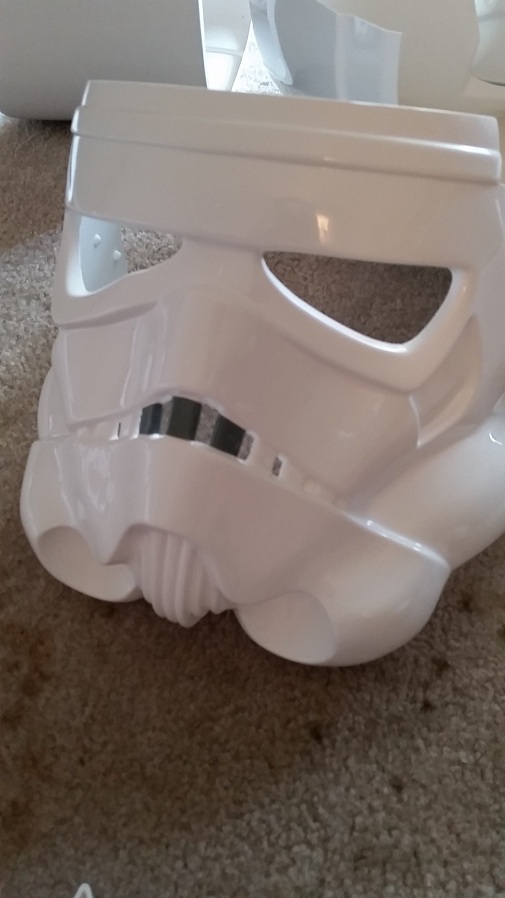
Fitting the ear pieces and aligning the holes. Test fitting it all together The left ear was a bit too small, so I heated it in the oven at 220F and reshaped it slightly to get it to fit. Unfortunately it's slightly off. Can't really tell at a distance though I'll have to clean up my paint job a bit later. Also got the mic tips installed. Glued the lid on and with that I got the exterior of the helmet done in a single day! I'm planning on painting the inside black and lining it with foam. The hard hat attachment isn't easy to work with.
-
Figured out how to add images to posts instead of as attachments. ----------
-
More pictures because my camera saves them in too big of files lol

-
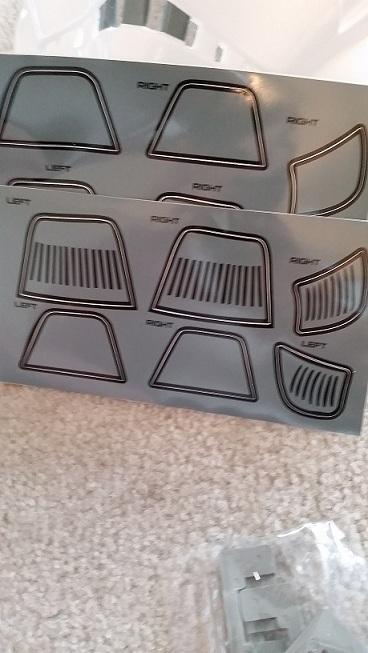
New pictures from today. I test fitted the helmet pieces and will be holding off on gluing anything until I'm absolutely positive I know what I'm doing... Other than that I've been cutting out the vents and applying decals as I go along.
-
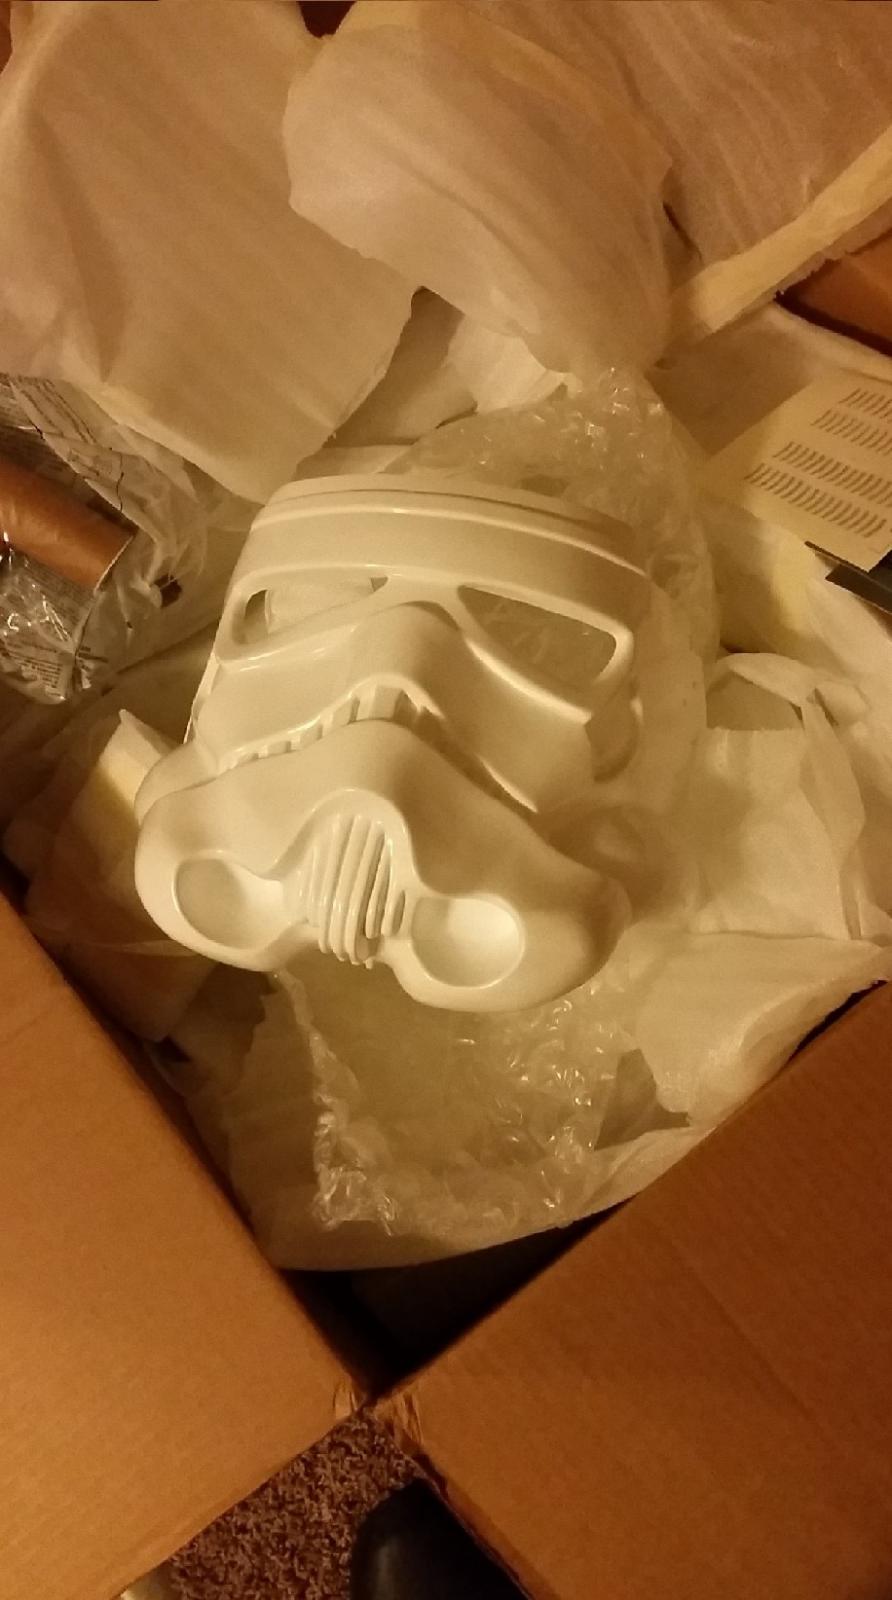
Hey everyone! I got my box while I was out of town, but finally had time to sit down and start putting it together. This is my first build, so any tips or tricks would be really really really helpful... I'm starting with the helmet just because it was the first part I grabbed out of the box... UPDATE: This is a Hero build, not a Stunt build. Update to the update: Found out I messed up and now am doing a Stunt build, not a Hero build.