

Templar726
-
Posts
241 -
Joined
-
Last visited
Content Type
Profiles
Forums
Gallery
Articles
Media Demo
Posts posted by Templar726
-
-
Whoohoo!! Thanks guys. It feels great to know the work on the armor paid off. It was really fun and rewarding. I will get started on the blaster tonight and also submit for Heavy weapons Trooper EIB since I am sure my T-21 makes the grade.

Thanks again and I can't wait to join the ranks!
-
Gazmosis,
Here are two shots I took. Not the best. Hope they sufice. I was so focused on armor shots I forgot to get good blaster shots. Hope these work if not I can get some when I get home tonight.
Thanks
-
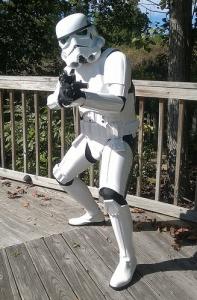
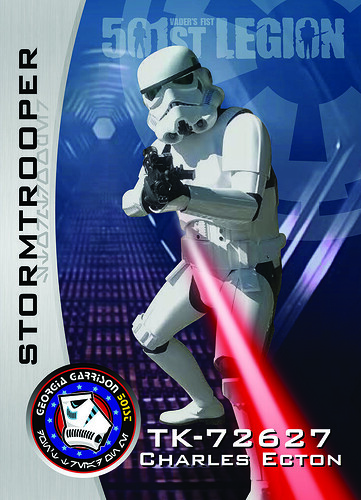
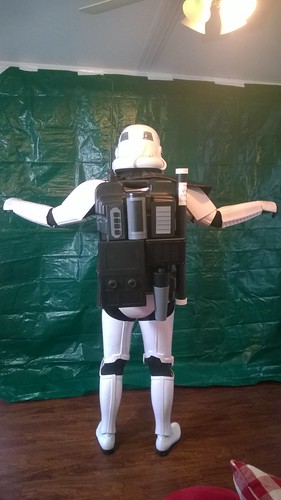
I forgot to add my card pic. Our Georgia Garrison GML did this for me. I got an action shot! Phew phew!!
-
 1
1
-
-
Charles Ecton
TK 72627
Georgia Garrison
Ocmulgee Squad
Fire Team Terminus
Height: 5’11â€
Weight: 185
Armor: FX 501st Approved 10/13/2014
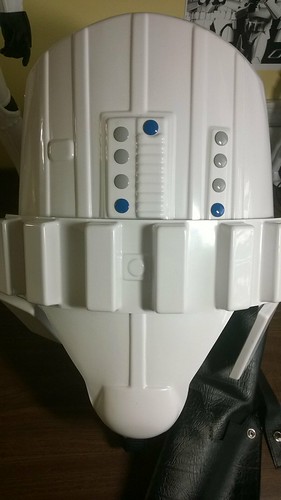
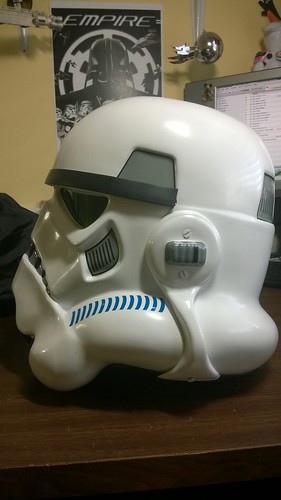
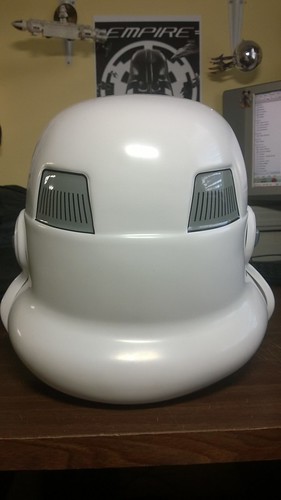
Helmet: Authentic Props (AP)
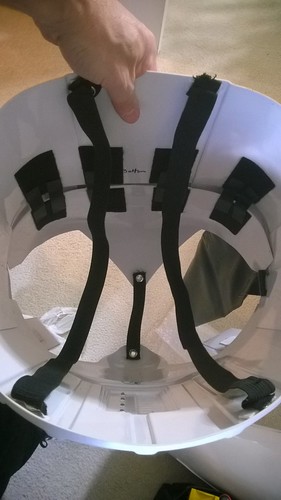
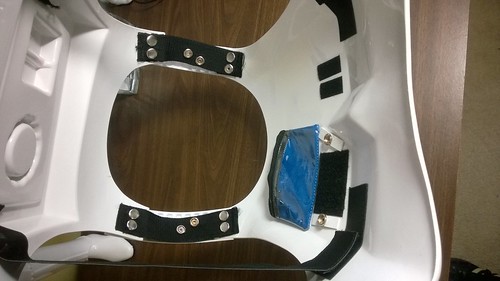
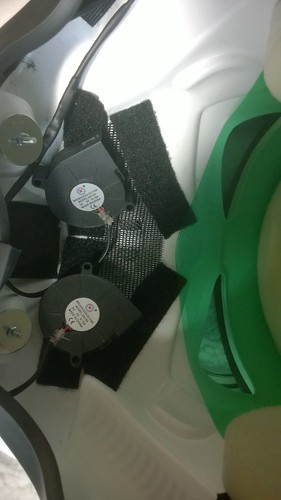
Helmet Electronics: Evil Boy dual fans FISD Member
Audio: Rom FX Static Burst kit in homemade chest sling or inside chest via installed mounting setup
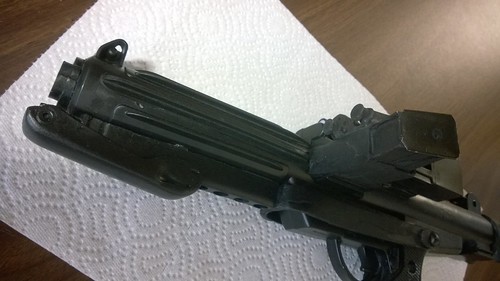
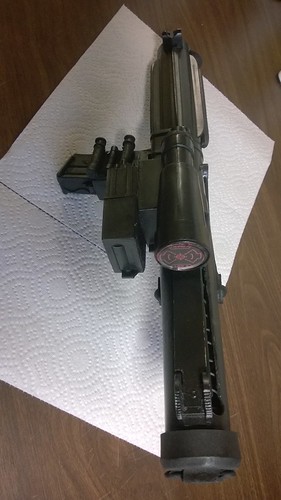
Blaster: Hasbro with Stryker kit
Boots: liquidsolidchewy FISD Member
Neck Seal: TrooperBay
Gloves: Chemical gloves rubber (2) Hand Plates: Flexible rubber (TrooperBay) and Hard Plate (FX)
Thermal detonator: Authentic Props (AP) with Evil Boy clips
Canvas Belt: TrooperBay
Holster: Custom made
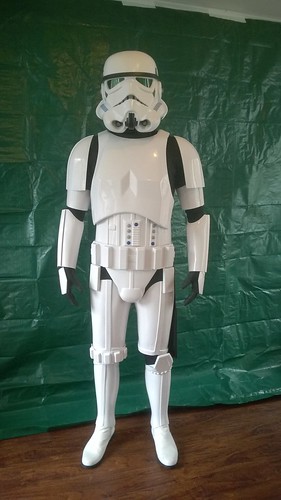
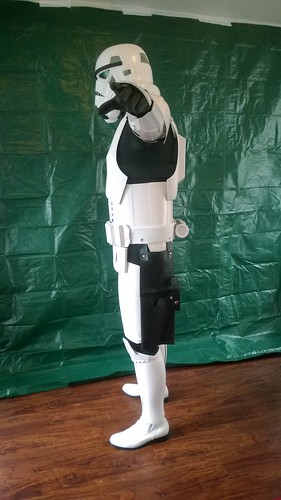
Front
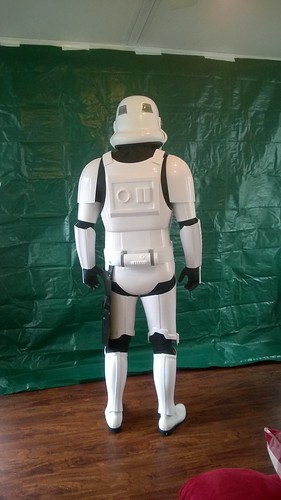
Back
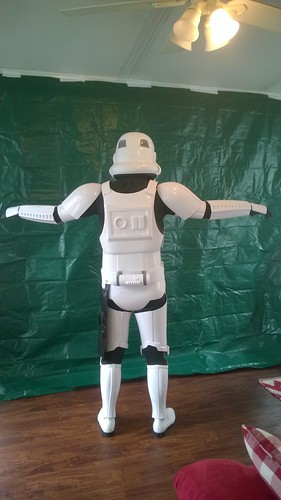
Back Arms Raised
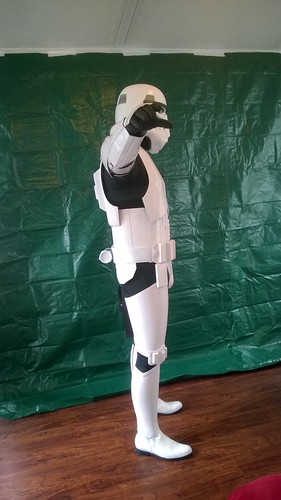
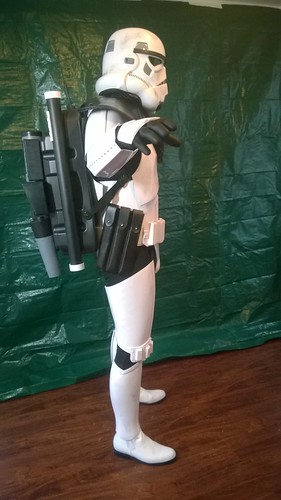
Right Side Arms Raised
Left Side Arms Raised
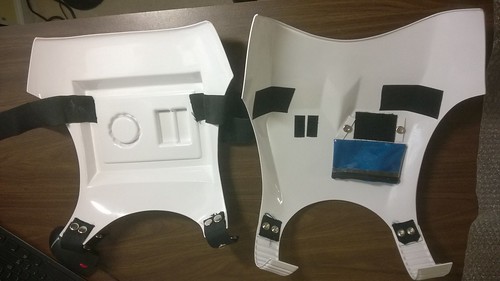
Ab Plate
Inner
Inner 2
Seperated chest and back. Rom FX brackets shown. Also added side strap for snug fit.
Crotch
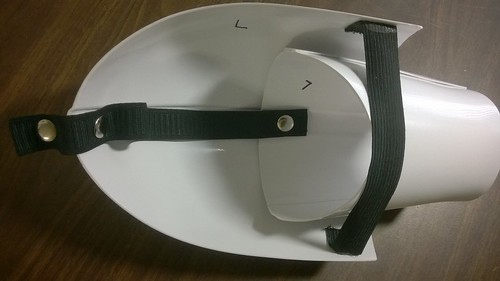
Pauldron strapping
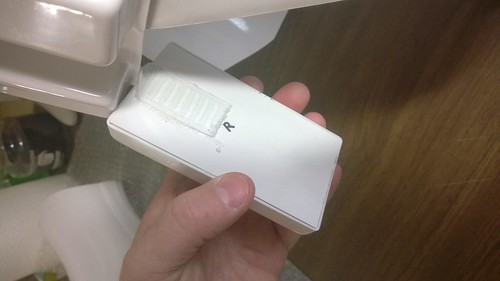
Drop boxes
Side w belt
Holster attachement
Thermal detonator
Front
Left side
Right side

Back
Mic tips
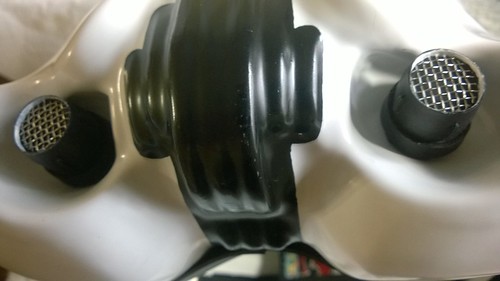
Fans and lens color
Ammo knee
Sniper knee
Rubber hand plates
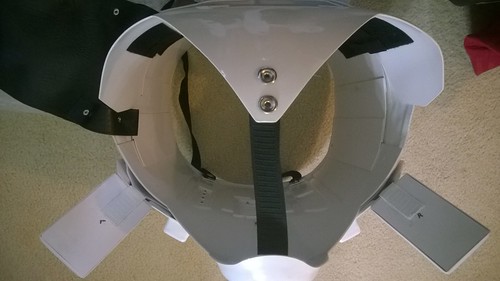
Neck seal
Rom FX in custom built chest sling
Blaster side

Blaster rear
Bucket off
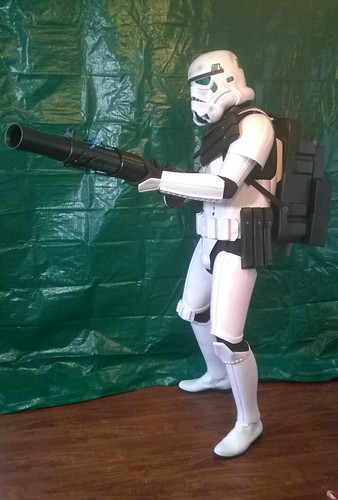
Action
More action!
-
Thanks sir. I will add a few more pics today to fill in some of the build gaps.
-
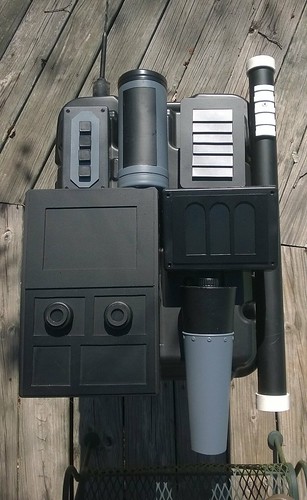
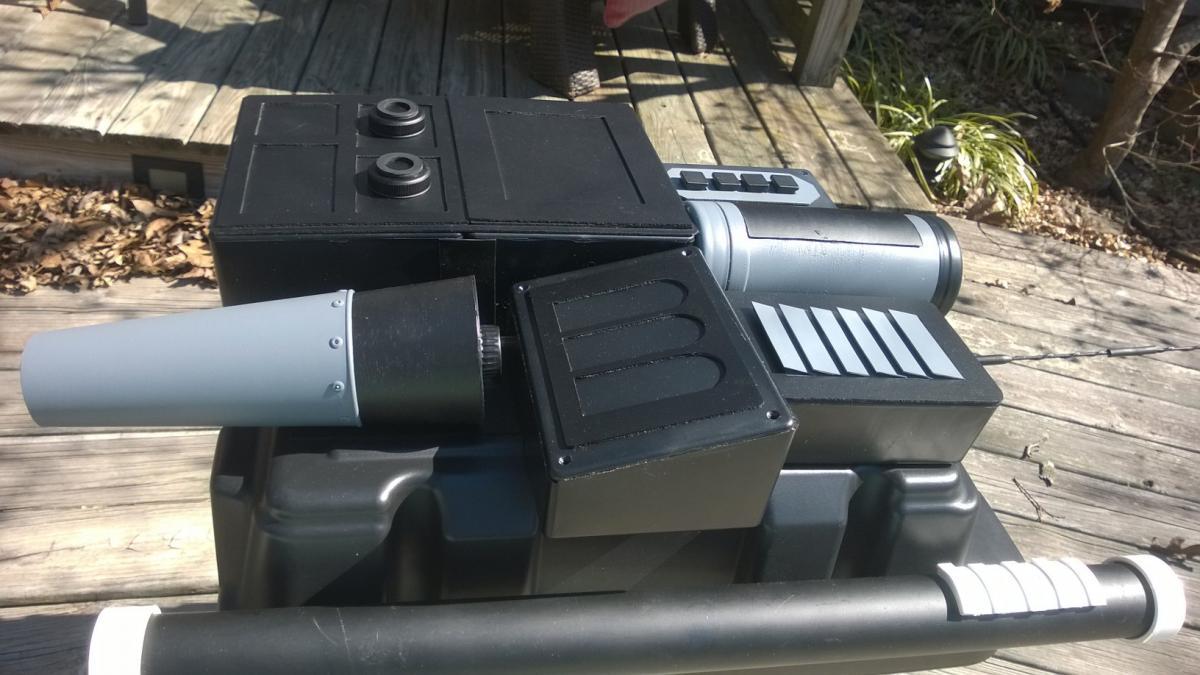
OK guys here is a brief explanations of my pack build. This is not a detailed "How To" per say it is just a good visual showing how I solved some of the build issues. I will answer any and all questions regarding how I did any part of it if you are interested. Just drop me a PM. Here is a quick overview:
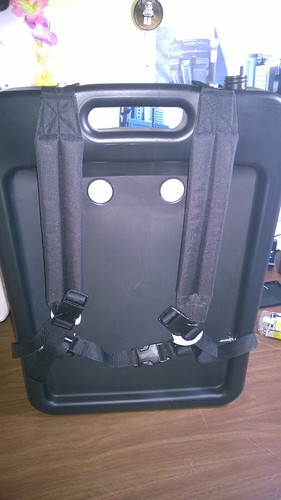
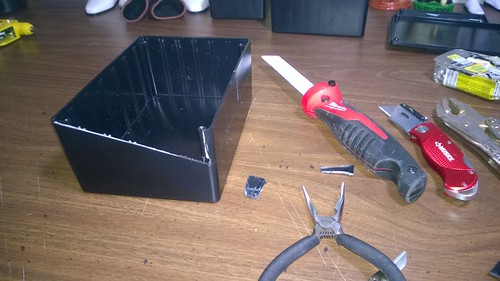
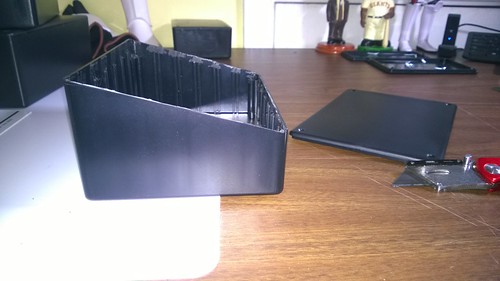
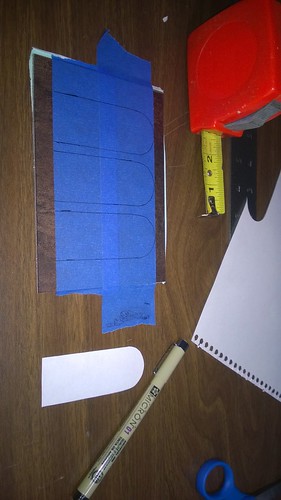
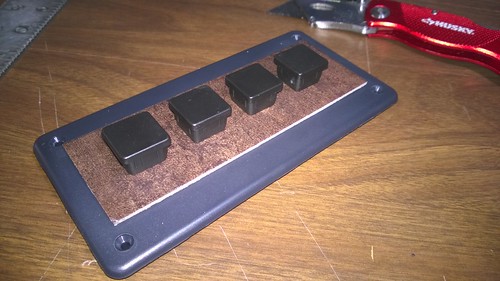
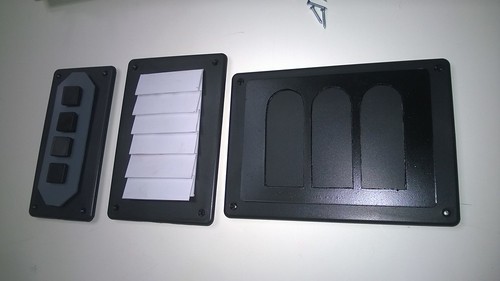
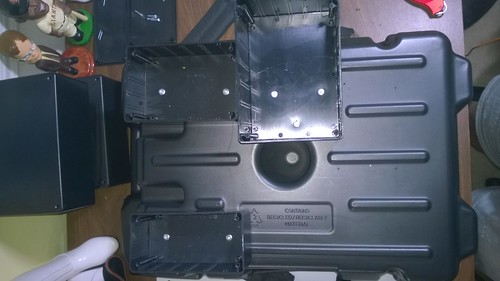
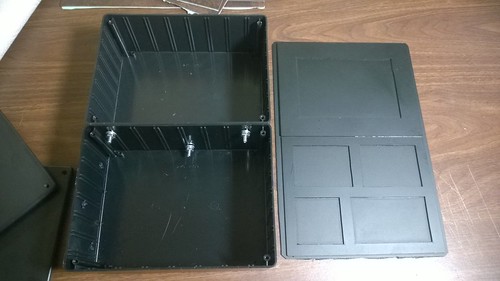
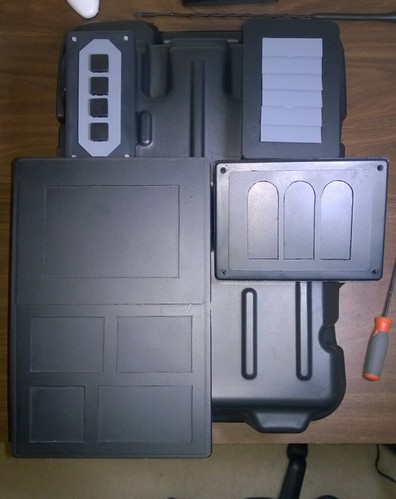
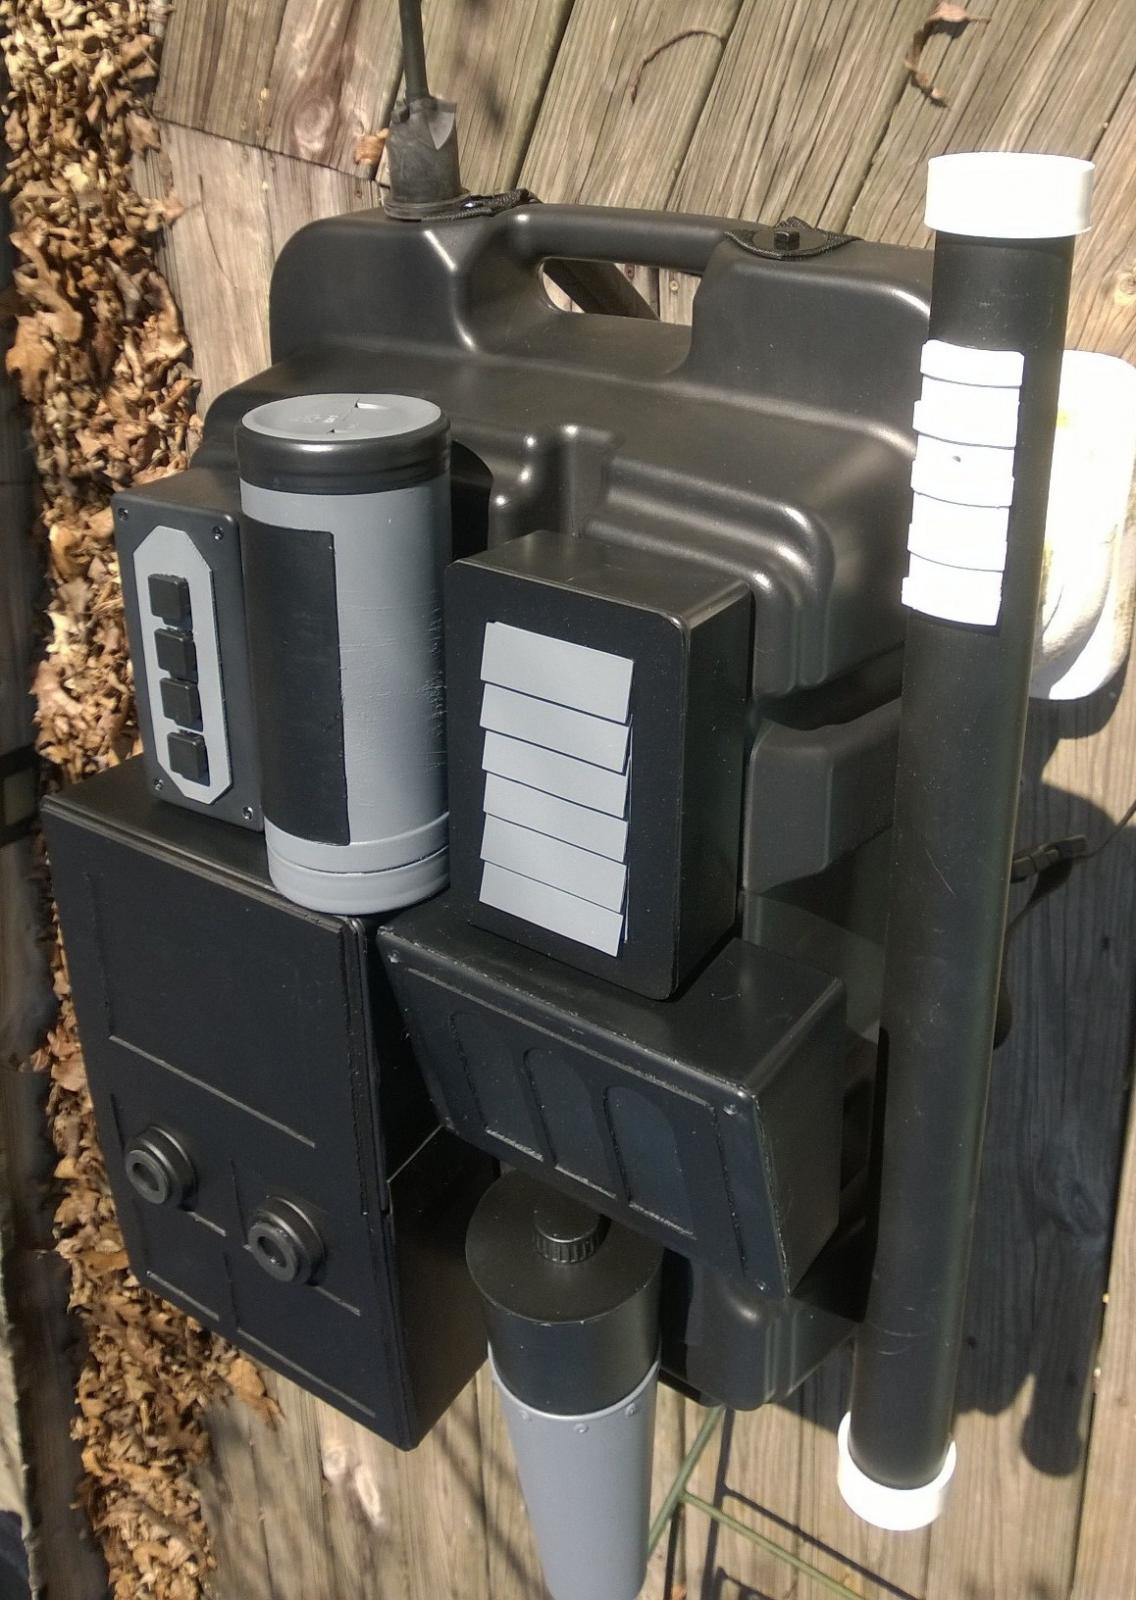
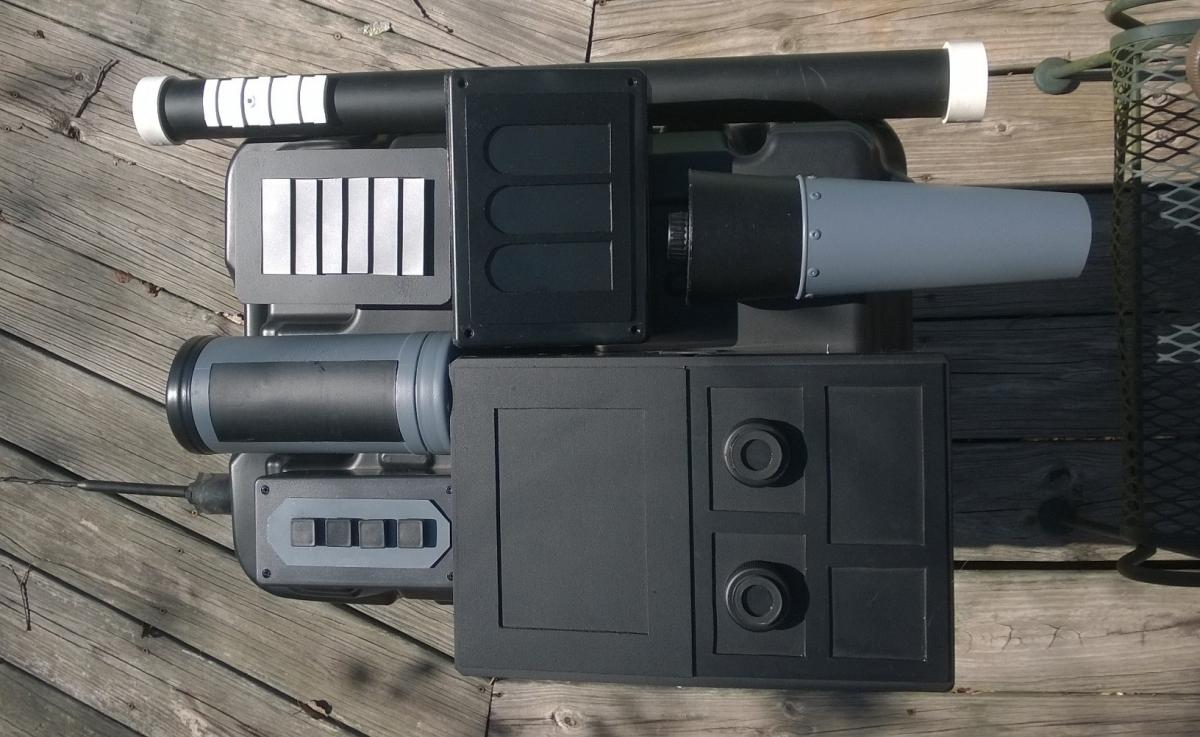
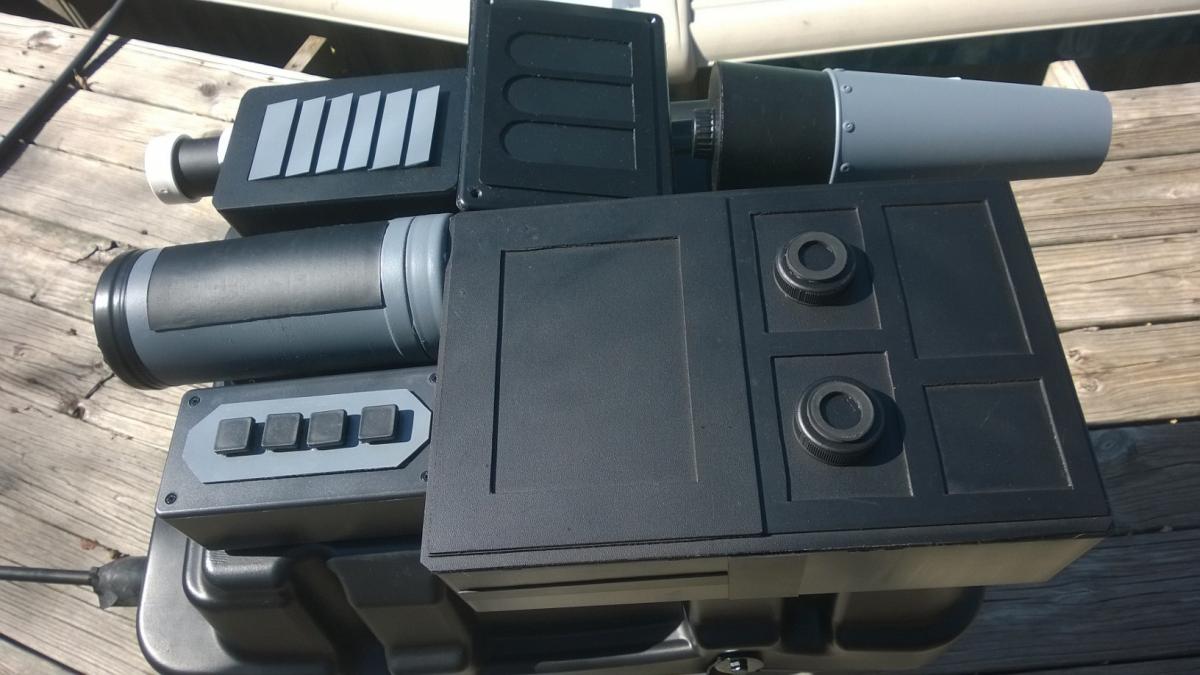
For the base I used an oil pan. Company and item number are shown in the pics. Starps were taken from a $9 Walmart packpack and bolted onto base. Boxes are project boxes from radio shack. I chose them based on best fit from the screengrabs in the HWT thread and the posts from Quartermaster showing his awesome pack builds. Covers were made from sticky back floor tiles from Lowe's at 88 cents each. Used one and a half of those babies! The buttons were furniture end caps from Lowe's and all the boxes were rivited to the base before the covers were put on. Slanted box was hand cut then re assembled. Tube is a handi wipes or bug repelant tube with the face cut out so I could rivet it to base.
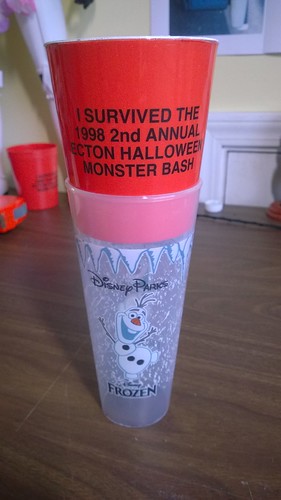
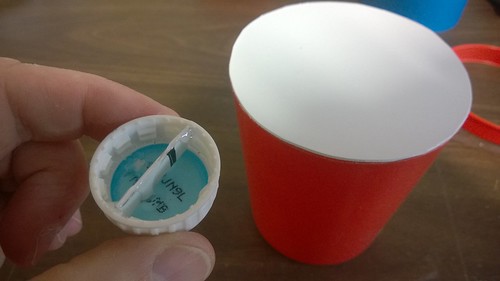
Pre drilled and test fitted all rivets before painting. Tube was painted, riveted, and piece from another tube was painted black and glued over opening. I think rivets make the overall pack more sturdy. Radio box was two project boxes bolted together then the face was made from floor tiles and painted before applying after riveting boxes to base. Pictures show the cups I used to make the funnel. Yes that is Olaf! I ended up riveting a flat piece to the bottom of the cone and then using that to glue the cone to the base. Getting it on the pack is the tricky part due to the shape. I did not get a good picture of this but if you need one to help explain I will get one for you.
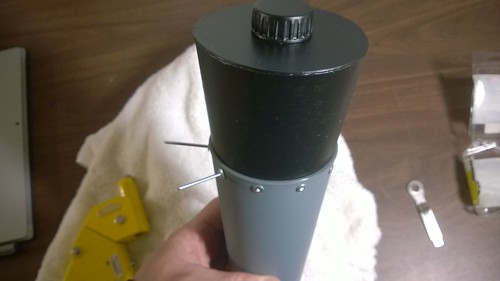
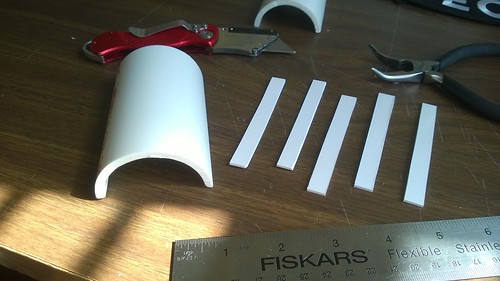
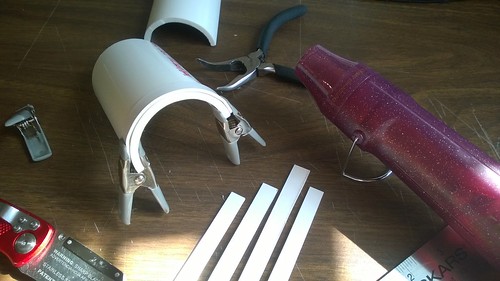
Tube is 1.5 PVC and caps are 1.5 end caps then cut to 1" and glued on after tube base was painted. Side cap is 2" PVC cut to match screen grabs and then small ABS strips left over from my TK build were cut to length, heated and bent to shape and glued to try and match screen grabs. I riveted that to the pole. That's really it and I hope it helps. Again any questions hit me up and I will do my best to help.


-
3
-
-
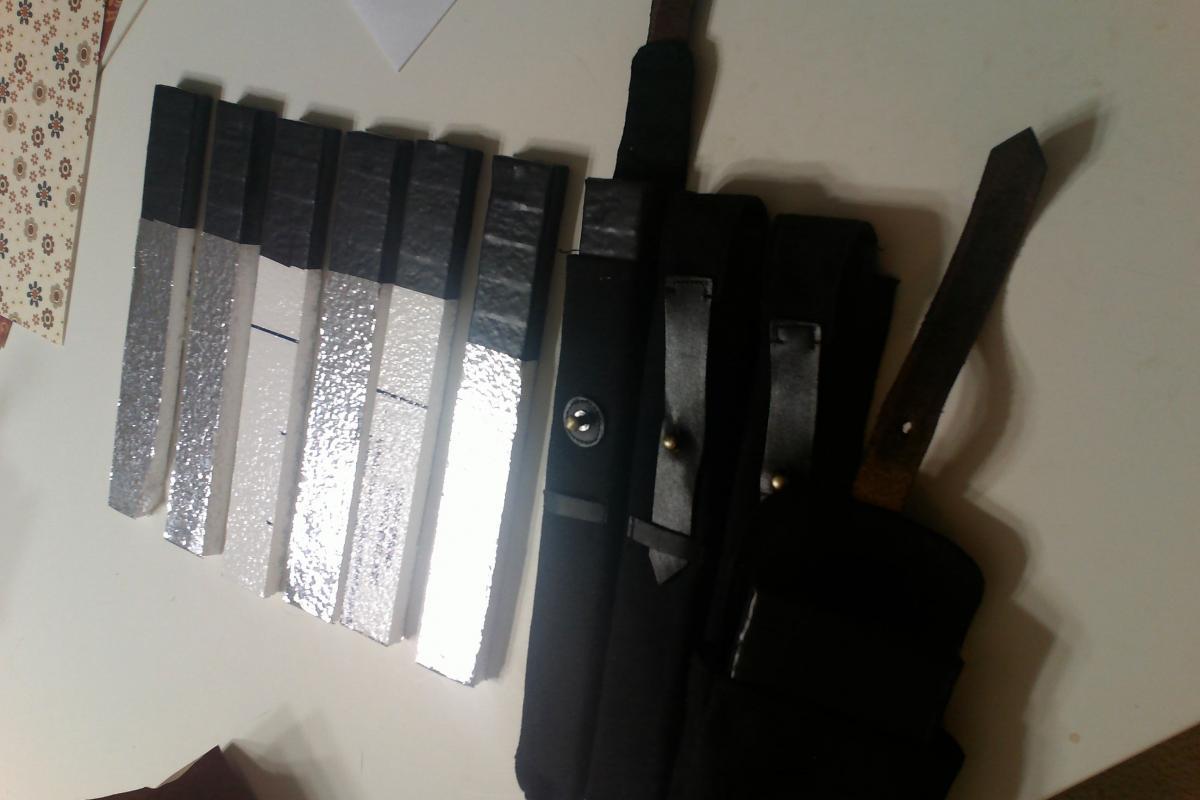
I used insulated siding just because I had it laying around. Cut to length and duct tapped the ends. Went ahead and made some extras for future pouches. They have a good weight and look good.
-
1
-
-
Thanks again Tony. I dropped him a PM. Question for you: would you recomend the charcoal dust mock up for the armor for the pics or dive in full and build a seperate kit. I was worried the armor may not clean up if I really mock it up good for submittal.
-
Next step TK HWT EIB

Yep! I'm working like an ant every night to get ready.
Last night I worked on my belt for the HWT. I am going to use the same plastic belt for both kits but had to have a new cavnvas belt without the holster bolted on and the two ammo puches attached. Duplicated the snaps from the original belt and all fitted well. Since I can't find a supplier to provide just the plastic belt without buying a whole kit I removed my drop boxes and re-worked the elastic to attach by velcro hidden by the belt strip so I can remove them when HWT'ing. Also aded home made square buttons on the belt per the Gazmosos tutorial. Not sure if my armor will make the EIB but I am going to give it a shot hopefully within the next two weeks.
-
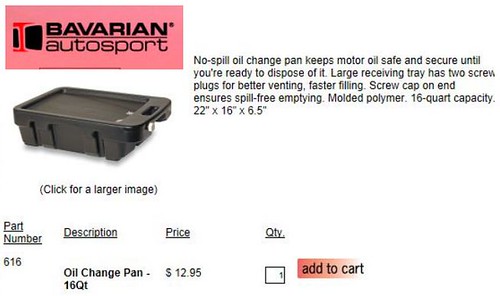
I have had a few inquires into where I got the main back pack base unit. Here is some general info before the build thread is complete:
The oil pan is at Bavarian Autosport ( Search for product # 616, Oil Change Pan, 16 Quart. $12.95 and just $ 19.00 total shipped). The boxes are project enclosures from radio shack. Riveted onto pack before covers were added. The details on the boxes are cut from black sticky back floor linoleum tiles ($0.88) from Lowes. Plate on 1.5" tube is a 2" piece of pipe cut to shape, then little strips of ABS were heated and bent to match curve and glued. The angled box was hand cut and reassembled. Radio box is two project boxes bolted together and riveted to pack before face was applied (black sticky back floor linoleum tiles).
I will get my build thread up soon.Thanks
Charles. TK 72627 -
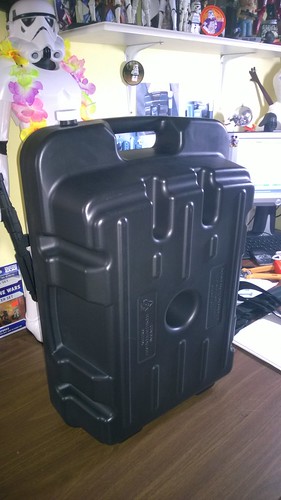
It is hard to see in my pics but I did try and add some side detail to the radio box. I used all the screen grabs and came up with some strips that would catch the light to shade the side the way the grabs look. I agree about the top handle should be solid. I was going to close it in and add some details but it makes it oh so easy to carry. I may just build a piece that slides over the handle for when I am trooping. Mine is very light weight. The oil pan base is hollow and is concave on the inside to fit over the OII.
-
It is a great looking custom pack. For approval, however, there are specific guidelines for what the pack is supposed to look like:
http://www.501st.com/databank/Costuming:TK_hwt
BackpackFor 501st approval:
- Styled after the ANH Sandtrooper packs or a simplified pack as seen in the video game (Battlefront series).
- Backpack should be lightly scuffed,(battle worn), but not weathered like a Sandtrooper (TD).
- If an ANH style Sandtrooper pack is used, it shall have the appropriate details for a specific ANH Sandtrooper, which is being referenced, but shall not be weathered like the ANH Sandtrooper, but lightly scuffed,(battle worn).
- If a game style pack is used, it shall closely match the simplified pack as seen in the video game (Battlefront series), but shall not be weathered like the ANH Sandtrooper, but lightly scuffed,(battle worn).
It will be great to troop with at a non-canon troop though.
Sir I took your advice and built a pack that meets the current CRL. I shall be submitting soon. I posted pics in the HWT thread "Pack Completed".
-
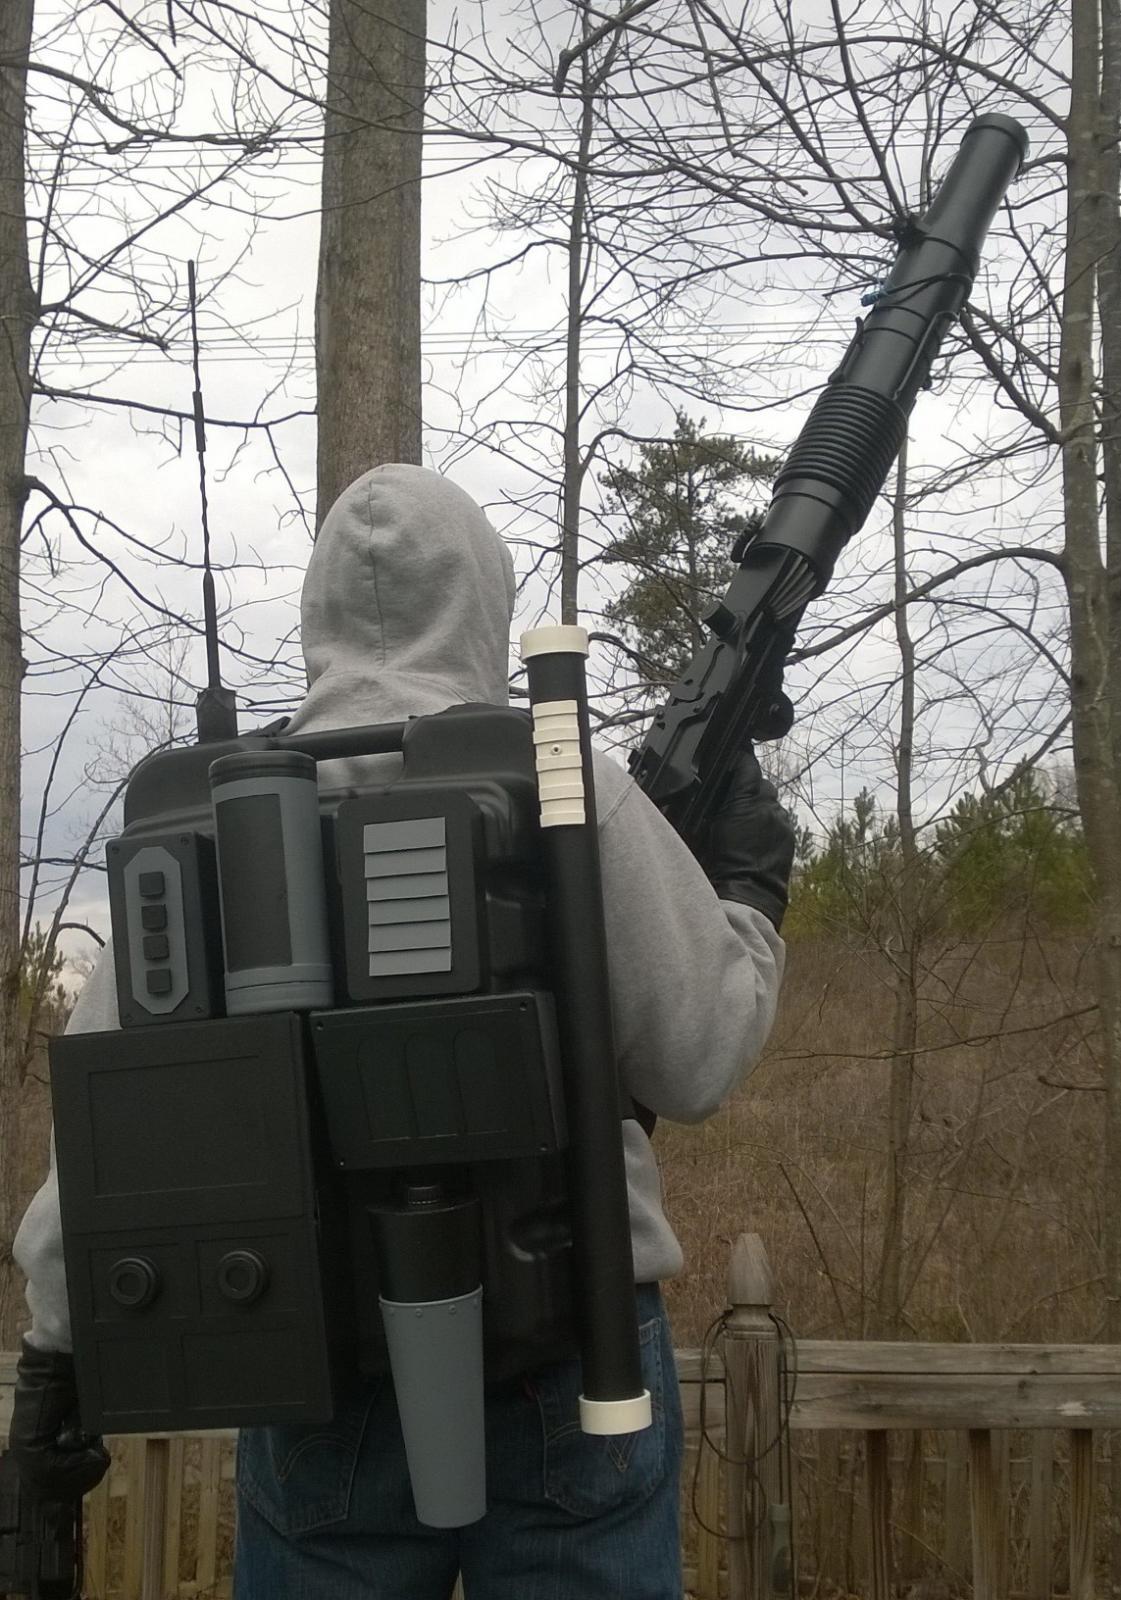
My pack is built and ready to apply for HWT status as soon as my leather pouches arrive. I need to give a big shout out to Quartermaster for inspiring me to build this and leading the way with his amazing packs. I also need to thank Ukswrath for support and the great build thread. I will post my build thread once I submit to the GA. Garrison. Hope you like it and if you have any questions on specific pieces or "How To" help is needed I will help if I can. Troopers helping Troopers is what it is all about!! I added a pick of me testing the weight of the completed pack. I am not sure the neighbors quite understand my hobby


-
3
-
-
Good grabs. I agree with Gazmosis that this pack will be open for interpretation. I will be posting picks tomorrow of my build and I am trying to stick as close as I can to the screen grabs. I do like some of the pics show a little detail on the side of the pack.
-
Thank you sir. The Drop Siphon Funnel build is the last piece of the puzzle for my build. I just could not figure it out but you sir have helped solve that for me. I can honestly say that your build thread is going to help me complete this "in progress" pack. Great idea and awesome build. Thanks for sharing.
-
Great stuff! Thanks for posting this.
-
Looking forward to seeing your kit. I am getting ready to strap my main pack. Got any advice on how to attach the straps? I am getting the rest of the kit from the awesome Quartermaster but wanted to go ahead and strap up the base. I am asking all the HWT's I know of, all two of you! Haha
-
We had a hard enough time getting everyone to agree on the Fire Teams, I'm not sure if another subgroup would work. The HWT is included in the Fire Team charter, but I see what you are asking.
Thanks sir.
I will troop with my Fireteam and down the road come up with some Fireteam Shocktroper swag that fits within my Fireteams goals.
-
I'm a few ammo puches away from submitting to my Garrison for HWT status. I was wondering if their is a special group our squad for the SHOCK TROOPERS? We do look pretty dang cool and I am sure we could have some awesome swag focusing on our BFG's. Is there already something out there? If so let me know if not once I am officialy cleared and designated we could work on something. We are after all the Big Guns with clean armor.
-
Thanks. Email sent.
-
Things change, things get better, we all have to learn to adapt. No conspiracy here just an update of the requirments. I built a pack that will not be approved but now I am building one that will get approved based on the video game pack. I can see both sides but I say build one based on the video game. It just looks better, is more basic, and looks awesome with leather pouches. But hey I'm just a caveman.
-
1
-
-
TK72627 GA. Garrison, Ocmulgee Squad requesting access.
http://www.501st.com/members/displaymember.php?userID=17663&costumeID=124
-
I like where this is going, a weapon octopus!!
-
Question for you guys and girls. I just bought an amazing T-21 and plan on trooping with it as a HWT. My question is if I have the pauldron, ammo pouches and T-21 can I still have a holstered E-11? The CRL lists the E-11 as an option so my thinking was a HWT would carry multiple guns just because he is a badass so can I wear the holstered E-11? I could easily get a new canvas belt to switch out from TK to HWT but I was just wondering.
Your thoughts?


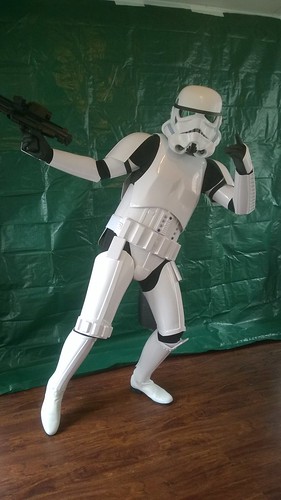
TK 72627 Requesting HWT EIB Status (FX) [APPROVED] 2nd
in Request Expert Infantry Status
Posted
Heavy Weapons Trooper (Shock Trooper)
Charles Ecton
TK 72627
Templar 726
Georgia Garrison
Ocmulgee Squad
Fire Team Terminus
Height: 5'11"
Weight: 185 lbs
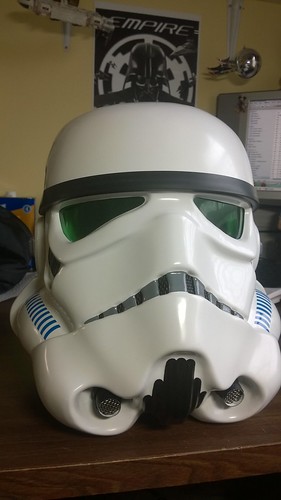
Armor: FX 501st Approved 10/13/2014
Helmet: Authentic Props (AP)
Helmet Electronics: Evil Boy dual fans, Rom FX Static Burst kit
Boots: liquidsolidchewy FISD Member
Neck Seal: TrooperBay
Gloves: Chemical gloves rubber
Hand Plates: Hard Plate (FX)
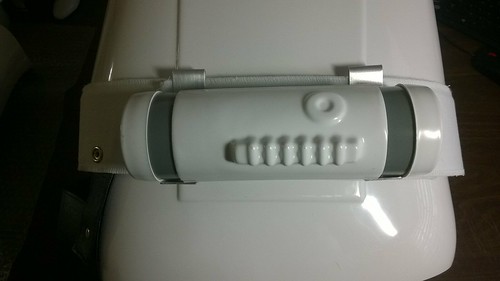
Main Belt: FX plastic front with button modifications and removable ammo boxes for TK/HWT kit
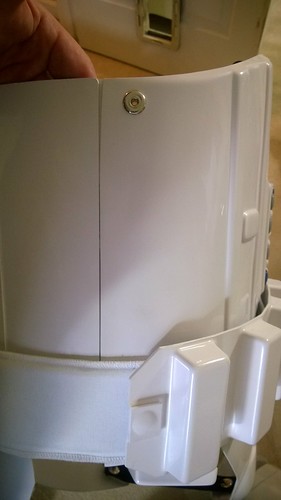
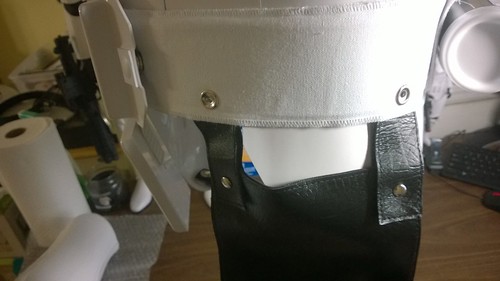
Canvas Belt: TrooperBay. HWT Ammo Pouches attached with no holster per FISD EIB standards.
Ammo Pouches: Three leather slim pouches per screen shots from Battlefronts Game by Blaster8266 FISD Member.
Pauldron: Hal Clay 501st
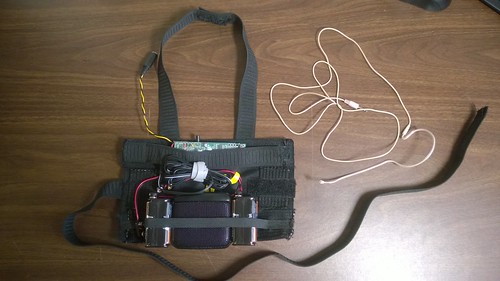
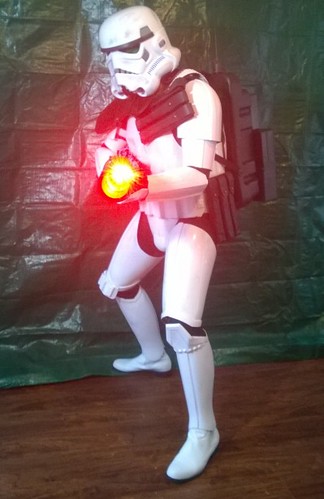
Backpack: Scratch built by Templar72627 modeled after Battlefronts Game screen shots. Straps from Pesticide sprayer. Base is an oil change pan. Boxes are project boxes with custom cuttings and linoleum sticky back floor tiles cut to match screen shots. Cone is a plastic cup with a Disney Frozen Olaf drink cup trimmed and painted. Build thread located at http://www.whitearmor.net/forum/topic/30222-templars-hwt-pack-build
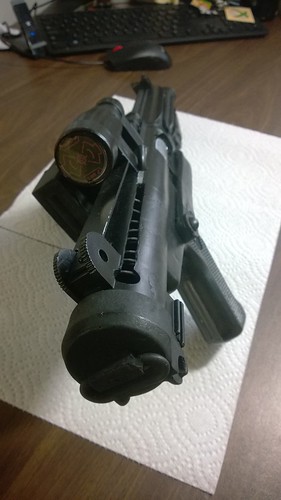
T-21 Rifle: Custom built by Blaster8266 with working inner sound board and LED blast effects.
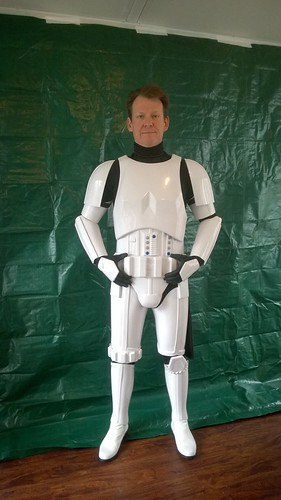
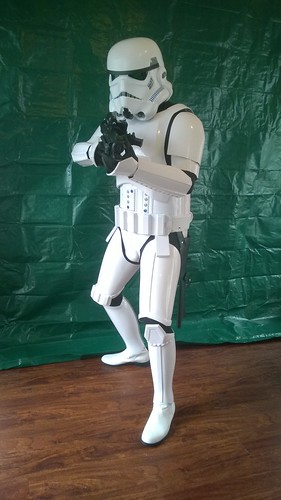
The bright mobile light washed out some of the scorch marks applied to the armor so I added a few shots of the individual pieces for review. I took the photos with my sling off the rifle to better show the armor but did include a follow up picture the sling attached per CRL.