Veeds
-
Posts
139 -
Joined
-
Last visited
Content Type
Profiles
Forums
Gallery
Articles
Everything posted by Veeds
-
I used a krylon hammered on the barrel, and rust-o-lium plastic for the plastic pieces
-
the bolt ready to be installed.
-
What respectible trooper would use anything but full automatic??
-
Sorry i haven't posted in a few days, I've been dealing with a pinched nerve in my neck.
-
beginning to work on the inner barrel. I chose a wood dowel and it worked wonderfully.
-
First coat of paint.
-
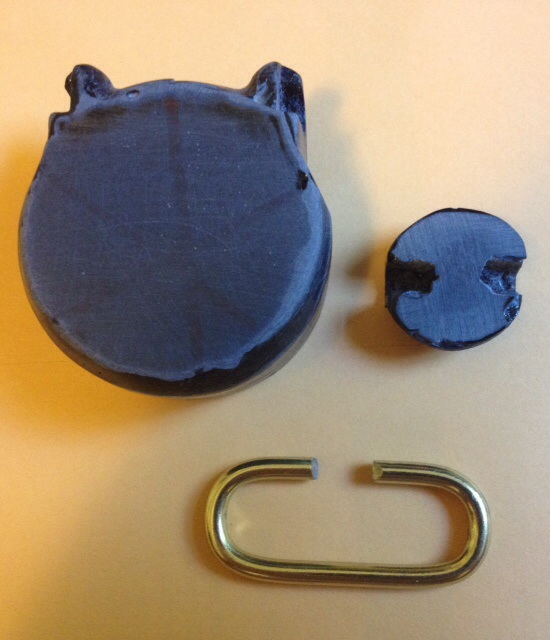
I I am going to make the folding stock functional. Here is the assembly together, and reasy to be fitted.
-
If I superglued the pin in it wouldn't be able to come off. I used the pin to help align it, and I have used E6000 to glue the two parts together but I am thinking of superglueing them. I want this assembly to be solid.
-
Thanks, ill give it a shot. its a really nice kit.
-
I've found out that E6000 doesn't hold very well to the metal pipe, superglue is great though. I am going to have to get a magazine lock and a scope/counter rail before I can finish it. I'll post a picture of what I have soon.
-
Give the crew a cookie, IE was the problem. I can use firefox to upload pictures.
-
Drilled out the holes and cleaned the edges.
-
The folding stock, after cleaning up and getting ready for drilling and painting.
-
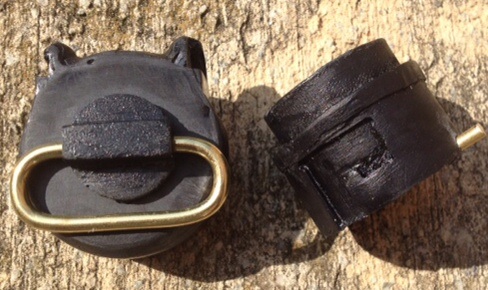
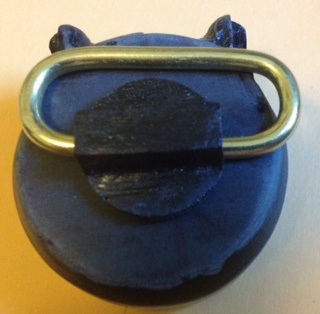
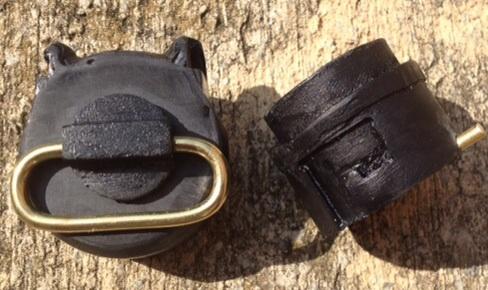
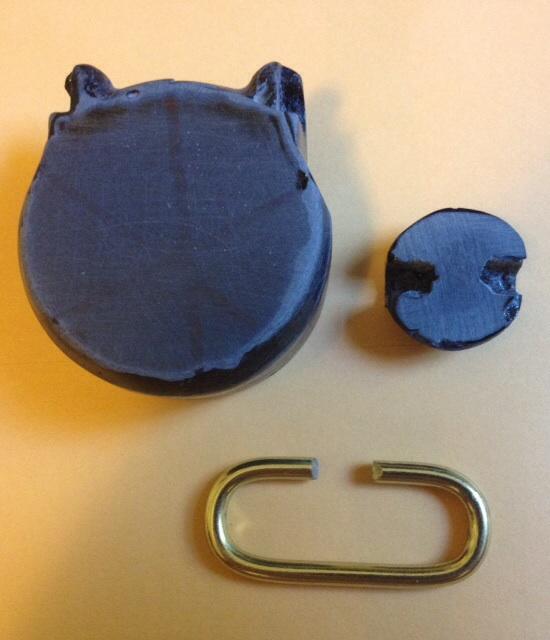
The end cap all together, I put a brass pin to line it up.
-
Not yet. I normally use Internet Explorer for the majority of my online searches. I may try Firefox and see how that works.
-
IE 11 thanks.
-
I'm having the same issues, I'm using photobucket and I've tried all the recommendations but I still lock up at the image properties screen. any other ideas.
-
I made a mistake, No Lord Vader!!!, (insert choking sound) I won't fail you again. I will have to repaint some of the plastic parts. The paint I used did not stick to the plastic, and when I removed the tape some of it came off. I will make the most of it and let it help with the aging. I have a bunch of pictures and as soon as I get my Photobucket account up I'll post them
-
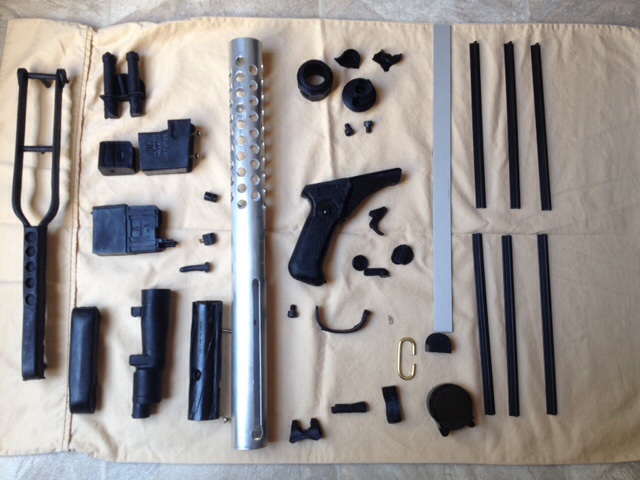
I've been working on it for the past couple of days. It's a great break from studying computer technology, and it's been a challenge. All the parts are well done and I'm happy with the way the kits coming. I'm not going to do anything too fancy as this is my first kit. I put together most of the minor assemblies and then I've been painting a thin coat of silver on some of them and then going over it with black. That way in the future if the paint does chip off a little it will look more realistic. The only part that I see I'm going to have to do any definite filling in is with the power cylinder piece. I'll post more pictures when I get the chance, I've been taking them as I've progressed.
-
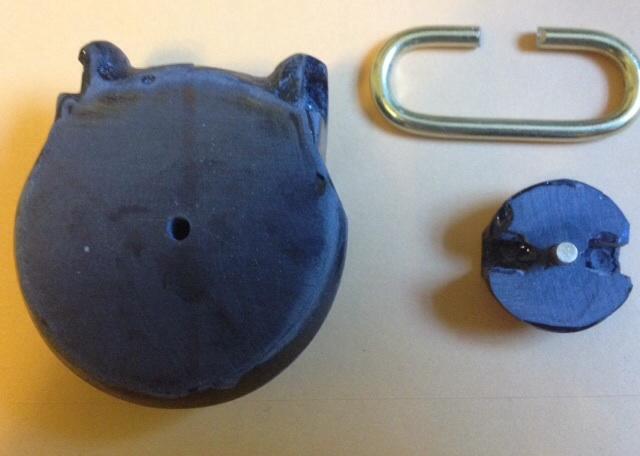
The cap all glued together. And the mounting piece that goes inside it. I drilled out the little dimple in the And I'm going to use that to push a pin to hold the two pieces together.
-
There are a few places that need to be filled in, but over all I am pleased. I've not worked with a Doopydoo's kit but I expect most kits like this to have a few bad spots. I may take a few of the spots and use them to help with the aging look.
-
I decided to start with the rear cap. I cleaned it up, sanded it down and ended up the putting in a pin to keep it all centered. The last picture is a dry fit to make sure I liked the way it looked. Then a little E6000 and tape it down to set.

-
The holes to mount the grip and the magazine holder are pre-drilled. For the pieces that have to be glued on I'm going to use E6000 glue
-
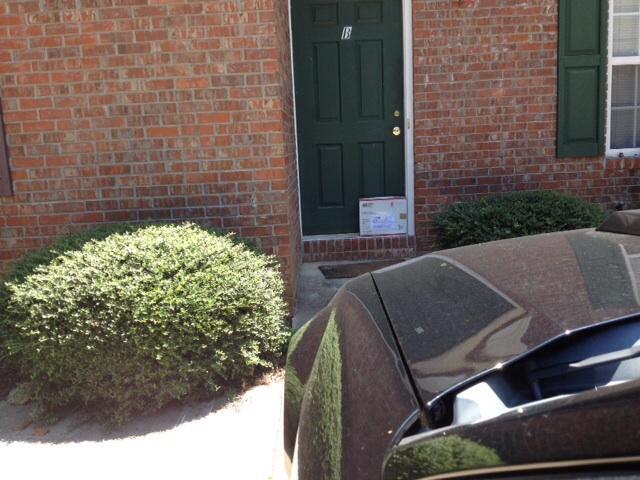
I had a box waiting for me at the front door yesterday, just in time for the long weekend. I will post more pictures as I go along, I plan on making this as detailed as I can. This is going to be a blast.

-
I don't know off hand. If you sign up they will notify you when they are back in stock. I bought a dvh kit instead.