

Starfox2010
-
Posts
486 -
Joined
-
Last visited
-
Days Won
4
Content Type
Profiles
Forums
Gallery
Articles
Media Demo
Posts posted by Starfox2010
-
-
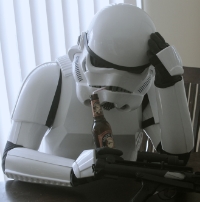
Mighty Tank to the rescue!!

-
No problem,
PM me your email and ill send it to you.
-
Hey Guys,
Sorry for not updating on emailing TG. I dont want to screen shot our convo but here goes what was said.
***Sorry, you have to read from the bottom up*****
No that'll be fine. I'm very sorry about the confusion.
Be mindful that some of the armor on the rest of that site is our previous NE, which is not sold anymore. But some of the fisd accepted pieces were moved (and some of those modified) to the AM 2.0.
Hide message historyOK TG,Thank you for your quick response. you mind if I share the link with the others on the forums?
On Sunday, August 3, 2014 2:39 PM, Trooper Gear <troopergear@gmail.com> wrote:Rick,I'm sorry this is so confusing. The calves are quite different from the original AM ones, i forgot we had completely changed them in the last run, so those other pics and old instructions don't really help much. We made them quite accurate, but they do look a bit wonky, here is proof that you do have the correctly designed ones. The curves will not be the same as the older AM onesRemember, all the pieces are now made to but joint together, then do cover strips to connect them, not overlapping like the old AM tutorials. This is the more accurate way of assembly.On Sun, Aug 3, 2014 at 3:05 PM, Rick Maravilla <rick.maravilla@yahoo.com> wrote:Hey TG,Sorry to keep bothering you but even after checking out the instructions I have a concern about the shins.Here is my concern:So according to this Topic for the shins:the side with the most curve goes in the middle, Im not sure if I got two left shins, I checked my brothers set and he has the same ones (There's also some posts about it.)Here is a pic of what I'm talking about:These seem to be the two inner pieces
These are the shins put together. On page 40 of the instructions it states that the top outer tail has a wider ridge. on my pic it shows it on both right sides.Thanks for your help.ABS BODY ARMOR ONLY INSTRUCTIONS 2010 NEW!.pdf>Whoops, here.>On Aug 3, 2014 10:08 AM, "Trooper Gear" <> wrote:>>Rick,>>Sorry you're having issues. Here are the original am body armor instructions. The assembly won't be the same because there are no longer overlap strips, but it should help with what goes where.>>The body armor are basically the same and None of the leg components have changed.>>>>On Aug 2, 2014 11:13 PM, "Rick Maravilla" <> wrote:>>>>Hey TG,>>>>>>>>>A couple of us are at a confusing stand still as to what limb pieces go with what. I'ts kind of hard to go by the old AM armor since you have modified them.>>>>>>>>>Can you help us out on the FISD and show us what piece goes with what.>>>>>>>>>Thanks.>>>Preview by YahooPreview by Yahoo -
Looking good, Rick!
Did you hand paint the traps/tears/ears/everything? Or use the stickers provided?
Which eye lenses are you using? I'm assuming the curved thick triangle shapes are the "bubble lenses" for the Hero helmet. The thin/flimsy film that came in the cardboard tube is the flat Stunt lens material? Did you affix the lenses yet? If so, how? E6000? I've been debating getting a piece of clear lexan or something of the like to give the film a little more girth.
Thanks, Michael.
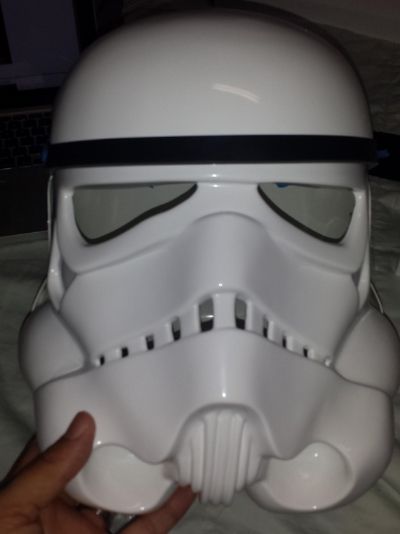
I used the Stickers for the traps, tears and back, I might paint them if I have the courage later. I painted the frown, Vocoder, ears and spray painted the mic tips.
I'm currently using the flimsy one since that one is for Stunt. Before considering permanently installing them I might cut them into 4 pieces and use 2 per eye (theres always trooper bay for the dark ones). I took a selfie (lol) and I could see my eyes clearly.
This is what I would love to do for the visor. http://www.whitearmor.net/forum/topic/24950-ales-anh-stunt-ata-helmet-assembly/page-2
Alexey did a badass job with her helmet, wish I had the painting skills.
How is your's going?
-
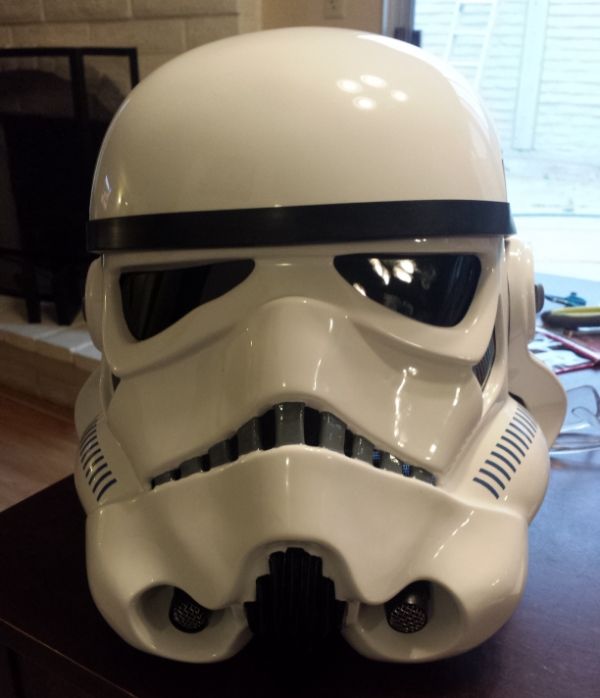
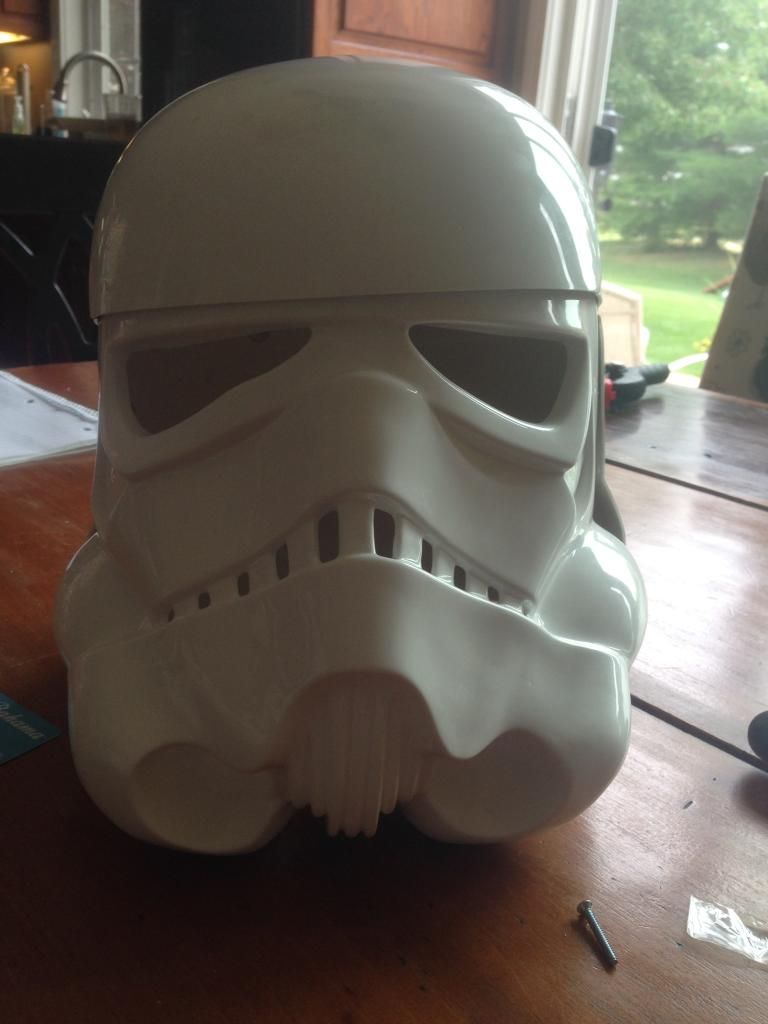
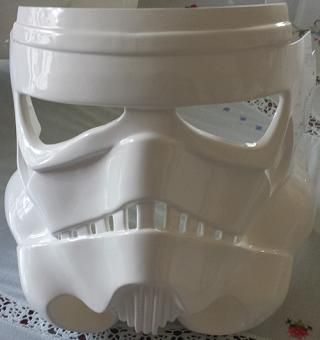
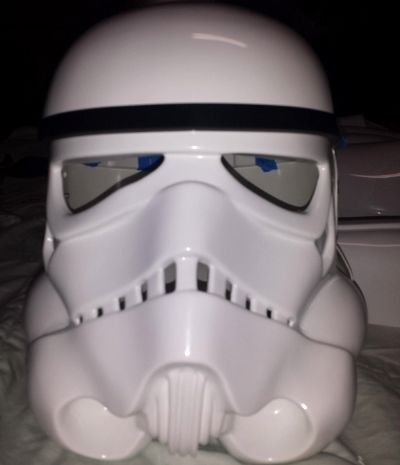
Almost done I think. Testing the visor and the frown screen, need to paint the screws white, clean up the vocoder and the ear paint a bit more and install the S trim.
any tips on cleaning the paint to make it look cleaner? Also any comments/critiques?
Front
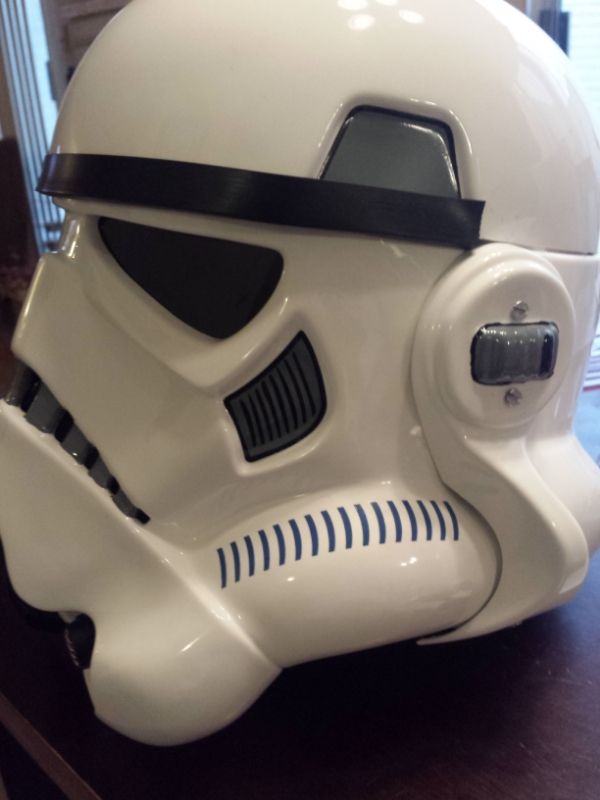
Left Side
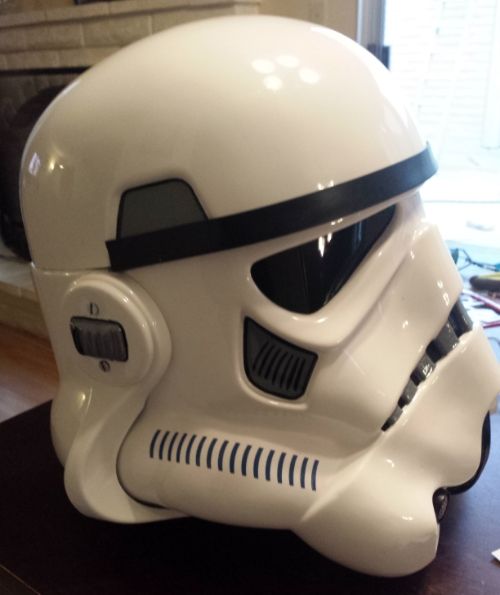
Right Side
-
 1
1
-
-
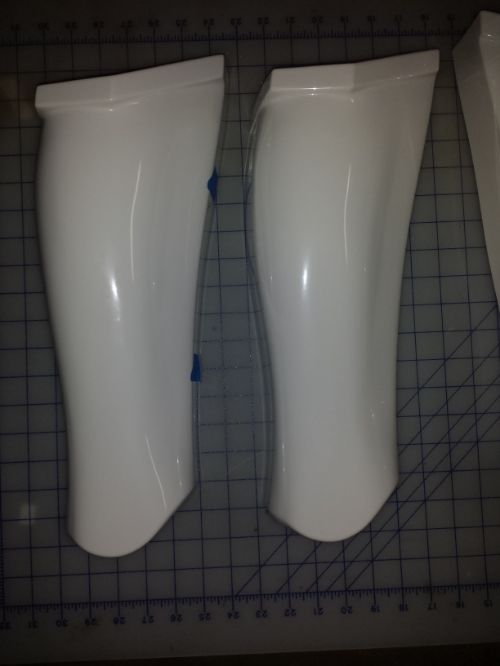
I sent an email to TG earlier asking for help clarifying the pieces. It looks like my brother and I both have 2 left leg pieces. These two are mine and it looks like the inner piece of the Left leg (I hope I'm wrong).
-
From what i've read, its just the wrist side.
-
Ok so im at the forearms while I wait for my mic tips and helmet's paint to dry.
So any suggestions/comments?
This is the right side. See where it's at on my wrist, do I need to trim it from the wrist side or from the
elbow side?
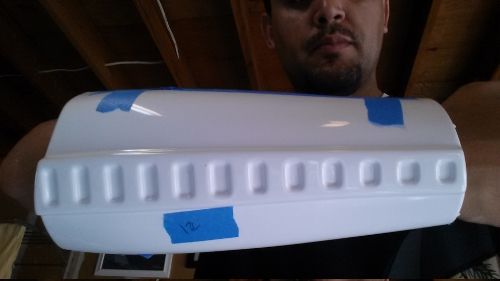
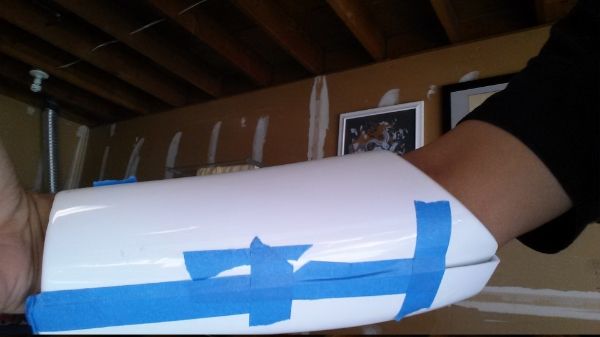

This is the wrist side. More trimming of the return edge?
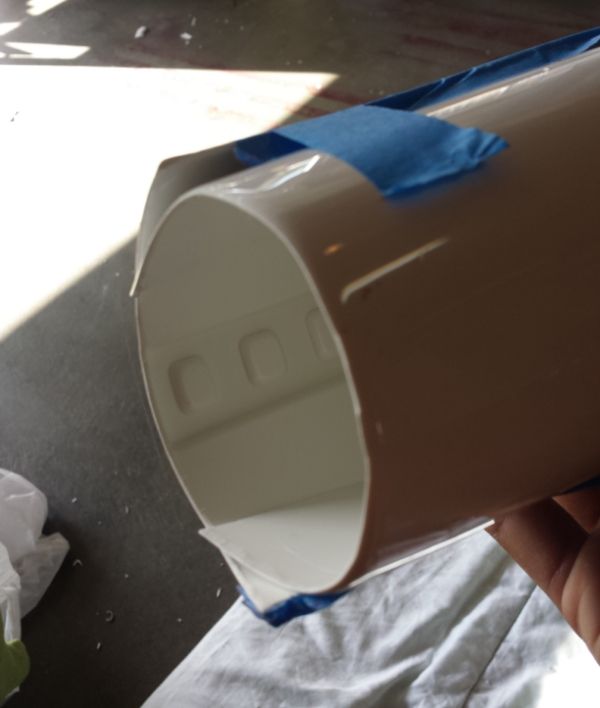
A lot to cut, how much should I cut at a time?
Thanks for the help.
-
Not going to paint? I was nervous about painting up mine but the stencils from trooperbay work great and I love the hand painted look. :-)
I have the handwriting of a Dr. but not the steady hands that come with it. I paited the gray on the ears before I did the black outline, ill have to see how that goes.
-
Hey William,
Did your face plate dimples allign with the back plate dimples when you added the screws?
-
Rick how many teeth did you cut out?
yea what Ron Said. Theres the center tooth, so count 4 teeth to it's left and 4 to it's right. You will pretty much end up with 10 holes.
Hope this helps.
-
Question. I am also part of the newbs who got their AM this week. Frankly atleast you have started. I am just staring at everything with a confused look. I am doing ESB and was looking at the frown. Looks like you cut out 10 teeth, not 6 or 8. I was able to cut them all out like you and then I read the CRL for the 900th time.CRL indicates 6 Hero, 8 Stunt and 6 or 8 ESB, Anyone know if we can just do all 10?
Hey Gus,
The teeth is per side of the center tooth. I know theres some differences between ANH and ESB such as the teeth color and frown position so you might want to check the ESB topics or local garrison as Tim suggested.
LOL "Confused look" I think everyone was in that exact spot. I even stared at the pieces the same as when my friends have me check out the new best thing in their motor and I have no idea what they are talking about.
-
Ok so I temporarily have the face on the back using screws. Using the pre-marked dimples, it sits a little cockeyed. any thoughts?
Glad / Sad that someone else had the same problem I had. I dont think the face dimples are placed right.
I just went home for lunch (i'm determined to figure it out) and I cut the top part of the face, right under the lip part. That eases the pressure it has a bit and you are ble to adjust it a bit better.
Let me know if you figure something out. ill try doing the same.
-
Ok thanks! Did you end up trimming anything on your helmet?
not yet. im planning on trimming the top of the face plate and the inside of the eyes a little as well as triming that teple indentation on the right side.
I did however add the stickers and primered the mic tips, im hoping to finish the helmet this weekend.
-
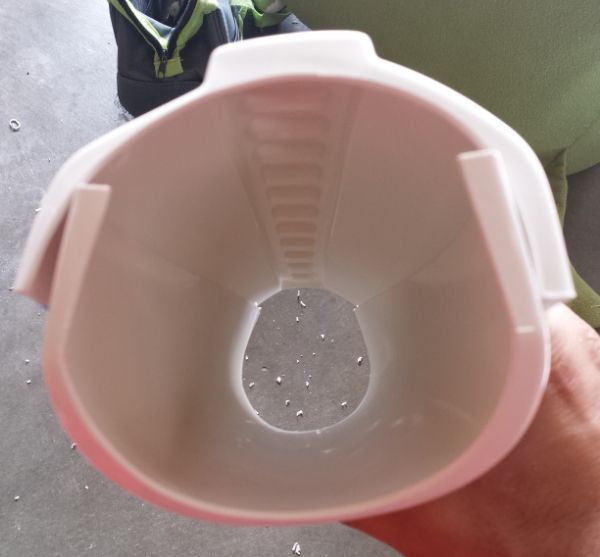
Hey Rick, what did you use to take the E6000 off?
I used an exacto blade and some pulling. I worked my way around starting from the temple grove. pulled a bit and cut with just the blede, kept opening inch by inch. then the dreaded thumb rubbing, peeling and blade scraping.
-
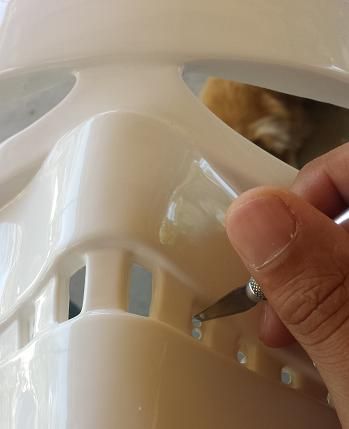
Make sure to clamp the eyes to he dome and position before you drill. That should help getting the alignment where you want it. Did you already trim the top of the face mask?
Hey Chris,
No, It was difficult setting the clamps in there. I used magnets and tape to keep it in place. I was following Darth Voorhee's tutorial and didn't see him mentioning trimming the top of the face, I thought the lip was something I needed to glue (I held off on it). I just emailed MightyTank about it.
I ended up starting from scratch, I didn't align the top and back correctly and the right side ear doesn't fit and wouldn't be able to add a screw at the bottom. I made a rookie mistake thinking there was a little difference in make helmets. it seems that the right side temple (my right) is longer than the left, therefore it throws off the helmet alignment for the face. you could see on the first pic of his tutorial that he trimmed it.
http://www.whitearmor.net/forum/topic/26301-ne-helmet-build/
I thought it was going to be easier since there were dimples added. Lesson learned for my brothers helmet. Im going to trim that part and go from there. i'm also going to trim the eyes more to use the clams. Thank the Force for E6000 being removable.
-
1
-
-
First question and then I'm done for the night:
Is there a way to reduce the display size of the photos in posts when coming over from PhotoBucket short of resizing the original images?
- Mike out
Yea select an image, and right on top of your pic there's an "Edit" button. click on that and select "Resize". All you have to do is change the width size (I ended up with 400) and the height will change automatically. Apply - replace original checkbox - save.
Welcome to the AM build takeover lol

-
Hey Tim,
Are you going to glue the forehead part, or just stick to the screws?
-
Ok here are some updates.
as I was waiting for the glue to set in, I worked on the teeth:
Drilled the holes
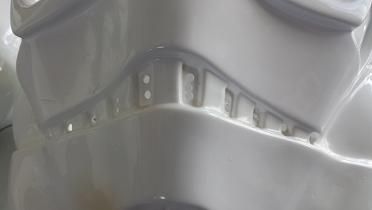
cut the gaps out
then I filed them down

Not so bad
I got a little brave and I drilled holes in the dimples and added some screws to see how it works out (only the screws so I could take them off with ease):
I noticed there was an extra dimple on the helmet's left side. Any Ideas why?
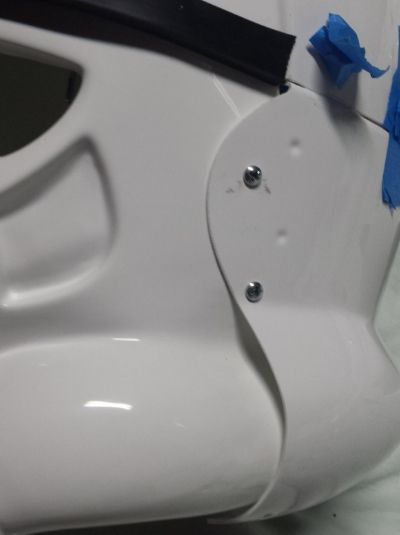
It's right side
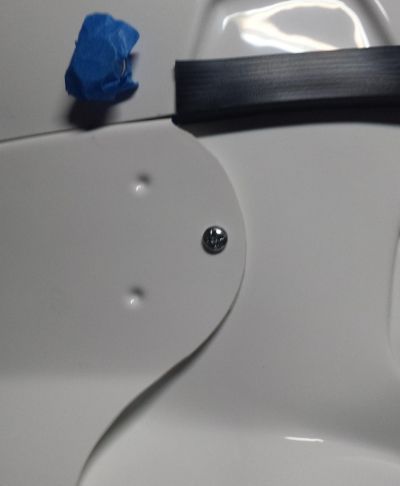
It didn't really align right for me, it was a little high on its left side
This is best I could adjusting it.
I'm going to plan it out again tomorrow, maybe make a new hole on its right side to align it better or add the rest of the screws and see if that helps.
Please note that it might just be my helmet, I don't want to discourage anyone since it's my first build (rookie mistake?)
-
Hey Ryan,
Theres a few of us on the same boat. Im on that nervous stage where you measure twice avoid it by doing chores then come back and stare at it for a while then cut, lol.
Keep in touch with the rest of us we're all in each others posts.
Good luck.
-
Looks to be an AM community build lol. Wish we all lived in closer proximity to host our own armor party! Armor party on FISD it is then!

Yea that would have been tight. LOL its gona be back and forth on everyones build posts
Is everyone staring with the bucket?
I think there might be someone starting with the arms. Im too scared of starting with the limbs and the least worriesome is the helmet.
-
Hey Scrim,
Its gona be a lot of home work but a good payoff at the end. I live in Monterey County but by the time you get your armor, I may be able to help you out (currently building mine).
I asked the GGG about mabe having an armor party soon, you could come along if they decide to have one.
One suggestion I have is when looking for tools and supplies, check for sales at Michales, Hobby Lobby and Beverly Fabrics if their in your area.
-
That looks pretty sick to me! Wish I had those skills.
-
Nice! more minds for the AM build.

Fuumantroop's AM armor build
in Build Threads Requireing Maintenance
Posted
Looking good so far, Andrew.