

Frank4vt
-
Posts
73 -
Joined
-
Last visited
Content Type
Profiles
Forums
Gallery
Articles
Everything posted by Frank4vt
-
TK-23325 Requesting ANH Stunt EIB Status [ATA][395]
Frank4vt replied to Frank4vt's topic in Request Expert Infantry Status
Ask, and ye shall receive -
TK-23325 Requesting ANH Stunt EIB Status [ATA][395]
Frank4vt replied to Frank4vt's topic in Request Expert Infantry Status
Steve, Anthony, & Eugene, thanks guys, it means a lot!!! I thought I posted this before my previous comment but it didn't post. I wasn't snubbing you guys! Jonathon, my fellow GT brother, thanks a bunch!! ATA's forearms are big out of the box, and it bothers me that they look big in pics too I may be able to angle them back a tad, but the wrist openings are barely big enough as they are for my hands to fit thru. Your kit is awesome by the way! Looking forward to trooping with a Centurion soon!! -
TK-23325 Requesting ANH Stunt EIB Status [ATA][395]
Frank4vt replied to Frank4vt's topic in Request Expert Infantry Status
Hey Jason! Thanks for the kind words and advice brother! ATA all the way!! 😄 The cover strip/ridge area gave me a fit on this build. I had some showing me pics covered and others not covered. So I kinda used the rule " it's easier to cut plastic than add plastic" 😊. As for the TD, I can't find the correct screws anywhere locally. Looks like I'm gonna have to outsource for those. And I'll have to measure the TD, because I had the ends off of it a few days ago, and just eyeballed them back on. It's gonna be a while before I try for Centurion, mostly because I don't have the funds to tackle a new blaster right now. Thanks too for the comments about my paint job. That means a lot when hours of meticulous work gets noticed! I sure appreciate your help!! -
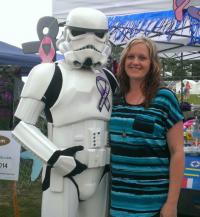
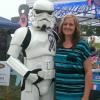
Frank Williams TK-23325 Virginia, USA Garrison Tyranus Armor = ATA Helmet= ATA Blaster= Hasbro/Doopy-Doos Height = 5'9" Weight = 170 lbs Boots = Bass Amsterdams that I dyed Canvas belt = TKittell Hand Plates = Raw latex painted white Neck Seal = Darman Holster = Darman Front: Rear: Left side: Left side arm up: Left side detail: Right side: Right side arm up: Right side detail: Action shot: Helmet front: Helmet left: Helmet right: Helmet rear: Mic detail: Lens color: Neck seal: Interior strapping: Ab detail: Cod/butt: Holster attachment: T-det: Latex hand guards: Blaster left: Blaster right: D-ring: Thank you so much for your time and consideration!
-
My attempt at a modded Hasbro/Doopy conversion
Frank4vt replied to Frank4vt's topic in ANH BlasTech E11
I bought a pair of toy binoculars at our local Dollar Tree and used the lenses. I had to dremel a bit of the circumference to make them fit, and I lightly scratched them up with some 800 grit sandpaper. Can't beat that for a buck!! -
Hello fellow troopers! TK-23325 requesting 501st access. http://www.501st.com/members/displaymemberdetails.php?userID=17114 Thanks!!
-
My ATA build thread (I think I goofed already)
Frank4vt replied to Swollendeathray's topic in ANH (Stunt and Hero)
Mine is low, right on top of the eyes. Looks more menacing in my opinion -
Dyeing Black Boots White
Frank4vt replied to Palpatine1977's topic in Build Threads Requireing Maintenance
Got a pair of Amsterdams in the mail! I'm bookmarking this thread, thanks Brandon!!! They look incredible! -
Dyeing Black Boots White
Frank4vt replied to Palpatine1977's topic in Build Threads Requireing Maintenance
Hey Brandon! Awesome job, they look great!!! I keep getting the same seemingly generated email from TK boots when I inquire about a timeframe for boots, so I might be going this route as well. Most of the UK sites I've looked on say they won't ship internationally, any advice? I'm gonna be a barefoot trooper soon!! -
DroidHunter's ATA armor build
Frank4vt replied to DroidHunter's topic in Build Threads Requireing Maintenance
Thanks so much for the info on the kidney plate! That thing has been giving me fits!!! -
RainTrooper’s ATA Build
Frank4vt replied to Raintrooper's topic in Build Threads Requireing Maintenance
Congratulations trooper! I'm following your thread as I am cutting and gluing my way into the ranks. Nice build! -
I actually bought mine from a member, so I've really only been waiting 3 months. I got on ATA's wait list in January. Still about 7 months, I hear.
-
Thanks guys! The info here is priceless. I spent most of the evening comparing pics in build threads and looking for some kind of direction for trimming. Believe it or not, that's one part that is tough to find in depth info on, so I just studied lots of pics. And of course, I did the obligatory hold the armor up to myself in the mirror and squeak like a girl I identified all the L & R pieces and marked them, and I went ahead and trimmed the pieces for the t-det (I have the pipe) and practiced on the hand guards. This 2mm ABS is the real deal! Might work up the courage to start on some of the main pieces tomorrow. I made the mistake of working past my tired level on my lid, needless to say, I learned my lesson. G'nite folks.
-
Hey all! Thanks to a fellow member, I've been able to get armor a lot sooner than expected (thanks, Brandon)!! I went from giddy to complete panic in 2.4 seconds I'm going to start trimming soon, so if there are any build threads or resources that you guys can recommend, I appreciate it. I've got my IPad locked in to FISD, some Lexan scissors, and nothing but time. Wish me luck!!
-
My attempt at a modded Hasbro/Doopy conversion
Frank4vt replied to Frank4vt's topic in ANH BlasTech E11
Thanks guys!! -
Hey guys! Just wanted to post a few pics of my recent Hasbro/Doopy conversion. I modded it quite a bit, and I'm really happy with it. I'm actually kinda sad that it's done, I looked forward to getting home from work and tinkering with it. I also got my Darman holster today, and it fits great!! Thanks for all the tutorials and build threads guys, they were a godsend. Hope you all like it! Pretty standard on this side. I decided not to add wires yet. Maybe in the future. Added aluminum scope rail, detail to the bolt, and blowback shield on the first barrel hole Made lenses for the scope Open row of holes on mag side I drilled all the rows of holes and made my own t-track out of a gutter guard from Lowe's D-ring and scope lens. Gonna add counter numbers too And the obligatory front shot. Hollowed the sight, added real bolt heads, left the electronics in for the kiddos. It was a blast building this thing. It'll do for now, maybe one day I'll tackle a full resin build. Guess I'm done building for a while, my armor isn't supposed to be ready til late summer. Thanks again for all the help guys! Troopers helping troopers at its best!
-
The ears took me pretty much a Saturday evening thru an early Sunday morning, prolly 8 total hours. I made the mistake of working after exhaustion set in and completely destroyed the first set. Then my frickin' OCD set in about the gaps & I ended up almost messing up the second set. If you did it in four hours, then you've accomplished something great in my opinion!! I started honing down the stripes this evening, I'll post pics when I get 'em done. Thanks guys!
-
Gmrhodes13, thank you for pointing that out, I did use the old measurement from pandatrooper's template that calls for them to be 13/16". They're sitting at about 21mm. What an eye!! I'm going to shave those down to 16mm ASAP. Thanks for helping me be as accurate as possible!!
-
Thanks man! It took two sets of ears, and a lot of fitting & sanding to get them even close to being right. Just take your time, leave plenty of material to work with when you make the first cut, and use the tutorials on here and it will turn out great!!
-
Hey guys! Just wanted to post some pics of my finished paint job on my lid. Painting was definitely more of a challenge than I expected. I used some vinyl masking to paint the tube stripes, but that ended up being a terrible mistake. The left side had paint runs between EVERY stripe. After much cursing and research, I found that plain old liquid dish detergent and a blunt toothpick will remove testors paint pretty easily without leaving any stains or harming the ABS. So, after two solid hours of reshaping stripes, the end result came out pretty good. I used masking tape for everything else, with little to no issues. I also added a hard hat liner using trooperbay's (I think that's who it was) YouTube video for reference. I wear a hard hat at work, so it's very comfortable for me. I'm happy with the end result, and looking forward to putting some mesh & fans in and calling it done! Thanks for all the advice and support guys, I can't wait to join the ranks later this year!!!
-
Thanks Minuteman! The reference pics for the painting are so hard to judge on the real thing! I'll definitely check up on that, thanks for the advice!
-
Hey folks! Time to call it a night....I filed the teeth more square, and took just a bit more off the eyes. Then I put the first coat of gray on over the black that I double coated this morning. Got the first layer on all over. Gotta do some edge work on the ear buttons and rear traps after it dries, I've got a wicked crooked edge on the left trap, but it's an easy fix I'm pretty happy with it. It's amazing how seeing color on your lid gives you a sense of accomplishment!! How's she look? Sorry 'bout the yellowish hue, the lighting in my kitchen isn't the best...
-
Thanks guys! SC, I'm kinda partial to the low brow, makes it look more menacing, to me anyway. Thanks for the advice on the teeth & eyes, i was worried about taking too much off both those areas, so I'll definitely refine some more! Thanks again!
-
Hey guys, just wanted to post an update on my helmet build. I haven't been doing a step-by-step thread, but I've used pandatrooper's tutorial from the start, as well as MANY other troopers' builds. I must say, I've never seen a forum with as much valuable information as this. I'm very proud to be a small part of it. Everything went pretty smooth until I got to the ears. Holy mother of the maker!!!!! Terrell sends two sets for a reason! After two solid days of fighting, cussing, maiming, bleeding and praying, I finally got em decent. I wanted gaps to be screen accurate, but I had a helluva time getting things to line up. PLEASE, if you are just beginning like me, TAKE YOUR TIME ON THE EARS. And don't skimp on getting some good lexan scissors, or you'll be sorry! Anyway, things are looking up now, and soon it'll be time for some paint! Thanks again, all of you that have come before. Your knowledge is priceless!