

toybiz
-
Posts
361 -
Joined
-
Last visited
-
Days Won
2
Content Type
Profiles
Forums
Gallery
Articles
Media Demo
Posts posted by toybiz
-
-
Thank you Ian and Steve! Got my fingers crossed...

-
Nice build! Brings back some memories...
Jut take your time and like learning to ride a bicycle...you never forget once you figure it out.
Most of all keep having fun!
Adam
-
Welcome Joe!
Yes, you came to the right place! All things TK related is found here.
So make sure you're comfortable and got something to take some notes, put on your research/studying hat and get to it BEFORE your armor arrives but we all been there. Remember, chances are someone has crossed the same challenges you may or may not come across. We are here to help or at least point you in the right direction.

I hope to meet you some day and go on a troop!
Adam
-
After reading about the Kidney Plate notch and subsequent reversal for EIB status, I am now ready to submit. Thank you to all that are holding us to a higher standard. I know it is for the greater good for all.
Here are the requested shoulder to bicep horizontal strap photos and a few resubmit photos covering details that were recommended by others or may not have been clear in my original submisstion:
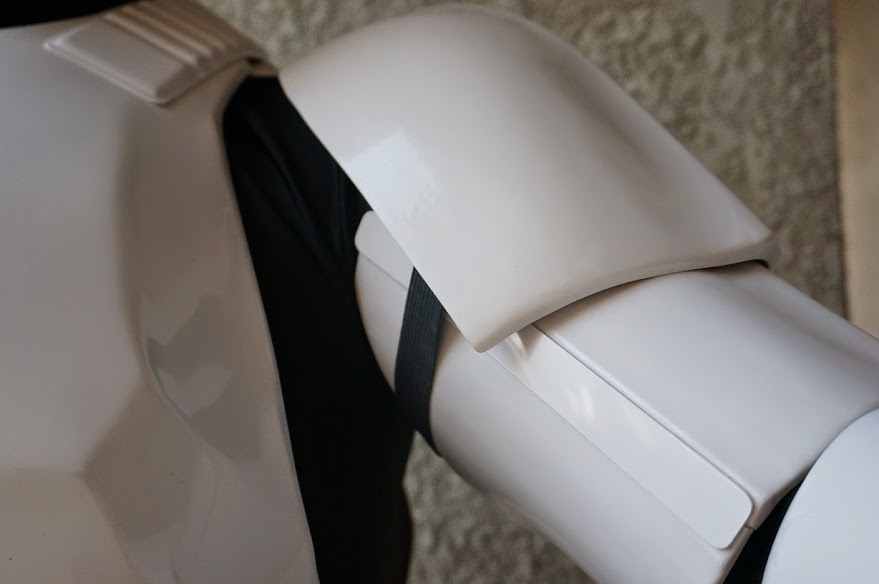
Left shoulder to bicep strap this is installed without the "J Hook" as it will move in and out of sight depending on my arm position.
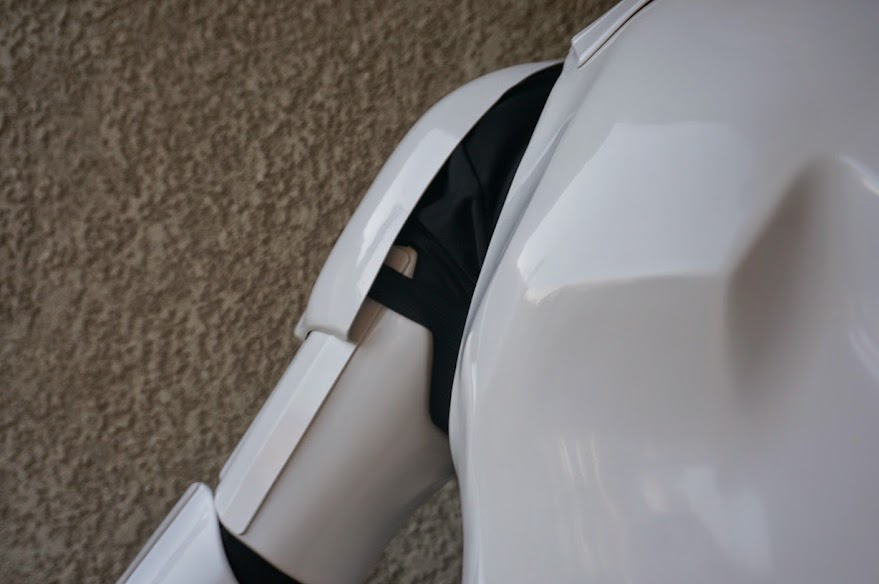
Right shoulder to bicep strap, installed similar to the left also without use of the "J Hook"
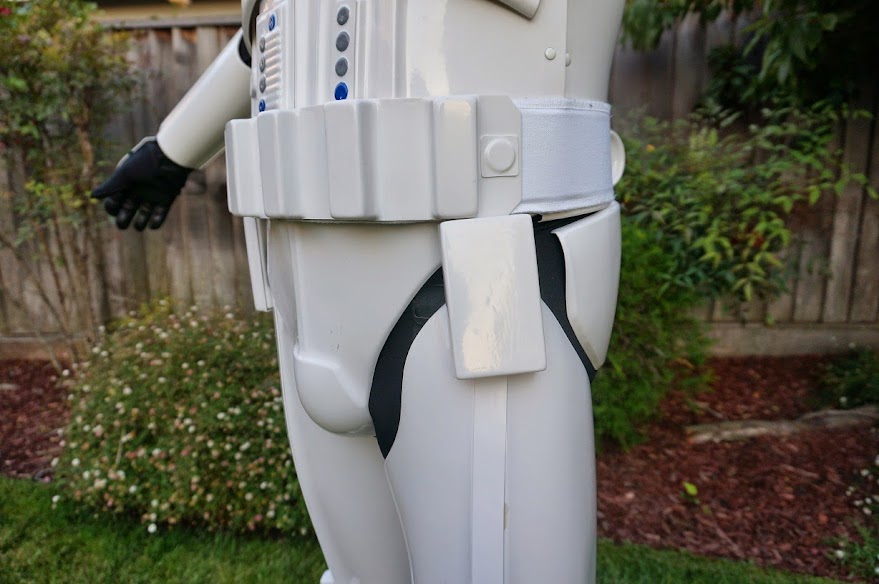
Left drop box alignment and repositioning of the belt higher on the waistline.
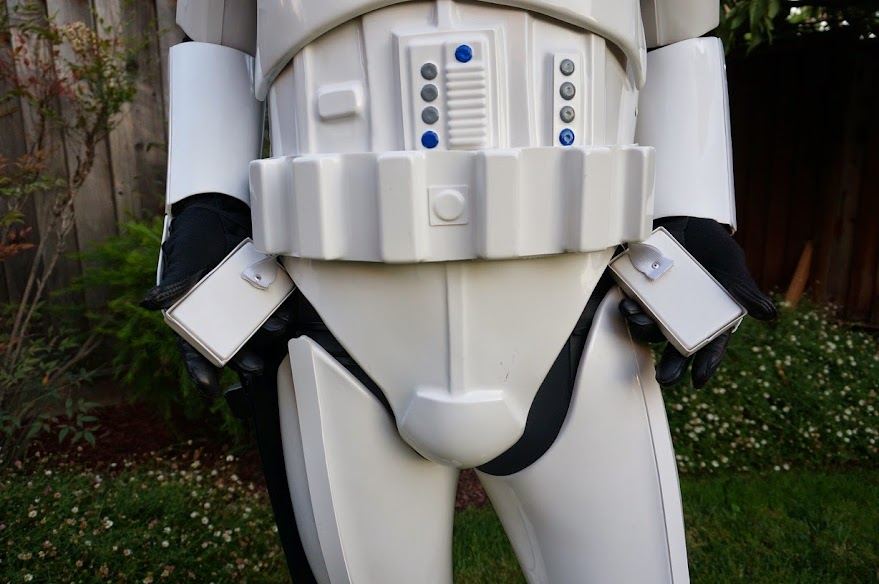
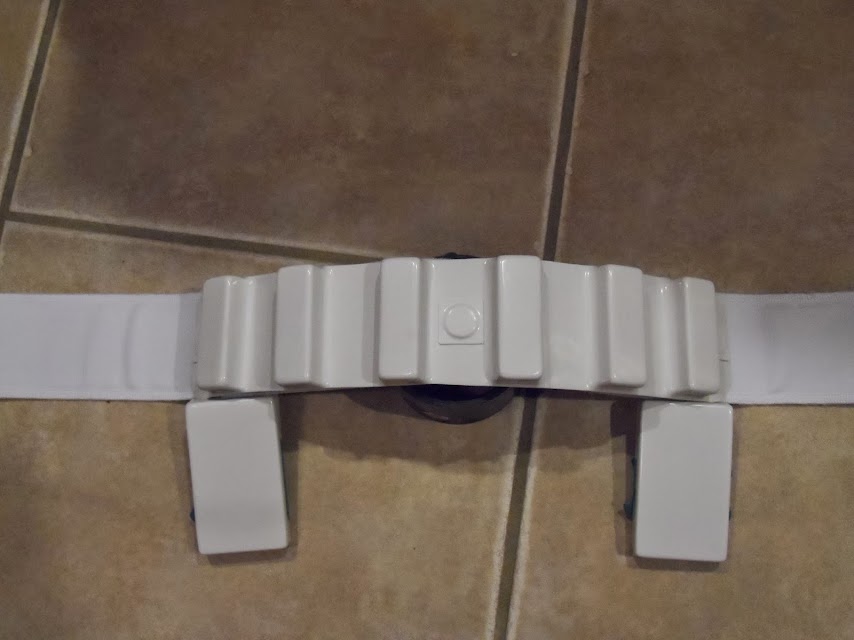
Drop box backing cover detail
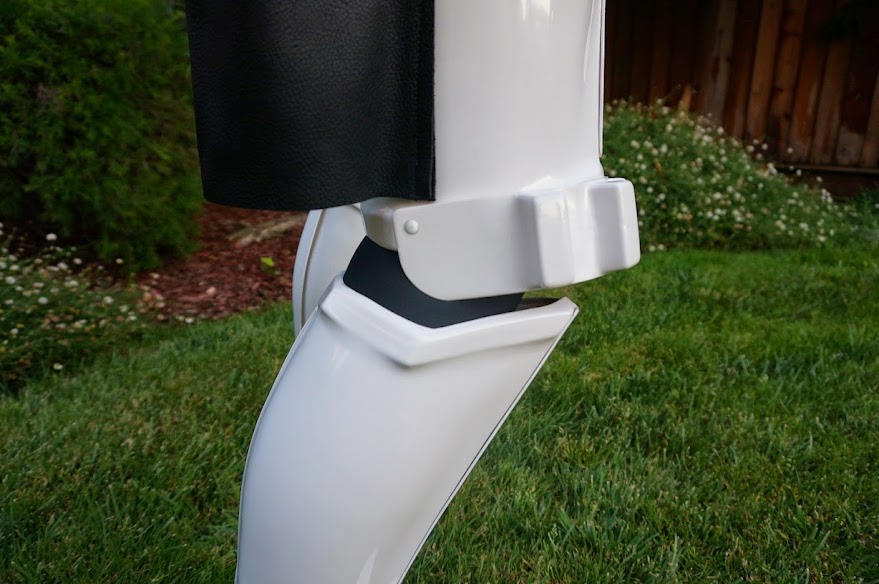
Right knee ammo box mounting rivet detail

Sniper plate mount and shin velcro closure side view.

Right side view including helmet ear stripe update from ANH to ESB. Note blaster scope weathering toned down.
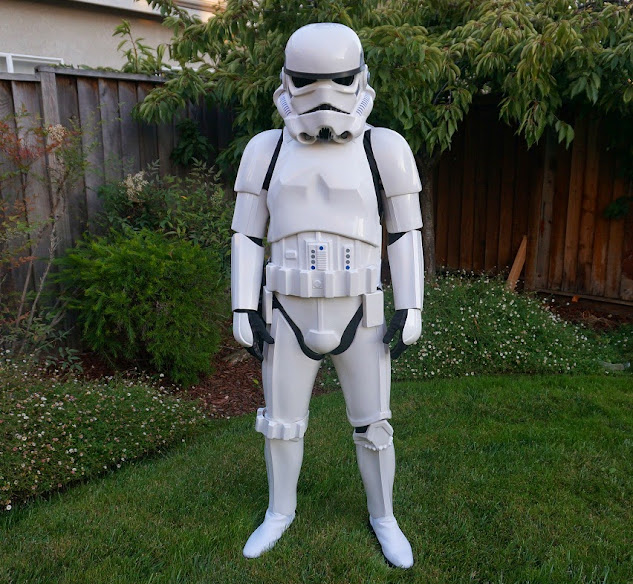
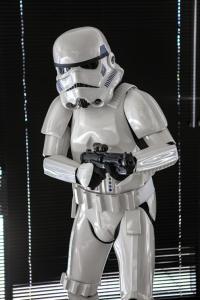
Overall fitting again with the changes.

Action shot arresting a smuggler trying to move some Rebel contraban... "those were NOT the droids we were looking for..."
Thank you for your support and let me know if there are any further action on my part for my resubmission.

Adam -
Thank you Diana...
Your journey definitely embodies some if not all that every TK builder experiences. Some are better at conveying this into words than others. Thank the Empire that you were genetically engineered as a writer or all would be lost to the Cosmos.
I know I for one enjoyed following your journey as every step along the way felt as if my hand played a part in the build. (except anything that involved the cod as I respect your husband too much)
But reaching Centurion has brought a wonderful close to your first series in your journey to the Dark Side...
Can't wait for your next installment...
Adam
-
Thank you everyone for sharing your thoughts and viewpoints. Considering I have a set of MTK armor,cutting this notch out will only result in the sides of the butt plate to extend past the kidney notch in its current configuration. Will this misalignment require extensive trimming of the butt plate sides to match and adding back the return edge to be compliant?
My previous application for ESB EI in June was held back pending the horizontal shoulder to bicep straps that were not at that time part of the CRL but recommended since the change was coming shortly.
I have completed the straps but failed to resubmit new pics since I was waiting to schedule with my photographer. This however adds another item to complete. Perhaps EI is not in my cards. Missed it by that much

-
Congratulations Diana on your achievement!
Hope to see your work in person soon!
-
Great to see another ESB joining the ranks!
Look forward to following your build.
Adam
-
Welcome Vidar and there is plenty of build information on this forum!
-
Welcome to most fun you'll ever have with a hobby!
As it has been said before..check out a few builds and take down some notes.
-
Congrats Tim! You are a great asset to the ranks with all your engagement to the cause and what we stand for!
-
 1
1
-
-
I'm a little late but I used a combination of washers and epoxy putty.
http://www.whitearmor.net/forum/topic/26919-my-first-esb-tk-build-mtk/?p=341267
-
Looking great! All the pieces are there...
Just take your time to fit the pieces to your needs.
-
Awesome progress Steve. Just one step at a time. If I can do it, so can anyone.
Remember confidence comes with experience and experience comes from action.
You are well on your way....
-
1
-
-
Hi Steve,
Great work thus far. Just don't glue anything if you are unsure. Come back here and ask for advice.
My recommendation on the thighs since we are about the same height is to take your time, really take your time. The thigh fitment will really dictate how well you are able to walk, especially if stairs are involved. Sitting is a whole different story that I haven't even thought about tackling.As far as cover strips, keep in mind they need to be the same on the front of the thighs and shins. The rear width of the cover strips are a little more forgiving as approval goes. With that in mind...
For thighs this what I did:
1) decide on the cover strip width. I went with 22mm for the front and 25mm for the rear.
2) trim the front of the thighs and shins to accommodate the width of your cover stip.
NOTE: try to leave the rear untrimmed if possible to fit the thighs and shins to your particular body build. More on this later.
3) trim the top and bottoms of your thighs and shins. I left about a 5mm return edge on the top and bottom of my thighs. The shins about 6mm top and none on the bottom. Reason? The top of the shins and thighs are very visible. Having a small return edge gives the illusion of thickness of the armor. The bottom of the shins will be right up against your boots and no need to have a return edge.
4) assemble the front of the thighs and shins along with the cover strip.
NOTE: be sure to not extend the thigh cover strip past the bottom "hex" flat part. Especially on the left since that will be behind the sniper plate. If you over extend the right, not so much worry because it will be covered by the knee ammo boxes.
5) with basically clam shells for both thighs and shins, fit them along with your under suit. Yes, with your under suit. What many builders overlook is compression material will actually make you slightly thinner. Which can affect your final fitment.

6) So, fit, tape. walk around, and mark where you think you will be cutting. Remove and wait another day and repeat. Reason I say wait another day was I found in my haste of my initial fitment, it was kind of tight. Then the next day, I tried again and the spot where I made my marking to cut changed. Better to be loose than too tight. Make sure the proposed cut line on the back is somewhat centered to the thigh. Of course this helps if there is someone to help with the taping and fitting.
7) decide how you plan to hold up your thighs. Hockey belt with elastics. Elastics and leather belt. Or custom harness? This will determine the comfort of your final fitting. I went with a 3" wide elastic, double snaps on the insides of the thighs, a slip adjuster wrapped around a stiff heavy duty nylon pistol harness belt that closes with Velcro. Some adjustability IMO is important here, as walking can be comfortable or simply painful. Nothing like the inside of you thigh being pinched between the thigh and cod piece.

8) once you have all that in order, and you have walked around a bit. Make sure you fit it so that there is a slight taper to the knee to give it a more organic shape and not like a bell around your knees. Then go for it!
Shins are very similar but you should again do the fitting with your under suit on and after you decided how you plan to close the back.
Good luck and keep sharing! You can do this. If I can and I'm no one special, then anyone can with some perseverance and plenty of studying of how others done it before you.
-
1
-
-
Nice idea for the drop box storage. I may take mine apart and try something with magnets and small metal plate. Just not sure about putting any credit cards or anything with a megnetic stripe in there.
I did try initially with a plate with Velcro inside but it was too thick.
Keep the creativity coming!
-
Congrats and welcome to the Dark Side!
-
I think you will be fine. From what I can see on the CRL, there isn't anything in regards to the ammo belt "lip". From what I see in other builds, it varies quite a bit.
Here are some photo references on the ammo belt that Mathias posted on the photo reference library.
http://www.whitearmor.net/forum/gallery/image/3158-dsc02494jpg/
-
Out of simple curiosity, what gaugeof ABS is MTK's armor? It looks really detailed and shinny.
Sent from my iPhone 5 using Tapatalk
Looked up an email I got from MTK, he said it was 1.7mm. So kind of in between thickness of most armor.
-
Looks great Ian!
Coming along nicely and some creative way to shorten the belt. Can't wait to see more but take your time.
The only advise I have while you are at this stage is to reduce the lip on the top and bottom of the ammo belt.
Since I couldn't tell where the belt was attached to the Ab plate, there are some that will want to see the top of the belt almost covering the lower painted button. Kind of like this.
-
Thank you Takashi for working so quickly and the additional photos. That is some great looking armor!
-
It was my understanding, as you state, that there should be no elastic for ESB, or at least use white. But I just looked at the CRL and it only says this:
No mention of shoulder / bicep elastic at all. Has this been changed recently? And if it is not excluded, is it allowed?
Anyway...
On to more practial things. Gluing coverstrips today!
Hi Sam,
Here is my EIB application. It's pending approval with the addition of the horizontal bicep straps we are discussing here. Since there may be pending changes to the CRL, it's best to build with the end in mind. Won't prevent you from passing basic 501st but could if going for EIB or Centurion.
www.whitearmor.net/forum/topic/27490-tk-24336-requesting-esb-eib-status-mtk/
-
Welcome Clint and you come to the right place! Take your time to decide which armor will serve you best it will all be worth it in the end!
-
Konichiwa Takashi,
That's some nice looking armor! Great fitting.
Besides the control panel which Matt mentioned was upside down, I think we need a photo of the backside of drop boxes to make sure they have full back covers.
Everything else looks great and best of luck with your EIB!
Adam
MTK Build - ANH Stunt
in Build Threads Requireing Maintenance
Posted
On pins and needles...but please share your latest fitting when you get a chance! Great following your build Ian and thank you for all the support and kind words during my build and EIB application...