

2thin
-
Posts
60 -
Joined
-
Last visited
Content Type
Profiles
Forums
Gallery
Articles
Everything posted by 2thin
-

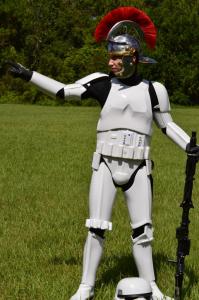
TK-10093 Requesting ANH (Stunt) EIB Status (AP) (Withdrawn)
2thin replied to Nezom's topic in Request Expert Infantry Status
Looking good! -
Nice! No I don't but they look like any standard size LED to me. The small amount of room you have to fit the wires in makes this tricky.
-
Yeah I guess I got really lucky with all this bs they are causing. Probably cause I was an early orderer and they weren't completely overwhelmed. As for the metal strips, you will need 10. But I'd have a few extra incase you break or bend them too much. I had to use a hammer quite often to straighten them out when they failed to slide in the slits properly.
-
That was the goal haha let me know if you have any questions.
-
Finally finished after lots of headaches! I'm overall really happy with how it turned out and will take my own video of it in action eventually
-
I got a lot done today. The entire main body is basically finished! All I have to do is finish painting the moving part and glue the end cap on. I'm hoping it fits nicely cause getting the lights and wires in while trying to leave enough room for it was kind of a pain! Also here is where the battery and switch are. Where you see the blue is where you need to sand or file down some material to let the cover slide out without too much force.
-
The complete ones they sell look fine, it'll save you a bunch of headaches. But I'm choosing to build it myself because I want to make it look like it wasn't 3d printed. Plus making it myself ensures that I'll have something I'm happy with in the end. I saw one person wrap some blue neon wire around the end of one of these. It looked cool but I'm not gonna do that.
-
I figured out the light problem and I cleaned up the uncured Resin coating! Here is the circuit diagram given to me by one of the Blu-bin employees. It is worth noting that it doesnt matter which side is negative or positive, but you HAVE to make sure that all the LEDs are going the same way. You can tell the positive/negative ends of the lights by looking at the length of the thing wires sticking out of them. The circuit starts with the positive long end, the short end connects to the next light's long end.
-
I'm currently having trouble getting the lights to work. I'm not sure what the problem is yet.
-
I wondered the same thing too. But judging from the videos I've seen they hold up pretty well. The plastic is really really strong. And I like to think of the connection like a fishing rod, the two parts fit in easily but its difficult to remove it unless pulled straight out. I'll be dumping a lot of epoxy in it.
-
I sanded some of the parts down and finished the main body section's details and lights. They still need to be wired to a battery, but that's my next step! I made a mistake with the resin coating on the other parts where it didn't cure properly, so Im gonna have to chisel it all off and put a new coat on before I can smooth it out
-
Dang dude that sucks. Look at the pics I have and see if you have all the parts I do. And it is a huge pain to build but it's coming along alright so far. I'll have more progress photos soon!
-
So after seeing this video https://www.instagram.com/p/BDhPDornIaO/ I immediately contacted the company called Blu-Bin that makes these in kit form or sells them already assembled. What ultimately sold me on their Z6 is the fact that it has a metal skeleton that makes this thing extremely durable, which could even allow it to be used for dueling. Anyways, after I purchased my kit and got it a few weeks later, I discovered that there was no build tutorial for this thing. I could ask the people at Blu-Bin questions but overall I was on my own. So, I decided to make a build thread so people will be able to get all the info they'd hopefully need and also learn from my mistakes... There are going to be plenty... This is what the kit looks like out of the box and after I removed a lot of the excess plastic support structures The first thing to do after cleaning up the pieces a bit is to put the metal strips through the pieces. This however, is WAYYYYY more a pain in the butt than it sounds! After realizing the strips didn't readily slide through the holes in the pieces, I tried hammering them in, which caused all sorts of problems (cracking/shattering the plastic, bending the metal, etc) and when I found this to be a bad idea, it took me 2 hours of constant and careful chiseling to get the metal back out. The PROPER way to do it after asking on of the Blu-Bin workers for advice, is to take a hacksaw blade and literally saw the ever-living crap out of those slits until you can push the strips through with a bit of effort. I wish I knew this from the beginning. But I'm not exaggerating. Saw those pieces A LOT. After getting the pieces to slide relatively easily through the slits, it was time to put the parts together. I started with the middle section. It is important to measure how long the bars need to be first so you can cut them and then slide them through. You'll want to start with the middle of the three pieces so there is less of a distance for the rest of the parts to slide down, making it harder for the strips to bend and also causing less friction. Measure everything before sliding them together. Also note that one pair of end pieces is shorter than the other pair, they aren't identical. The slightly longer pieces go towards the grip end. Once the metal strips were finally put in and cut right, I made the grip piece by using epoxy, and epoxy putty to fill in the creases. I used epoxy putty to also fill in the shattered plastic from me trying to hammer out stuck metal strips. Next up was making sure the provided LED lights fit through the holes. So I took a drill and widened them to fit. I then decided to fill in the parts using Smooth On's XTC-3D which basically smooths the finish using thinned out epoxy. I got it on Amazon for about 25$ And here's where I am at right now! All the parts got a coat of that smoother stuff and in a day or two I'll sand it down and get the parts ready for paint.
-
Star Wars Battlefront (DICE) Shock Trooper
2thin replied to mikedwelle94's topic in Build Threads Requireing Maintenance
Thanks for the compliments! I have another MR helmet I need to convert into something too lol I just don't know what. This was easier than usual since the ears for ROTJ are glued on rather than screwed on. I filled in the gap using spot putty. http://www.amazon.com/Bondo-907-Glazing-Spot-Putty/dp/B0002JM8PY/ref=sr_1_1?ie=UTF8&qid=1452663254&sr=8-1&keywords=bondo+spot+putty -
Star Wars Battlefront (DICE) Shock Trooper
2thin replied to mikedwelle94's topic in Build Threads Requireing Maintenance
This is looking really nice! I just wanted to share my recently finished helmet. I made it from a converted Master Replicas helmet and I know it still needs bubble lenses. And I'm debating whether or not to make the full suit still. ----------- -
My Death Trooper (Centurion WIP)
2thin replied to 2thin's topic in Build Threads Requireing Maintenance
Yes we do it'd be better at some setting in downtown Tampa though during TBCC. I hate having to put all the makeup on and stuff! -
TK-18421 Request ANH Stunt Centurion Status [ATA][162]
2thin replied to Barcode's topic in Request Centurion Status
Congrats! Now we party this Saturday -
TK-18421 Request ANH Stunt Centurion Status [ATA][162]
2thin replied to Barcode's topic in Request Centurion Status
Looks awesome man, should be an easy pass! -
My Death Trooper (Centurion WIP)
2thin replied to 2thin's topic in Build Threads Requireing Maintenance
Lol thank you! That means a lot. Yes, she's one of my friends [emoji14] -
My Death Trooper (Centurion WIP)
2thin replied to 2thin's topic in Build Threads Requireing Maintenance
I'm flattered haha -
My Death Trooper (Centurion WIP)
2thin replied to 2thin's topic in Build Threads Requireing Maintenance
It really did hurt, but thank you! -
Alright, I recently finished building my death trooper costume and it made its debut at Megacon here in Orlando. It got more praise than I could have imagined and was featured on Buzzfeed and Movieplot! #25 http://www.buzzfeed.com/niaalavezos/ridiculously-awesome-costumes-from-megacon#.osr7OvXyeP #32 http://moviepilot.com/posts/2015/04/14/mind-blowing-cosplay-from-megacon-fan-art-2857593?lt_source=external,manual,manual I wasn't planning on making a thread about it but I got so many requests. I don't have many work in progress photos but I'll do my best to show everything. To start, I'll just show what it looks like now (I'm not done with it yet, there is still a lot more I want to do to it). Like all death troopers, it starts out with a fresh set of armor. It was painful but it had to be done. I just thought of a picture in my head of how I wanted it to look and went crazy with a Dremel cutting wheel Once all the heavy cutting was done, I used 60 grit sand paper and scraped up the whole thing. Of course I found I was still never happy with the damage I put into it, so even after I was finished painting everything, I sometimes came back to rough it up some more! But as far as the paint job goes, I will try to be as detailed as possible. It was all painted purely with acrylic and natural sponges. 1)The base layer I went with was butter -Mixing a little lemonade(Folkart 904) with white (Americana DA02) 2) The second layer was golden straw, i didn't cover the whole thing in it, just large patches everywhere. - Golden Straw(Americana DA168) This is where I had to get more selective with the colors I used but unfortunately, I did not take any pics after this. 3) Next, i practically and lightly coated the entire set in a brownish green color, but also adding more in darker spots or where there was more damage. This coat actually toned down the yellows a lot and gave it a nice hue. -Mixing celery green (Americana DA208) with a small amount of bambi brown (Ceramcoat 02424) 4) Following the dirty green, I decided to apply the mossy green color, conservatively in strategic splotches -Clover (Folkart 923) 5) Next was making the scratches and damage look realistic. So I started with a black base in the crevices of everything, then moved to a dark grey and sponged the heck out of the dmaged areas. -Black (Americana DA067) and then Slate Grey (Americana DA068) 6) Then it came time to add the dry blood stains. So I took red and added a small amount of black until it almost looked purple and then afterwards mixed another batch with slightly less black to get a dark red. - Tuscan Red (Americana DA265) with black This is where I added the canvas mummy straps in with hot glue and painted them using a mix of browns. 7) The final step in painting was just using the slate grey from before and lightly applying it anywhere that didn't look like it blended well with the rest of the armor, this followed by a clear coat of hairspray finished the Job and I was very happy with the results! I found the helmet to be very empty inside so I needed to fill it with cool details. Using an old broken Nokia phone I decided to fill in the details as well as some other scrap electronic stuff I found, and use the excess for other parts of the armor. I really enjoyed this part cause I had to get creative. One of the most difficult parts about building this was deciding on prosthetics. After a very long search and trying to imitate the gentle giant statue's face, I came across this one. http://www.grimmbrothershalloween.com/slack-jaw-the-zombie-foam-latex-appliance.php Which I then had painted using latex paints from monstermakers. The other prosthetic I used was for my hands Next thing I'm gonna be doing soon is making the undersuit blend with the armor, this means more prosthetics and painting! If anyone has any good ideas for prosthetic zombie skin, let me know! If anybody has any questions or would like to see more detailed photos of something specific, just ask. So that about does it for my build thread. I hope this helps some people wanting to make one. I'll be putting in the finer details soon to get it to that centurion rank. Thanks for looking And here are some random photos from Megacon... The droid I'm hungry for... The crew When you party too hard on the Death Star...
-
TK - 18421 Requesting ANH Stunt EIB Status(ATA)[455]
2thin replied to Barcode's topic in Request Expert Infantry Status
Looks fantastic man! -
I feel the same way. I always want everything to be perfect, but it never happens.
-
Look at Hans's build thread. He posted a lot of good pictures. You basically twist it together and tuck it in.
