

Haribon72
-
Posts
1,336 -
Joined
-
Last visited
-
Days Won
3
Content Type
Profiles
Forums
Gallery
Articles
Media Demo
Posts posted by Haribon72
-
-
Thank you Tony and Paul! Major work this weekend on the abs. Hope to share good progress on Monday.
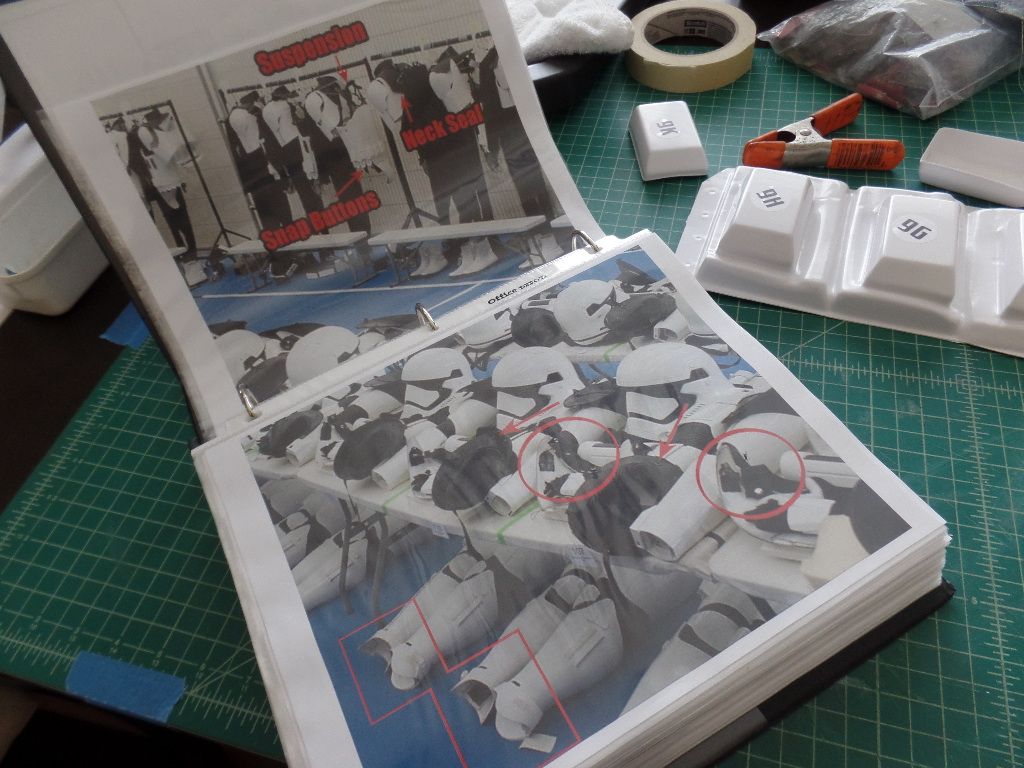
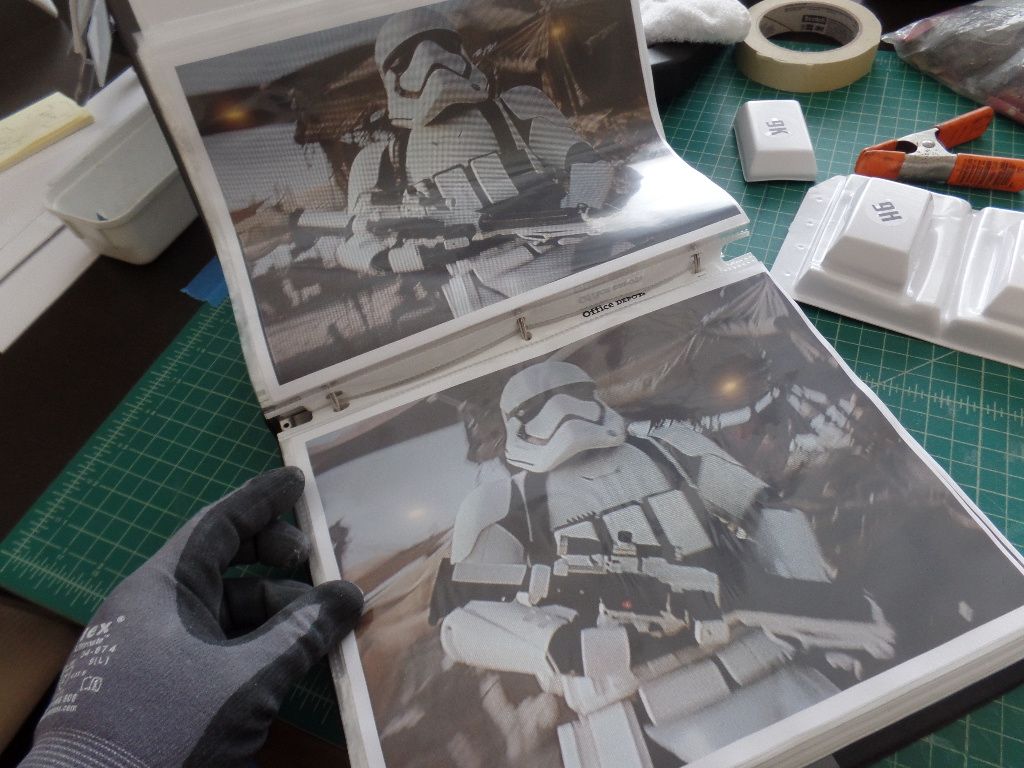
Some of my study material I put together.
-
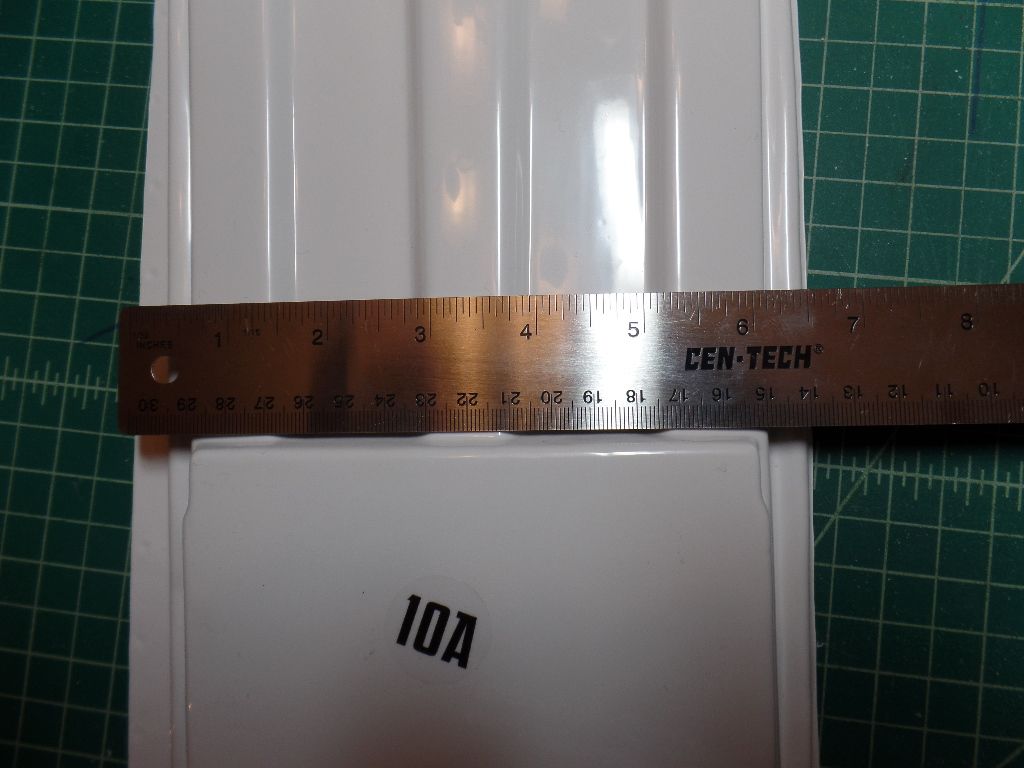
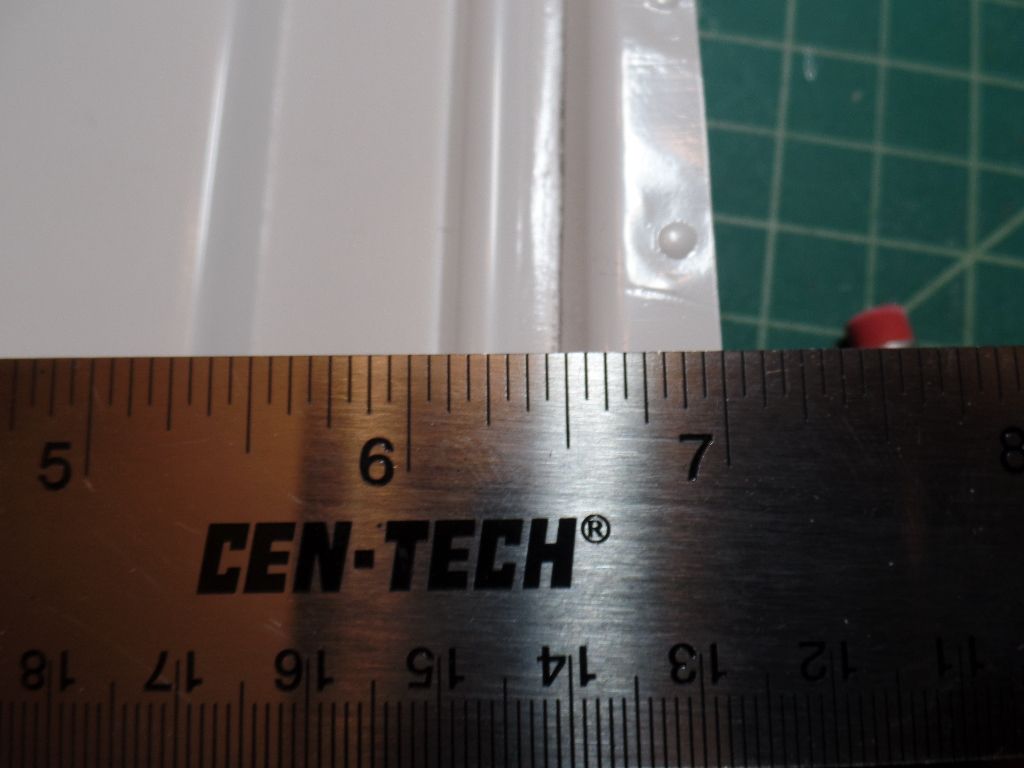
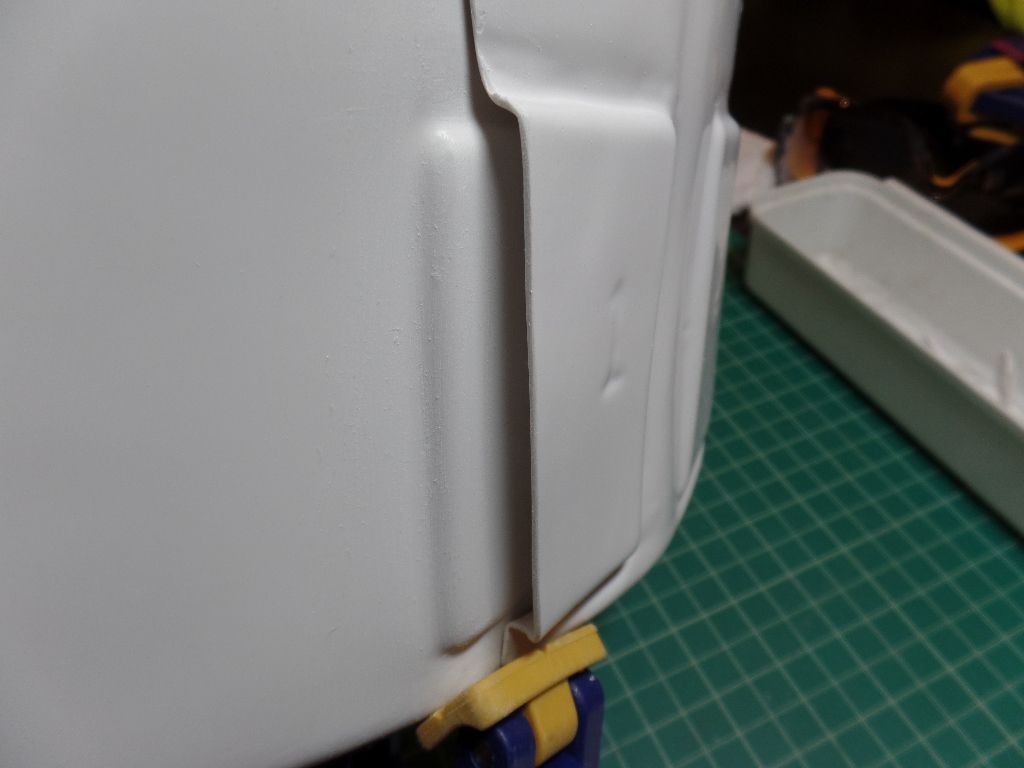
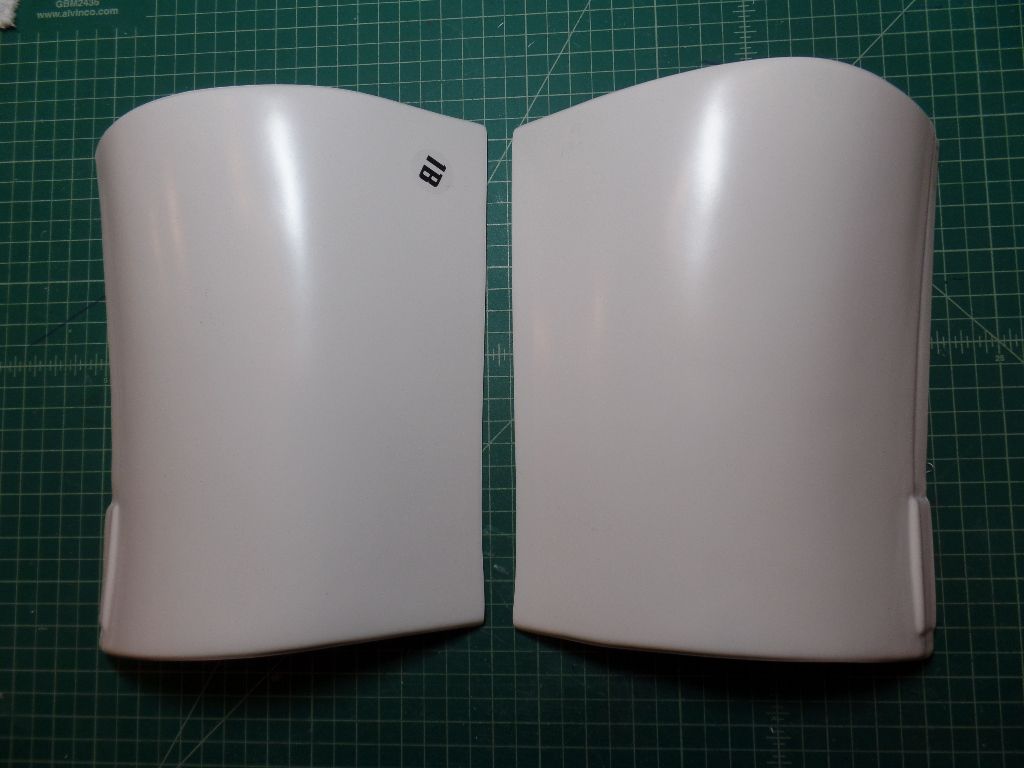
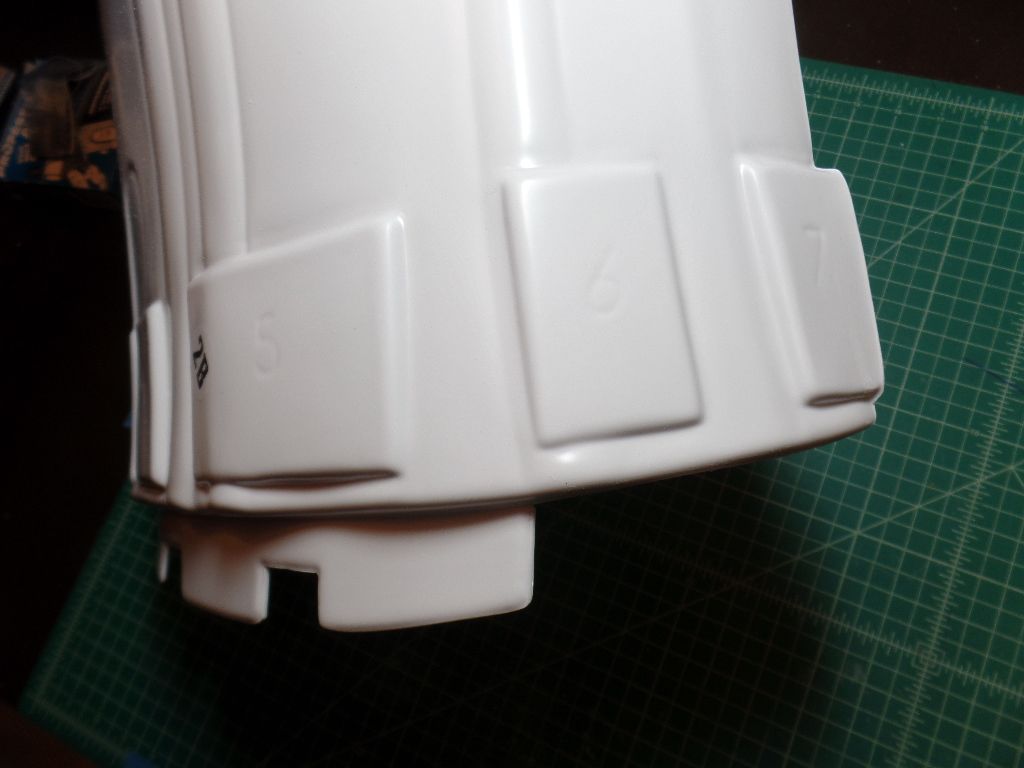
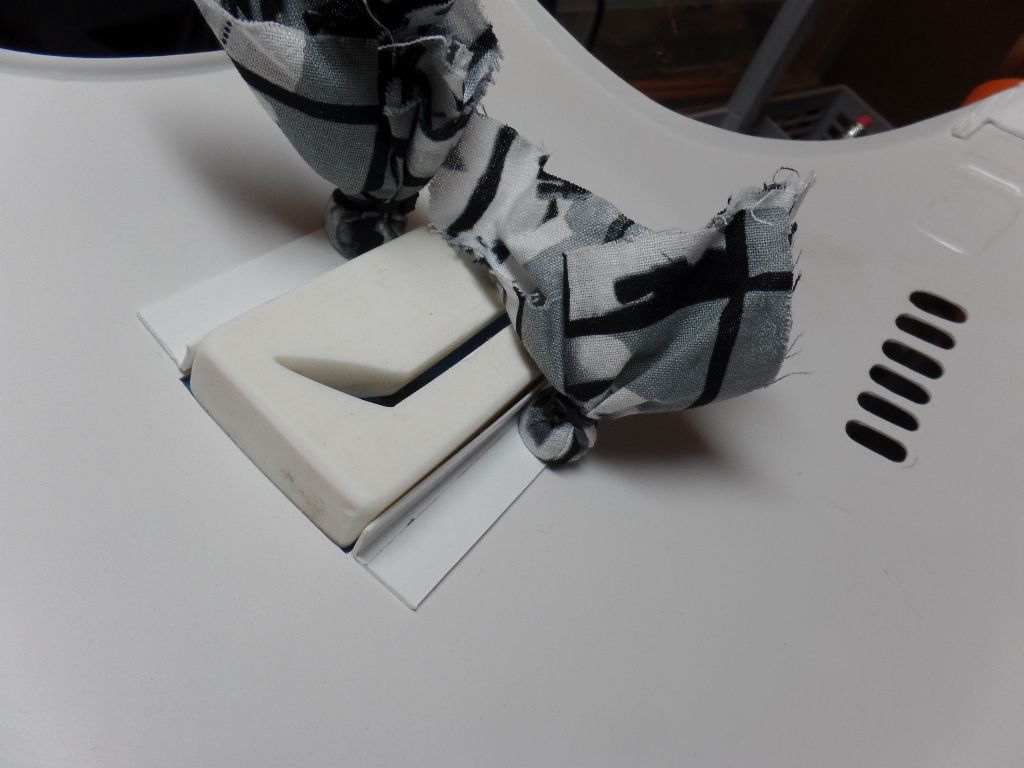
Shim Work on the Abs section
These are my blueprints, ideas, rough draft section on the shim work for the Abs section. My waistline is 40 inches and I have a nine inch gap in the back area.
I will need to shim both sides of the mid-section to help close the back area. Hopefully I can achieve four to five inches of gap space to get into the armor (without struggling).
TD is currently at six and half inches.
Current mid-section plate
The Blueprint . . .
-
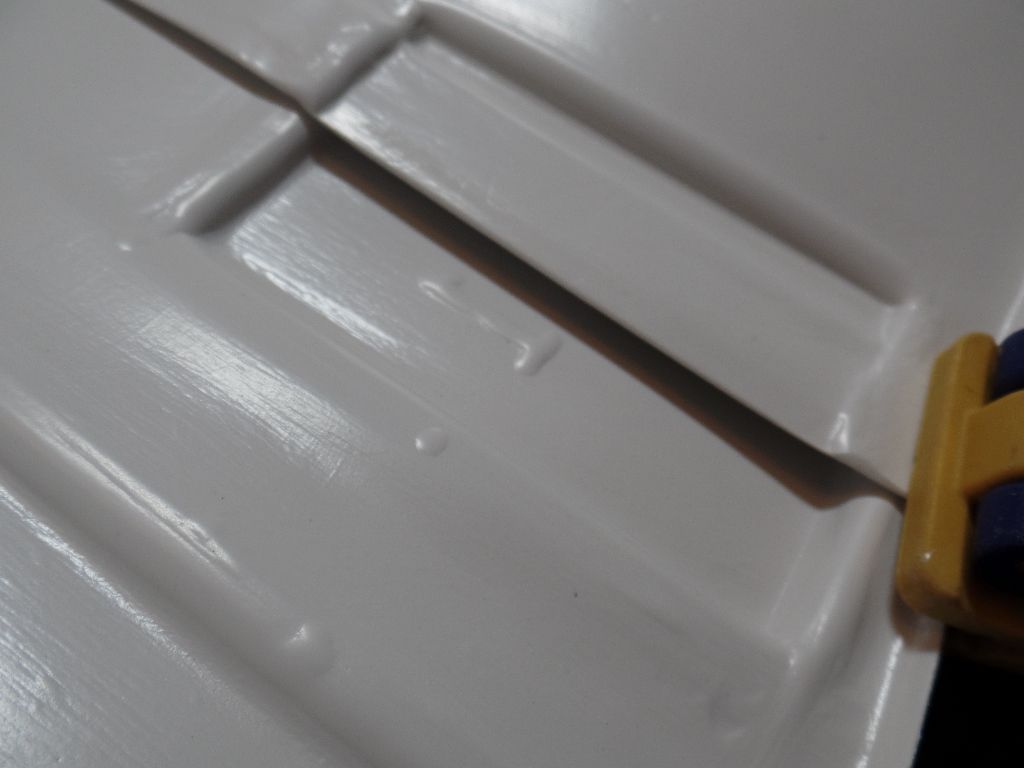
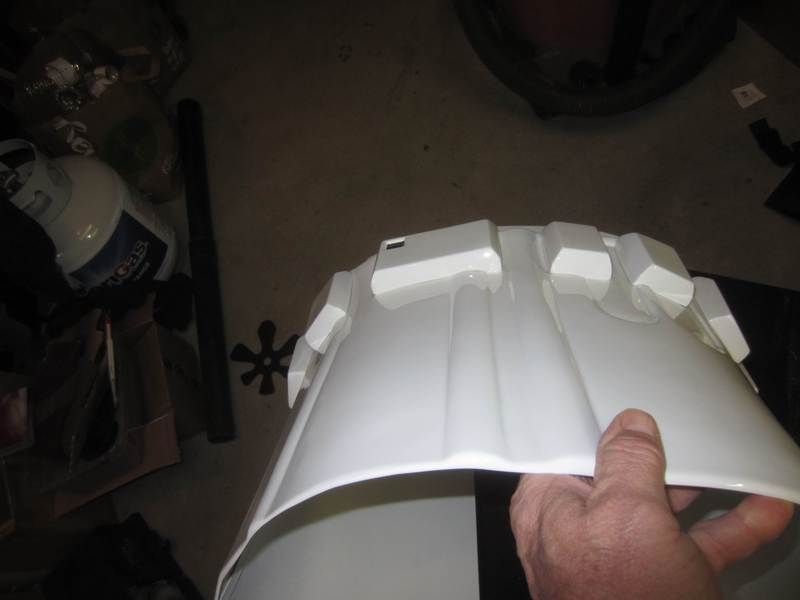
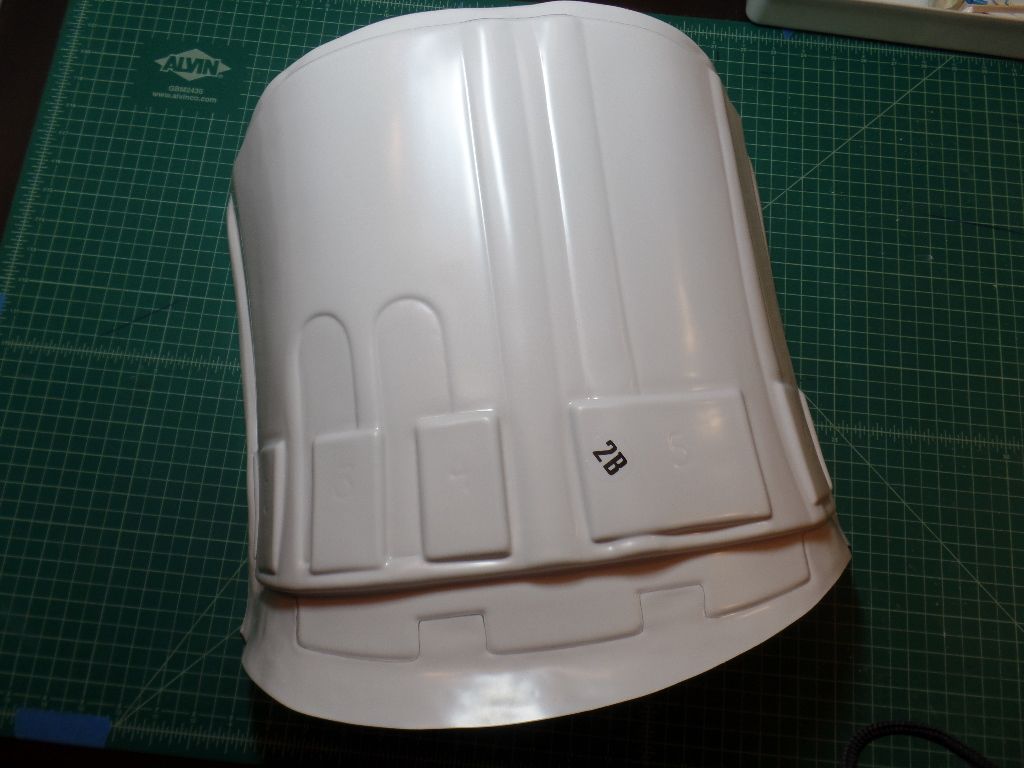
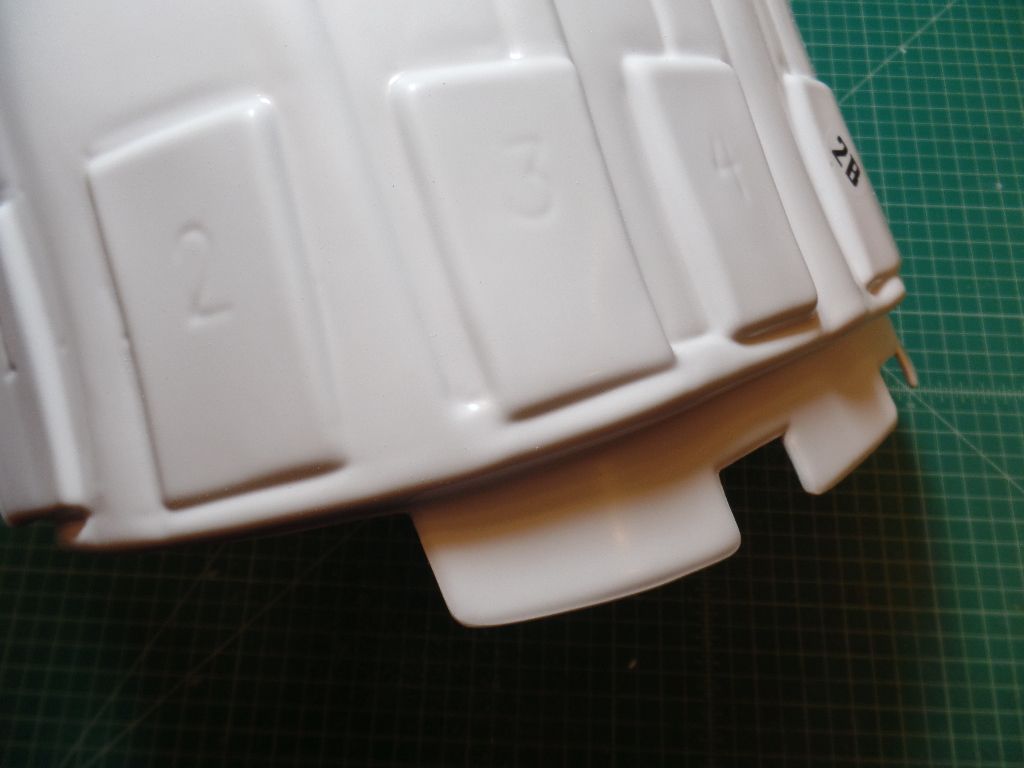
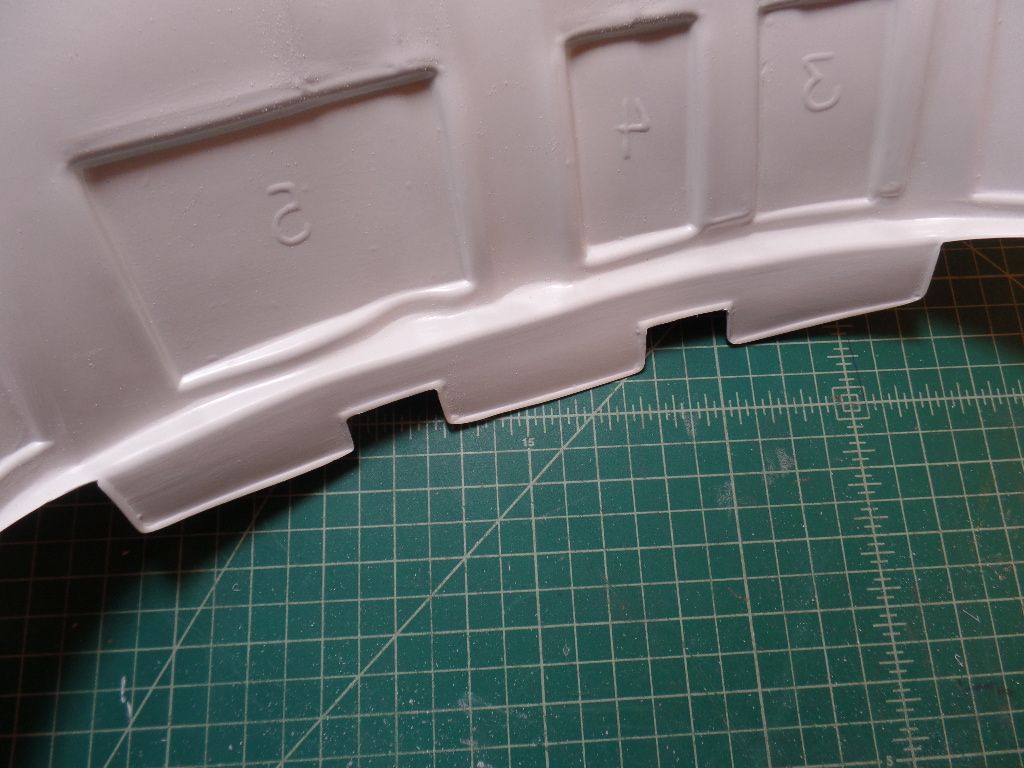
Looks like I might be heat bending this section. It does not sit well at Box # 1 and Box # 7 area.
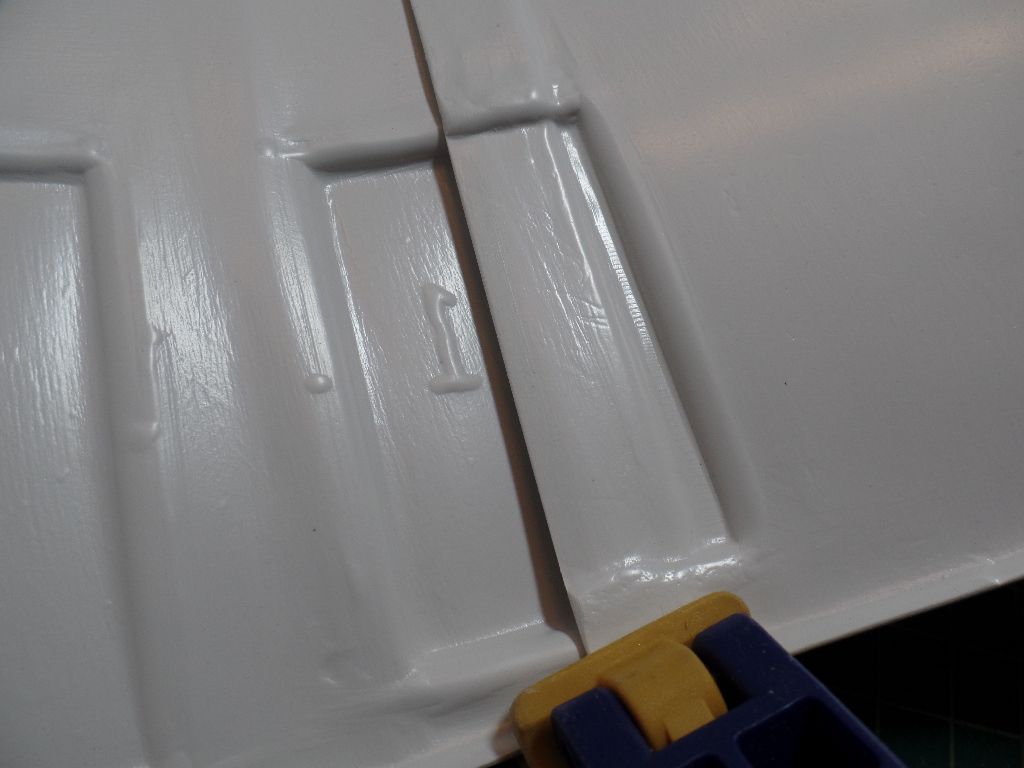
I have a quarter inch gap here. No worries. I'll do the heat bending work during the shim work.
-
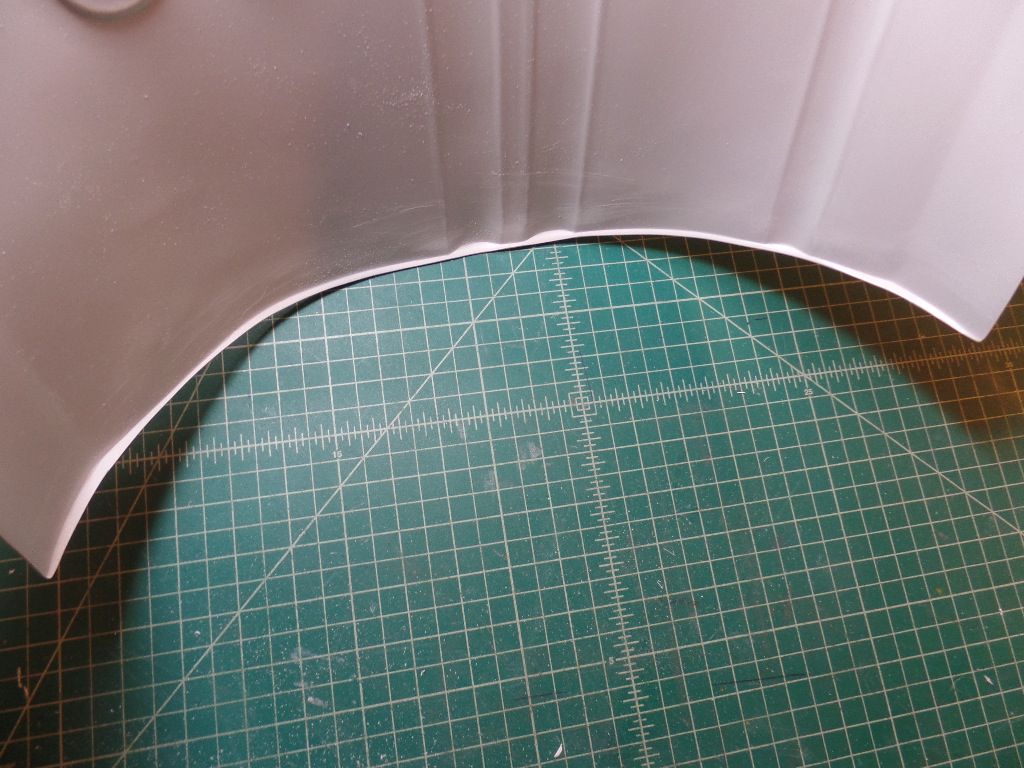
Continuing with the back part of the abs to kidney section . . .
Before
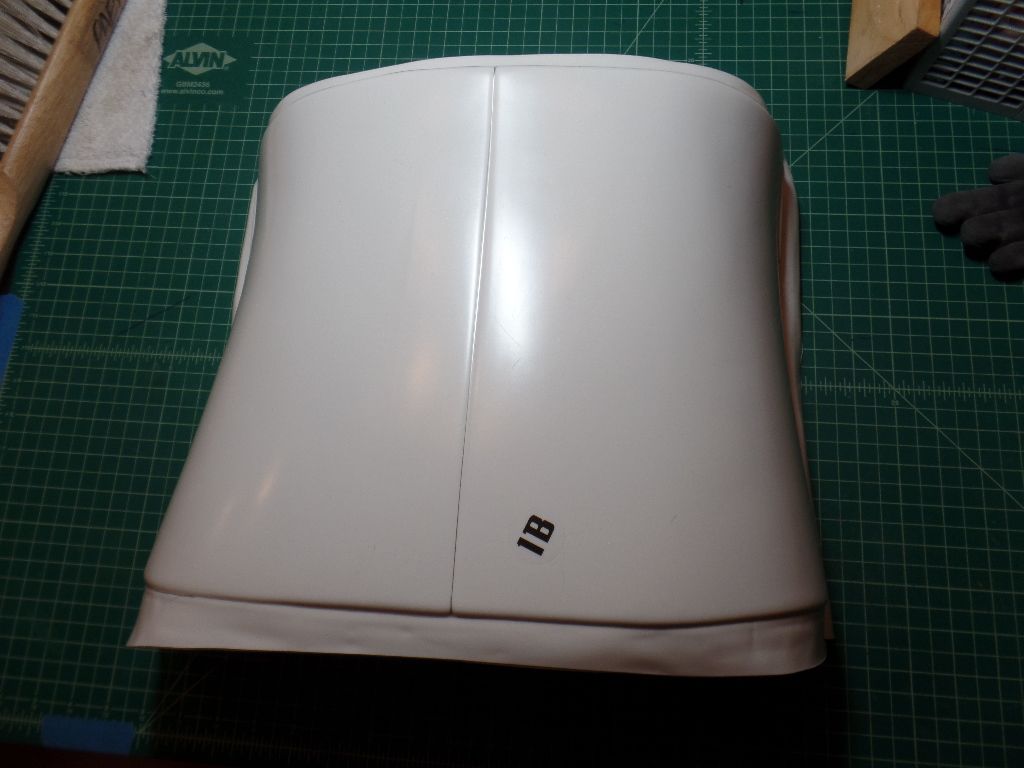
After
-
Hello,
ESB Helmet Decals Hack -You Don’t Need to Buy Special Decals Anymore (Two Steps)
http://www.whitearmor.net/forum/topic/33467-team-armor-build-ne-esb-in-northern-california/?p=439428
Hope this helps.
-
 1
1
-
-
Thank you! I'm quadruple checking! (i'm over-reading and over-thinking sometimes).
-
Tony, I like the bolt and nut assembly on this. I just want to make sure that we're not going to make any bondo action on the boxes right (meaning they won't be permanently closed).
-
ABS
Before . . .
After . . .
I left some return edge. Let's see if I need it or not.
-
1
-
-
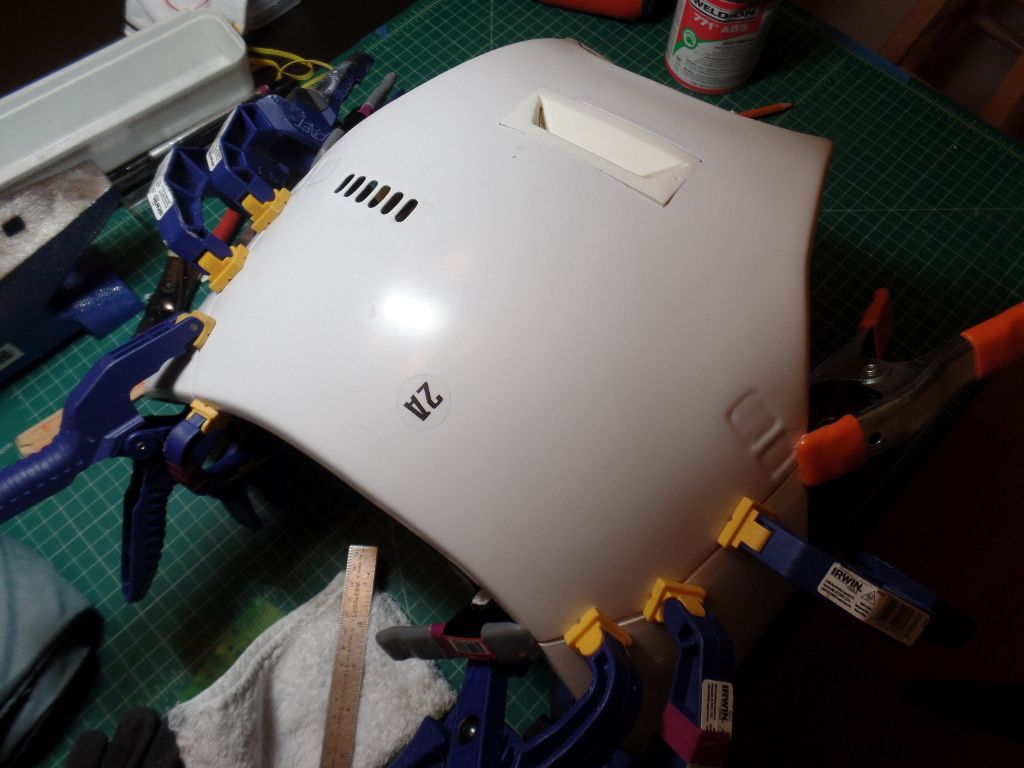
Brackets and Installation of the Updated Chest Piece
Take a look at the picture below. This was done by a friend not long ago.
I'm going to reinforce the chest piece so that I won't crack under pressure.
Using:
1. Brackets made by ABS scraps pieces (heat gun & bend into 90 degrees).
2. Weld-On 771 ABS cement
3. Magnets and washers
4. Two Bar clamp spreaders
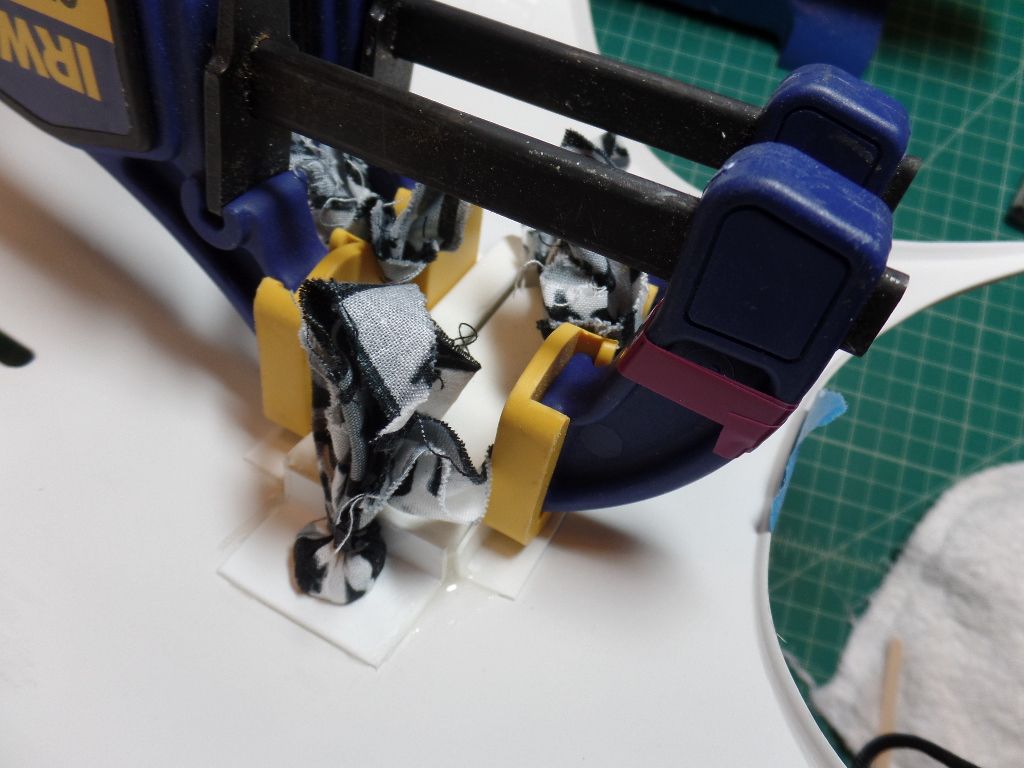
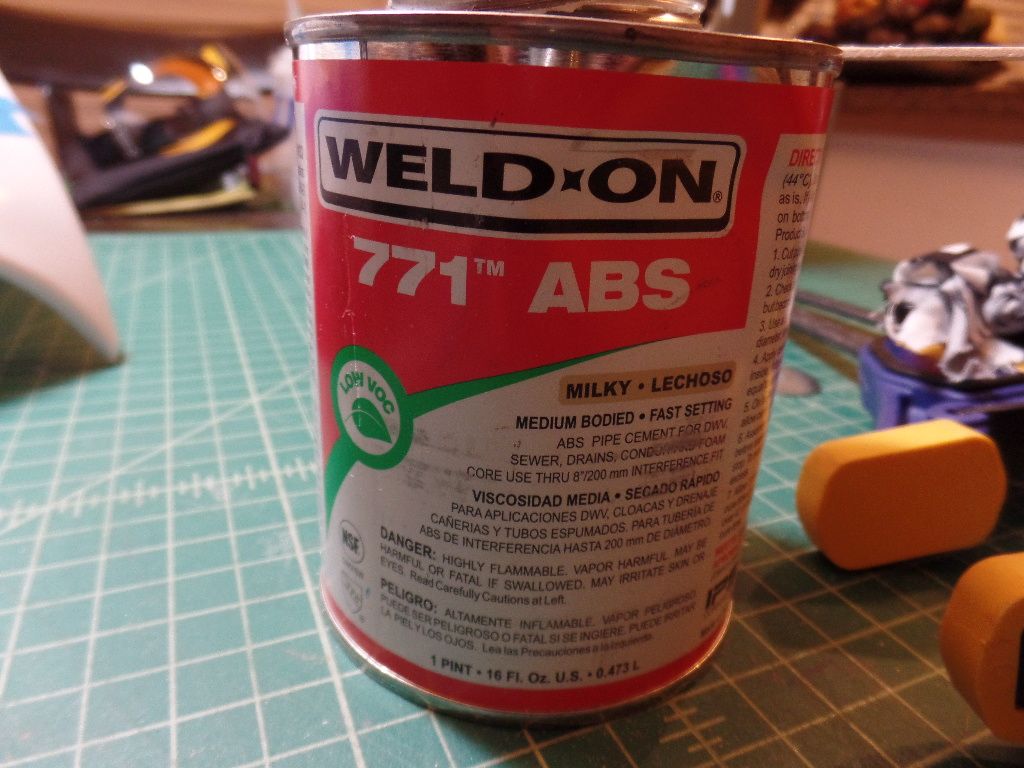
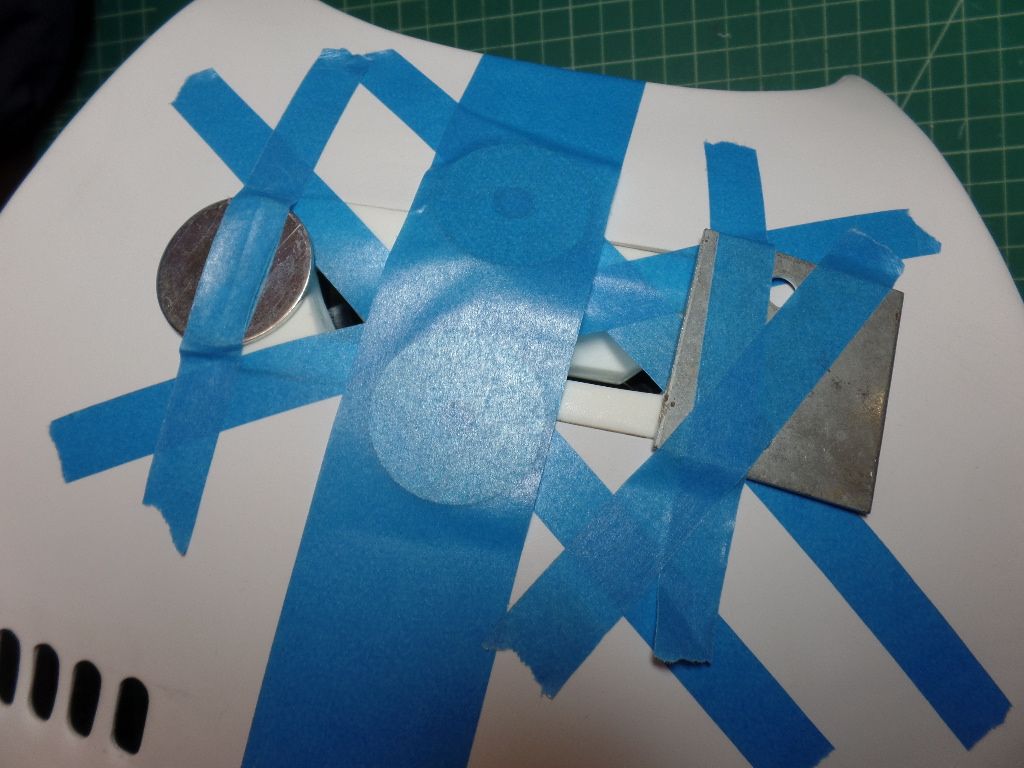
Let it hang out overnight. Peel everything off and sand the next day.
-
1
-
-
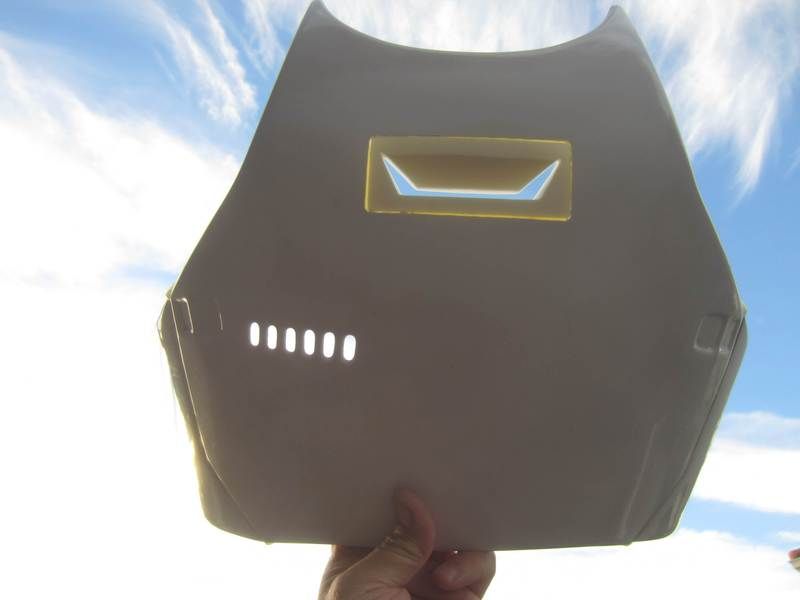
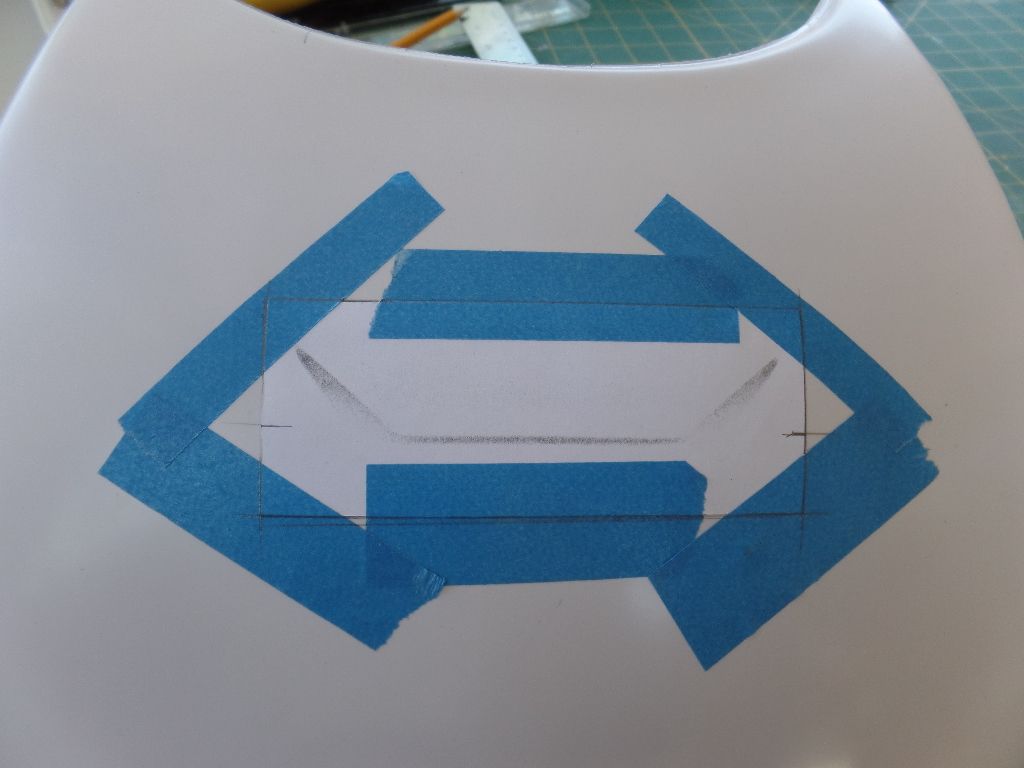
Alleluia! Let me touch the sky with my smiley face chest piece. I had to do the infamous "blue sky test" to make sure we get a good cut out. This should be written into the CRL

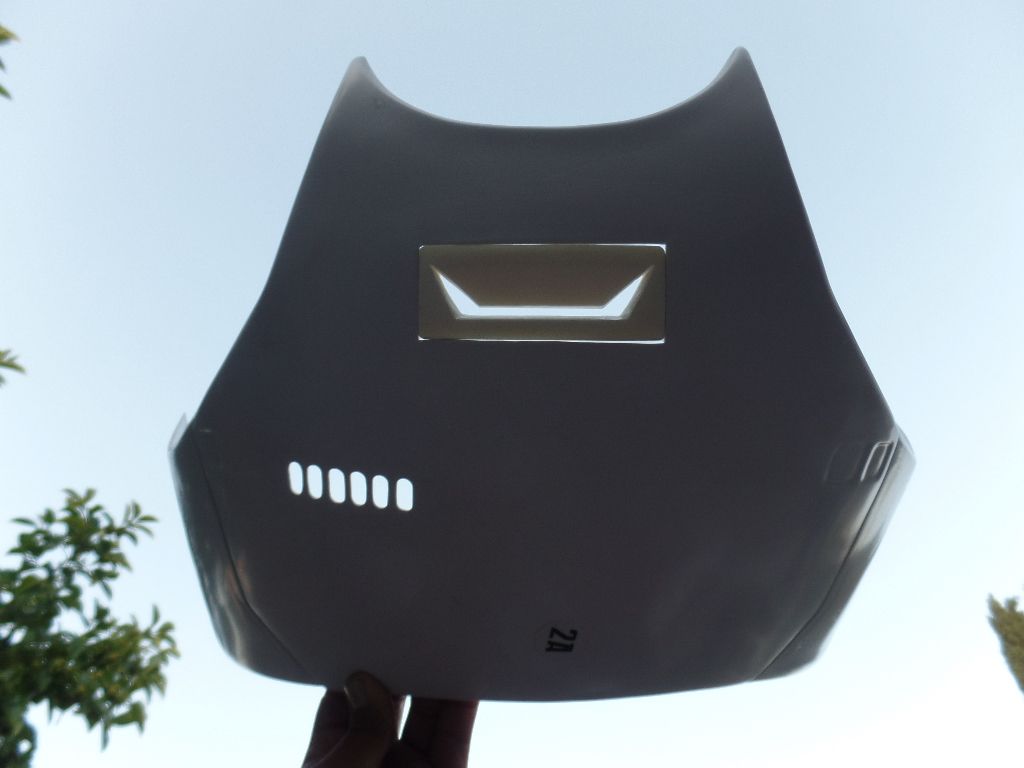
Spent some time on it before the sun went down. I'm calling this good unless we have the measurements from the movie. Speak now and forever hold your (piece)!
-
1
-
-
Rick, try to re-use them. Just try again using the heat gun. It took me three tries to get to sit well into the chest plate. My last resort was to boil it in hot water and then form it into the plate.
-
2
-
-
If you're wondering if "shimmed thighs and kidney plates" are approved for Basic, Expert Infantry, and Centurion, they answer is yes!
This is how I covered the gaps in between the thigh armor and custom shims. I used Apoxie Sculpt because its non-toxic and easier to work with (remember to wear gloves). All you need is water in a spray bottle to keep it moist as your working the compound into the gaps. Be sure not to use too much water. Just keep it moist like clay or joint compound (like sheet rock work). Allow to dry overnight and then sand down the area to a finished and smooth look and feel. I used various sand paper to smooth out the rough surfaces left from the dried Apoxie Sculpt.
Please note: You only have to cover up the outside finish of the thighs to make look like one piece. No cover up work required for the inside of the thighs.
You can use automotive bondo, ABS paste, or other compounds. Its totally up to you and your comfort level. Always remember to follow the manufacturer's information on use, handling, clean up, and safety concerns.
Now, the primer and spray paint will be your greatest challenge. Since my NE kit is glossy white, I was able to use an all in one primer and paint - Rustoleum glossy white.
I would suggest bringing your thigh armor to your local paint or hardware store and asking an experienced associate on color matching. Good Luck and let me know your project turns out.
---------
-
2
-
-
Hola Thomas,
Here's the link as mention by Tony.
http://www.whitearmor.net/forum/topic/26001-haribon72s-anh-stormtrooper-ne-hero-build/?p=484000
Here's the sample pics that can help. Let us know how it goes mi hermano!
-----------
-
2
-
-
Hello Brian, I have no idea what rifle set up I want yet. My budget is the biggest obstacle. Hahhahaha! I'll be sure to share when I get to that point.
-
On 2/20/2016 at 8:28 PM, DarthSarcasm said:
So, I'm working on the shins and I have everything all lined up.
there is a flair at the top. Is this ok? I have gone through tons of reference and can't quite get
a good view of this. Will take any suggestions.
Also cut the cover strip to 7/8th's is this ok?

Can we see the inside of the lower legs? Just checking to see how the flair looks on the inside.
Thank you.
Also, I would suggest doing 20mm cover strips.
-
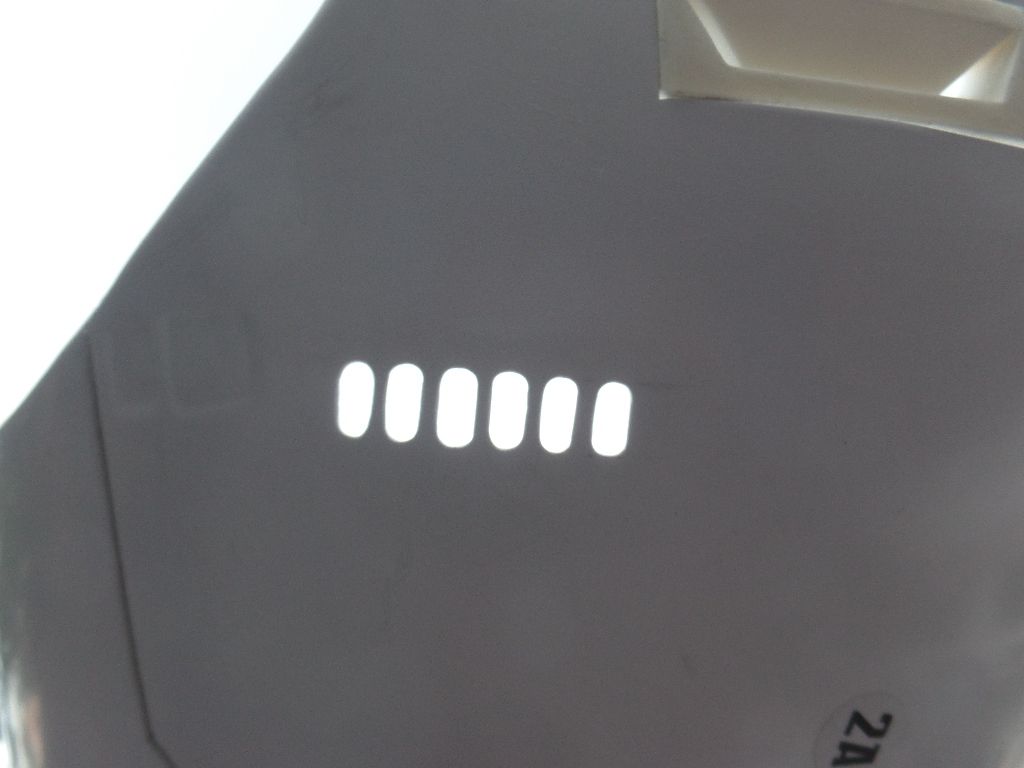
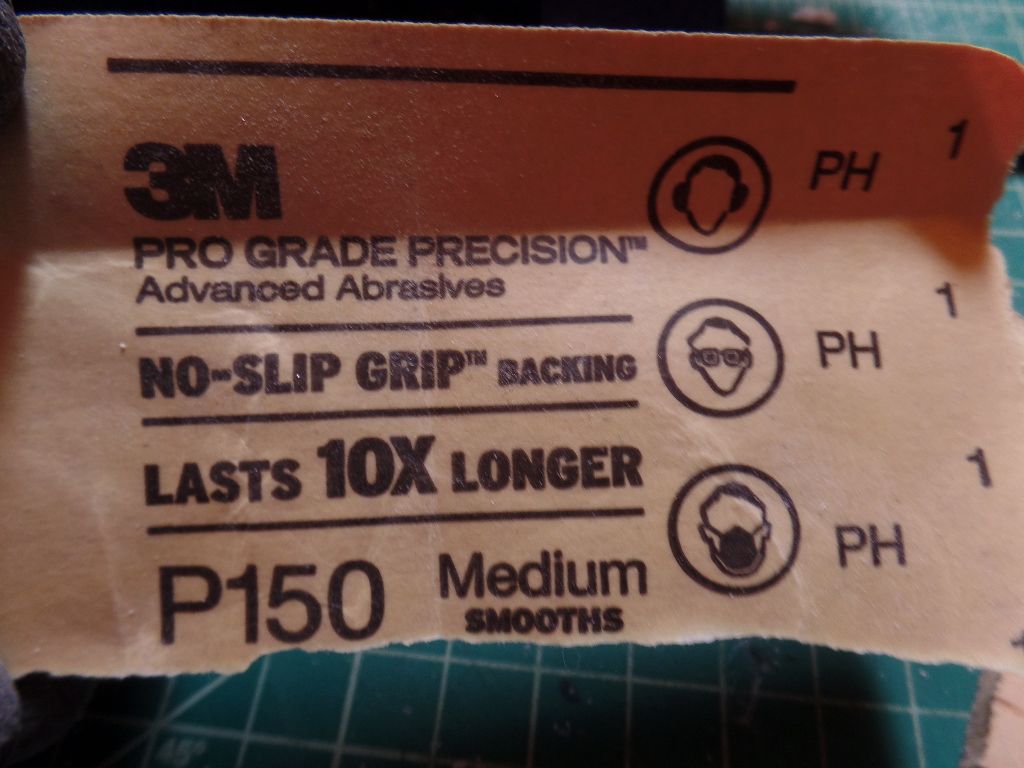
Hello Dave,
When you have a moment, please sand out the eyes and get a smooth finish on the cut out edges.
I'm recommending to get this sand paper at Home Depot.
3M Pro Grade Precision - P130 Medium

Great work on the ears.
-
Hello Luis, just checking in to see how your TK build is going.
-
1
-
-
Congrats Shaun! One more level to go!!!
-
1
-
-
Progress look before belt sanding the back. I'll continue working on it.
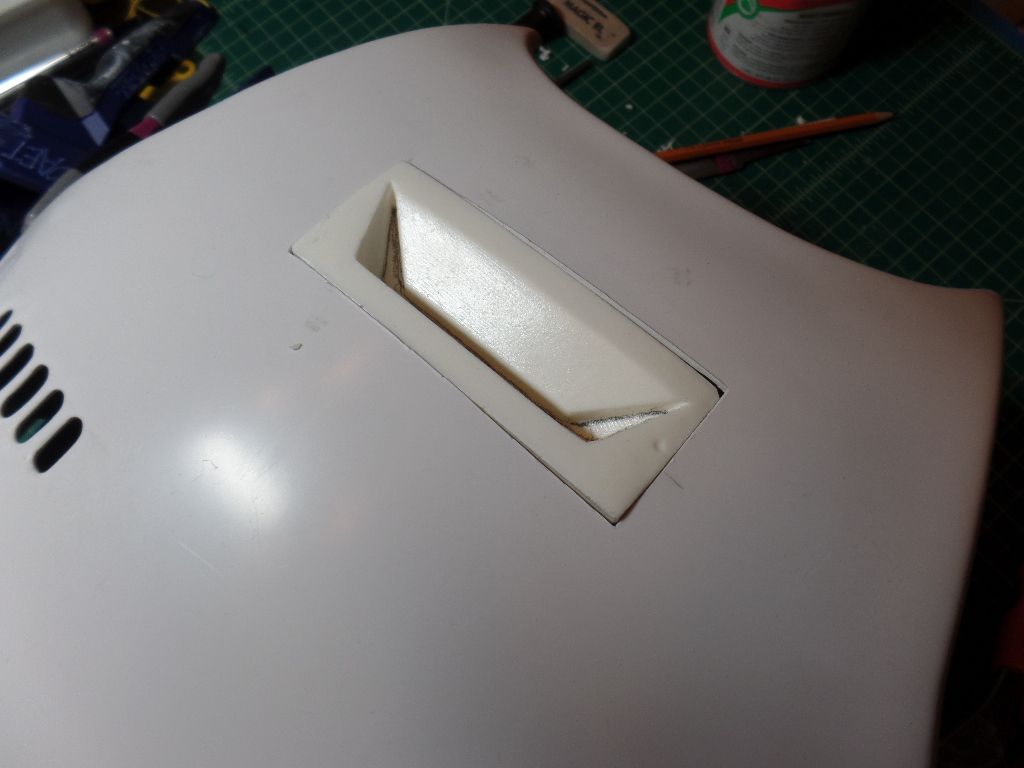
I'm going to encourage everyone to work on the chest piece cut out before installing it to the your chest plate. Its easier to work with.
Some references I used last night.

Here's the ultimate goal ( reach for the sky like Tony! )
-
2
-
-
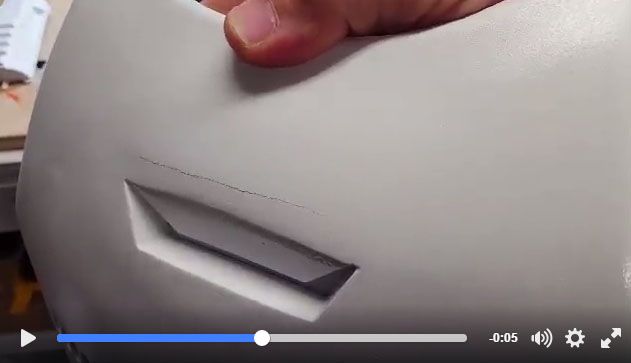
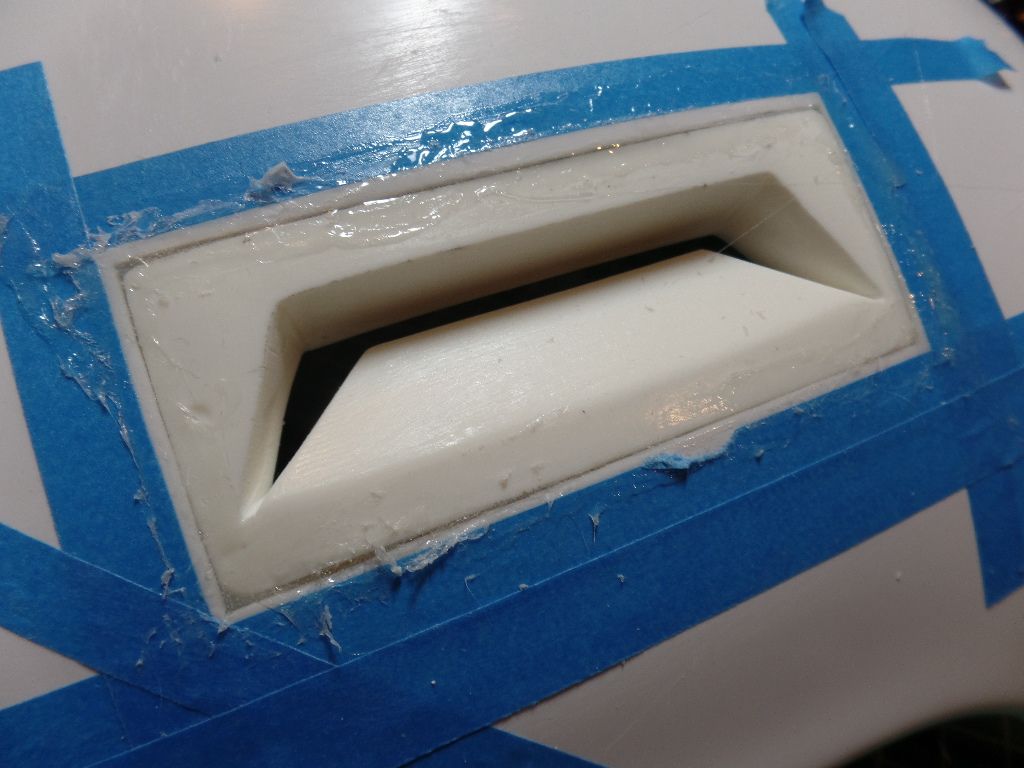
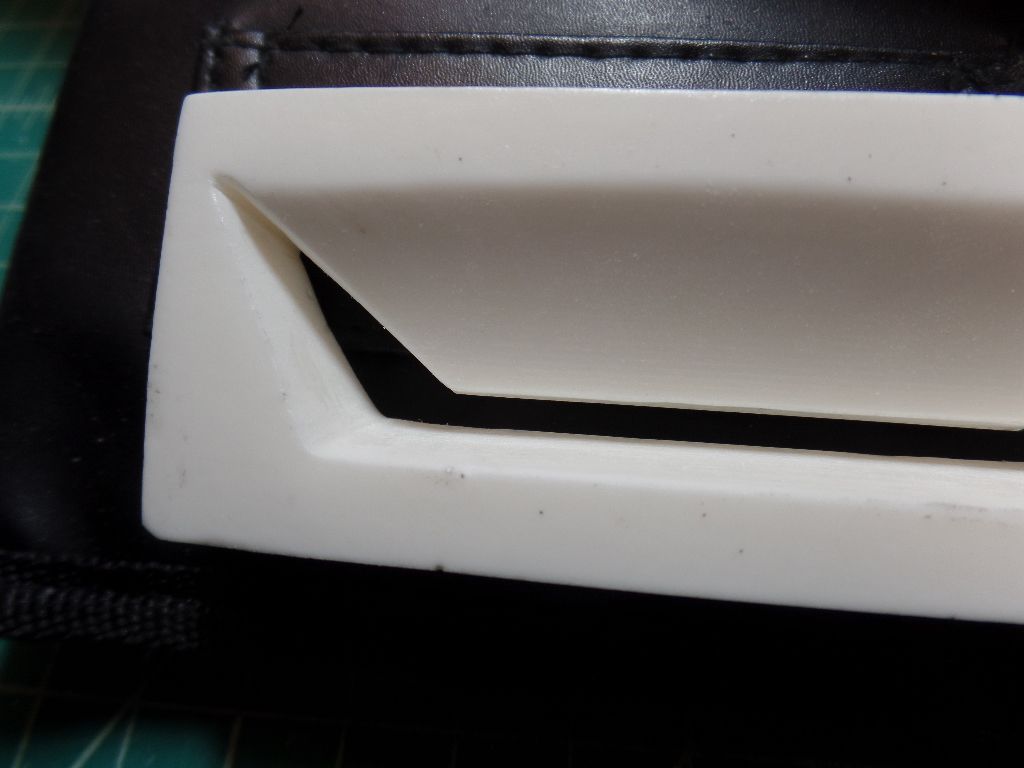
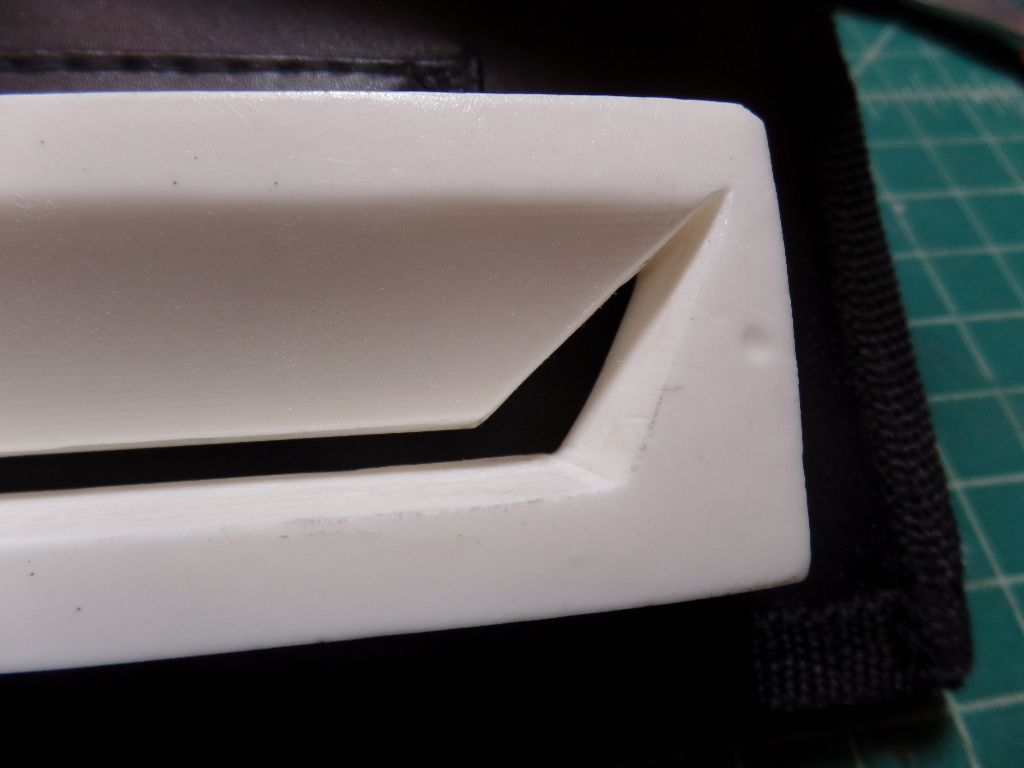
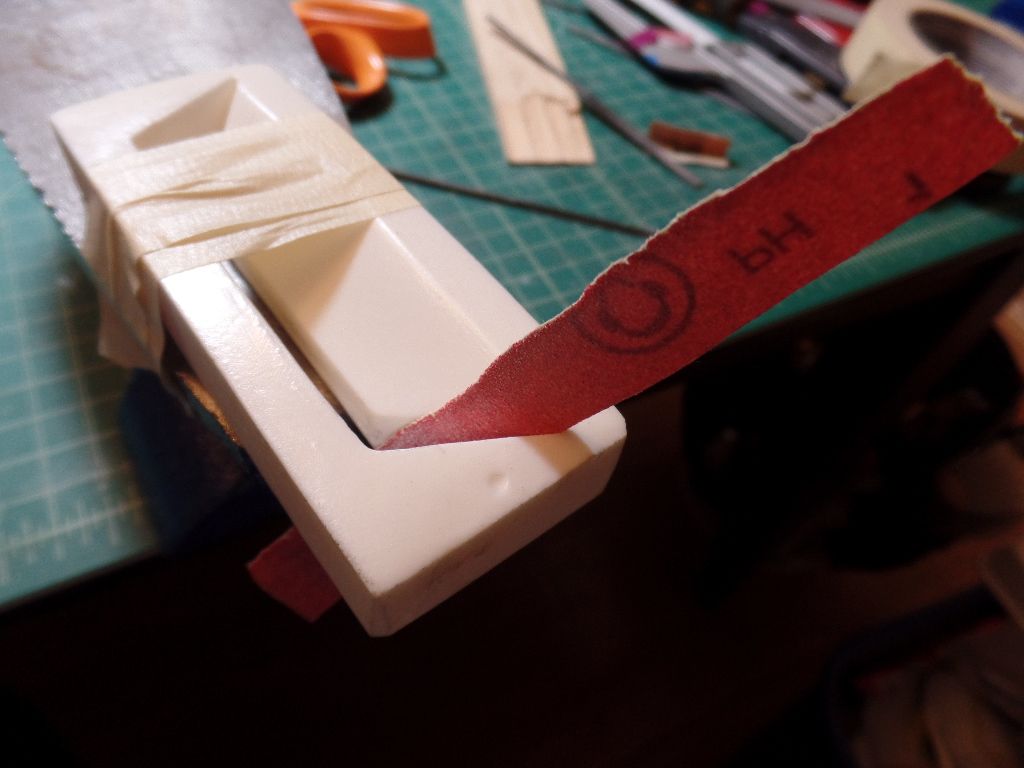
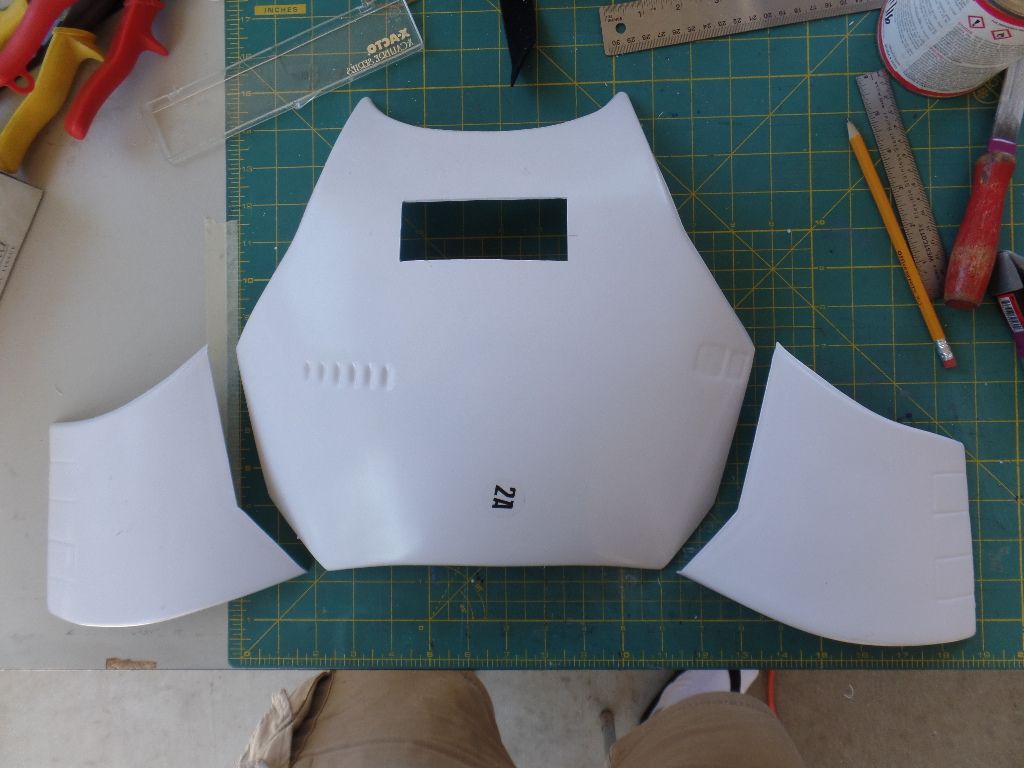
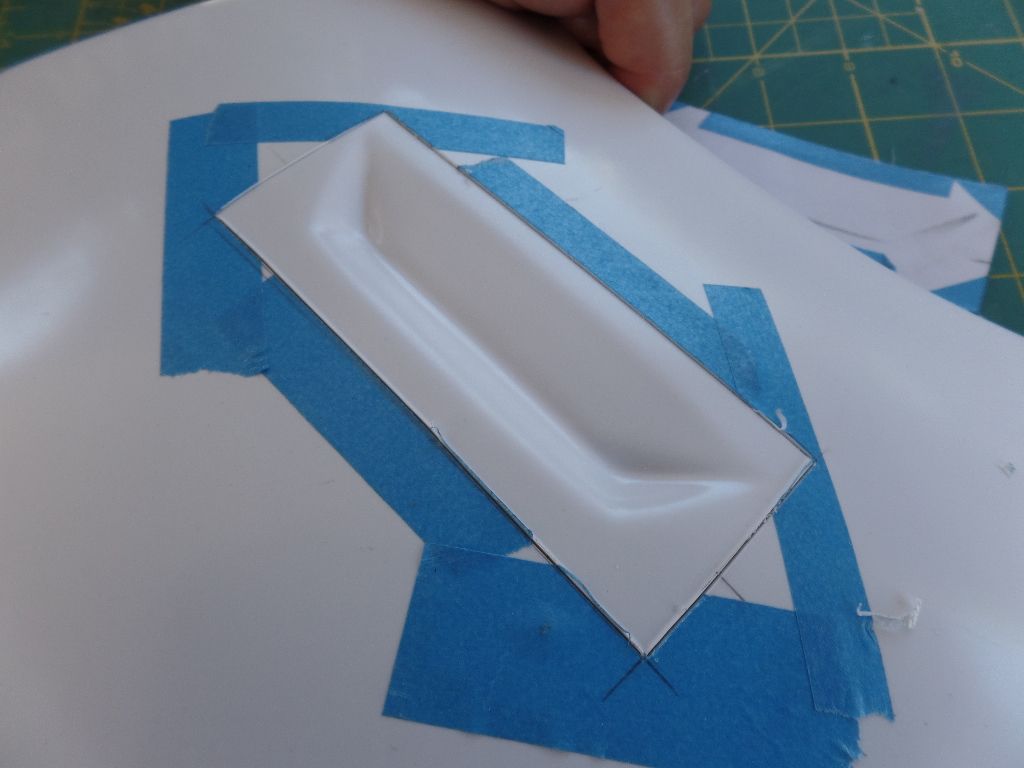
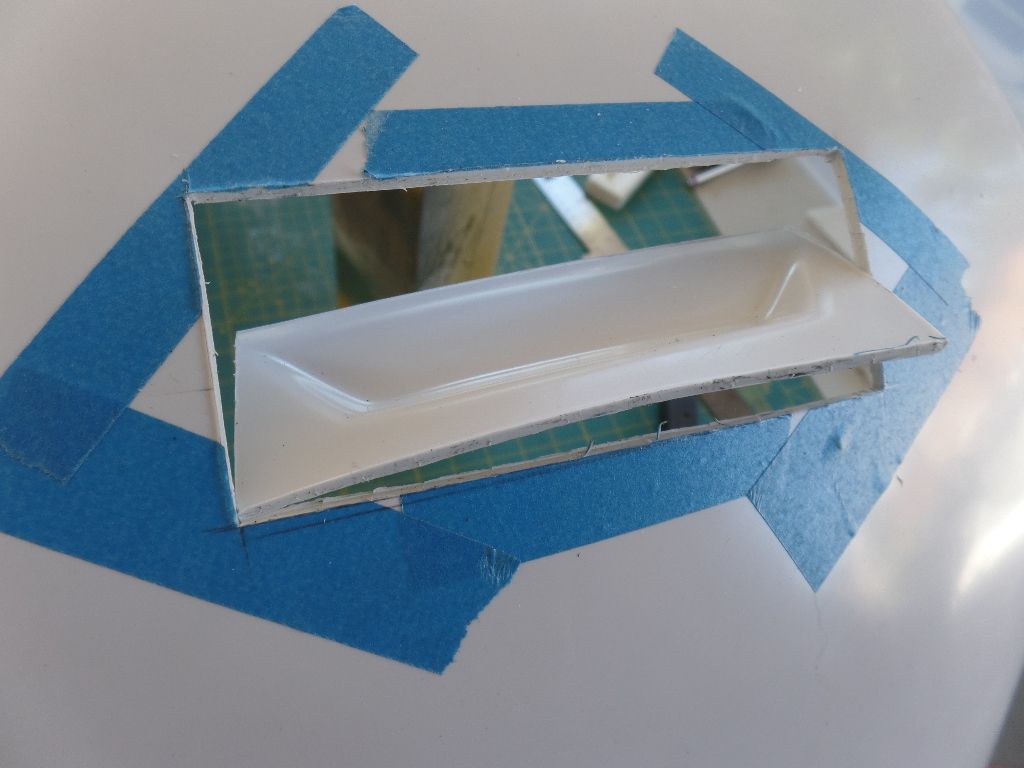
Cutting Out the Updated Chest Piece
Here's what I did last night. It took me about 2.5 hours to carefully hack this piece. I have never done this before and happy to share what I did.
Some areas I had to be a little crafty with a chisel and hammer. Take your time and relax.
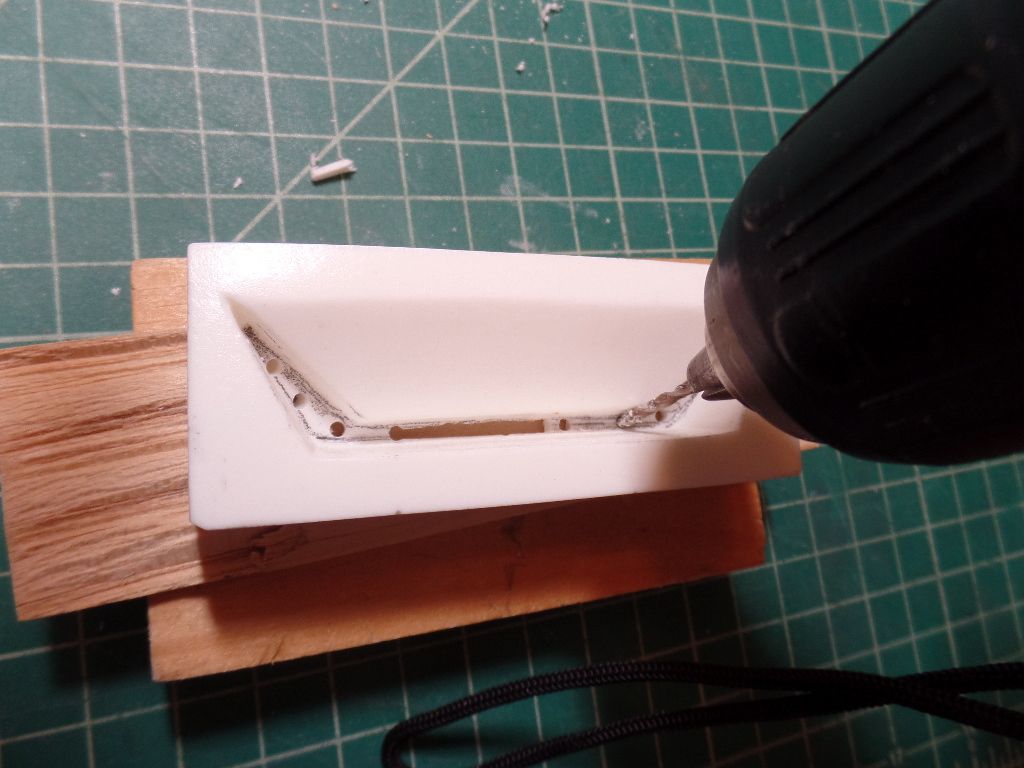
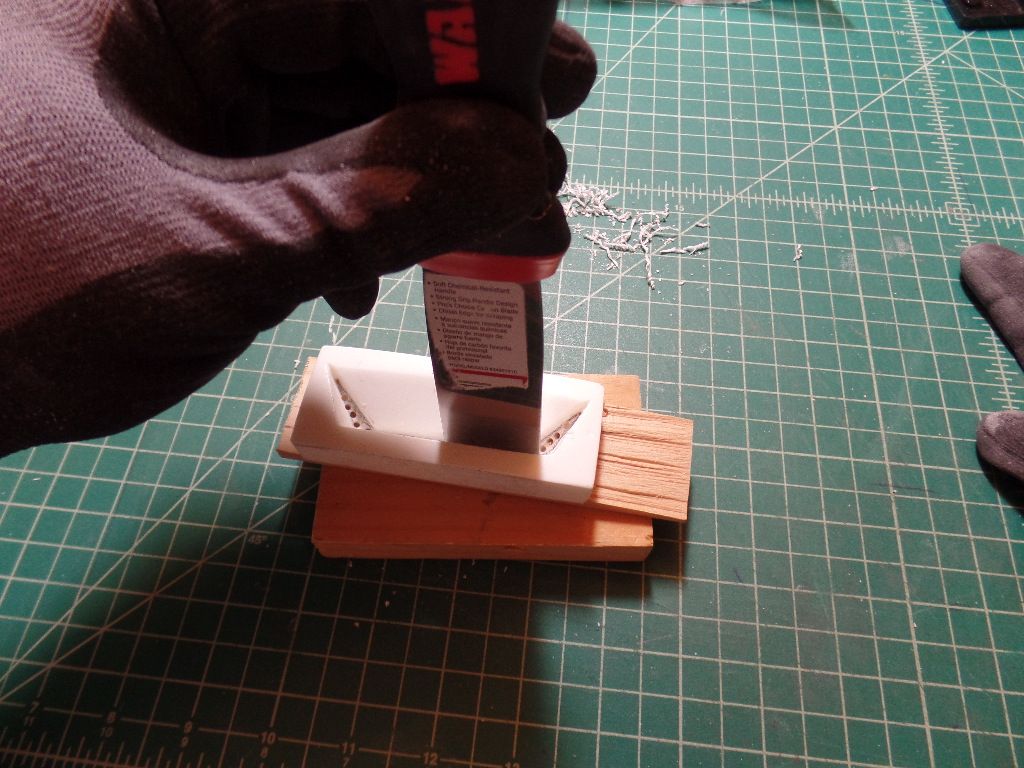
Drill small pilot holes and chisel away. I marked the areas with pencil to keep me focused on the shape I want.

I'm using multiple chisels and mini files.
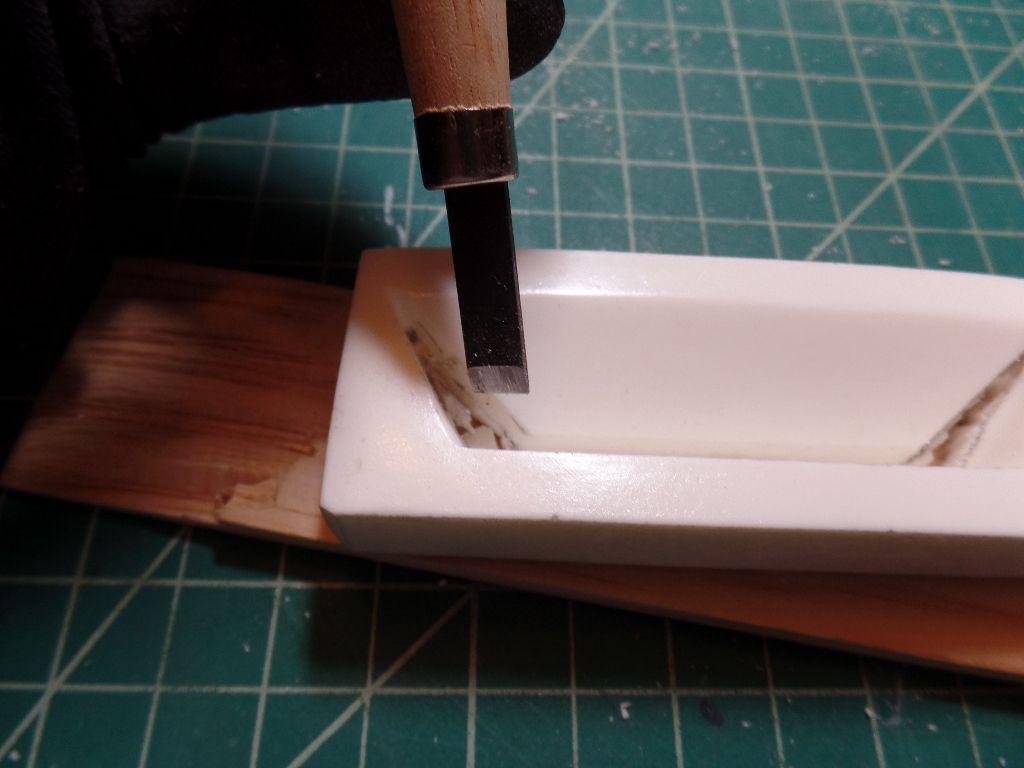
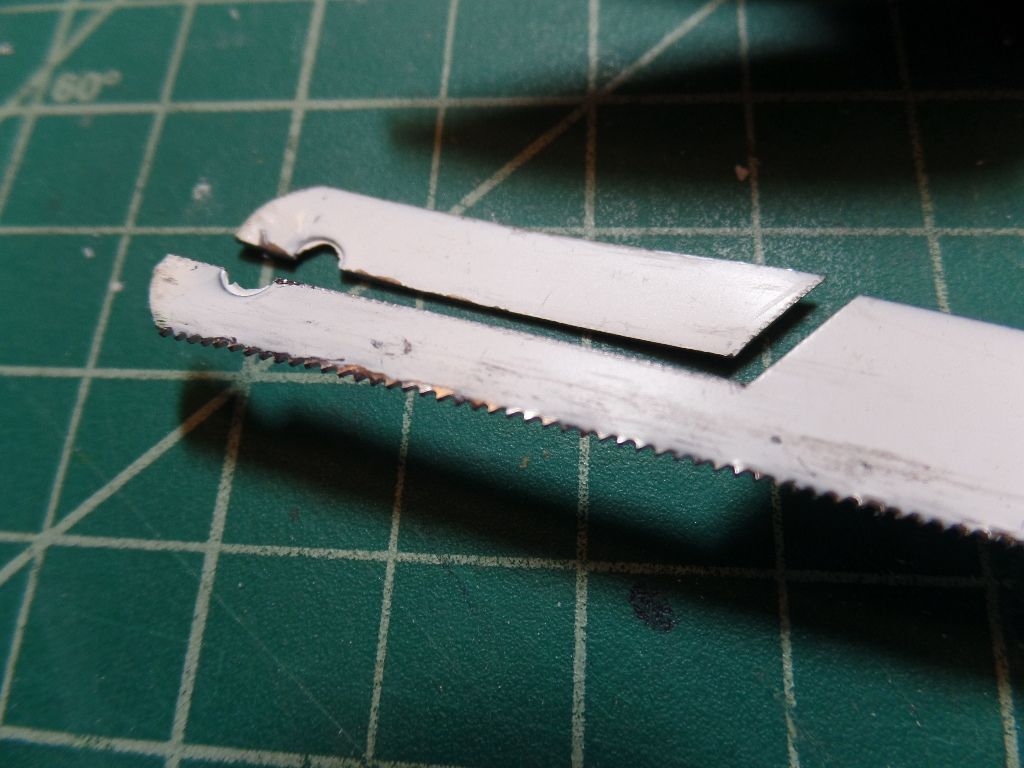
I hacked my mini hack saw to fit into the chest piece. This made it a lot easier to cut inside.
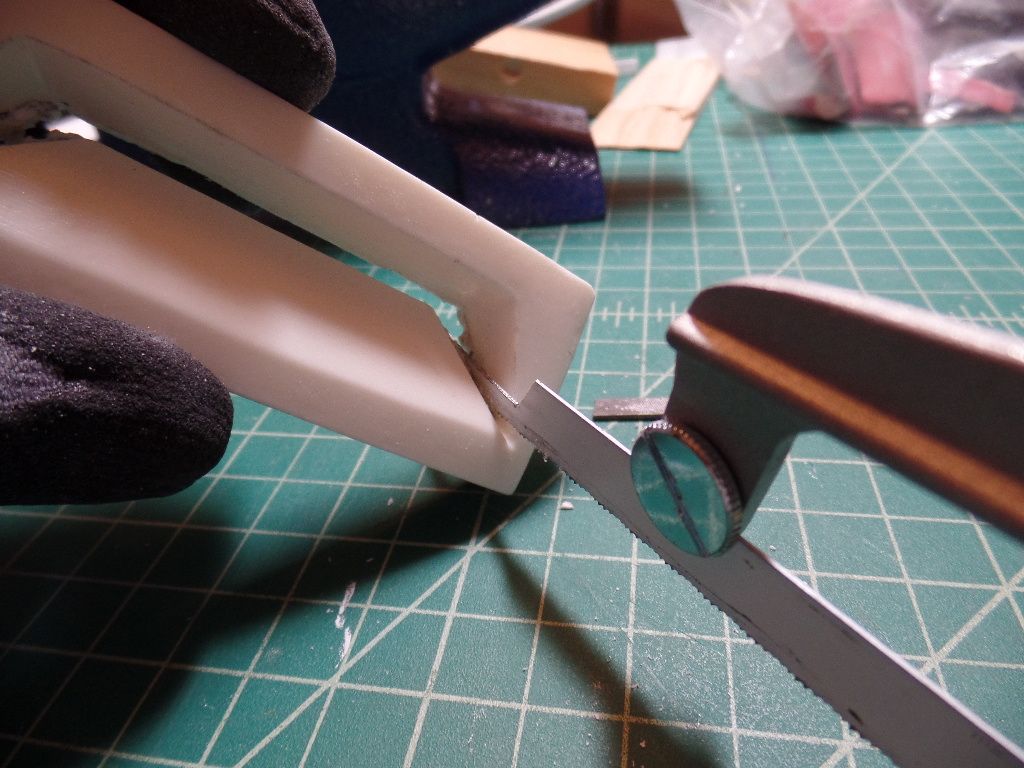
Sanding the inside with my favorite sand paper (3M Pro Grade Precision - P150 Medium)
-
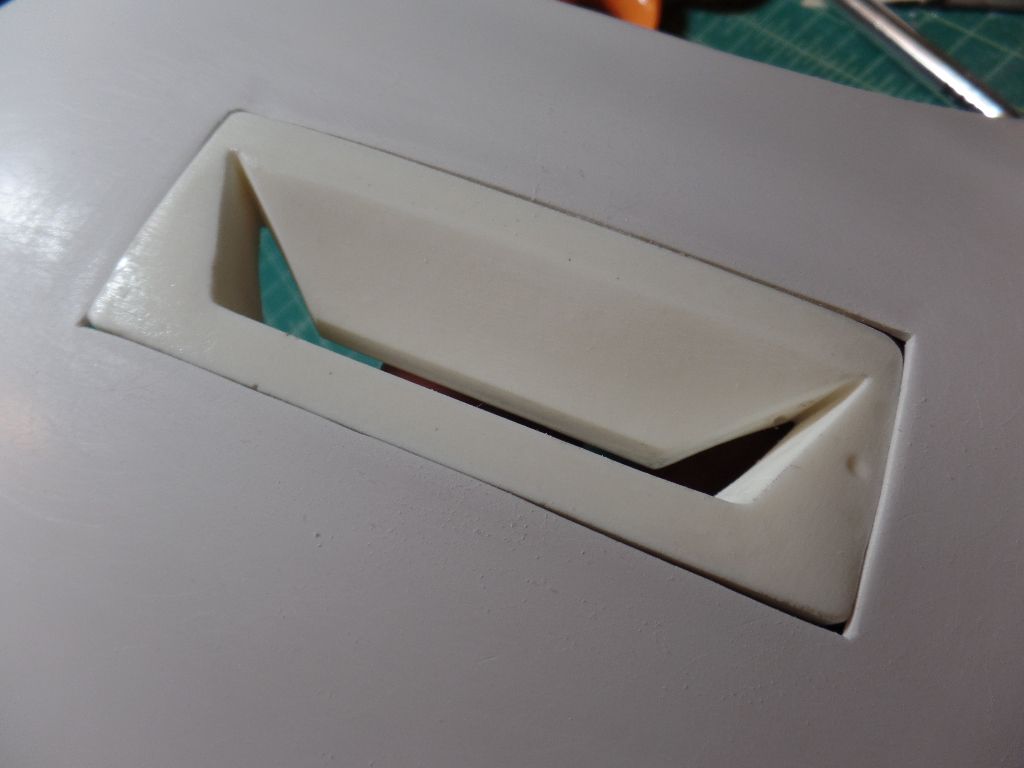
Tony was right.
Mine = No valley
Rick = Double valley.
Also, we compare the both of our armors.
Mine = Matte finish
Rick = Glossy
Interesting findings and love that Rick and I are working together now on this build. Lots of laughs and jokes while cutting our chest plates yesterday.
So happy i'm not struggling alone!
-
1
-
-
Chest piece is snugged (test fit only). I will be sanding the back of the piece to get the desire cut out as done by Tony.
To be continued . . .
-
1
-
-
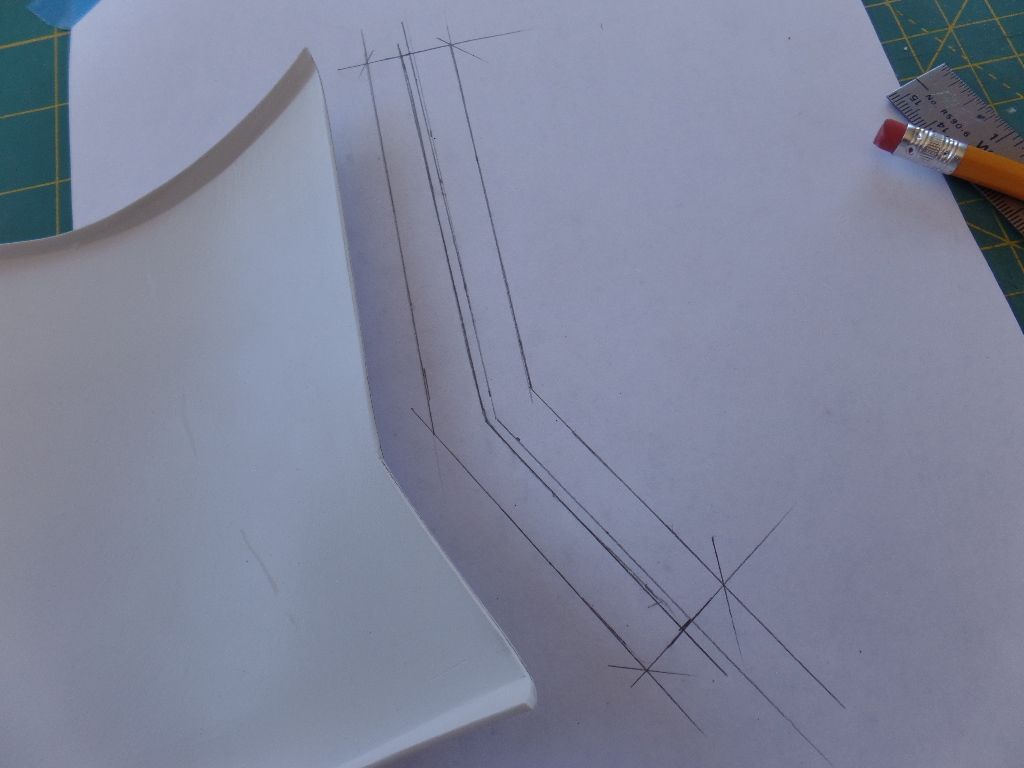
Cut wings out and prepare backer stencils.

-
Score and snape (took about twenty minutes).
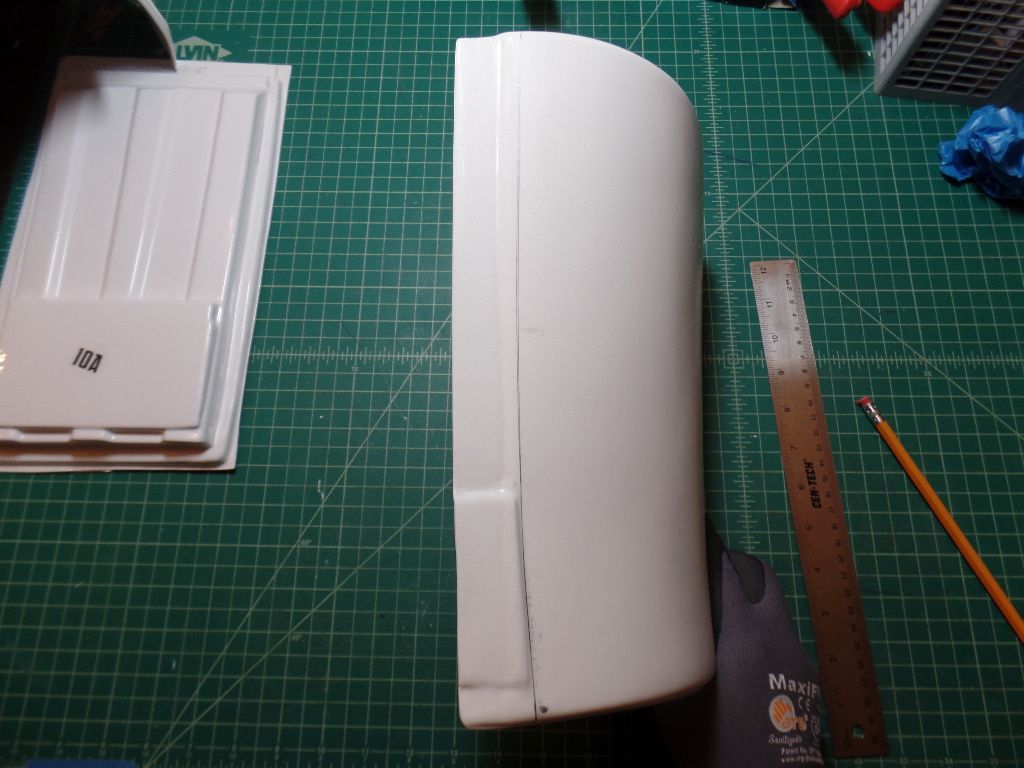
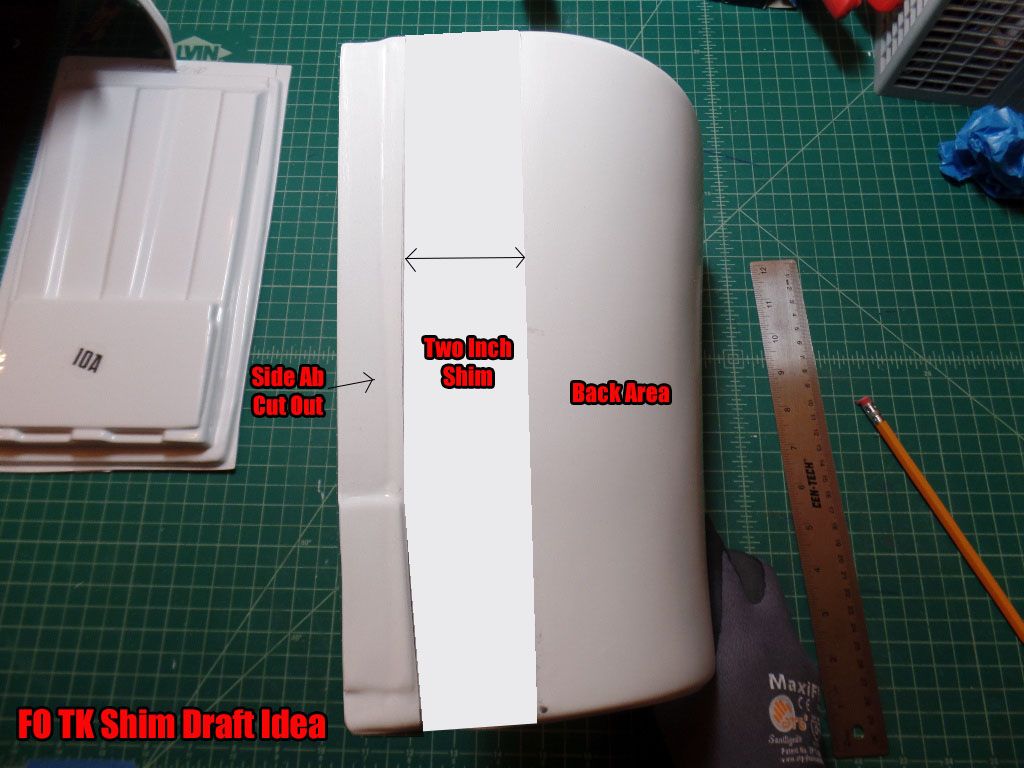
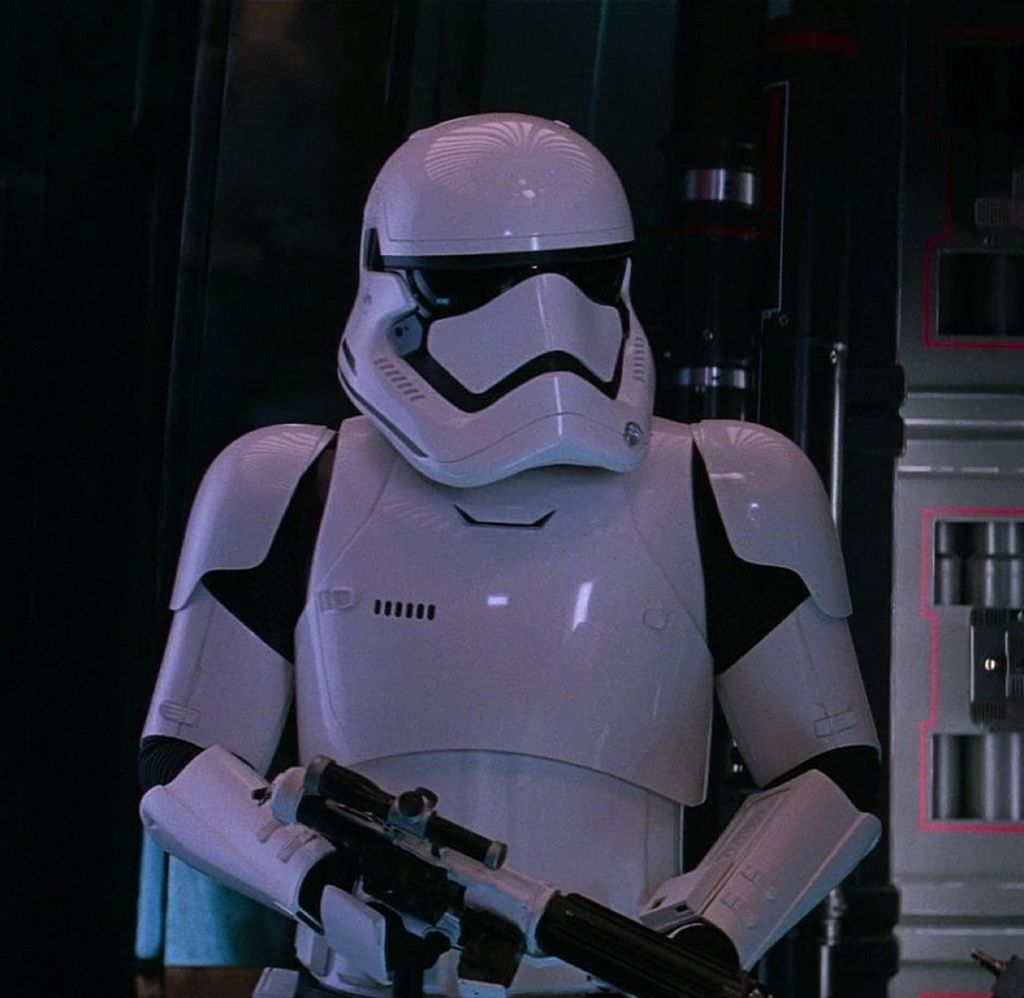
Haribon72’s First Order Stormtrooper (Jakku Chase Scene) – Large Trooper Build
in Build Threads Requireing Maintenance
Posted · Edited by Haribon72
Thank you Keith! Definitely a labor of love for this project.
Let's get this week's work going . . .
ABS strips for the job.
Creating two inch shims and about 1.5" backers to hold the shims in place.