


EJGreen
-
Posts
199 -
Joined
-
Last visited
Content Type
Profiles
Forums
Gallery
Articles
Media Demo
Posts posted by EJGreen
-
-
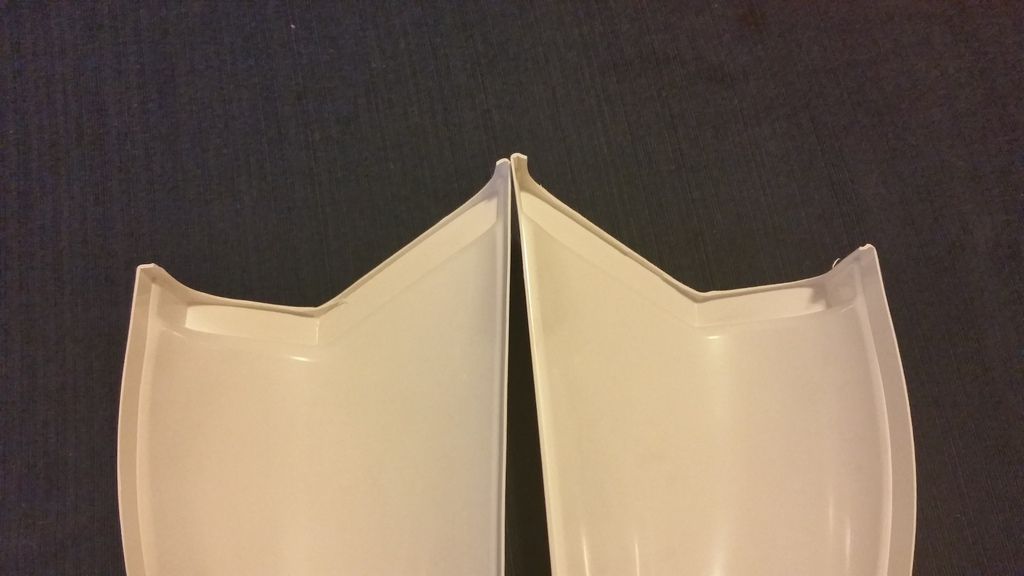
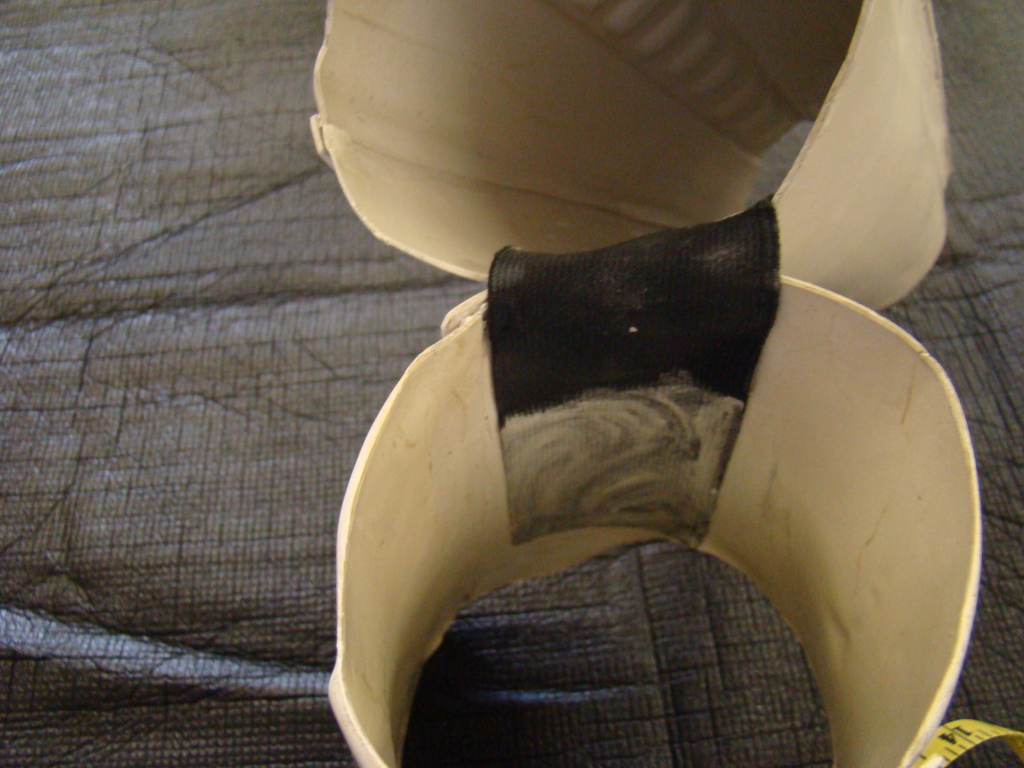
I've trimmed the "V" notches based on my pencil markings and took off the extra material that was down at the bottom of one of the halves. Using a blade, my dremel, and some sanding paper, I've got these edges pretty smooth. I've already glued the cover strip to the back--making sure that the calve pieces open in the right direction. This happens to be the left leg...
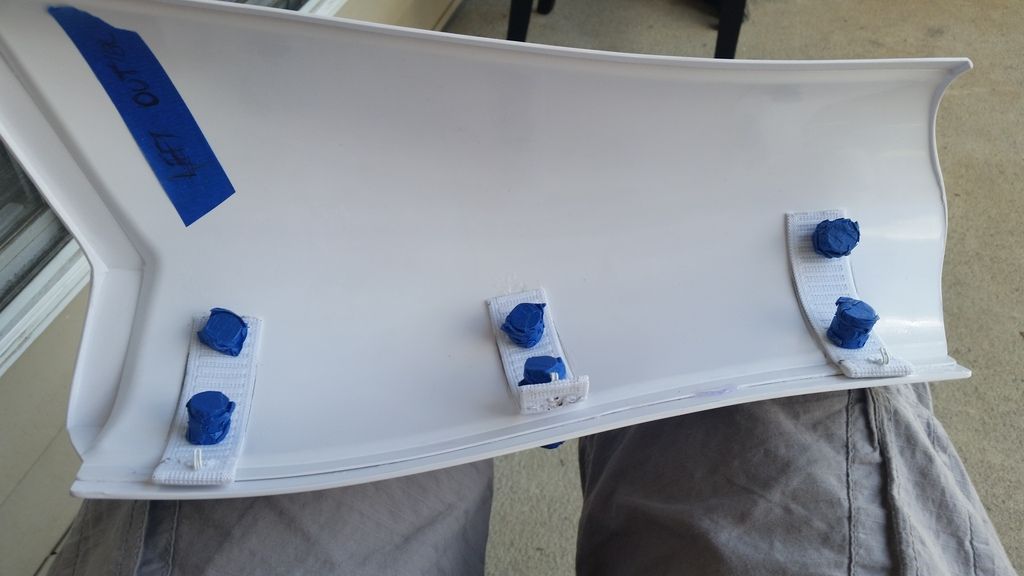
Following information that I found in Trooperbay's video regarding the eye hooks (size 2), I started with 4" long white elastic which is folded over .5" to have 3.5" strips. I don't have access to a sewing machine (nor do I know how to operate one), I hand-stitched the end over with needle and thread. I then sewed the eye hooks on the ends of each strip. I'll be using three strips for each leg...

In Trooperbay's video, he basically glues both halves together before gluing in the elastic strips but I decided to do that before gluing both halves together for easy placement. I marked where I thought they should go, one towards the top, one in the middle, and the third towards the bottom. I stuck them on with magnets and made some pencil marks for where I need to apply the glue. It's important that you want to leave that last half inch (with the hook) free to move--you don't want to glue that sections of the elastic down! Once I was confident where I wanted to place them, I glued them in and let them cure with the magnets...
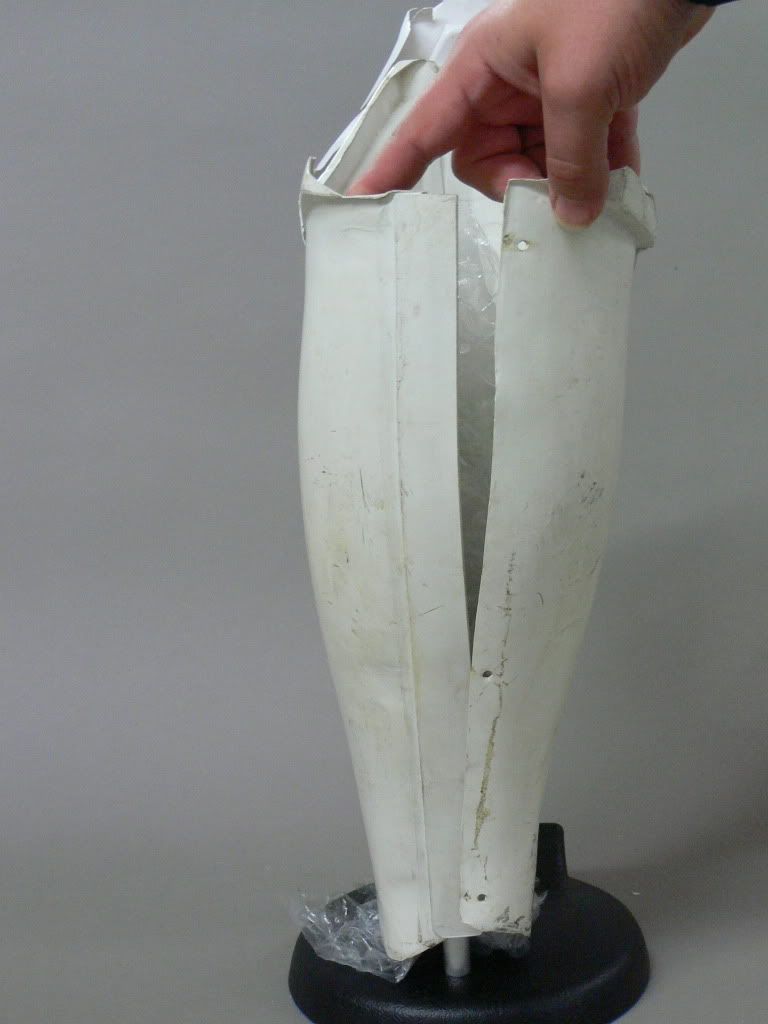
I have since then glued both halves of the shins together and made some pencil marks where I will need to drill holes for the eye hooks to fit...
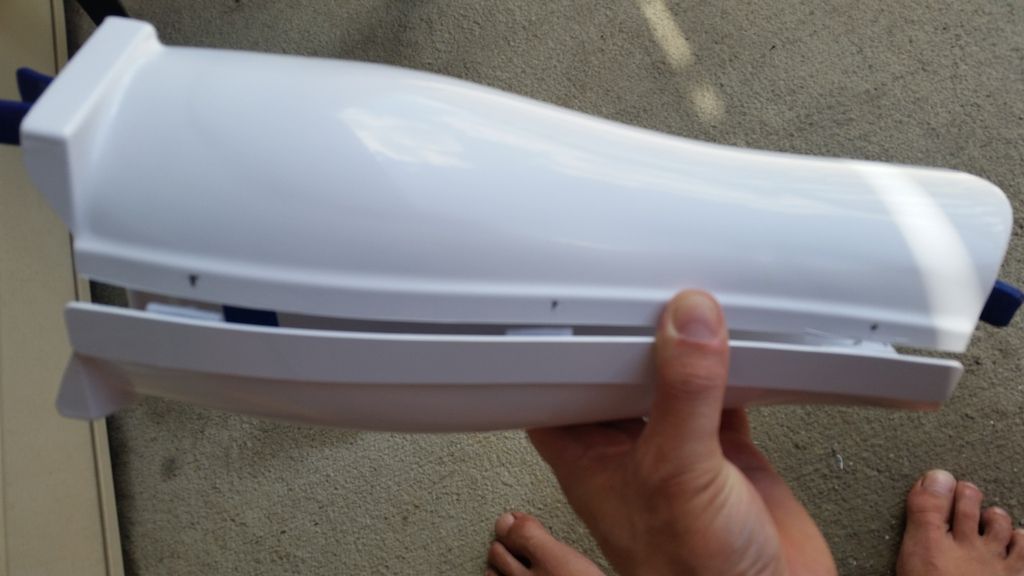
I need to let these pieces cure for a while longer before I drill the holes. If everything turns out the way I planned, they should fit together quite nicely!
-
Thanks, Eric, for the motivating encouragement. I figured as long as I'm shooting for Centurian, I might as well aim for screen accuracy as much as possible.
-
 2
2
-
-
Welcome to the FISD Greg! It's great to have you with us. This site is definitely worth the cost of admission when you think of all the great troopers and information available for your assistance. Hope your build is coming along nicely. Please share some pics with us!
-
1
-
-
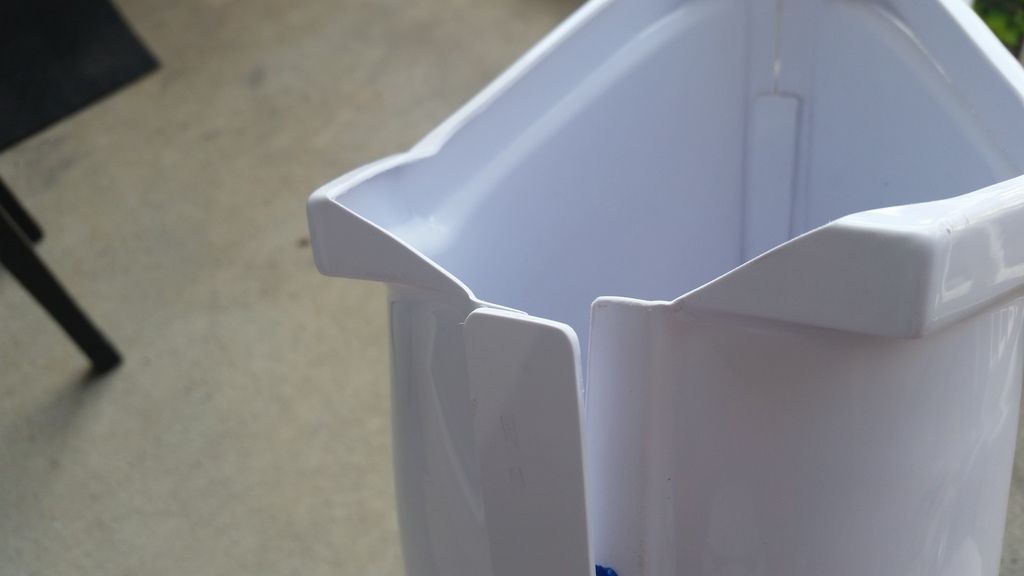
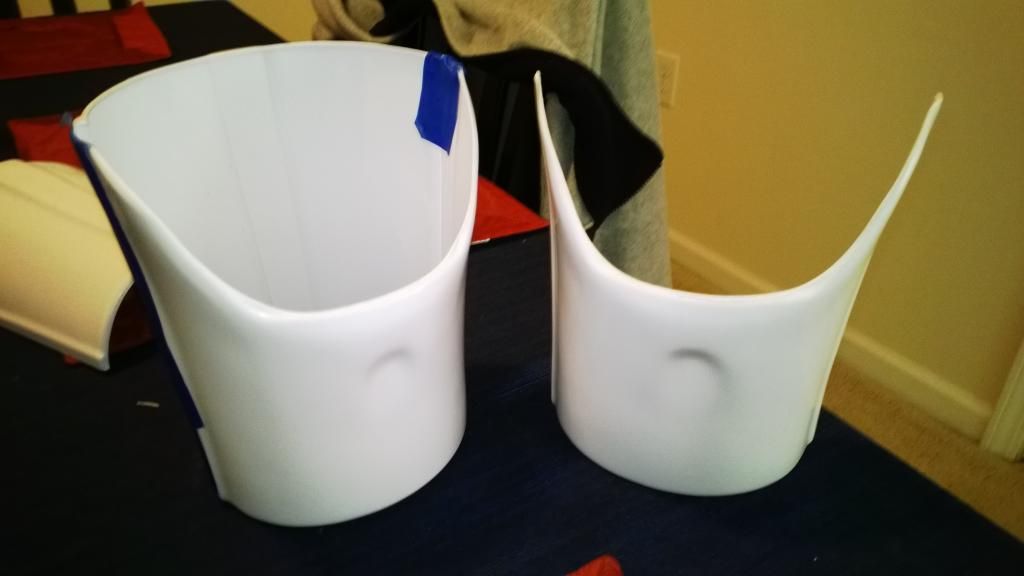
Here's where I'm considering making the cuts to shape he "V" notch into the calf pieces. I measured 15mm from the outside corner and angled the line down to where the top of the cover strip would sit.
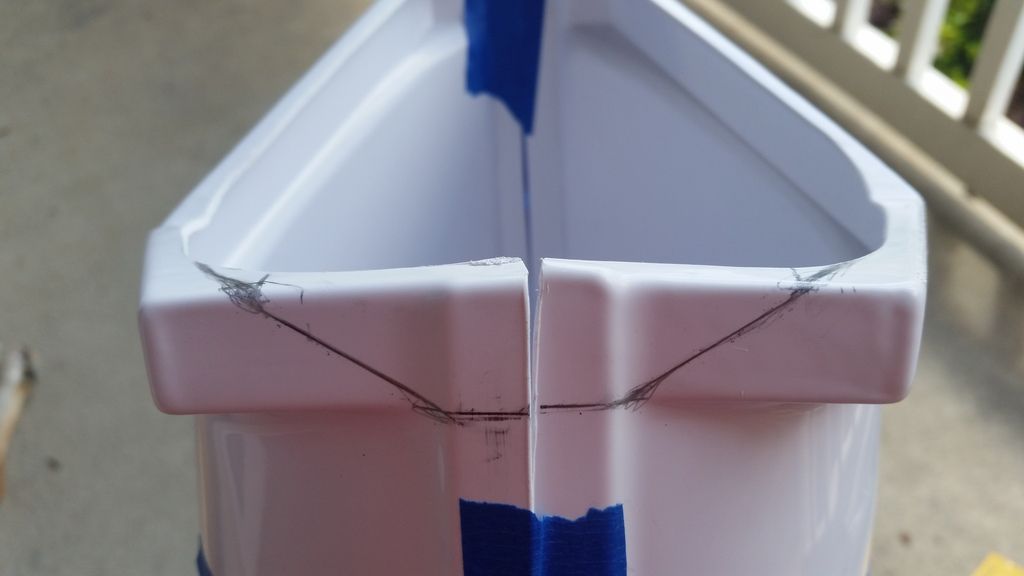
I noticed with the top edges aligned there's a considerable difference in the length of the two halves at the bottom edge in the back...
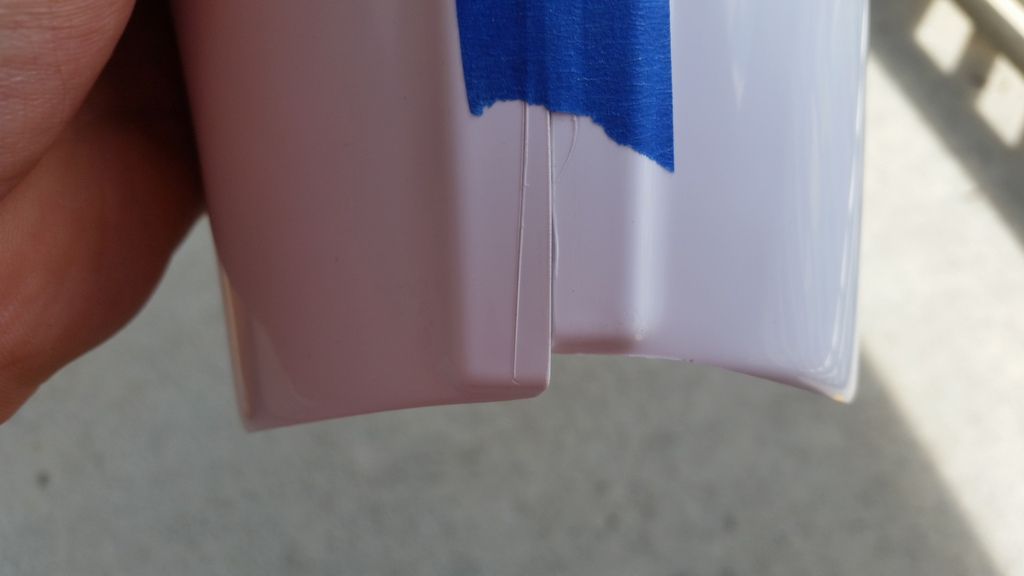
My knife got away from me when I was trimming the edges for the butt joints but I'm not worried because the scratch will be hidden with the cover strip.
-
2
-
-
I found this interesting video at Trooperbay regarding the eye hook system for the shin armor...
https://www.youtube.com/watch?t=113&v=TZFLO8PJjcw
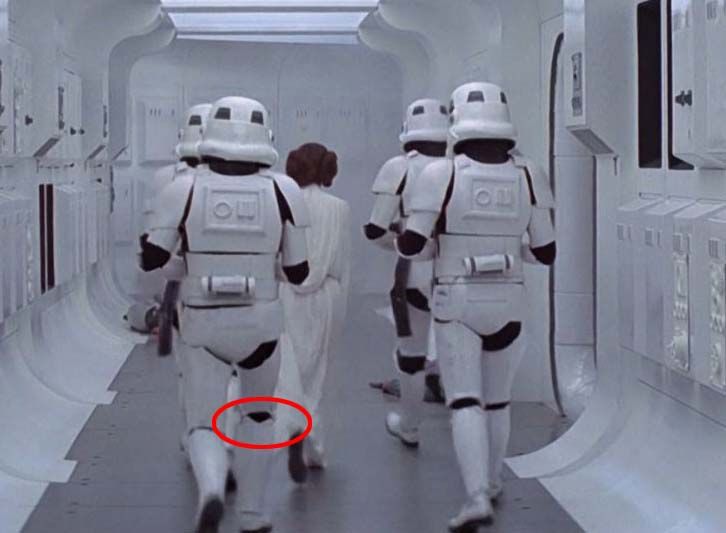
Poking around some of the screen capture references, it looks like I'm gonna make those "V" notches into the greaves on the calves....
-
I found this video on Trooperbay...
Is this pretty much the way the hooks are used?
-
So I've been searching all over the forums and can't really find the information that I'm looking for so I'm hoping that someone can help me out or point me in the right direction...
I'm working on the calve pieces (RT-Mod) and I know that in the films, hooks were used to close the shins up in the back as opposed to velcro which is commonly used around here. I'm looking for specifics on what types of hooks were used and how they were added to the armor. Photos would definitely be a major plus here!
If anyone else has used this method, do they keep everything closed up in the back pretty well? Do they have a tendency to break off or come unclasped?
-
Welcome to the group, Chris. You're going to find lots of information here.
In terms of suits built for us bigger guys, RT-Mod suits seem to be the most popular. I'm building a set of it as we speak.
-
Welcome to the group, Richard. You are definitely in the right place. There's lots of research and preparation that you can do before your suit arrives. Ask lots of questions and check out what others have done with their AM builds.
On a side note, that's a brilliant piece of art, there! I'm trying to finish up my degree in Character Animation. That looks like something done in Maya software. I'd kill to have a TK rig that I could animate but I'm not so great at 3D modeling.
-
You're definitely off to an amazing start, brother! I'm really excited for you and I'll be looking forward to seeing your progress.
-
So I've trimmed the edges on my shins to reflect the correct size of the cover strips. It wasn't until after I trimmed the back edges that I realized I should've researched the hook method. Does anyone have any information on how these bra hooks are attached/used?
-
Thanks for the response, Jason. I thought the widths for the front cover strips were 20mm but I wasn't 100% certain.
I was medically retired from Bragg about three years ago. I was a PSYOP guy.
-
Going through my box of parts and pieces, I remembered that I left off with the biceps. Everything is butt joined and I've already added the "Han hooks." I still need to add some strapping to the arm pieces but until I get to the craft store for elastics and strapping, I'm moving on to the legs.
I never realized, until now, that my shins appear to be cut for overlap construction. Seeing as how I butted the arm pieces together and the CRL for Centurian calls for butt joints, I'm going to have to trim some of these edges down.
Is it 20mm for the cover strips?
What's the recommended construction for closing the shins in the back? I know the velcro seems to be popular but wasn't there a hook method that I've seen in a few threads?
-
I've had to deal with som personal family issues surrounding my fathers health which caused me to take a break from my armor. But I can say that I'm back with a vengence to dive in where I left off.
I just have to remember where I left off...
-
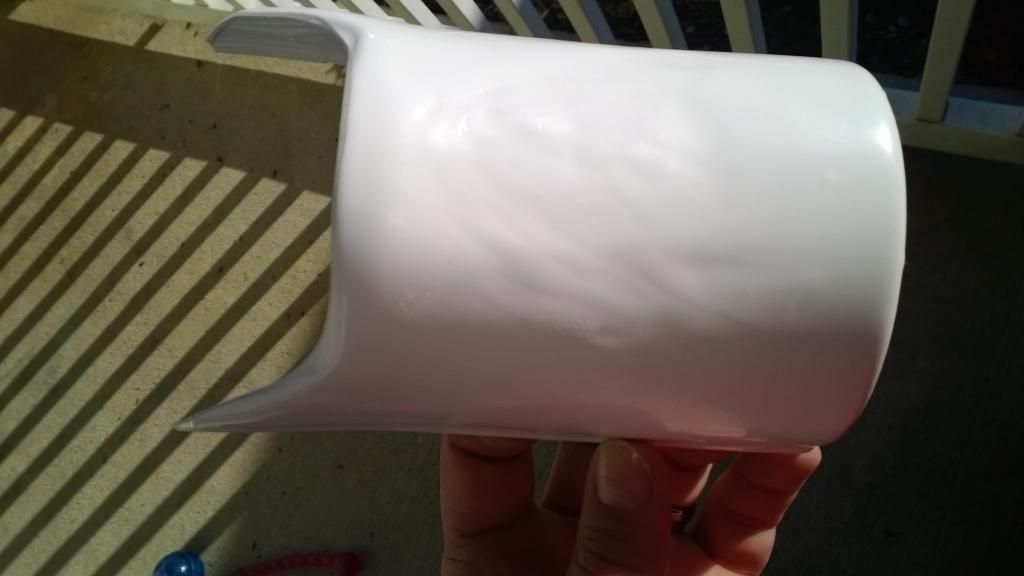
I've been playing with this piece for over a week, now, and I'm wondering if I'm sweating too much of the small stuff or it's good enough to move on to gluing the pieces together. I'm thinking that this is as good as it's gonna get...
From a distance, you can't really see anything but there's still a bit of mild dimpling going on the surface of the piece. Part of me thinks that because this is the inside of the bicep, nobody's going to notice but the other part of me knows it's not perfect.
-
I appreciate everyone's support and feedback. I think I mentioned at the start of my thread that I can often get too wound up in the details that it's almost debilitating. Right now, the condition of the bicep isn't completely horrendous. I can see and feel a bit of rippling in the abs and that's pretty much driving me crazy.
My heat sealing iron is teflon coated but after reading Tim's awesome input, I realized that I had my temps cranked too damn high. I'm going to continue working on it but at much lower temperatures and see what more I can do.
Honestly, I have to admit that I'm surprised that this whole thumbprint issue isn't in the CRL; at least for Centurian. Part of me was starting to think it wasn't a consistent feature in the original suits but I'm trying to push for as much screen acuracy as I can get.
I'm trying to find out if the bicep hooks were for stunt suits or if that was a "Han" thing. I want to add them to mine but only if they're accurate.
-
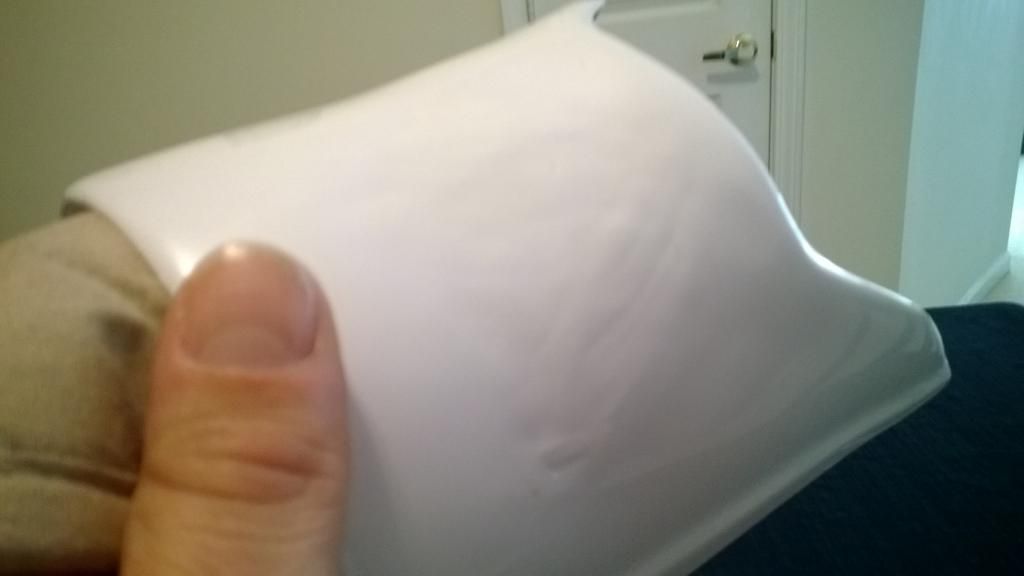
I continue to smooth the surface on this bicep. I noticed that the iron was not only causing dimpling in the plastic, the entire piece was beginning to warp a bit out of shape. I ended up clamping the right bicep over the left one so that it would help retain it's original curvature.
Using my wife's hair dryer, I began heating up the exterior surface and then using a lint-free cloth, I would "polish" the surface once it got hot...
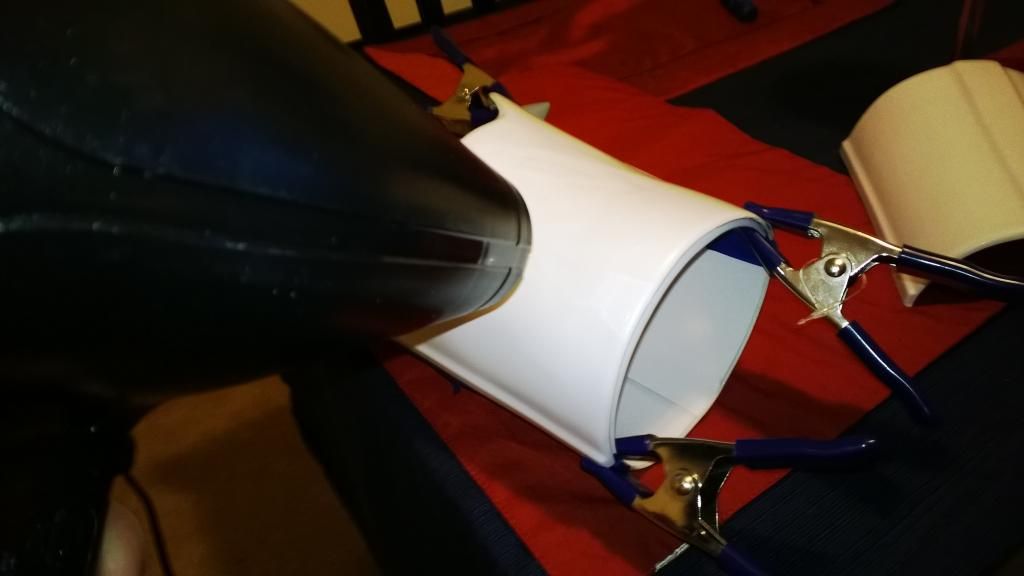
This technique actually began to smooth away some of the dimples caused by the heating iron so I ended up putting an old sock over the iron and, while moving in circular motions, began ironing out the outer surface. I have to say that it's not 100% perfect but I think it looks a lot better than it did this morning...
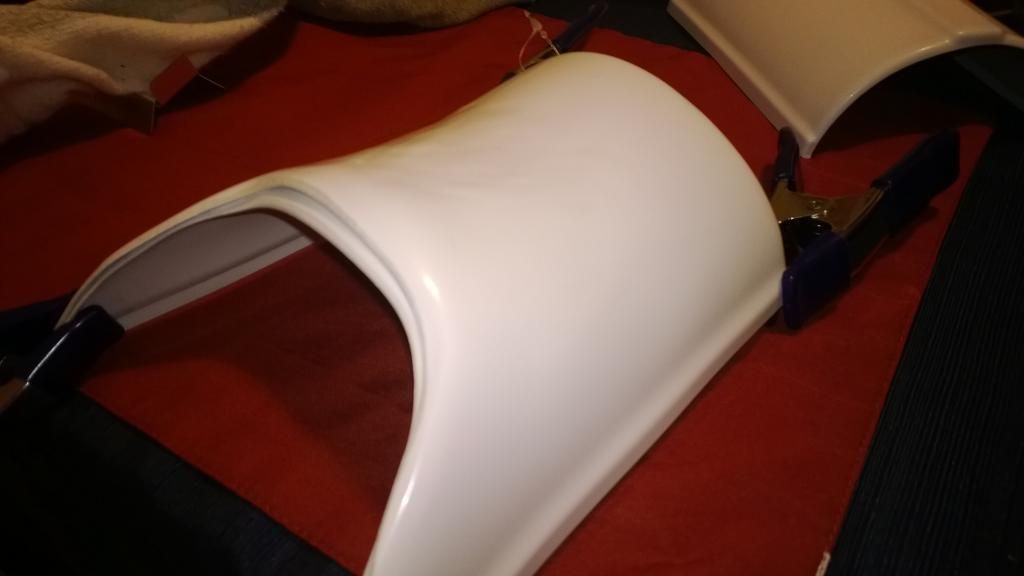
I'll continue to work on this some more until I feel confident that's it's as good as it's gonna get.
-
1
-
-
I've come to realize that I am NOT proficient with this damn heating iron. For the past couple of days, now, I've been attempting to use the heating iron to smooth out the thumbprint from the right bicep. For whatever reason, however, this is not working out the way I had imagined it would. I'm finding it really difficult to heat a rounded piece of abs with a flat iron.
My attempts have left the bicep piece looking extremely dimpled and uneven. No matter what I attempt to do, it only seems to make everything worse. I don't know if this piece is beyond working with. I'll let you look at the picture and you can give me your opinion...
Personally, I don't know why Rob hasn't considered the idea of molding a bicep without the thumbprint in it.

-
Have you tried searching online for hobby stores in your area? I feel the same as you do and found multiple hobby stores within a 20 minute drive that all had multiple brands of heat sealing irons; much to my surprise.
As a matter of fact, Rod, I managed to score one today!
In a last ditch effort, I called a local store that caters to RC hobbyists (HobbyTown USA) and they said they had one for me and would hold it with my name on it! I drove 20 minutes to the store with my bicep in hand to see if it would work and they said it should do what I need it to do.
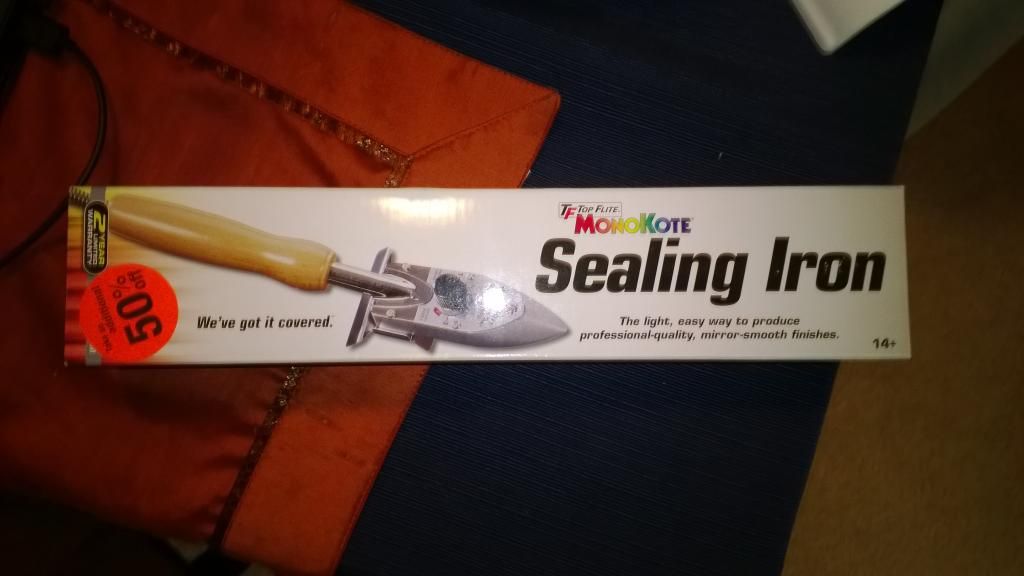
It's got a rounded, upswept tip to prevent surface gouging, a contoured wooden handle, and a 5.5 foot cord with heat ranges from 130-395 degrees F. The great thing is that it was priced at 50% off which meant that I got to take this baby home for $10!!
Upon closer inspection, it looks like the heat sock iron cover is sold separately, I don't think it's wise to apply a bare iron directly onto the abs as I suspect it might melt a hole into it. There's no instructions either so I'm not sure how hot this thing needs to be in order to smooth out the thumbprint.
-
While I ponder the great mysteries of snapping/strapping, it's time to move on to the biceps.
"Welcome to the gun show!"
Really, my guns aren't all that impressive. Squeeze the trigger and a flag pops out of the barrel that says "BANG!"
Preliminary fittings suggest that I can trim the butt edges to accommodate a 15 mm cover strip like I have on the forearms and I've already trimmed those edges down.
I've been reviewing photo references and reading several threads about return edges on the biceps. From what I've seen, the majority seems to say leave 'em alone. Rob didn't leave much of a return edge on the biceps but I do know that I need to get rid of that pesky "thumbprint" from the right bicep.
Reading Dark CMF's (Tim's) build thread, I see how he managed to remove the thumbprint by using a heat sealing iron. Apparently this isn't something I can find at my local Lowe's or Home Depot. Even Radio Shack doesn't have anything like this. I've looked at Amazon and the reviews for the Hangar 9 brand are questionable, at best.
I personally hate shopping online through the mail. I'm an instant gratification guy. I'll spend $30 for express shipping on an item that costs $10--just so I can get my hands on it ASAP. Yeah, it pisses off the wife considerably. Nine out of ten times, when I'm expecting something to arrive, the UPS guys are too lazy to knock on the door when they're supposed to and will come back the next day. That pisses me off considerably as I typically waste the cost of express shipping when it doesn't show up on time!
Anyway, the closest thing I found to a heating iron, at Lowe's, is a tool used for laying carpet and has a plate the size of a brick. NOT something I want!
A heating gun seems to be something I can grab, locally, and pretty cheap. Would this work?
-
Thanks, Tim, for jumping in again. It's a great comfort knowing you've got my six!
So I read through the "What We Know..." thread and it's a bit confusing but I did get some valuable information out of it.
If I was reading correctly, the original forearms and biceps were merely strapped together with elastic glued into the pieces? No Snaps? This would make them permanently tied together, right?
This raises several questions...
1) How easy is it to actually put on armor this way?
2) How secure/durable is this method? After a while wouldn't the glue eventually peel off?
3) I know this isn't notated in the CRL's but is this what all the cool kids are doing?
I'm ultimately aiming for Centurian but I'm also interested in going as screen accurate as I can possibly go. At the same time, however, I don't want pieces of armor falling apart on me while I'm putting it on or trooping about.
-
My RT-Mod didn't come with a pipe so I'm thinking a piece of pvc would do the trick. If 46 mm is the correct diameter what would be the correct length (without the end caps)?
-
Thanks for that tip, Steve, something definitely to keep in mind. To be honest, I still have yet to buy all of my strapping, snaps, and elastics as I'm still tossing and turning over what materials are best/accurate.
-
The second forearm is finally cured and both forearms are finally complete. I still need to add snaps for strapping.
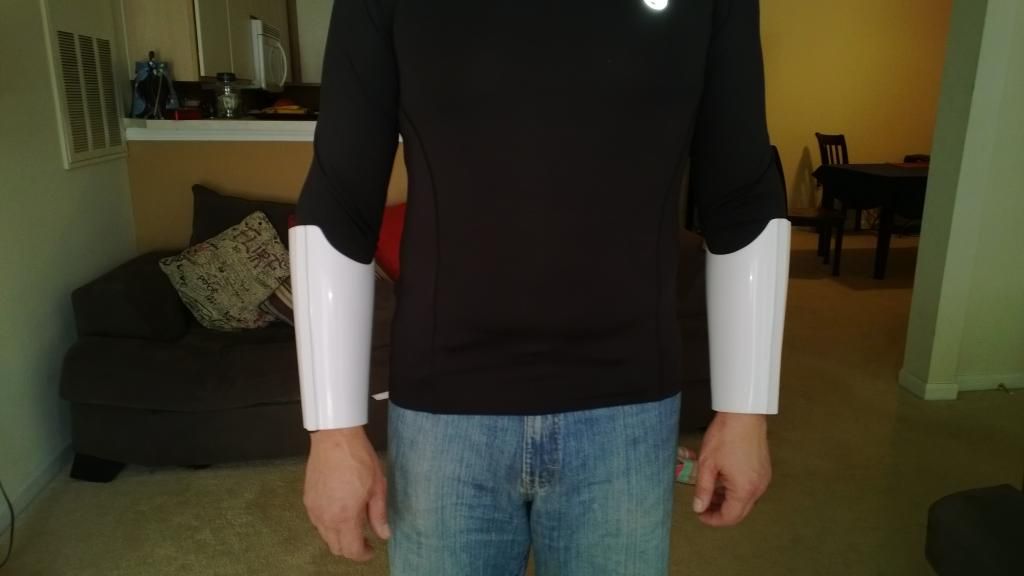
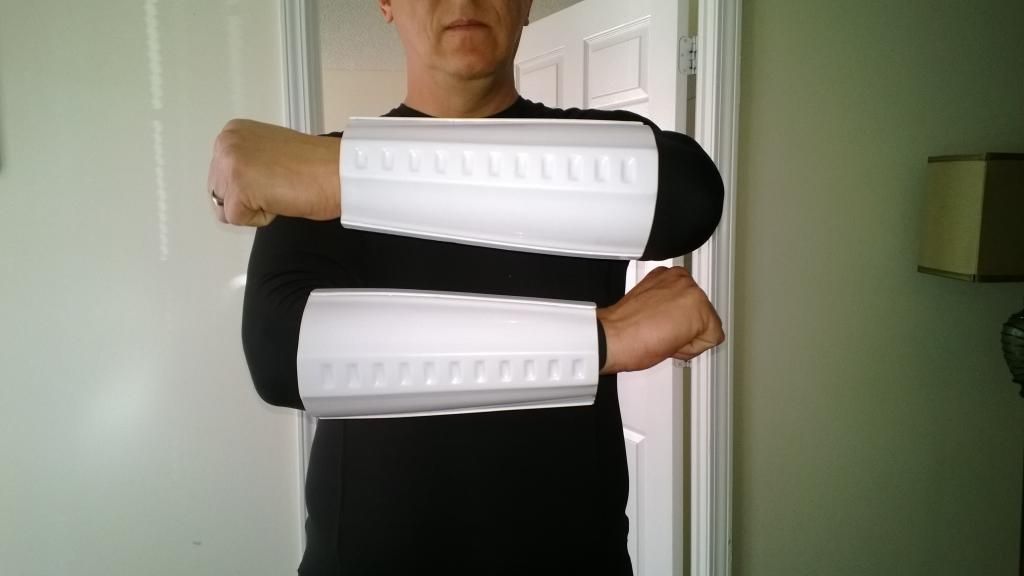
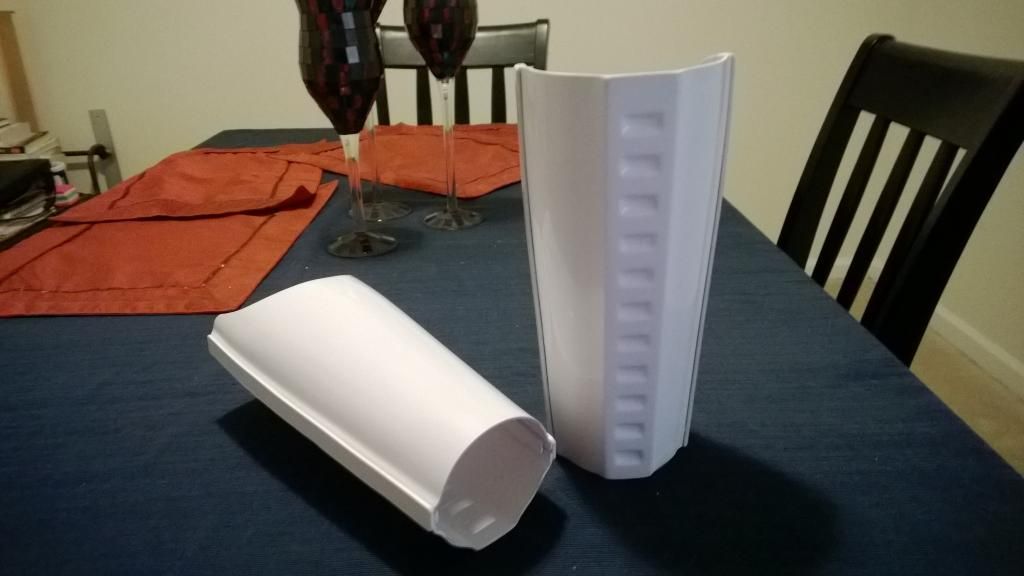
Forearms
For 501st approval:- Forearms are fully closed.
For level two certification (if applicable):
For level three certification (if applicable):
- No return edge on the inside of the front of the forearm is allowed.
- Forearms must be constructed using the butt joint and cover strip method. Overlap construction is not allowed.
CHECK!
-
1
EJGreen's RT-MOD (Stunt) Build Thread[*RT]
in Build Threads Requireing Maintenance
Posted
Can anyone tell me what's accurate in terms of return edges on the shins?